
|
|
Route |
|---|---|
|
|
46.51267°N / 10.53992°E |
|
|
Mountaineering |
|
|
Summer |
|
|
One to two days |
|
|
PD+ (UIAA III+, 40º ) |
|
|
Overview
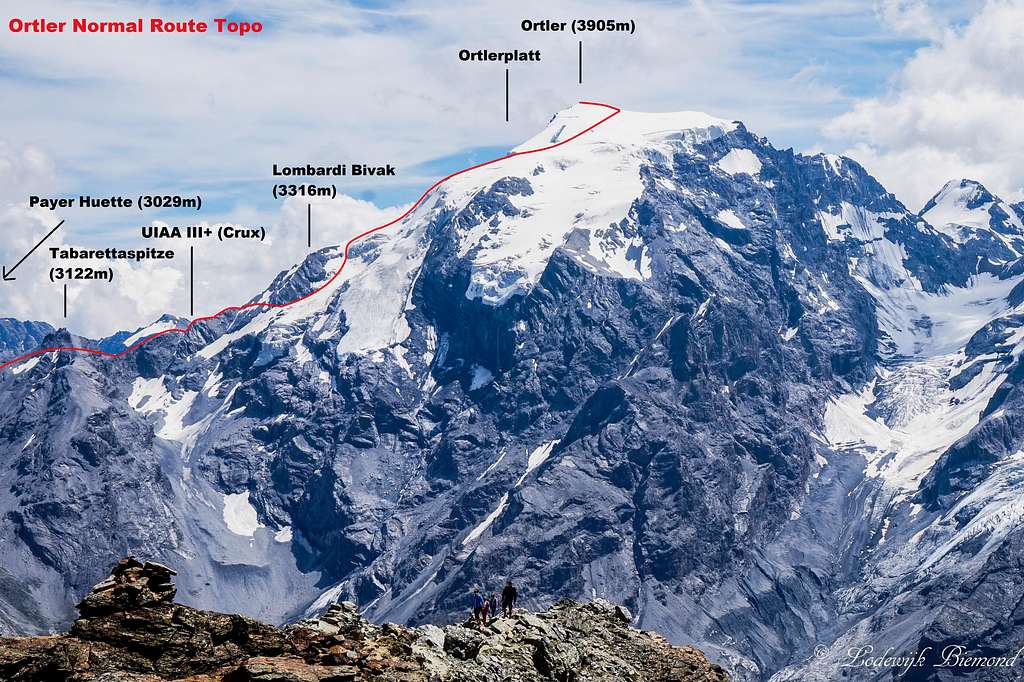 Ortler Normal Route Topo - Photo taken from Roetlspitz (3021m)
The normal route on Ortler can be considered as one of the most popular high alpine routes of the Eastern Alps. When the Bernina Group is not taken into account, Ortler is the highest mountain of not only Tirol but of the entire Eastern Alps, and therefore a popular objective for climbers. Although popular, the normal route is not that easy. Many of the other major peaks in the Eastern Alps provide easier routes up to their summits, like for example: Wildspitze, Grossvenediger and Weisskugel.
The normal route on Ortler is graded PD+ and is a mixed climb. The first part of the route, after the Payer Hut, requires rock climbing in the third grade (UIAA III) and the upper part of the route is a climb on glaciated terrain with a steepness up to 40 degrees. The combination of rock and ice makes this route very diverse and fun. Having said that, the climbing should not be underestimated. As a result of the popularity and the harder rock climbing sections up to UIAA III, traffic jams are quite common, especially in the summer months. The route can get crowded in this period, especially during the weekends. So if you have the possibility, avoid climbing during the weekends.
 Tschierfeckwandl by T. Kristofory Tschierfeckwandl by T. Kristofory |
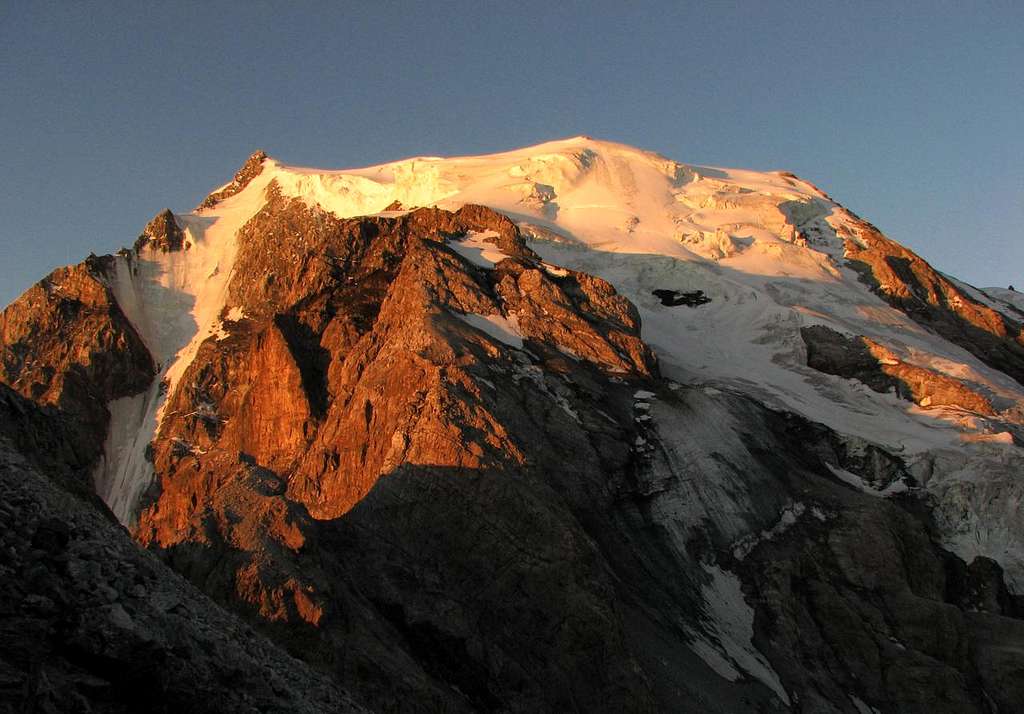
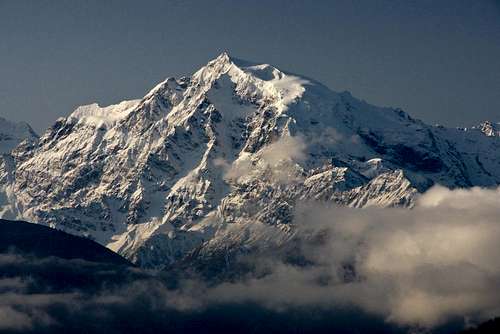 Ortler by Gangolf Haub Ortler by Gangolf Haub |
 On the glacier by haubi On the glacier by haubi |
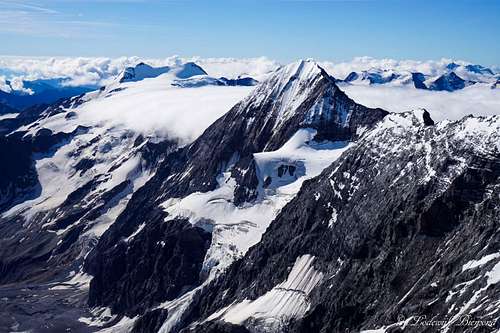
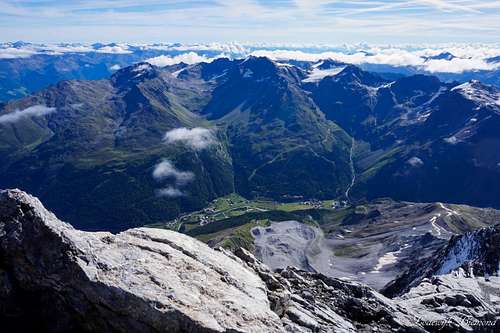
The Ortler normal route is one of the finest routes in its grade due to the combination of some nice rock climbing combined with glaciated terrain. Standing on top of Ortler is fantastic. Ortler really dwarfs all mountains surrounding it, which makes for a fantastic 360 degrees panorama. You can see the other giants of the Ortler Group like Gran Zebru and Cevedale and also you can see the legendary Stelvio pass with its endless curves and with good weather the Bernina Group and Otztal Alps are visible as well.
Climbing Ortler via the normal route requires 2 days. The first day one has to hike up to the Payer Hut from Sulden. This hike is not difficult and graded T3-. The second day is for climbing Ortler from the Payerhut and returning via the same route back to the Payerhut and further down to Sulden. The summit day is long and requires between 8 and 11 hours from hut to summit and back.
I Approach Routes from Sulden
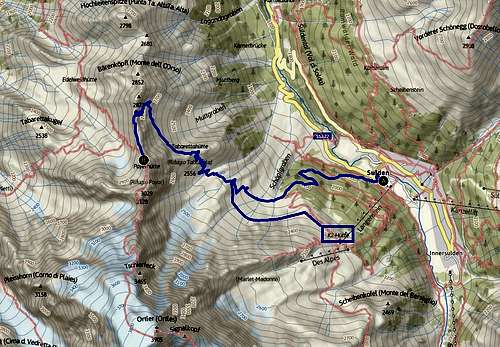
Approach Route Map: Sulden
Ortler is usually climbed in two days. On the first day one has to hike up to the Payer Hut at just above 3000 meters. This hike is not difficult and graded T3-. There is a good hiking trail present so route finding is unproblematic.
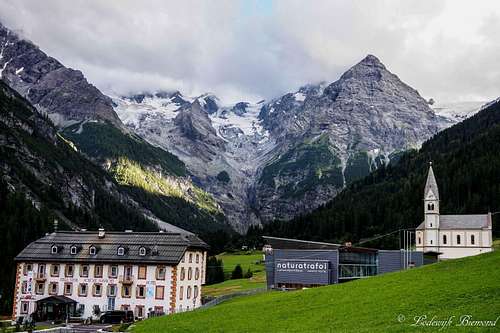
Most people start their climb on Ortler from the scenic village of Sulden (Solda in Italian). In Sulden there are two options. Ether start your hike from the village or take the Langenstein chairlift to somewhat shorten the hike. Taking the lift decreases the amount of vertical meters to be climbed but only shortens the hike a little bit. The lift goes up to the west of the trail so you have to do a little extra crossing to get on the trail to the Payer Hut.
The trail from Sulden to the Hut is named ‘’Trail 4’’ and the trail from the Langenstein lift is named ‘’Trail 4A’’ (before it joins trail number 4). The trail goes over easy terrain up to the Tabaretta Hut at 2556m. This hut is a great place to stop for a drink and to gaze up to Ortler’s North Face. You can also spend the night in this hut, but this is mostly done by climbers climbing the North Face.
After the Tabaretta Hut the trail continues. Keep following trail number 4 in the direction of the Payer Hut (signposts). Eventually, you will reach the ridge providing the first views in the direction of Stelvio and Trafoi. The trail more or less follows the ridge until you reach the Payer Hut at 3029 meters. This climb will take about 2 to 3 hours in total.
II Approach Routes from Trafoi
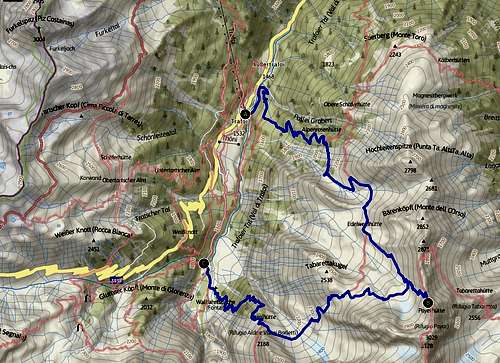
Approach Route Map Ortler: Trafoi
Scenic Trafoi and Trafoier Eiswand
A third possibility is also from the Trafoier valley. Drive in a southern direction out of Trafoi to the ending of the valley (not along the Stelvio Passroad, but on the local road of Trafoi). At the parking lot a hiking trail (number 18) starts and goes up to the Berglhuette (Rifugio Borletti) at 2188m. Keep following the trail up until it joins trail 19. Keep heading up to the Tabarettascharte (2903m) and further on to the Payer Hut at 3029m.
Route Description
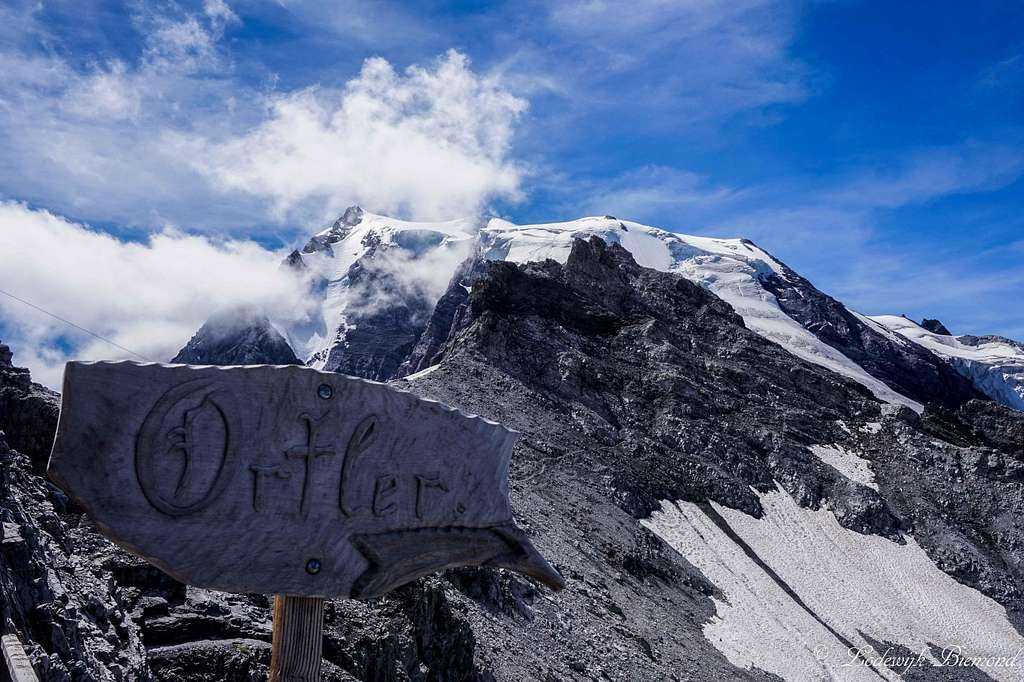 Ortler from the Payer Hut (3029m): Starting point of the Route!
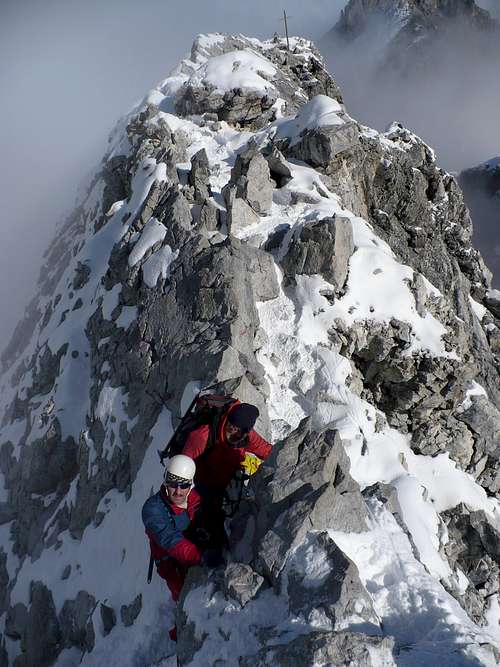
Directly after the Payer Hut there is a wooden plaque with the name ‘’Ortler’’ carved into it together with a big arrow pointing in the direction of the massive mountain.In the first minutes there is a good trail heading towards the south. The trail goes around the Tabarettaspitze (3122m), a rocky summit laying in front, directly on the ridge. The Tabarettaspitze is passed to the west of it. Afterward, the trail goes back to the ridge and the real climbing starts. The first section on the ridge requires climbing in the second grade (UIAA II, mostly I). After this relatively easy first part the route along the ridge steepens. This next part, the Tschierfeckwandl or Hinteres Wandl, a 70m high wall, is secured with steel cables and iron poles to step on. These poles and cables ease the otherwise difficult climbing section. Still, this part is steep and quite airy, so watch out here. At the top of this part a wooden cross is waiting and you feel like you are on a small summit on the ridge.
 Tabaretta ridge Tabaretta ridge |
 Tabaretta ridge Tabaretta ridge |
 Tschierfeckwandl Tschierfeckwandl |
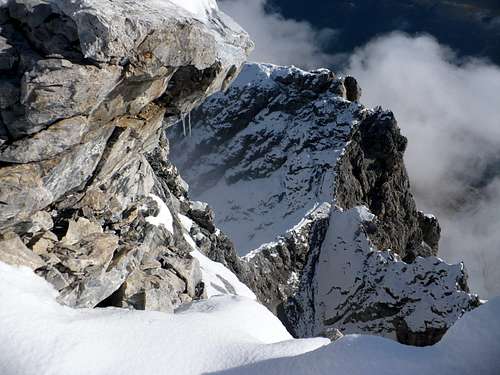
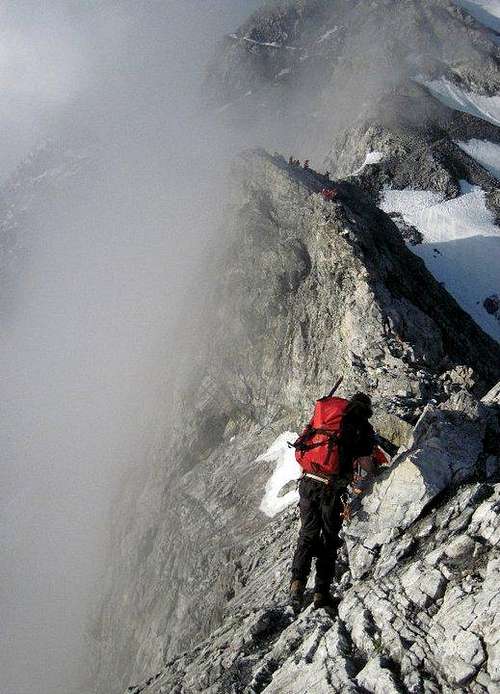
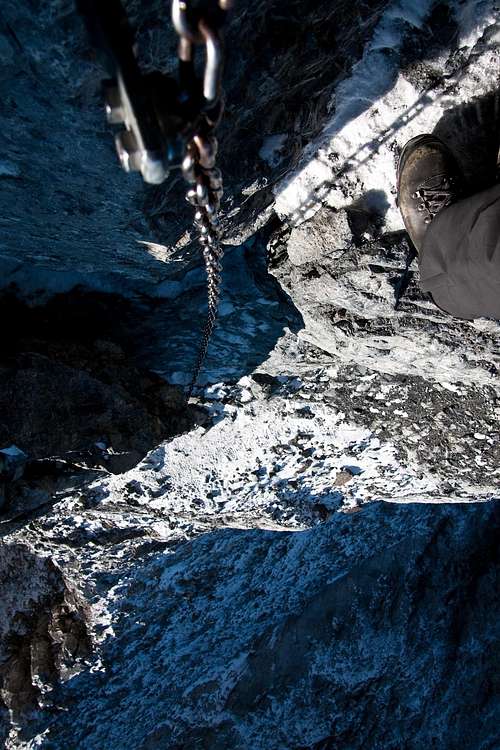
After crossing this small plateau the crux of the route is waiting. At this point traffic jams are not an exception. And not only on the way up, but even more on the way down since a piece of near-vertical rock requires abseiling to get down from. ‘’Bohrhaken’’ are present to be used for abseiling this section. This part of the route sadly shows that there are a lot of people on Ortler who are not ready for the job. I have seen some pretty crazy things at this point from people ether trying to climb up or abseil down. Let this be a warning for those who want to climb this route. Make sure you have the proper experience to climb this mountain or rent a mountain guide. Otherwise simply don’t go.
 Ortler Ortler |
 the upper part of the Normal Route the upper part of the Normal Route |
 Ortler from Ortlerplatt Ortler from Ortlerplatt |
To get up here a short passage of UIAA III+ has to be overcome. Apart from the potential traffic jam, this is a nice section. After covering the III+- slab the steepness decreases again and after some light climbing (UIAA II, mostly I) the glacier comes into sight. At this point, still on the rocks, put on your crampons. Climb down a little bit to reach the ‘’Scharte’’. At this point you will enter the glacier. Head up the Glacier (Barenloch) and watch out for crevasses.
In the summer months often a path along the glacier is visible. Head up the Barenloch glacier to the Lombardi Bivak at 3316 meters. This Bivak is standing on a small rocky outcrop surrounded by glaciers. To climb up here a small section of UIAA III has to be climbed. On the way down it is possible to abseil (20 meters). When conditions are good (enough snow), it is also possible to pass around the Bivak and rocks along the, at this point steep, glacier. In this way the UIAA III section can be avoided.
 Cevedale & Gran Zebru from Ortler Cevedale & Gran Zebru from Ortler |
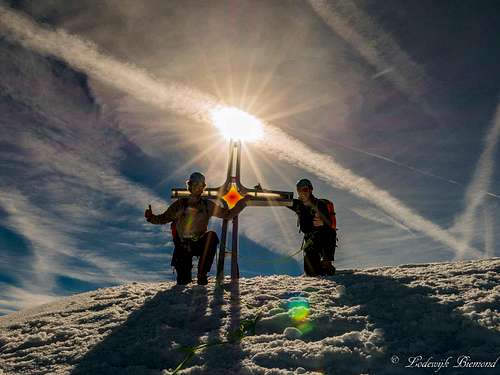 The new Summit Cross The new Summit Cross |
 Summit view towards Sulden & Vertana Summit view towards Sulden & Vertana |
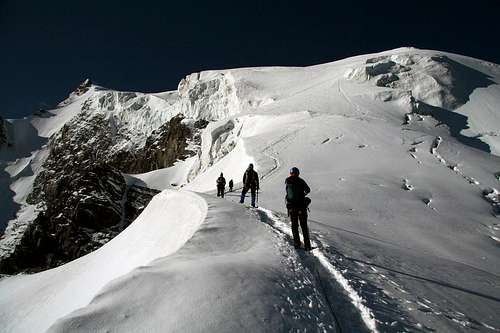
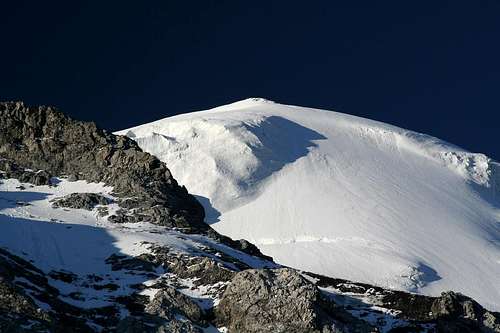
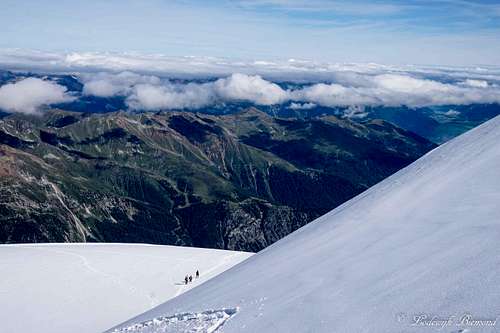
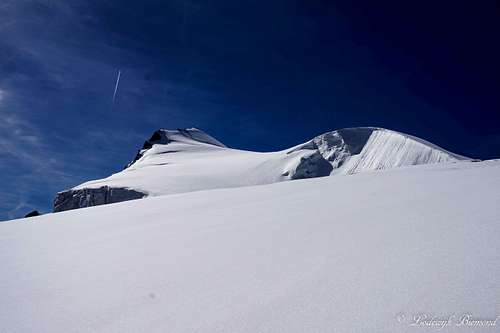
After the Bivak enter the glacier (Oberer Ortlerferner / Vedretta Alta dell Ortles) again. Once again watch out for crevasses. The first part of the glacier is quite steep: up to 40 degrees. More and more the steepness starts to decrease on the glacier that is also called the Ortlerplatt which translates into the Ortlerplateau, a name that fits the decreasing steepness of the glacier well. Keep heading up until the summit cross comes into sight. Cross underneath the summit to the west of it and eventually up to the summit over easy terrain. You are now standing on top of Tirol. Descent is the same way back.
When to Climb
Ortler from Payer Hut by Morceaux
The route is mostly climbed during the summer months when there is normally no snow on the ridge. Difficulties increase substantially when there is snow present on the ridge above the Payer Hut. The best time for climbing this route is between late June and September. Because of the popularity of this mountain, the route can get crowded and traffic jams are no exception, especially on the harder sections. Try to avoid the weekends, during the week the routes are less busy.
Essential Gear
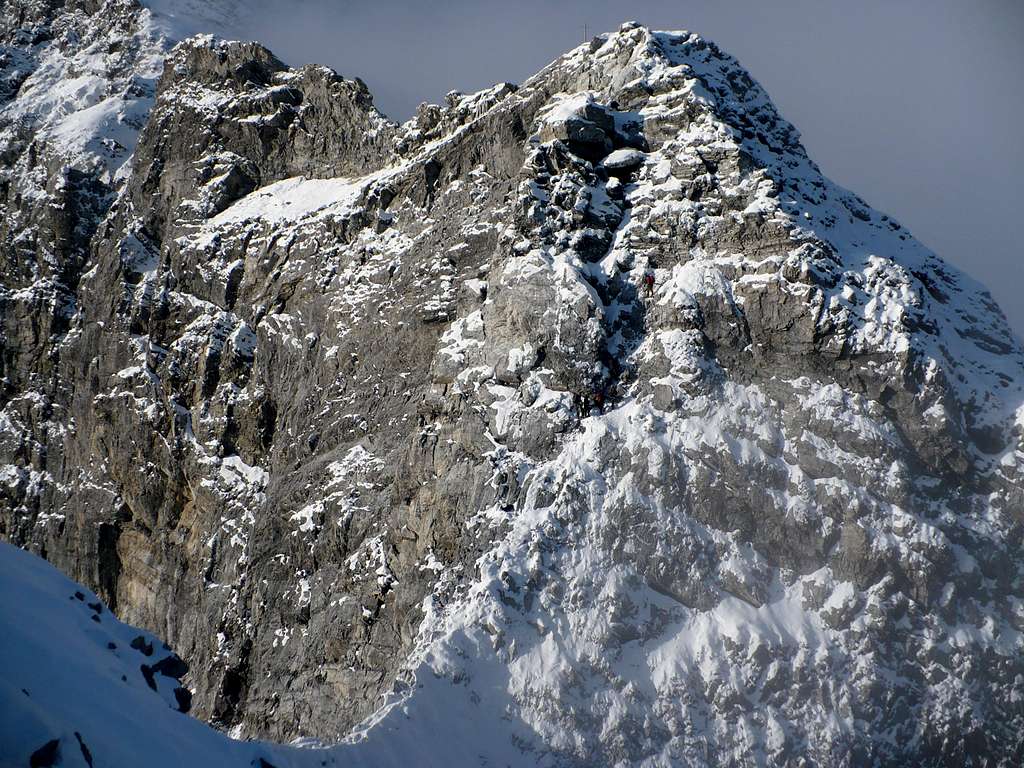
Tschierfeckwandl with climbers on it by Tomas Kristofory
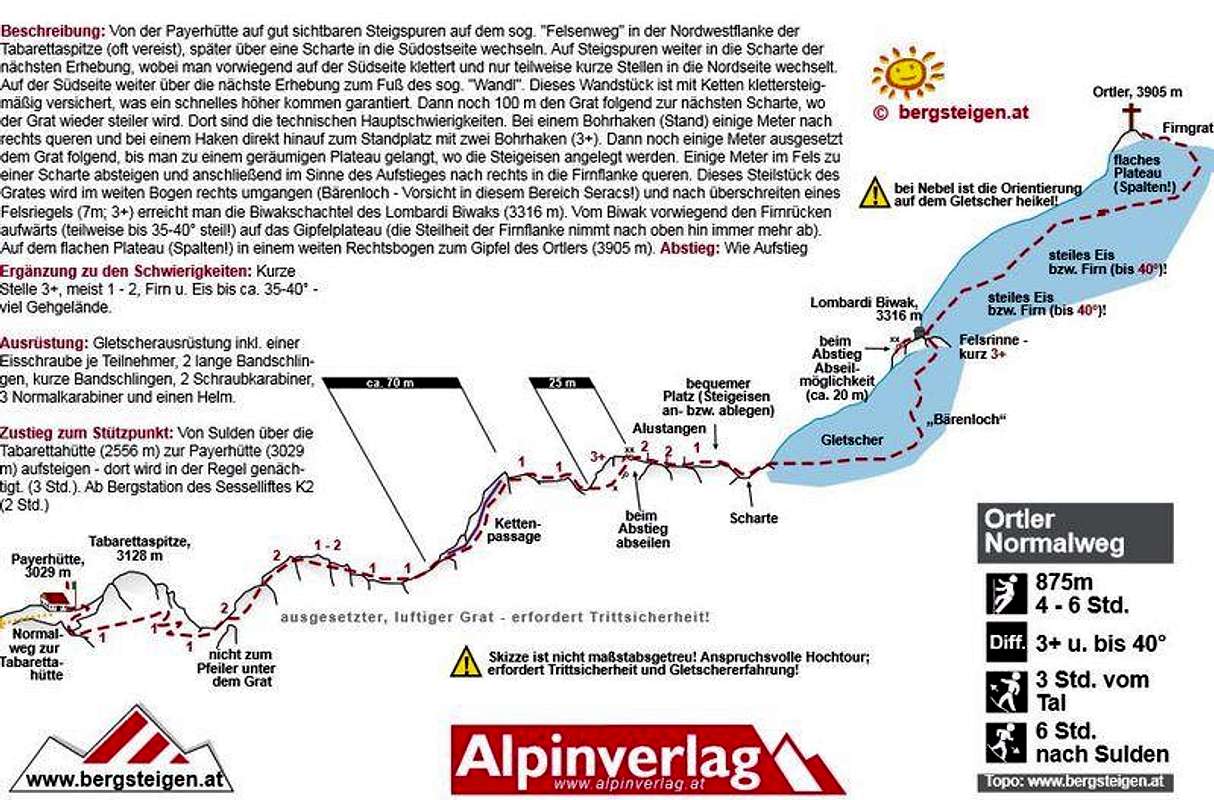
Route Topo
External Links
Mountain guides for Climbing Ortler: Veit Bertagnolli, Alpinschule Ortler
Ortler on CamptoCamp Description of the normal route on Ortler
Webcam Ortler by Bergfex
Webcam Stelvio & Ortler by Bergfex
Langenstein Chairlift - Sulden am Ortler
Ortler Official Tourist Internet Page
Ortler Weather forecast by mountain-forescast.com