
|
|
Route |
|---|---|
|
|
48.48000°N / 120.91°W |
|
|
Glacier then Rock |
|
|
A few days |
|
|
5.4-5.6 |
|
|
Special Notes
A Cascade Classic!
Rock type: Skagit Gneiss, which is usually loose stuff elsewhere but is pretty solid here.
First Ascent: Fred Beckey & Tom Stewart on August 6, 1966
First Winter Ascent: Bill Pilling and Steve Mascioli, March 3-5, 1984
The NE Buttress is a commiting climb in that bailing on it and making a retreat becomes problematic once you get too high up. For this reason, a lot of parties do this as a carryover. As a carryover, you can descend via the Southwest Couloir. Then, if you happened to have come in via Stehekin, you can descend Park Creek back to the shuttle van. Or, you can circle around to the Storm King-Goode Col to get back to the northeast side of the peak (back into Bridge Creek). For those not carrying over or those who came in via the North Cascades Highway, this is the way to go.
 |
Approach
There are two options for approaching Goode's NE side:
1) From the North Cascades Highway by way of the Bridge Creek Trail
2) From Stehekin by way of shuttle buses and trail
Option 1: Drive the North Cascades Highway to the Bridge Creek Trailhead (2 miles east of Rainy Pass; 3 miles west of Washington Pass). The trailhead starts at approx. 4,600 ft but don't let that fool you. You're going to be dropping nearly 2,000 feet before you start going up again. Hike the Bridge Creek Trail southward then westward for seven miles to where it crosses over Bridge Creek (c. 2,550 ft). The North Fork Trail junctions off here and proceeds northward.
The North Fork valley gradually bends to the left (northwestward). The trail crosses over Grizzly Creek in another 3.5 miles (can be difficult to ford if the creek is swollen with meltwater). In another mile or so you will be leaving the trail at around 3,200 ft. When the trail comes out of forest for good and enters a brushy area, the idea is to find a way across to the other (southwest) side of the creek. Mild bushwhacking will be necessary to cross the 100 yards or so from the trail to the creek. You may have to search for a suitable log to cross. Note that, if it is early enough in the season, there may be an avalanche-made snowfield over the creek a little farther up-valley where the trail draws near to the creek (about 1.3 miles past Grizzly Creek). If this snow bridge is present, then this will be your easiest crossing. If the bridge is not present, then you may have to backtrack downstream to find a log crossing or go upstream another quarter-mile to the next forested section.
Once across the creek, parallel it for a few hundred yards until the terrain opens up to talus or an avalanche debris field. Looking to the left (westward), you will see two prominent canyons with waterfalls plunging from on high. On the right side of the right (north) canyon there is a large slab. This is the way we went. This is the 2nd approach description given in Beckey's CAG. Others have apparently gone other ways, but, not knowing them personally, I will not comment on them. Bear toward the slab and begin climbing it closely right of the canyon. Beware: the slab steepens as it goes. You don't want to get yourself in a tough spot. The slab is steep enough that some people belay up it and rappel down it. There is a rappel anchor around a scrub tree. At the top of the slab, it will be necessary to bushwhack across a small ravine and then up onto another slab. The second slab is easier than the first but more vegetated and slippery. At the top of the second slab you will have to whack through some brush for about 100 yards. Snow or stream chutes begin to parallel the brush. Get into one of these chutes and follow it upward until the terrain opens up above after about 4,700 ft. Above you will see several vegetated humps bounded by snow or slabby chutes. The bivy sites are located on these humps (approx. GPS=48*29’30”N, 120*54’10”W). The one we camped on is at an elevation of approximately 5,400 ft.
Option 2: Once you get to Stehekin (if by ferry boat, go here: Lady of the Lake), you then have to travel up the Stehekin Valley Road, which is vehicle accessible for only the first 11 miles to High Bridge camp. You could walk it but it would take forever because it is over 20 miles to the peak from the town. The better two choices are to hitch a ride or take the shuttle bus service. The bus leaves Stehekin at scheduled times (I dare not guess at them here; best you call Stehekin Ranger Station of North Cascades National Park; this might be the number: 360-856-5700, ext. 340, then 14). This is a Laidlaw school bus. For $5 (2006 prices but subject to change) one way, it will transport you and your gear the first 11 miles from the ferry terminal to High Bridge Camp. From there the road is now permanently closed so you'll have to proceed on foot or pedal for the next five miles.
A trail leads up Bridge Creek from the camp near the road. In approximately 2.6 miles the trail comes to a bridge over the creek. Shortly after crossing the bridge (c. 2,550 ft), the North Fork Trail trail junctions off and continues northward. The main trail continues to the head of Bridge Creek and North Cascades Highway. Continue on the North Fork Trail as per Option 1.
 |
 |
Getting to the Buttress
Above the bivy sites the Goode Glacier hangs precipitously over a slabby escarpment. Ice fall seracs will periodically slough off and crash down the chute below. You certainly don't want to mount the glacier under this ice fall. You could gee and go up a little further to the northwest. This is the way we went but I don't think it is the most prudent approach (for one, you've got to cross the serac debris field). Instead, go way left on easier slab and firn, then, when the glacier allows it, make a hard cut back to the right above the ice falls. Aim for the left side of the toe of the NE Buttress just below where jumbled blocks of ice crowd for space at the base of the prominent dihedral couloir that leads up between the main bulk of Goode and its Southeast Peak.
 |
 |
 |
The Lower Buttress
From in amongst the ice blocks and a slapdash moat, belay one easy but chossy Class 5 pitch up to the crest of the buttress. Once at the crest, climb one Class 4 pitch through a patch of small trees. Above the trees, the buttress is Class 3 and 4 for about 700 vertical feet until it steepens and narrows (simulclimb this 700 vertical). Climb up onto the narrowing crest. Now, either continue up the crest or angle into the steep gully on the right. Each has its problems. The crest is steeper but the gully may have more slippery snow patches or ice in it.
 |
 |
The Amphitheater Area
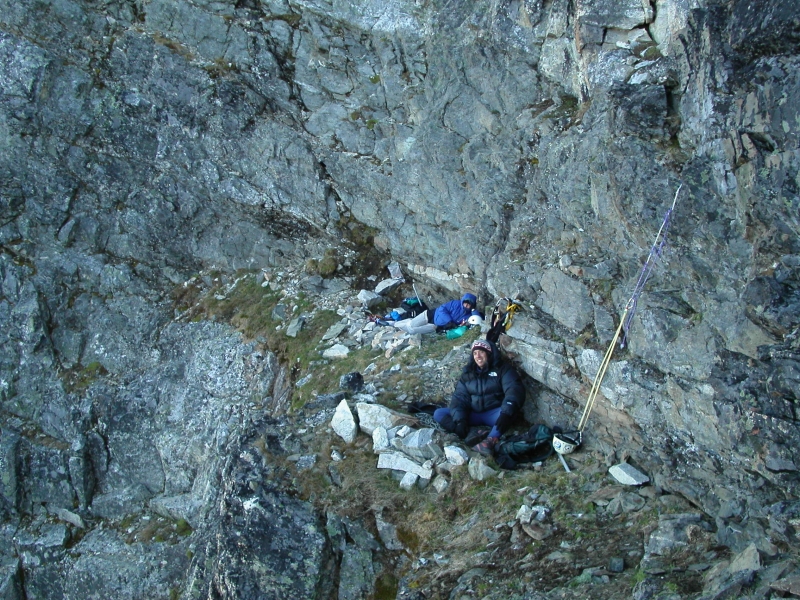
As you continue up the crest or gully you will begin to see a black amphitheater above. This amphitheater marks the location of a huge ledge that arcs around to the right. The crux of the climbing is getting up to this amphitheater (5.4). This is especially true if fresh snow lays in all the level nooks in the rock, as was the case for us (5.6 if snowy). As you near the amphitheater, it will probably be necessary to go right into the gully if you haven't done so already. High blocky steps (visible here where the climber is standing) get you onto the big ledge. This is a good bivy ledge, meaning that there isn't a better one until the summit itself. So, if you don't think you'll make the summit before dark, best stop here for the night. Don't make the mistake we made and continue on for a couple more pitches.
There are two continuances from the amphitheater ledge: the left arête or the right arête. Both arêtes converge about 150 feet above the ledge. The left arête is harder than the right. We took the right one. Three more pitches up the right arête will get you to a flat but narrow crest. There is a very small bivy ledge on this crest, but it may be snow-filled or encroached upon early in the season by a big snow whale on the right.
 |
 |
 |
The Upper Buttress
From the narrow crest, you will be able to see Black Tooth and Black Tooth Notch on the left. Directly above is a prominence called White Tower. There is an alcove (may be snow-filled) in the middle of this tower. Bear toward this alcove but cut right at its entrance. One or two easier Class 5 pitches up and right then Class 4 and 3 scrambling terrain gets you to the summit, which is a nice bivy square excavated in the boulders.
 |
 |
 |
Black Tooth Notch
From the summit, make one or two rappels back down to the aforementioned alcove. Rappel one more time down to a ledge east of the alcove. Make one short Class 4/5 traverse on a loose ledge to the notch itself. Descend about ten feet on the southwest side of the notch to a rap station at the top of the Southwest Couloir. Down below, the next rap station cannot be seen. It is on a hidden ledge. Essentially, rappel from the notch anchor but swing to rappeler's left. A 50m rope will suffice to get to the hidden ledge. The next rappel gets you off of technical rock and into the open couloir.
 |
The Southwest Couloir Descent
Back down steep snow if early season or descend talus several hundred feet to the mouth of the couloir. Below the mouth is cliffy terrain with a waterfall. Because of this, it is necessary to go left. Find a rough climber's path (there might be cairns) down a gully close to the left (east) wall. Ugly gully terrain can then be descended until sufficiently below the waterfall to cut right underneath it.
 |
Traverse to Storm King-Goode Col
If you carried over and are now aiming for Park Creek, suggest you read up on that route in Beckey's CAG. If you are returning to the Bridge Creek side, then here's what you've got to do:
Once around the waterfall, you want to bear due west down a snowfield (some glissading is possible) to a corner in the next ridge over that is visible far below. This corner is a flat part of the ridge at about 7,480 ft (GPS = 48*28’50”N, 120*55’10”W). Round the corner and cross northward along the top of a steep snowfield (possibly no snow in late season). Arc around the basin along a natural bench then bear right through breaks in the rock to the 7,900-ft col. Find the rap station and rappel down the northeast side of the col to the glacier below. A rock outcrop in the snow makes for a good end point for the rappel; else you'll be ending on steep snow, which is never any fun.
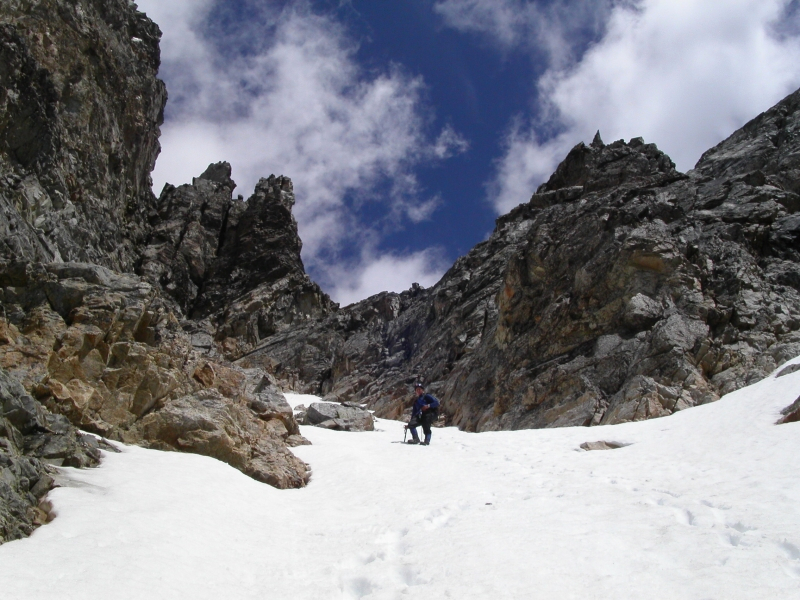
Note, you can see this part of the route in this photo. On the return, you must descend the middle snowfield to its bottom left corner. At that corner, a flat spot in the ridge spur allows you to gain the left snowfield by way of the snow lobe extending to the right.
 |
 |
The Return to Camp
After rappeling onto the glacier, hard snow may require you to cautiously kick steps backward down to a schrund/crevasse that may stretch all the way across the constriction below. We found a way past it on its north end. After the schrund, the angle backs off and you can then face the direction you're going. A few crevasses further down the glacier will necessitate some routefinding. The idea is now to descend to the right side of the glacier (skier's right) until it is possible to leave it for heather, talus, and snowslopes below the main apron of the Goode Glacier. Traverse underneath the glacier back to the bivy sites.
Deproach
Descend quickly back the way you came up to camp, rappeling the slabs down below if necessary. Once back on the trail, run back down the trail so you don't miss the shuttle van. It's prompt. We made it within five minutes of its scheduled arrival time and were amazed to see it on time and containing the threesome we had climbed the NE Buttress with the previous two days. They had done a carryover to Park Creek and had caught the shuttle bus at that rendezvous. But the shuttle bus doesn't run anymore. <color=red>Also, make sure you have enough money for the return shuttle bus fare. It is cash only.
 |
 |
Essential Gear
Glacier portion:
Ice axe, one or two ice screws (though you can probably find a way to avoid using them), crampons. Pickets may or may not be useful.
Rock portion:
At least a half rack trending toward a full rack. A varied assortment of cams, nuts, and hexes. Other specialty pro is at your discretion. 50m rope (60m probably better). Ample slings. Rappel device.