
-
 7638 Hits
-
 79.04% Score
-
 10 Votes
|
|
Route |
|---|---|
|
|
16.2°S / 71.52°W |
|
|
Mountaineering |
|
|
Spring, Summer, Fall, Winter |
|
|
A few days |
|
|
9,000 feet gain |
|
|
Overview
 Reserva Nacional Sign
The normal route to climb Chachani is starting from the east on the La Azufrera route, but according to the Chachani page there are two other routes. There are two companies in Arequipa that specialize in climbing adventures, which are owned by brothers, Carlos and Migel Zárate. Their father, pioneered a direct route from the south many years ago, but it is longer with much more elevation gain. However this route is easily accessible by public transportation, unlike the La Azufrera route. The Cabrerías route starts at the first "Reserva Nacional de Salinas y Aguada Blanca" sign, which is on the gravel road that goes between El Misti and Nevado Chachani. According to the sign, the elevation there is 3,270 meters (10,728 feet). The sign also lists the elevation of Chachani at 6,075 meters, instead of the 6,057 meters shown on the map. Most of these signs have elevation readings that appear to be wrong, I wasn't able to verify this one as my GPS is not working and I hadn't calibrated my altimeter watch. The Cabrerías Route has about 9,150 feet of elevation gain, whereas for the La Azufrera route, base camp is at about 16,600 feet giving an elevation difference of only 3,272 feet. However the actual gain is more, as there is a substantial drop after the first saddle before resuming the climbing between Cerro Nocarani and Chachani.
Getting There
 Cruz Verde Street
 Combi for Chachani
From the center of Arequipa take Ave. Ejercito, which crosses the Chile River on Puente Grau. This is the main route to the airport, passing through Yanahuara and Cayma. Just past the large blue Saga Falabella building on the left side of the street, the road drops down in an underpass, don't take this. Instead, go to the right of the underpass and turn right at the street that crosses this, the map shows number 30A but I doubt that you will see a sign for that. This street goes in the general direction of Chachani, but there are numerous turns and jogs, like all streets in Arequipa. You want to pass through Carmen Alto and go to 1ro (Primero) de Junio, which is the last suburb on the edge of the city. This is also the route to the Escuela Polica (Police Academy), which is well known and your best reference point for asking directions.
If you are going by combi (minivan bus service), take the "Cayma – 1ro de Junio" or the "Cayma – Enace" combi from Cruz Verde street, which is two blocks below (towards the Chile River) from Plaza de Aramas, the main square in Arequipa. Do not take those combis from Sucre street, one block below the Plaza, they are going the wrong way. You want to get off the combi at the last gas station (grifo) in 1ro de Junio, on the road to the Police Academy, which is almost at the end of the route. The cost for a combi is 70 centimos (2008). Here you should be able to get a taxi that will take you the rest of the way. You want to go to the cruze (intersection) of the Police Academy road and the rough gravel road (trocha) that goes between Misti and Chachani. This road is paved and the fare should be 15 soles. Our driver was willing to take us on the trocha to the Reserva Nacional sign (letrera), which takes about 5 minutes, for another 5 soles, but not all taxis will do that. Most of them have never been on the trocha and don't know where the sign is, or how much to charge.
If you want to take a taxi from the center of Arequipa, it will cost 30 to 40 soles. If they will only take you to the intersection of the gravel road and the Police Academy road (there is a sign there for the Police Academy), go left on the gravel road to the first hairpin turn to the right (5 minutes or so) and then take the jeep trail that goes straight up towards a prominent hill between Misti and Chachani. There will be a fairly deep canyon off to your left. You will cross the gravel road on the next switchback, there the jeep trail will end but a footpath will continue up. At the base of the hill are a couple of thatched roof huts, where a goat herder named Alfredo and his sister live. This is just above the Reserva Nacional sign, and is visible from there if you get that far in a taxi. Alfredo and his sister are very helpful and friendly - once you tell them you are climbing Charchani and they realize that you are not robbers. Their four dogs are less friendly, they barked and growled a lot, but didn't bite us; however threaten them with small stones if trying to make friends with them doesn't work! It's about 30 minutes by foot from the jeep trail to their home, maybe 40 minutes from the paved road.
Route Description
 Looking Down to Alfredo's Home
 Fire Circle
 Misti, from the Fire Circle
 Route view from the Top of the Hill
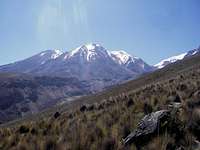 First View of Chachani During the Traverse
 The Bowl Below High Camp
 Final Climb
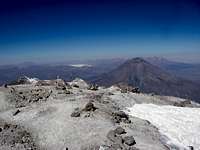 Chachani Summit
From the Reserva sign, find the trail behind it going up to Alfredo's hut and goat pens on the saddle. Please stop and talk to them so they know what you are doing, as well as check in with them on your return so they know you are down safe. If Alfredo is there, he will come out to meet you, his sister might not if she is there alone. You will not be able to sneak by the dogs unnoticed! There is a good trail that goes up from their house to the top of the hill. At the top of the hill, look for a fire pit with a circle of rocks around it. I don't know if it has any significance to the locals but it is a good landmark for finding the trail down if you are returning in the dark. You will also get a good view of El Misti and Nevado Pichu Pichu looking to the southeast. Looking the other way, towards Chachani, you will see a broad ridge leading towards a large broad hill, with the summit of Chachani sticking up behind it, right at the top of the hill. Follow the ridge to the "V" below the hill, and start traversing around the left side of the hill. From this point there is no real trail, but it is easy going as the whole ridge is crisscrossed with animal trails. It looks like going around the right side would be shorter but the directions I received from Julver, a local guide, said to go to the left. If it is possible to go around to the right there would be more elevation gain and loss.
Traverse around the hill, either staying level or climbing slightly. At this point Chachani will not be visible. You may see various rock cairns here and there, but they don't seem to be marking trails, however take note of them and watch for them on your return. Finally, as you reach the far end of the hill, Chachani will again come into view. At this point, the true summit is the highest visible peak. The deep saddle to the right is where the La Azufrera route comes up from the other side, but the Cabrerías route goes up to the summit from the sharp ridge just to the left of the center of the mountain. The broader ridge leading directly up the center has some steep steps and looks very difficult. The snowy valley between the two is another option.
Keep an eye on your summit options because you will soon be going down into a deep bowl where your views will be restricted. There are really two options here, straight through the bowl and up the other side, or traverse around it to the right. Neither one is very pleasant and both require about the same amount of time. Above the bowl on the other side, near the base of the ridge, are a number of great sites for a high camp. If you want to do it as a two-day climb, it is best to get as close to the ridge as possible, although the better site is a broad sandy area near some large boulders. This area is called Pampa Grande on the topo map. It took us seven hours to high camp and from there seven hours to the summit.
Starting the climb in the morning can be a bit confusing, remember your choices from the previous day and check your photos if necessary. You don't want the broader ridge directly to the summit unless you are prepared for rock climbing and want to pioneer a new route. We went up the side of the ridge in the rocks and sand, just to the left of a narrow patch of snow. We joined the main ridge just below a step, which was obvious from below. This was a shorter route, and seemed like it would be quicker, but the actual route is on the ridge. To get to the start of the ridge would have required going away from the summit, or going up the steep side of it. Our route was steep and tiring but not technically difficult. The ridge would more than likely be easier, and probably not take any longer. In July there was snow on the left side of the ridge, but none on the crest or on the right side. Near the top of the ridge there is a good view of Cerro Jorqueta, with Nevados Coropuna and Ampato in the background. This is the left peak of the three-peaked crown visible at the start, or from Arequipa.
At the top of the ridge there is a small step that had an icy chute in the middle and then another ridge angles to the right to the summit. Depending on the time of year, you may need crampons from this point. In July of 2008 this summit ridge was covered with snow, however the climb was easy using crampons and ice axe. In December of 2007 there wasn't any snow there. In general the snow will increase starting in January, and then gradually decrease from about April.
The Descent
 Ubinas, Misti and Pichu Pichu
 Cerro Jorgueta
 Look for this View Coming Back Down
If you are comfortable descending with crampons, the quickest way down is the snow chute from the step at the start of the final summit climb. If you prefer to slide down sand, continue down the ridge a few minutes until there is a visible sand route down to the lower part of the snow chute. The snow descent is quicker, about two hours to high camp; the sand was slower, about 30 minutes longer. After packing up, from high camp to the Reserva sign took four hours, but only the first hour and 20 minutes was during daylight. I highly recommend doing it during the daylight, unless you are using a GPS or at least a compass, as there is no trail and landmarks aren't visible. Coming back down, as you are traversing around the large hill, aim for the notch to the right of Misti, about where Pichu Pichu is. That will take you down to a broad ridge on the other side of the canyon from the ridge you went up on. At this point the canyon isn't very deep and you can easily cross over to the other ridge and continue on down the same way you came up.
We did it the night after a full moon and had to wait until the moon got high enough over Misti to see our landmarks. In the moonlight at one point we could faintly see the saddle where goat herder's house is, below the hill, however once we got on the broad ridge above the hill, we couldn't see where we were. We could see the city lights and two cars coming up the road, so we headed in that direction. Even then we were not really sure where we were until we saw the fire circle at the top of the hill above the goat herders house, where the trail starts going the hill.
Recommended Gear, Etc.
Crampons and an ice axe if there is snow on the route, GPS or compass if you think you will be returning at night. No permits or fees required. Good camping at Pampa Grande and other places.There is no water on the route, make sure you take plenty.
If you are doing this climb using public transportation, be aware that there is almost no traffic on the gravel road, except a few garbage trucks on the lower part during the day. There is a little more on the paved road but even there almost none at night. You can arrange with the taxi driver who brought you up to come and get you at a set time, but make sure he is willing to wait for you if you are late. They will charge 30 to 40 soles for the pickup trip, plus 15 soles per hour if they need to wait for you. If you have a cell phone, there is service for almost the whole route, so you can call to schedule a pickup as well. I would only do this with the taxi driver who brought you to the mountain for the climb. You can buy a cell phone in Arequipa for 60 to 70 soles, which includes free phone calls for an amount equal to the purchase price. This can be a good safety measure as well because most of the Arequipa area peaks have cell coverage, at least on the top. Movistar is most common and versatile but Claro is the only one who has coverage on Nevado Solimana near Cotahuasi.