
-
 45354 Hits
-
 87.23% Score
-
 24 Votes
|
|
Mountain/Rock |
|---|---|
|
|
46.75810°N / 121.7532°W |
|
|
Hiking, Mountaineering, Scrambling, Skiing |
|
|
Spring, Summer, Fall, Winter |
|
|
6012 ft / 1832 m |
|
|
Overview
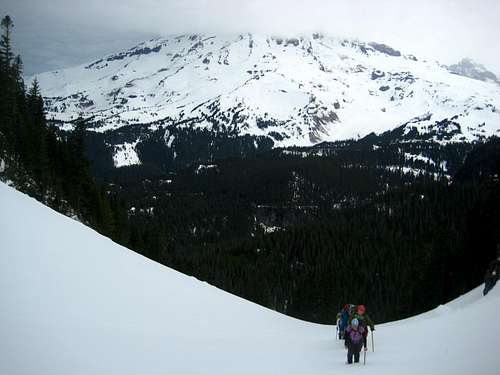
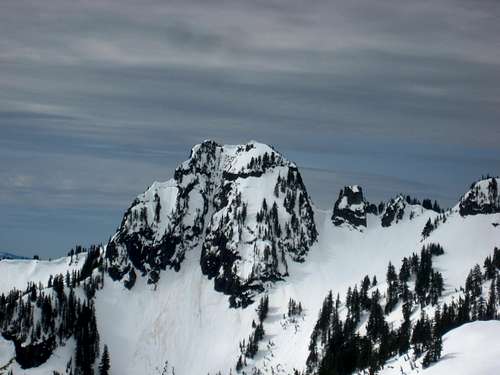
Situated near the middle of the Tatoosh mountain range just south of Mount Rainier, Lane Peak boasts the same spectacular views as it's neighboring peaks, but is slightly farther from the beaten path. Lane Peak is still a short hike from the road, but will allow you to find enjoyable scrambling away from the crowds at Pinnacle peak. There are a variety of routes to the summit ranging from 3rd class scrambling on the south side to steep snow couloirs on the north face. Lane peak is very clearly seen from the road to Paradise in Mount Rainier National Park and in spring, the view of its north face from the Narada Falls parking area is nothing short of spectacular.
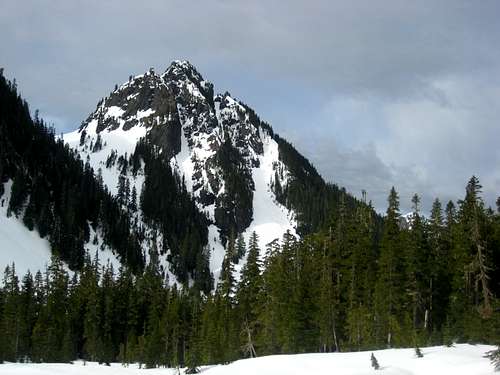 Lane Peak Lane Peak |
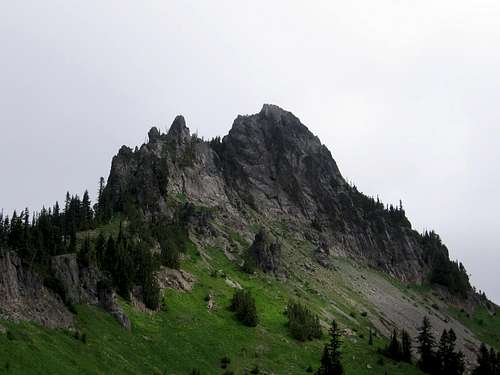
 Lake Peak summit area Lake Peak summit area |
 Lane Peak in summer Lane Peak in summer |
Getting There - Reflection Lake TH
From Portland:
Take Interstate 5 north to Exit 68 and turn east onto US highway 12 and continue for 30 miles to Morton and State Highway 7. Take SH 7 North to a junction in the small town of Elbe. Turn right and follow this road through Ashford into Mount Rainier National Park. There are signs for Mt. Rainier National Park at nearly every junction.
From Seattle:
To reach the West entrance by Longmire, take Highway 7 from Tacoma 35 miles South to Elbe. At the junction, follow the signs to Mt. Rainier National Park and drive East about 15 miles to the park entrance.
Once inside the park, follow the main road east to Longmire and continue east past the turn off to Paradise and onto Steven's Canyon Road. Lane Peak is in the Tatoosh Range south of Mt. Rainier and clearly seen from the road. All routes begin at the Reflection Lake pullout on Steven's Canyon Road which is about 1.5 miles before the Snow Lakes Trailhead. Note the Steven's Canyon Road typically doesn't open until around Memorial Day and closes at the first major snowfall of the season usually in mid-October. If the road is closed, you can park at the Narada Falls pull out on the east side of the road just before the turnoff for the Paradise Loop Road. A short but steep 200 foot hike to the east gets you to the Stevens Canyon Road.
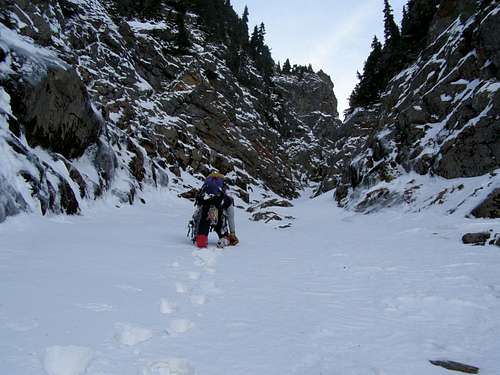
Whether you start at Narada Falls, or Reflection Lakes, you will have to do about a half-mile of road walking to reach the 90 degree turn where the road begins heading east. If parked at Reflection Lakes, hike the road west for 1/2 mile and if parked at Narada Falls, hike the road south for a 1/2 mile after the steep 200 foot hike. Once at the 90 degree turn, leave the road and begin hiking down through sparse forest to the south towards Tatoosh Creek. The approach to Lane Peak is not on a trail therefore fewer people make the summit of this elusive peak. It's best climbed in spring when you can go up any of the north face couloirs, otherwise in summer you will have to hike to the saddle between Lane and Denman Peaks.
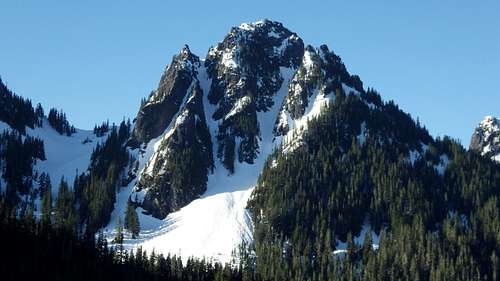 Lane Peak and its north face from Narada Falls
Route Options
North Face Couloirs - Moderate to Steep Snow + Class 3
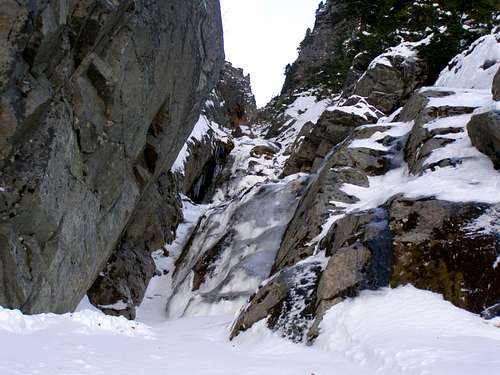
The north face of Lane Peak is a complex and beautiful face with three awesome couloirs that make for perfect snow climbs in spring and early summer. You will likely have to start at Narada Falls for these routes. Hike up to the Stevens Canyon Road and follow it south to the obvious 90 degree bend where the road begins heading east. Leave the road and hike gently downhill for 400 feet through the forest to Tatoosh Creek. Cross the creek (look for a snow bridge) and follow along the south side of the creek (flat) until you are directly below the north face. Now you must choose which of the three couloirs you will ascend. All three are at least 45 degrees and an ice axe is mandatory. Depending on the snow conditions, crampons may be necessary. New climbers may want the comfort of a 30 meter rope and a few pickets with someone who knows how to set running belays. Helmets are also a good idea as rocks tend to fall down these couloirs especially when the warm sun is out. Make sure the avalanche forecast is favorable before attempting any of these routes.
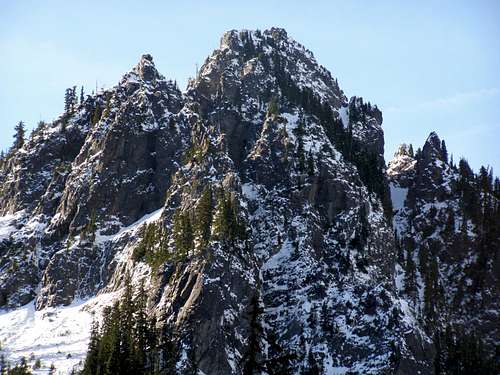
 Routes on the North Face of Lane Peak
Lovers Lane
Lovers Lane is the steepest, narrowest, and consequently the most difficult of the routes. Hike accross Tatoosh creek to the northeast corner of the north face. The line should be obvious as you can see it all the way from the road. Climb straight up until it ends abruptly on a ridge above The Zipper. Rappel from here into the Zipper and finish by climbing the last 300 feet of the zipper.
The Zipper
This is the most popular climb on the North face. It is the left-leaning couloir in the center of the face that you can see from the road. However, once you begin the approach, it will be hidden behind a ridge. From the basin, hike below the face and climb up a large triangle-shaped feature composed of debris from the upper mountain. At the top of this, angle left and straight up 1000 feet to a dead tree at a notch in the east ridge of the summit block. The couloir is about 45 degrees and 20 feet wide at it's narrowest. After topping out the couloir, traverse southwest over to the standard finish to the summit.
The Fly
This is the easiest couloir on the north face. At the base of the face, instead of turning left at the top of the debris pile, continue straight up the broad couloir trending to the right to a notch in the west ridge. From this notch, continue around to the south face and climb the standard route to the summit.
 Climbing The Fly Climbing The Fly |
 Looking up The Zipper Looking up The Zipper |
 Looking up at the start of the Zipper Looking up at the start of the Zipper |
South Face (Standard) - Class 3 with possible moderate snow
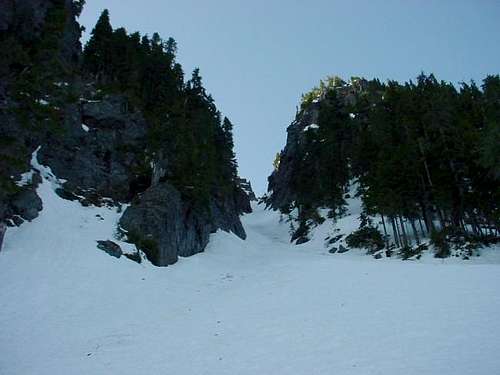
The standard route starts the same as described above. Cross Tatoosh Creek at 4,500 feet and follow it down however do not go all the way to the base of the north face proper. Instead, head up the large gully separating Lane and Denman Peaks. In spring, this gully will have moderate snow but in summer, you can start on the large 250 foot talus slope that comes all the way down to the creek. At the end of the talus, continue up through the trees and stay right of a short cliff band. 700 feet above Tatoosh Creek (at 5,200 feet), emerge above the trees and continue to the broad, 5,440 foot saddle.
From the saddle, turn right and head west up gentle slopes and aim for the obvious weakness in the southeast face of the peak. The final 50 feet will involve some fun Class 3 scrambling. The summit is a small perch with beautiful views of three volcanoes and most of the Tatoosh Peaks.
Descend via the standard route down the SE face. The scramble down is fairly straightforward but there is a large tree you can make a short rappel from. Continue down to the Lane/Denman saddle and return back to Tatoosh Creek and make the final 400 foot ascent back to the road.
 Approaching the saddle Approaching the saddle |
Lane Peak near the Tatoosh Creek crossing |
 Wahpenayo Peak from the summit Wahpenayo Peak from the summit |
Map
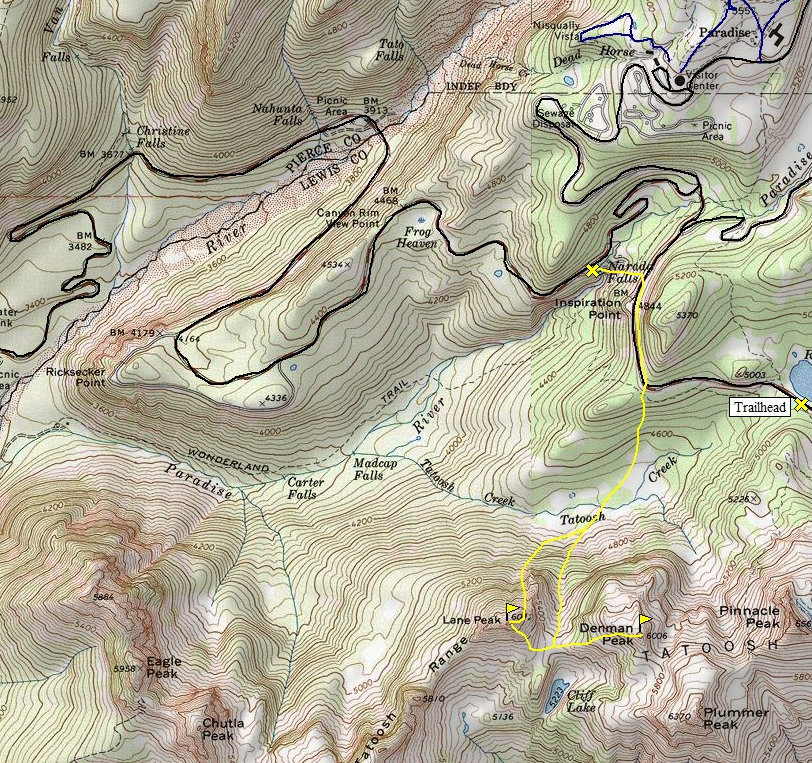 Lane Peak map
When To Climb
Like the other Tatoosh mountains, Lane Peak can be climbed year-round. For routes on the North Face, late winter/early spring is probably the best time for good snow conditions. The peak usually has snow until Summer, but this shouldn't be much of a problem. By mid-late summer, it should be completely snow free and the standard south face route is recommended.
 Tatoosh Panorama from Paradise with Lane Peak lower down at center right
Camping/Red Tape
A $15 fee or park pass is required to enter Mount Rainier National Park. Once inside the park, there is no fee to climb. Backcountry camping is allowed, but regulated. Permits are issued from the Longmire Ranger Station. Camping in Mt. Rainier National Park is regulated by the National Park Service. There are many campgrounds within park boundaries - some pay, some free. There are also limited backcountry camping permits available.Wilderness Camping:
The best resource for wilderness camping information is the Longmire Ranger Station. Stop by there on your way into the park and the rangers there will let you know exactly what camping is available. There are a handful of trailside campgrounds in the area or you can obtain a permit for backcountry and alpine camping. Permits for all wilderness camping are free and can be obtained at any ranger station during the summer. During the winter, the Longmire Museum is the only place open and they will set you up with a permit. Click here for more information on wilderness camping.
Car Camping:
Mount Rainier National Park has 6 car-camping areas with a total of 600 sites that are open during the summer months. Sunshine Point campground is the only car-campground open year round. Fees to use these facilities are from $9 to $15 per night. Click here for more information on car camping in the area.
Mountain Conditions
More information on climbing conditions and regulations can be gathered from the Mount Rainier National Park headquarters at Rainier National Park Website
See this page for good webcams of the Mount Rainier area!
 Tatoosh Webcam
External Links
Good Trip Report of the Zipper in winter