

PAROFES - Oct 13, 2013 9:11 am - Voted 10/10
Great beta!Great to see you working with Steph, she rocks! In photography and noted photos.
Fantastic beta!
Hey, I know you're a big fan of long exposure shots right?
I did some this weekend, the longest with 15 minutes and I got a beautiful star trail on it...soon to be posted!
Cheers man
Parofes

Josh Lewis - Oct 17, 2013 8:22 pm - Hasn't voted
Re: Great beta!Thanks Paulo. I admit that Steph has had some inspiration to me with some of the work she does. I decided to take a look, it certainly had a neat effect and of course good details. The profile shot you have is quite nice. I still need to figure out the remote timer issue (I've always been constrained to 60 seconds).

Jarpup - Oct 17, 2013 8:13 pm - Voted 10/10
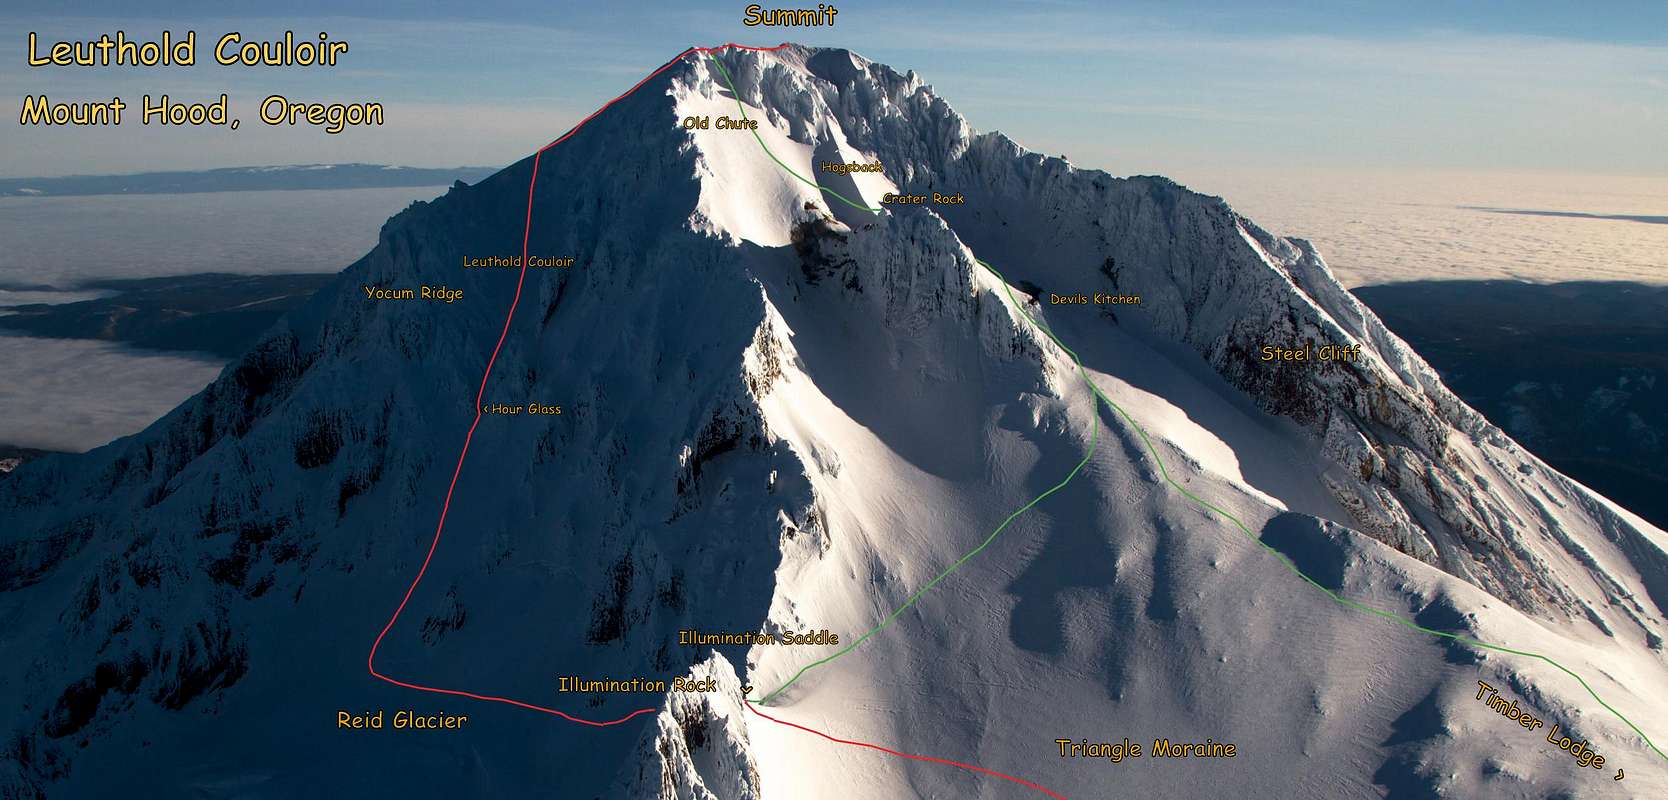
Awesome!What a great (and helpful) picture!
Josh Lewis - Oct 17, 2013 8:45 pm - Hasn't voted
Re: Awesome!Thanks Jarpup. I could not find a diagram that showed almost the entire route so I decided to make one myself. It was a fun little project.


Comments
Post a Comment