Route Description
This is merely a description of my route. I hope it will be helpful to someone climbing Mount Russell's East Ridge. This route description is more geared towards beginners and intermediates. I should also probably mention the route described below is non-technical, requires no ropes, but I recommend bringing climbing shoes for the ridge. These are not necessary, but they increase your confidence quite a bit, weigh practically nothing, and for me made the ridge more enjoyable.
Obviously you should bring at a minimum hiking boots. Other clothing - of course a jacket, you never really know what the weather will be like and it can change rapidly. Helmet? Rockfall is not generally an issue on this route. I tend to bring one anyways. Again it doesn't weigh that much and something that hits your head could cause you to lose consciousness. I tend to be a little conservative. You can probably survive just fine without one though.
I did the standard approach from Whitney Portal. Everyone has their own climbing style, and I think most people would say this is a route you would want to do in 2 days. Still, there's something about doing an out-and-back climb/scramble. With that being said, if you are planning on camping you will probably be at Upper Boy Scout Lake.
I drove to Whitney Portal after work on a Friday and got to the portal at around 1:00AM. I managed to sleep for 2 - 2 1/2 hours or so, and started the hike with headlamp and backpack sometime around 4:00AM. Given this is fall, I didn't bring any snow/ice gear with me (note - you can find a webcam of Mount Whitney live on the internet, which can give you a pretty good idea about conditions on nearby Mount Russell). It was Saturday, October 5th, and a warm and pleasant day for fall with no clouds in sight.
Let's start with the route description. If you're hiking at night, it can be disorienting so another route description doesn't hurt. First, you will begin at the Whitney Trail. It is clearly marked at the righthand side of the parking lot as you drive in. You will hike in on this trail for about 1 mile until you see a wooden sign that says "North Fork" on it. Take a right here where there is a trail that goes up into the hills to the right. You will be on the right-hand side of the creek and then eventually the well-maintained trail takes you across to the other side. It is at this point you will run into a sheer granite face in front of you. There seems to be a trail that goes left here. Don't take that trail. Continue right heading towards the direction of the river and you cross it again, so that you are once again on the North side of the river.
E Ledges
You are now going to follow this until you arrive at a "dead-end" on the trail that makes a sharp V and sends you up into the ledges on your right. This section is short, it is called the E Ledges. There are some minor 3rd class moves you need to make to get up this section. You will know you are on the E Ledges when you see the big tree branch that is in your path. Essentially you will be zig-zagging back and forth on the ledges until you are heading East and then back West again, onto the trail towards the lake. Ducks help mark the way. I climbed them at night so they aren't that hard.
Lower Boy Scout Lake
Now you are at a very small lake - Lower Boy Scout Lake. The trail heads around and continues West. You will know you are in the right place when you see Mount Whitney's East face in this section. It usually takes about 2 hours to get to Lower Boy Scout Lake. The trail will head along the South side of the stream to your right. You will be in a boulder/talus field. Cross the stream in an easy place when you get the chance. Now you are on the other side of the stream. If you are here you are doing great, you're almost to Upper Boy Scout Lake just to the West. Now is your last chance to fill up on water. To the N/NW you will see a big hill - you can't miss it - in other words on your right if you were looking in the direction of Mount Whitney. Don't underestimate this hill - it was my least favorite part about the approach.
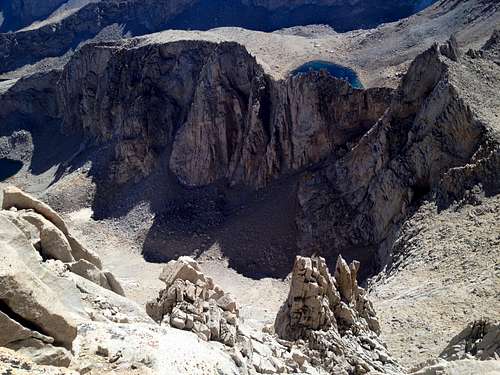
The Scree Hill
This hill should be ascended in less than an hour - if it wasn't for the scree. It took me about 2 hours to get up it. I know that seems like a long time but the scree results in very slow, never-ending hiking. Imagine a beach at a 45 degree angle, covered in sand, and you are trying to climb up this beach. You just keep sliding back down. That's kinda how this section is. A note - bring a map with you. It really helps orient you. When you look up you will see a big flat section at the top. Don't go to the left or to the right where it becomes steeper. Just stay in the middle more or less where it's not as steep. Once you ascend this you are at the Russell Carillon Saddle. So side note on this one, don't underestimate this section by looking at your topo map and going "doesn't look too bad."
![Unnamed Image]()
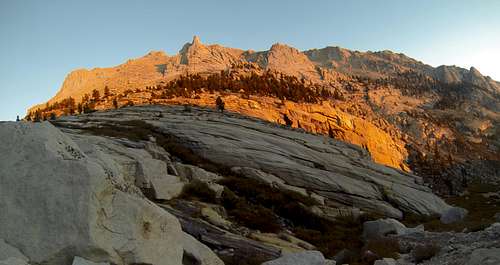
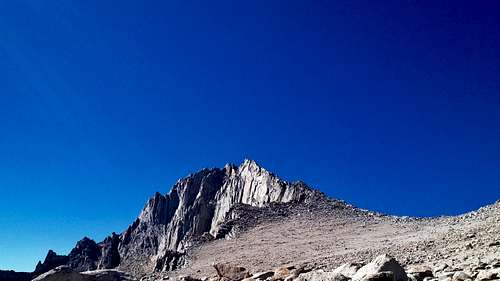
The Saddle
All of a sudden your toil has paid off. Mount Whitney looks amazing from the saddle, and you are afforded your first view of Mount Russell right in front of you. Walk across the flat, easy terrain to the start of the East Ridge. Scramble up the boulders and they eventually taper off into a single point.
The East Ridge
The first move you make is kind of a scary one. Not hard, but lots of exposure all of a sudden cause you to go "this is the first time so far today that I feel like my life is in danger." Tune those thoughts out and maneuver up and across this short sequence - you'll know it when you see it. Now you are at a relatively straightforward hike up the right hand side (or North side) of the ridge. So far it's pretty wide. There is one section here towards the end where there is a 3rd class sequence with moderate exposure. It's very easy, just ignore the void on your right. Once you get to the end of this section, you are now at the true East Ridge in all its glory. This is why you drove 7 hours to get here. This is why you hiked 7 hours for (7 hours for me to get to this point from Whitney Portal - everyone is different though). It's worth every drop of sweat - probably some of the most striking views in all of the Sierra are right here on this section.
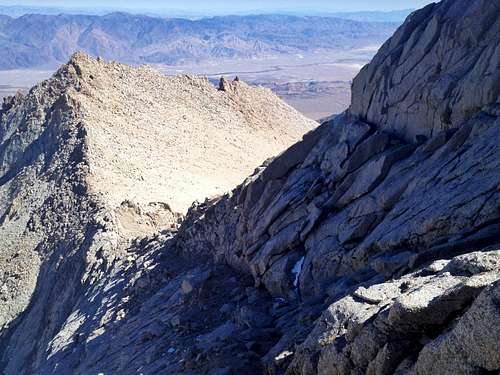
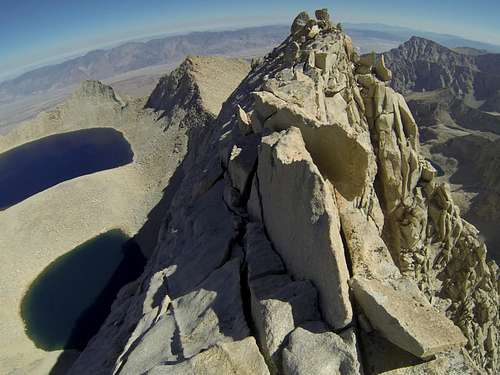
![Looking down the East Ridge]() Some of views are so spectacular
Some of views are so spectacular
On your left is Mount Whitney and all the various ridges along Iceberg Lake and the surrounding area. The ridge itself looks scary, but once you're on it it's manageable.
Guidebooks list this as Class 3. I don't disagree with them, but I think it should be Class three with an asterisk. Warning, be prepared to keep it together when you face huge exposure on both sides. Having said that, I don't think anyone should attempt the ridge unless you have at least some bouldering/rockclimbing experience.
None of the moves are really hard, but you will need to approach the ridge confidently. The reason I make such a big deal about this is because this isn't bouldering at sea level in an air-conditioned climbing gym. This is 14,000 feet, and the air is very thin. Breathing is hard. You move slower than normal. Even your thoughts are sluggish. The other reason I bring this up is because you will need to be able downclimb your moves. So get confident at downclimbing.
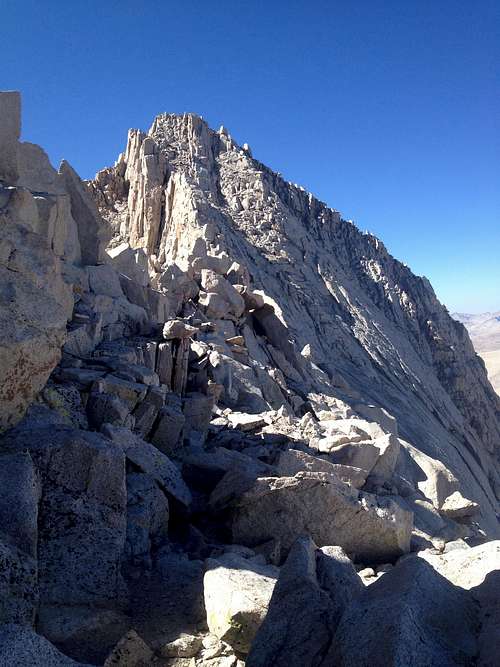
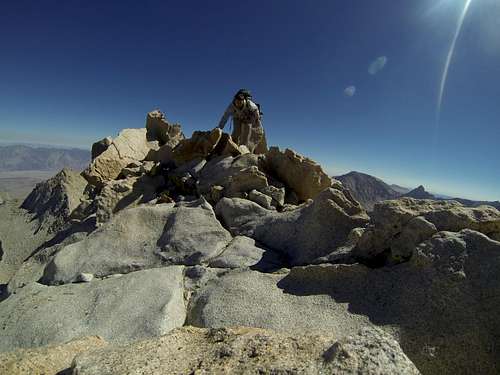
![Mount Russell from the Saddle]() First time you can clearly see Mount Russell
First time you can clearly see Mount RussellI think the hardest moves are in my opinion on the ridge itself. Not hard physically - just hard mentally.
On the way down - if you are on a time budget to get back to the car (like I was) you may wish to bypass the E Ledges before it gets dark. It's not the end of the world if you don't, they can be easily downclimbed at night - but for some reason light seems to make the downclimb so much easier. I reached the summit around 2:00PM and headed back down to reach my car around 6:30PM. I was exhausted. I feel like that's a pretty fast descent time. So allow maybe 5-6 hours tops. As always, bring a headlamp on every climb.
Have fun and be safe!
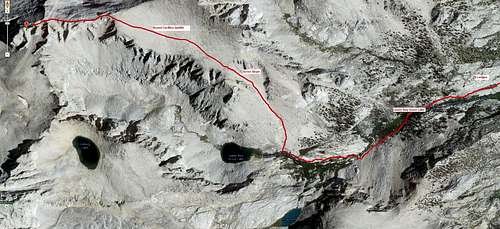
![Map of Mount Russell from N Fork Lone Pine Creek]() Map of E Ridge Route
Map of E Ridge Route


Comments
Post a Comment