
-
 13513 Hits
-
 83.1% Score
-
 16 Votes
|
|
Route |
|---|---|
|
|
Trad Climbing |
|
|
Spring, Summer, Fall |
|
|
Half a day |
|
|
5.8 (YDS) |
|
|
5.8+ |
|
|
6 |
|
|
I |
|
|
Overview
Like many of the routes in Eldo, the first ascent of this line was done by Laton Kor in 1961. This is a fairly well known climb that is considered by most to be classic. The climbing is relatively sustained and there is a lot of variety on the route. The climb is essentially broken into two 3 pitch sections with a large ledge at the top of the 3rd pitch. If weather becomes and issue, this is a good place to rappell from. The Redgarden Wall as seen from the Bastille.
 It sees a fair amount of traffic and can become crowded on the weekend, so make sure to get an early start. Another advantage to starting early is avoiding the sun. This is a south facing wall, so it can get pretty hot in the afternoon.
Getting There
Super easy, if you can get to Eldorado Springs, then you can find the Redgarden Wall. From Denver head North on I-25 towards US 36. Take the CO Hwy 170 exit. Follow it as it curves around a new shopping complex, and go past CO Hwy 93 to the town of Eldorado Springs and to the state park. Yes, this is a state park so there is a fee required (5-6 dollars depending on the time of the year.)From Boulder, take CO Hwy 93 (Broadway) South until you get to the first stop light after leaving Boulder. This is Eldorado Springs Dr. Take this West until you hit the town. The park entrance is at the end of the dirt road into town.
 On the slab leading to Ruper.
 Once in the canyon look for a large red face, this is the Redgarden Wall. It is to the west of the Windtower and across the road from the Bastille. Cross the bridge and take the dirt path westward until you reach a concrete pad. From here follow the switchbacks until it forks. Take the right option and continue on switchbacks until you reach a large slab. Climb the slab to the top and find the large flat area. This is the base of Ruper. This slab is 4th to low 5th class climbing and can either be simul-climbed, (although placing any pro would be near impossible due to the texture of the rock) or soloed. Do not fall here since you could severely injur youself! The slab is around 200 feet or so.
Route Description
Pitch 1: (5.7+) Climb up a finger crack system with good feet until the crack discontinues. From here move to the climbers right over towards a large ledge. A large block can be seen from here, you must either traverse to set up a belay on the east side of the block below an off-width crack, or head towards the Rover Variation. The first pitch and a half.
 Pitch 2: (5.8) Climb the offwidth crack to the top of the block that you passed in pitch 1. There are two solid bolts that make up an anchor at the end. Make sure to bring a #4 camalot to protect the beginning. Smaller gear can be place in the sides of the off-width higher up.
Rover Variation Pitch 2: (5.9) Move to the left of the block and follow the obvious finger crack. Start with some awkward moves getting over a small roof. There is a piton here to protect you before moving to the finger crack. From here either jam or lyback the left facing dihedral and pull over the bulge of the block. This pitch ends up at the same anchors as described above.
 Steve on the Rover Variation, (5.9).
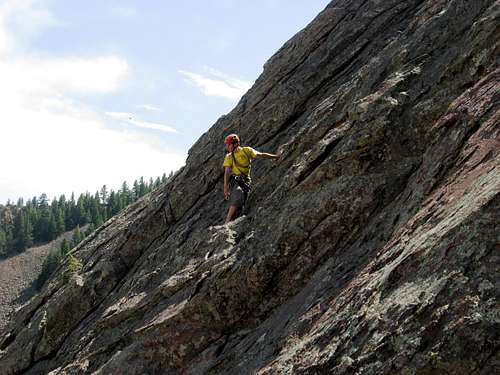
 Pitch 3: (5.8) From the good anchors you will be able to see the traverse. Follow the path of least resistance and make sure to place gear where you can. There is a fair amount of exposure and a good drop-off for the entire traverse, so make sure you are comfortable leading a 5.8. The holds are large but the feet are sometimes minimal and can be a bit reachy for smaller folks. Follow the traverse until you pull around a corner. From here follow the easier terrain of a crack system to the top where a tree can be used as an anchor.
 Steve on the airy traverse. Pitch 3.
 After the 3rd pitch you will reach a large ledge/slab similar to the slab climbed to get to the base of Ruper. Either solo or simul-climb this slab across to the rock face and find the base of the 4th pitch. From this vantange the climb looks much more vertical and much more difficult than it really is.
Pitch 4: (5.8) A nice and long sustained pitch with a mixture of face climbing and crack climbing. Pro is good and can be placed almost anywhere. Follow the crack system, (that occasionally breaks and has short sections of face climbing) to a large flake. Once you reach the top of the flake there is a very small area that you can use to set up an anchor. There is also one fixed Stubai piton that can be used for backup and is realtively well placed. Not very comfortable but large enough to make a safe SRENE anchor. There is not much room for a second party though.
 4th pitch of Ruper.
 Pitch 5: (5.8) Continue upward following the crack system until you come underneath a roof. From here follow the angling chalk marks to the climbers left. Large holds makes this part fun, but placing pro can sometimes be difficult. There are a few fixed pitons to help.
Pitch 6: (5.5) Easy face climbing on great rock that leads to the top. Not very many places to place pro here, so just keep going and take what you can get. The pitch ends at the top of tower one, and a large tree can be used to set up a belay station.
 Last pitch. Easy 5.5 terrain with great exposure.
 Pitches 5 and 6 can be combined with a 70m rope for sure. A 60m rope will barely make it and require a more direct route on the last pitch to reach the top. To descend walk of the east face of Tower One. Look for a cairn marking where you need to go down. The down-climb is very similar to the approach slab, although much longer. Take your time and if you encounter anything higher tahn low 5th class terrain, you know that you have gotten off route. The end of the slab will put you on a trail to the west of the Windtower. Follow this back to bridge.
 Decsent slab.
 Essential Gear
A typical Eldo rack will suffice. If you take the standard route a #4 camalot is required for the offwidth crack. Make sure, as always to bring plenty of extendable,(alpine) draws to minimize rope drag. I brough the following, but depending on your comfortability with climbing a 5.8+ at Eldo, you might want to either bring less or more gear.Set of nuts.
Set of micro-nuts.
Full set of Hexcentrics.\
BD Camalots #.1-3
Aliens: Blue, Blue-gree, Yellow, Grey.
 Some Eldo gear.