
|
|
Route |
|---|---|
|
|
8.9583°S / 77.6333°W |
|
|
45-55 degrees snow/ice |
|
|
A long day |
|
|
D+ |
|
|
Approach
Note: This is tour number 3 on the picture ! This is the standard route that nearly everyone takes.
See the Main Page. Every climb from the south starts from the same camp.
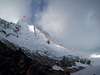
From the Moraine Camp, you first cross a flat glacier that has no crevasses,
but instead some knee-deep holes filled with water.
Sometimes the ice that covers them is so thin, that you break through many
times on your way (especially on the way out), at other times they are all stable.
There is nothing you can do to avoid them, its just plain luck. Try walking in
one line, so it only hits the first person !
With wet feet your tour will be over before it begins. Don't try to climb
with wet feet, it's cold enough when they are dry !
(P.S.: If you hear of others before that this happens often at the time you are there, you might
want to try and use some garbage bags that you close tightly at the bottom.)
There are no deeper crevasses on the flat part, a rope is not necessary.
Then you walk up the left shoulder across a glacier part with deep crevasses.
There are often small flags that you can follow, but will will most likely not see
them in the night anyway, only on the way down. Here the use of a rope is
absolutely necessary, there is a high risk of falling in the crevasses !
 |  |
Route Description
The Climb:
The general inclination of the face is 45-55 degrees. It is purely packed snow climbing,
but quite long and tiring. Expect a minimum of 7 hours up and another 7 hours down.
from the moraine camp. Many (!) accidents happen on the descent of this route, because
people get tired and are not concentrated any more !
Belaying & Pro:
Belaying is usually not necessary except for the top pitch: 45-55 degrees on packed
snow means that you can comfortably make a rest and eat something after you have pushed
a small platform in the snow with your feet.
Tip: Another tip you can rely on: There is no ice on this route ! -> Leave your Ice-Screws in
Huaraz, you won't need them. It is just packed snow, all the way up. Take some extra
snowstakes with you though, if you plan to rappel. Ablakovs (Ice-V-Threads) or other
natural snow shapes (bollards) for rappels are not possible because of the soft type of snow.
Descent:
People with a lot of technical experience will simply downclimb the face except for the top
3 pitches. Others prefer to rappel which is probably not a lot safer although it might first seem
that way. This is because the 16 abseils are done on snowstakes. These snowstakes
are most of the times (but not always) in place. As you can read in my report on my webpage
a peruvian guide fell to his death while we were there, because he didn't check the little piece
of cord that was tied into the snowstake which then ripped. We also saw snowstakes that
would have popped out of the snow and even one that was broken in the middle !
Tip: To make rappelling on snowstakes safer, always follow this rule: Use 2 stakes at
the top for the first person rappelling (one with load, the other one as backup!) and then
the last one takes out the backup stake before he rappels, while his partner puts in
2 stakes at the next rappel point and secures the end of the rope to that point.
Note: Especially after some heavy snowfall the snowstakes are often covered with snow.
The difference can hardly be seen on the way up, because even in good conditions you will
rarely see the stakes in the dark. Therefore start early so you have a safety margin before
it gets dark in the evening. Starting around 2 'o clock in the moraine camp is a good idea !
 |  |
Essential Gear
Snowstakes:
You should be fine with a total of 3-4 snowstakes in a team if you plan to downclimb,
and maybe 6-8 if you are planning to rappel and fear, that you don't find enough that are inplace.
If you want to save some money, buy your snowstakes in Huaraz, not at home !
The snowstakes you can find there are mostly self-made, but certainly good
enough for rappelling on them.
Tip: If you plan to rappel, but are really short on money, collect or buy (for a few
soles) some strong pieces of wood, ideally already in Huaraz and use them
as a T-anchor with a small piece of webbing tied around them. This is just as
safe but much cheaper than the regular snowstakes when you just want to leave them.
Boots:
I often got the question about Plastic or Leather boots and which are recommendable
on this mountain. There is no 100% rule that plastic is necessary. I have personally
bought plastics specifically for this trip, because my leather boots are far too cold
anyway (Sportiva Nepal Tops) Warm leather shoes like the Nepal Top Extremes
or the SuperGuides Thermo are probably the best shoe for this type of climb.
Still I was very happy to have the plastics, because my feet were cold on the climb,
but 4 toes of my friend (also wearing plastic) were frozen white when we came down
(nothing permanent). Conditions on the mountain change, and this was a very cold and
windy day. On other days, leather might be enough. Another friend went there 2 weeks
later with Leather and Thermogators and said it worked well.