

Diggler - Apr 21, 2004 11:06 am - Voted 10/10
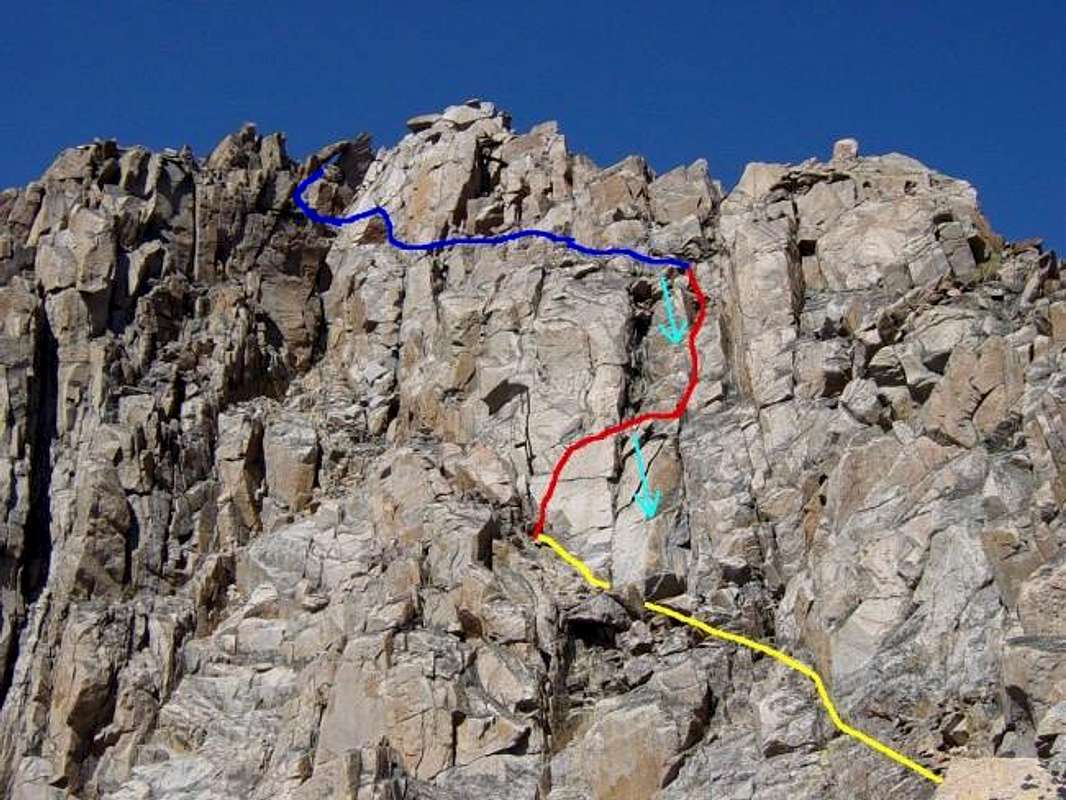
very informativeThis is great for showing key parts of the climb. If I ever make it up there, I'll make sure this comes with me- thanks!

mrwsierra - Apr 21, 2004 11:26 am - Hasn't voted
nice overlayOne of my favorite climbs ever, truly a glorious place. The route you outlined is perfect, this will be of use to future Granite climbers.

TYoung - Nov 7, 2007 10:49 pm - Hasn't voted
perspective difficultPictures so often fall short of demonstrating scale and are only 2 dimensional, but I agree w/ Diggler-print this out and take it with you, you might find it helpful. Of the entire/hike climb this was the only REAL sphincter-tightening section...

mountaintopper - Feb 20, 2008 2:41 pm - Voted 10/10
QuestionI have a question about the rappel stations. What are they like. Has someone drilled something into the rock and if so, is it well made? Or do you have to bring slings and throw them around a piece of rock or something?

Alan Ellis - Feb 20, 2008 10:39 pm - Hasn't voted
Re: QuestionThere are no fixed bolts or rap hardware drilled into the rock. The rap stations are established masses of slings tied around boulders and rocks. Bring a couple of unsewn slings and rap rings in case you don't like the way they look. I like to use the screw-links instead of rap rings because you can put a screw-link around the existing slings as well as your own.

PellucidWombat - Aug 24, 2009 2:37 pm - Hasn't voted
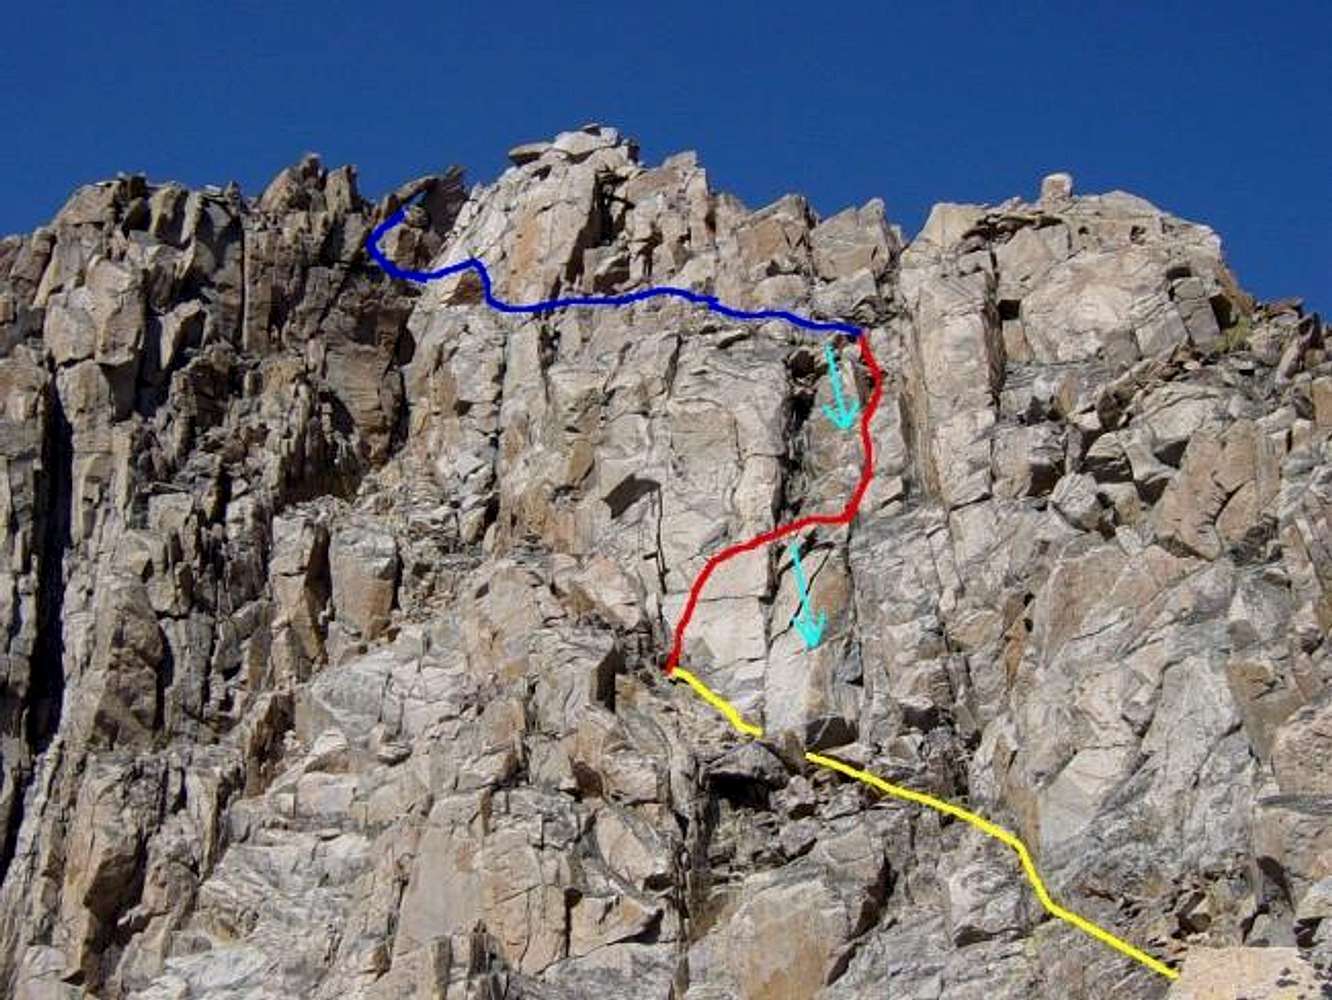
How does this matchAlan Ellis' photo of the south face? Is the "x" feature in this photo?
Alan Ellis - Aug 25, 2009 10:36 am - Hasn't voted
X FeatureThe X feature is not in this photo. The part of the route with snow bridge and the X feature occurs BEFORE the south face section. Check out the complete route description for details.

Kifaru - Jun 24, 2011 8:25 pm - Hasn't voted
RappelsHow long are the rappels? In other words, what length of rope do you need? I'm thinking of using a rope secured with a locking carabiner on one side of the rappel ring or screw-link and a light pull cord to retrieve the rope. Any advice would be appreciated.
Alan Ellis - Jun 26, 2011 11:19 pm - Hasn't voted
Re: RappelsOne 60-meter rope would be fine. Your method would work too. Good luck on your climb!
segoja - Feb 6, 2013 6:50 pm - Hasn't voted
Down ClimbingAnyone tried down climbing the route?
How tough is it to do so
Alan Ellis - Feb 18, 2013 8:41 am - Hasn't voted
Re: Down ClimbingIt's down-climbed all the time. However, I wouldn't recommend it unless you have experience down-climbing low class 5 with lots of exposure. The class 4 sections between the snow bridge and the start of the route would also be tricky to down-climb. Rappelling definitely adds time to your day, but I was was glad I had a rope for the rappels.


Comments
Post a Comment