
-
 15014 Hits
-
 81.54% Score
-
 14 Votes
|
|
Mountain/Rock |
|---|---|
|
|
39.93191°N / 105.28286°W |
|
|
Spring, Summer, Fall, Winter |
|
|
6220 ft / 1896 m |
|
|
Overview
Wind Tower is one of the main climbing areas at Eldorado Canyon and is about 300 feet tall. Wind Tower is right across the creek from the Bastille formation. This rock can be quite crowded as it houses some of the more moderate routes in the park. However the ratings in Eldorado Canyon are known to be "old school" so keep that in mind. Most climbs are on the southwest side and follow the moderately angled rock up various crack systems. The rock quality is excellent but be aware that the closer you get to the summit, there will be more loose rock lying around. Many of the routes were established by legends like Layton Kor, Richard Rossiter, and others.
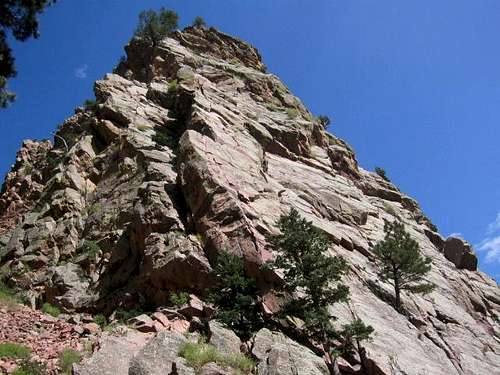 Perfect view of Wind Tower | 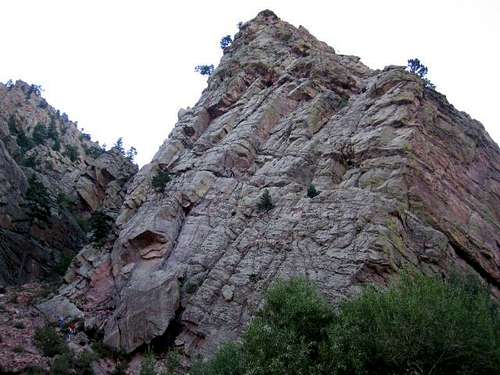 Wind Tower from the bridge |
Getting There
Directly after entering Eldorado Canyon State Park about couple hundred yards to your right will be a parking lot. From here, hike up the road a coupleminutes and cross the South Boulder Creek on a bridge and the large rock tower to your right and directly to the north is Wind Tower. There is a distinct but steep path heading up the gully which will take you to the base of various popular routes on this formation such as Calypso and Wind Ridge. See below for a description of some of the more classic routes on the popular southwest face of Wind Tower.
SW Face Route Options

Annotated view of the more classic routes on the SW face of Wind Tower
Wind Ridge - 5.7
Pitch 1 (5.7) From the trail walk to the left end of the tower and next to a tree at the base of the obvious arete. There are two ways to start this pitch. Either go up the somewhat overhanging awkward flake (5.7) or go left up the obvious wide gully and traverse right onto the face (5.5). The 5.7 start is highly recommended as it takes good pro and is more sporty. Once you top onto the flake go around the corner on the west face. From this point on climbing eases and follows a crack with good holds and pro to a large ledge, belay here on gear.
Pitch 2 (5.6) Go to your right and get into the crack which is the hardest move of this pitch. Follow the crack which becomes wider higher up. Save your biggest pieces for the last part of this pitch. Belay from the large ledge which almost looks like a cave. There is a 4th class walk-off option from this point to your left.
Pitch 3 (5.6+) I thought surmounting the weird roof and flake on the opening of this pitch was the hardest move of the entire climb. There are not many places for pro and holds above the roof. There is a "thank god" hold just out of sight you have to find! Above the overhang, the climbing eases and you'll reach the summit at a tree. Belay from the tree and watch out for all the loose rock around. See descent information below.
Calypso - 5.6
Pitch 1 (5.6) From the same trail per Wind Ridge, locate a huge boulder leaned against the tower about a third of the way up the gully (see the bottom of the photo to the right). Climb up 0 feet on a face with good features until you reach the right facing dihedral (5.6). This first 20 feet has no pro so use caution. Once in the dihedral, climb up using the crack for pro and traverse right at the overhang reaching the bolted anchors 100 feet off the ground (5.6). This is a real fun pitch with great holds.
Pitch 2 (5.6) From the bolts, climb up and left up a small overhang using the obvious crack for pro (5.6) and continue on lower angle terrain above to the large ledge (5.4). Walk off to the left on this ledge to the gully passing the belay ledge atop the second pitch of Wind Ridge along the way. You can also make a low 5th class third pitch to the summit.
Raggae - 5.8
Pitch 1 (5.6) Use the first pitch of Calypso as described above.
Pitch 2 (5.8) This is a classic pitch. From the bolted anchor atop the first pitch of Calypso, instead of climbing left up the small overhang, traverse the ledge 20 feet to the right to the base of an awesome dihedral and flake system. Climb 100 feet up the right facing dihedral and pull through the flake near the top which is the crux. This section does have one piece of fixed pro. Reach a ledge with a large wedge shaped rock and straddle it to the right and climb up, traverse back to the left and continue up now easier terrain to a big ledge with a small tree. Belay here.
Pitch 3 (5.2) From the ledge atop the second pitch, climb 20 feet up easy but near vertical terrain with big pockets for holds (5.2) and emerge onto the upper part of the tower which offers easy 4th class climbing. Just below the summit you will join a ridge. Beware the upper part of the tower has more loose rock.
Tagger - 5.10c
Pitch 1 (5.9) Start with a technical .9 crack underneath an overhang. Break left, surmount the roof and belay at a tree with two bolts next to it 75 feet above the base. Nuts work well on this pitch.
Pitch 2 (5.10c) Climb a short 5.6 pitch to the base of the dihedral that forms the crux roof. From here, climb up the dihedral (easy) and tackle the roof via several technical stemming type moves (solid 5.10) there is some 5.8 above the roof to a belay on the big ledge. The pro in the roof (pins) is decent and a #1 Camalot can be placed at the lip to further protect it.
Descent
From the summit of the tower, traverse the ridge to your left on exposed slabs. Pass a large cable and angle down to a notch but don't go too far low to your right. You will traverse below a small rock formation and find the 2 bolt rappel station. A short, 40 foot rappel will bring you down to the trail. Walk back to the base of the route.
Photos
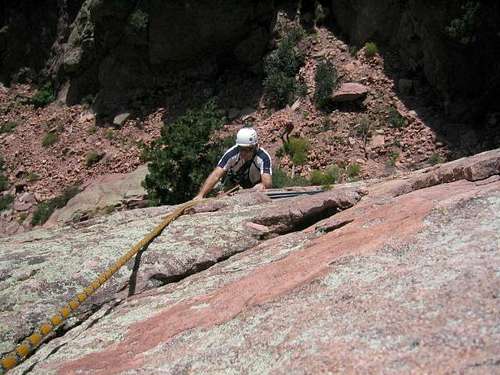 Looking down from top of first pitch of Wind Ridge |  First overhang on Tagger |  Second crux overhang on Tagger |