Minuteman Tower, East Face

Minuteman Tower, East Face

Summit block and crux pitches on East Face of Minuteman Tower (III 5.10). Shirley is rapping on the right. There is more than one option (I think) of how you reach the P4 belay indicated in photo (yellow line at bottom roughly shows how we traversed in from the left) but ending up at P4 is what you want (I think). From here, the line indicated is the 5.10 option. Specifically, P5 is a short 5.10 finger/hand/off-hand crack (photo here showing lower 2/3rds of pitch); P6 starts with a 5.8 (maybe sandbagged a little?) pull through a flake in a roof (photo here) follwed by stellar hand cracks (photo here). Alternatively, one can bypass the indicated P5 and P6 pitches by taking a (dirty?) chimney on the right (hard to see it in this dark photo - it's right and about 30 feet above the 5.10 crack) and joining the indicated route above the roof pull.
rpc
on Aug 19, 2005 1:57 pm
Image Type(s): Alpine Climbing
Image ID: 121308

Comments

Post a Comment
Viewing: 1-2 of 2
Eric Sandbo

Eric Sandbo - Sep 1, 2005 1:52 am - Voted 10/10
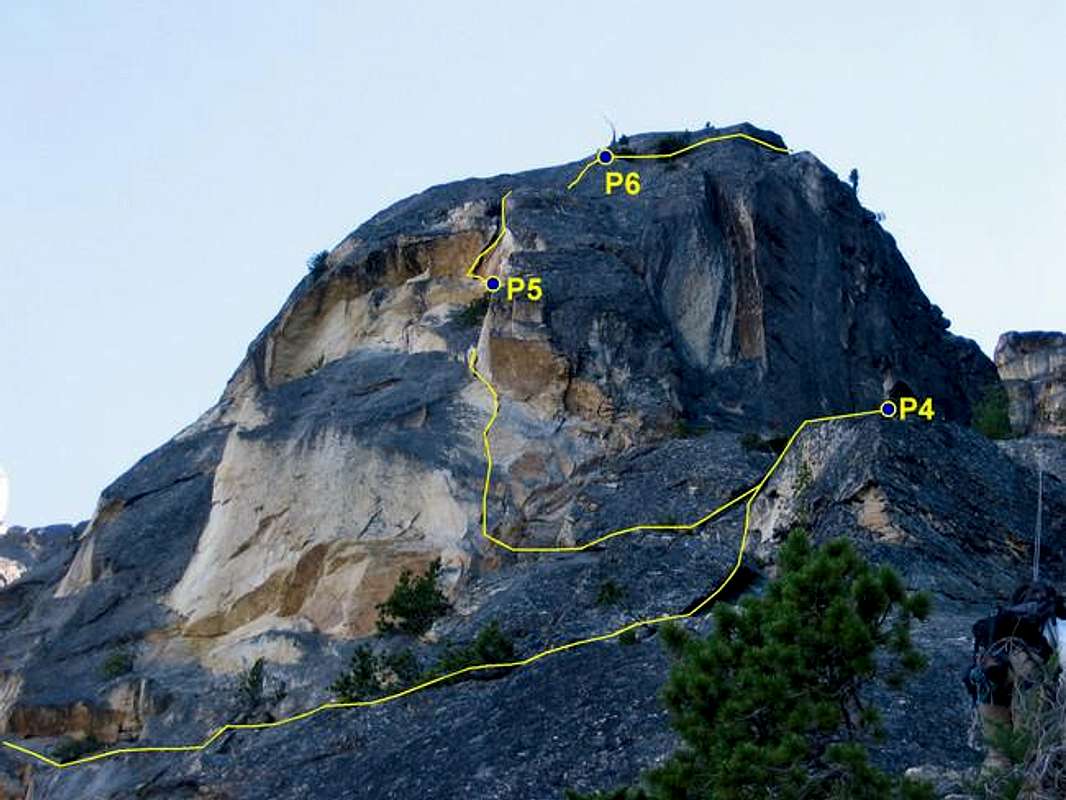
Good view.

Thanks for this shot. I wasn't sure until now which other crack you climbed to bypass that crap chimney. It's the same one we looked at and considered, but weren't up to climbing. The chimney we took was undeniably garbage, but it got us to that fine little shield that made it all worth it.

rpc

rpc - Sep 1, 2005 12:08 pm - Hasn't voted

Re: Good view.

Hi Eric,

Thank you for visiting and the good comments. Yeah - I agree with you that it's that cool shield with that great hand crack that makes all the efforts below worthwhile :)

radek

Viewing: 1-2 of 2