


MoapaPk - Apr 1, 2007 1:10 pm - Voted 10/10
must try thisGood info. I have lots of shots of people in the woods on the edge of mountain gullies. Looks great in the viewfinder, crappy when developed.
PS this is a check of SP services. I tried posting to this report before, but the post vanished in a few minutes... so if you get this twice, you know the reason.

Vid Pogachnik - Apr 1, 2007 1:46 pm - Hasn't voted
Re: must try thisDidn't get it twice :)

morceaux - Apr 2, 2007 8:15 am - Voted 10/10
Me too...Thank you for posting this article!
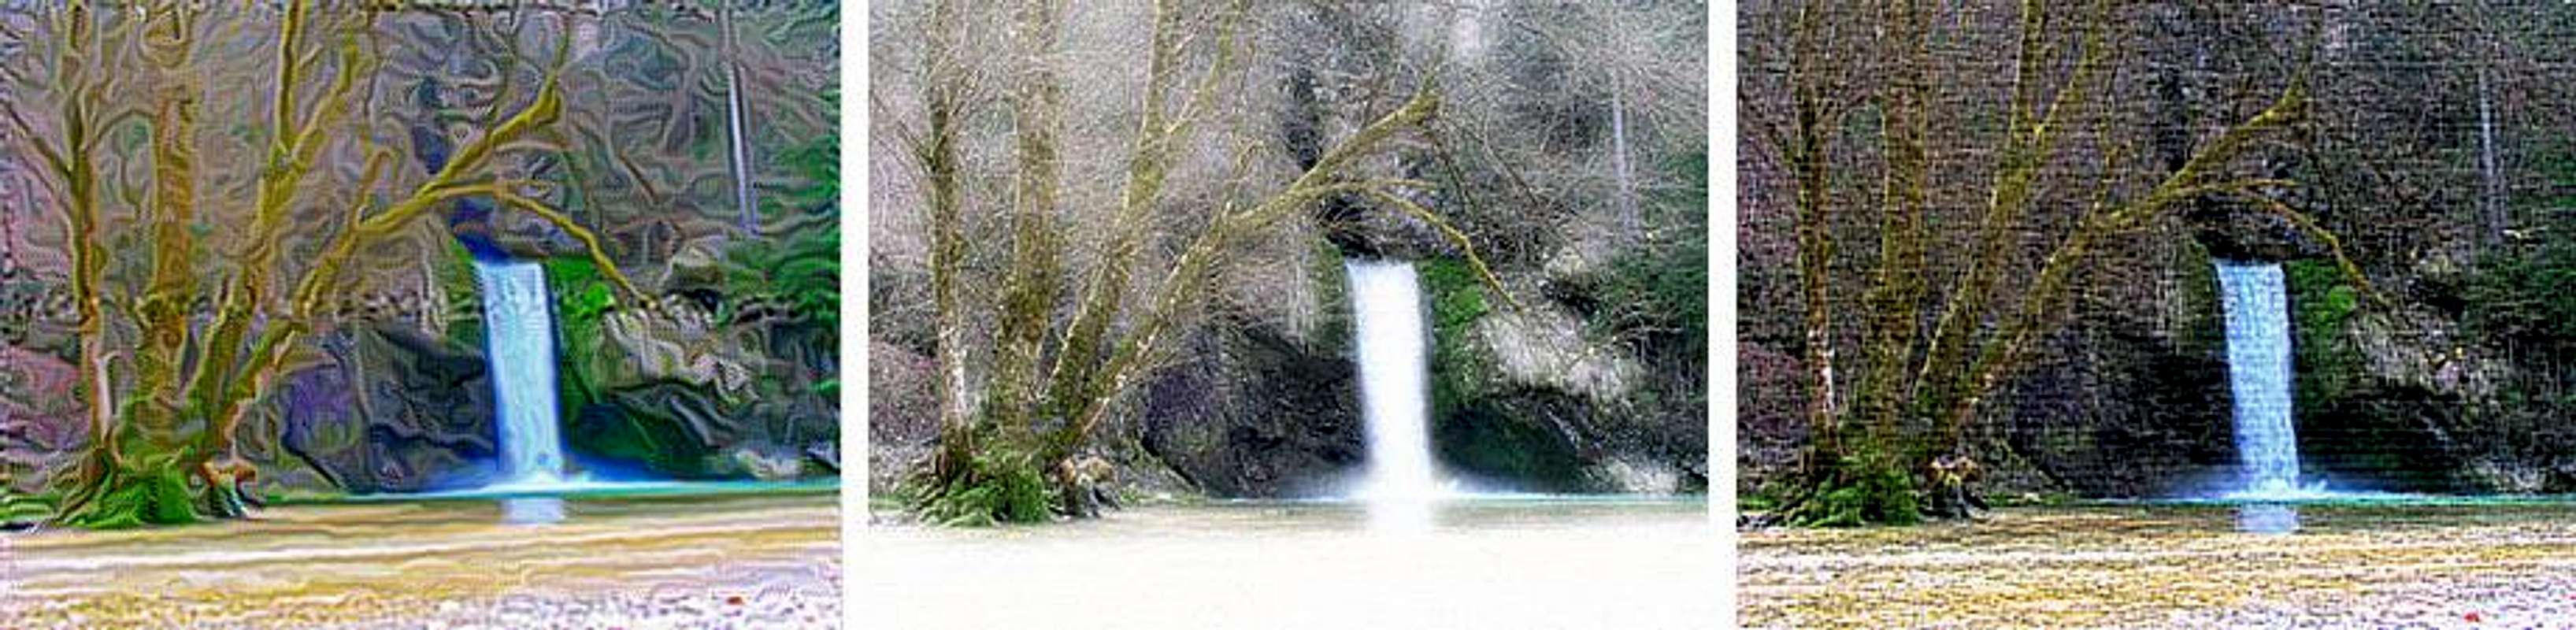
Now I have another stuff to work for - recently I made tons of photos for making panoramas on Forno glacier, but almost all of them went wrong. I think of pillow distortion due to too wide setting of the zoom on my machine.
But this HDR imaging gives me a new opportunity to make some different pics. The problem is now I don't have crude images for this task.
Vid Pogachnik - Apr 2, 2007 12:50 pm - Hasn't voted
Re: Me too...For training you can try it anywhere, you don't need to go on mountains :)

zenalpinist - Apr 2, 2007 1:20 pm - Hasn't voted
a few other things to note..In landscape photos, say like sunsets where there is a clear distinction between sky and ground...you are better using Graduated Neutral Density filtering techniques to get similar results.
HDR would be great in areas like taking a photo inside a cave out towards the entrance, allowing you to get the lighting/color of the cave walls while down-toning the brightness of the entrance.
It's great to play around with in artistic sense, but takes some practice to get good, natural looking results from it.
Nice article.
Vid Pogachnik - Apr 2, 2007 2:43 pm - Hasn't voted
Re: a few other things to note..You're right! Agree completely.
Cheers!

jwproulx - Apr 2, 2007 1:54 pm - Hasn't voted
back in the day...People used to use all kind of processing techniques for these purposes. In addition to using lens filters (graduated ndf, polarizing, colored, etc) you might mess with the exposure time and development time of both the negative and the print; dodge-and-burn; or use different contrast filters for the print, possibly for different parts of the same image. Ansel Adams's famous Moonrise over Hernandez, NM photo is a classic example. Because it was so hastily taken and unbracketed, it was one of his most difficult prints to produce. We've largely lost those techniques, and replaced them with new ones. Lots of fun either way.
It's fascinating how the human eye and brain do all of this automatically.
Vid Pogachnik - Apr 2, 2007 2:46 pm - Hasn't voted
Re: back in the day...'It's fascinating how the human eye and brain do all of this automatically.'
Yes, we have a very flexible machine - our brain. It compensates a lot with past experiences (long and short term).

brendon - Apr 2, 2007 5:21 pm - Voted 10/10
Coincidently...my last two photo submissions have mild HDR treatment.
Winter Scene
Sunset
Either the sky would be washed out or the forest would be too dark in the first one. In the second one, the reds on the bottom and the blues in the clouds would not have turned out in the same shot.
I hope we don't see any blantantly over-processed shots on SP, because they are popular on flickr.
Vid Pogachnik - Apr 3, 2007 12:36 pm - Hasn't voted
Re: CoincidentlyNice two examples, Brendon :)

Vid Pogachnik - Apr 4, 2007 1:44 pm - Hasn't voted
Re: hdrAnother good example :)

mgeo - Apr 6, 2007 2:20 am - Hasn't voted
National GeographicThe last issue of National Geographic I looked at had HDR images for about 1/2 the photos. Done right, it can be absolutely surreal and very engaging.
Vid Pogachnik - Apr 6, 2007 3:54 pm - Hasn't voted
Re: National GeographicVery interesting!

Gangolf Haub - Oct 5, 2007 9:22 am - Voted 10/10
You got me started...... or maybe I should say you Dovski Kriz pictures got me started with hdr again. I found two scripts for The GIMP, with which you can make HDR-Photos from a set of three.
As you know I'm not too interested in the impressionist effects you can achieve but rather with increasing visibility in dark sections of the photo. So far I only used the contrast mask techniqu, with which you lose much of the contrast of the photo. By reducing the HDR effect to a minimum I now might be able to achieve what I want. We'll see...
Vid Pogachnik - Oct 5, 2007 10:20 am - Hasn't voted
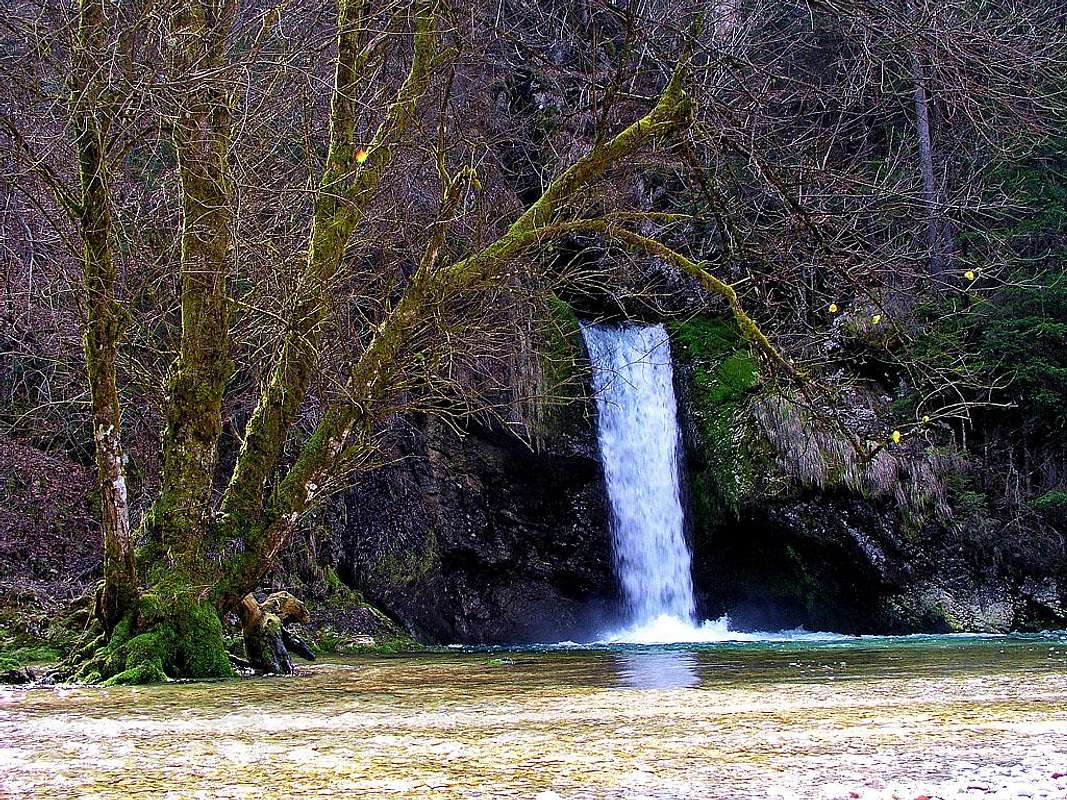
Re: You got me started...Yes, that the appropriate approach, Gangolf. It's worth experimenting a bit. And remember - also vivid colours :)
Gangolf Haub - Oct 5, 2007 10:35 am - Voted 10/10
Re: You got me started...Not sure I like the colours - your Triglav photos are interesting though. Say, could you send me the pancake photos in a large version - I simply forgot to take photographs. And maybe also Mali Matterhorn and the summit shot? And Gangolf kicking up a lot of dust?
No reason to hurry though.
Gangolf

friday - Feb 7, 2009 10:30 am - Hasn't voted
Re: You got me started...The scripts for GIMP really don't do the HDR very well. I've found that by using either Enfuse (part of the Hugin panoramic stitching package) or QTPFSGUI, I get a better results. These results get ported into GIMP for further processing.

MegasAlexandros - Jan 6, 2009 8:43 am - Voted 10/10
RE: My First Experiences With HDR ImageryTo excellent result! As always...thanks for a very interesting article. I really have to sit down and learn PS...
Cheers
Alex
Vid Pogachnik - Jan 6, 2009 9:44 am - Hasn't voted
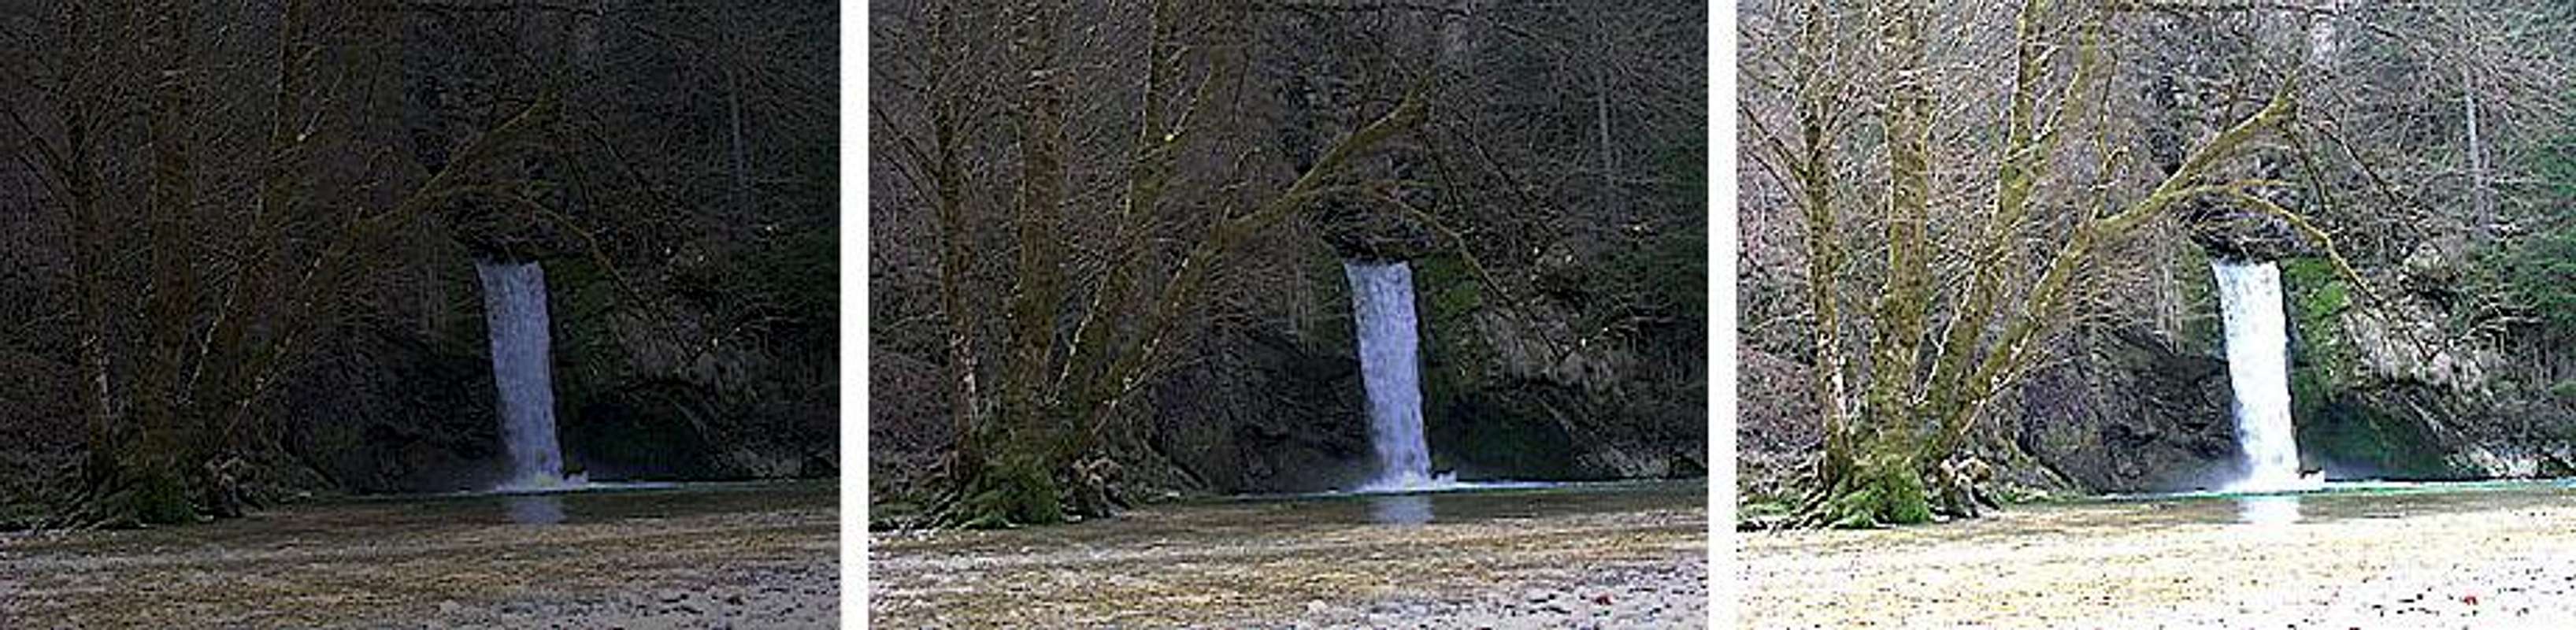
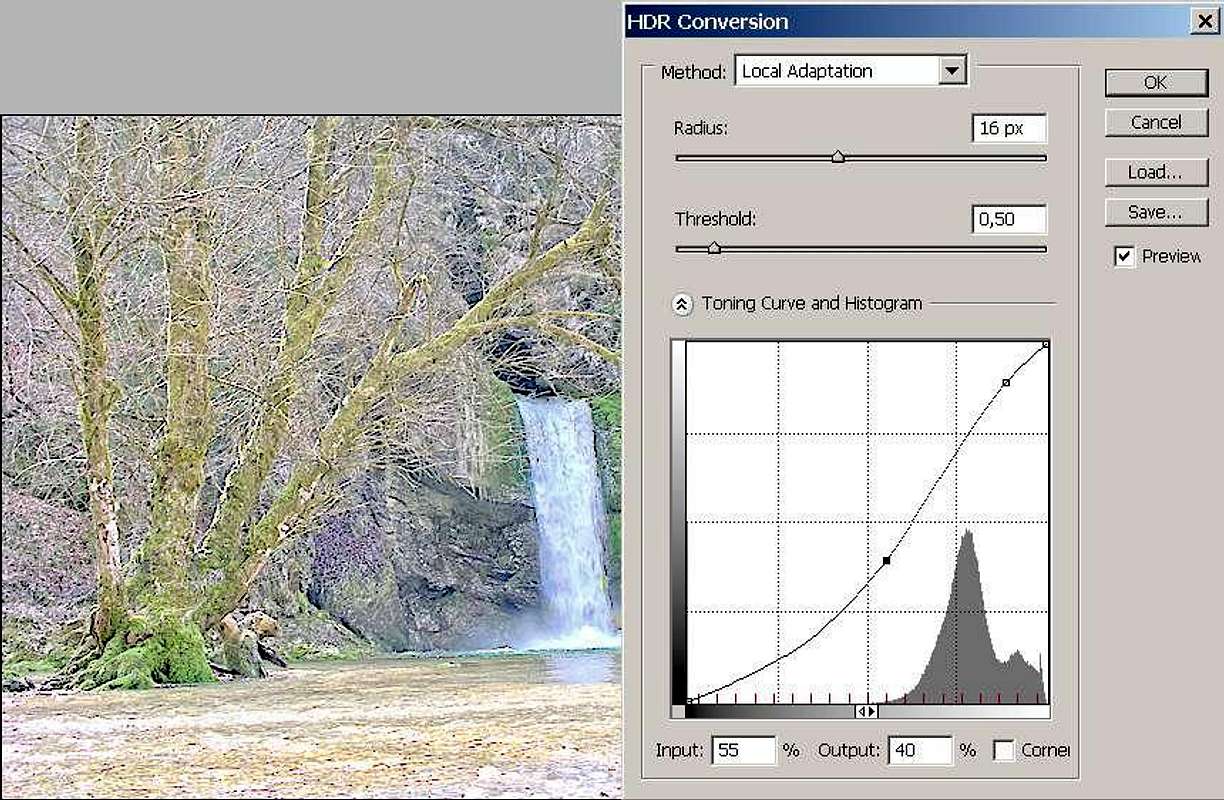
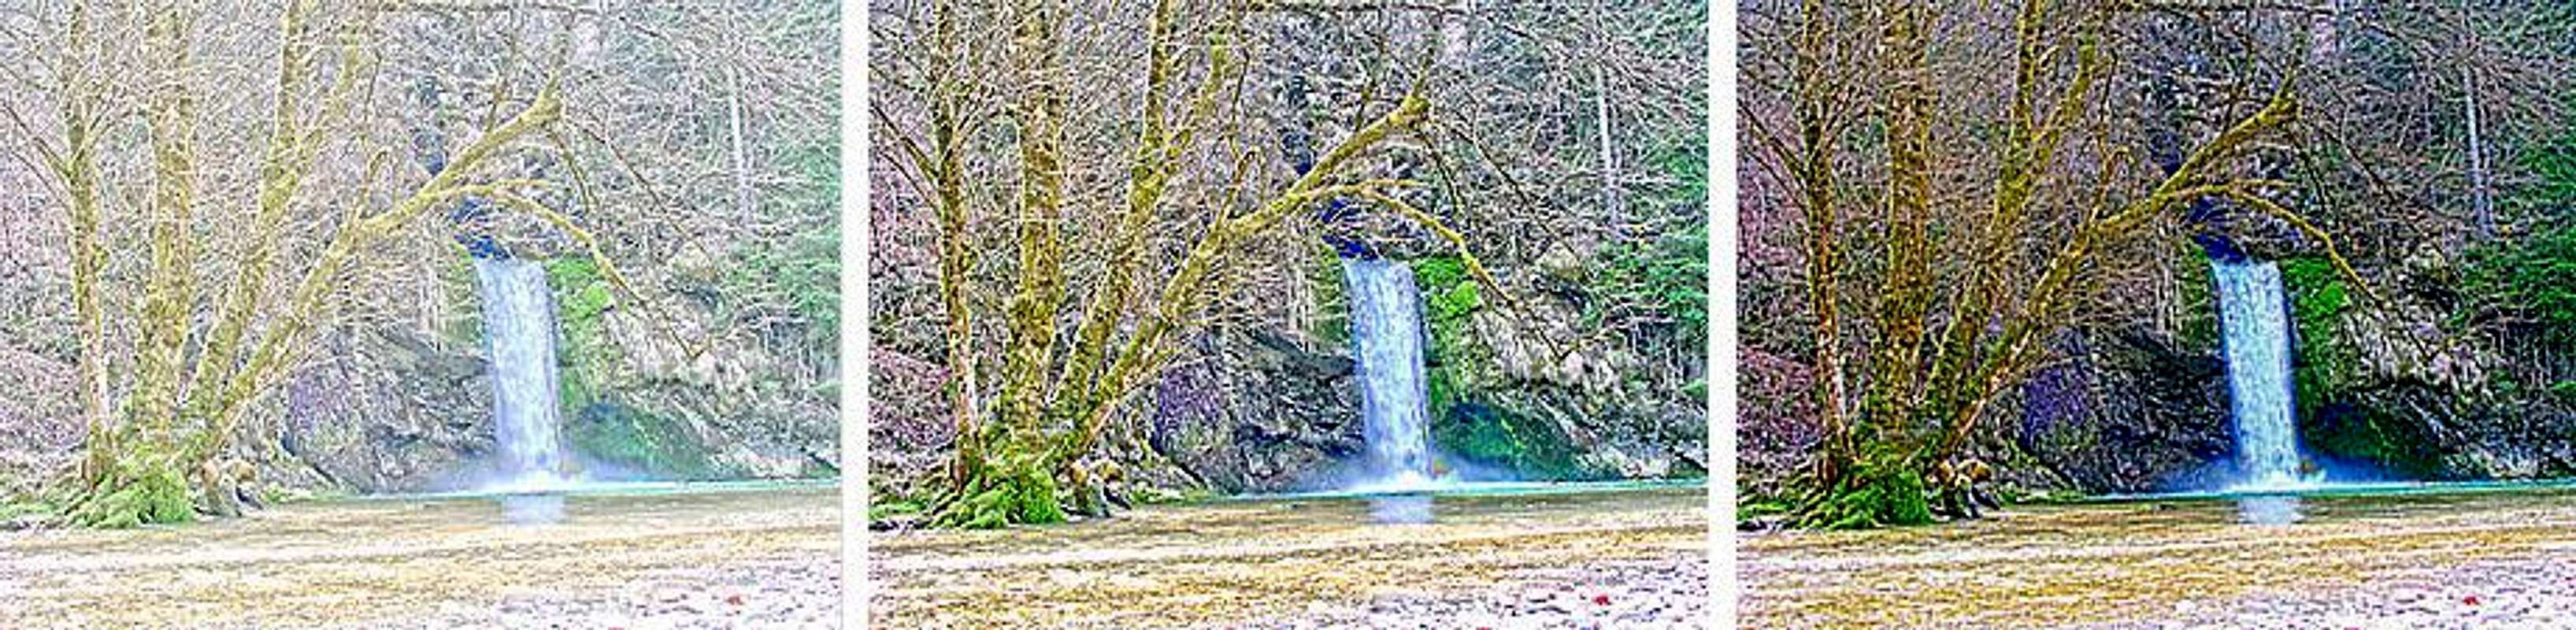
Re: RE: My First Experiences With HDR ImageryThanks Alex! Don't learn PS systematically. Just start using it. I think that for normal photos one must only have a look on contrast (getting out some dark areas details and perhaps darkening a bit too white clouds, snow etc.) and do some corrections if pictures fail high quality standards (sharpness, colours, contrast etc.). HDR is a special procedure though.
Cheers!
Vid
Comments
Post a Comment