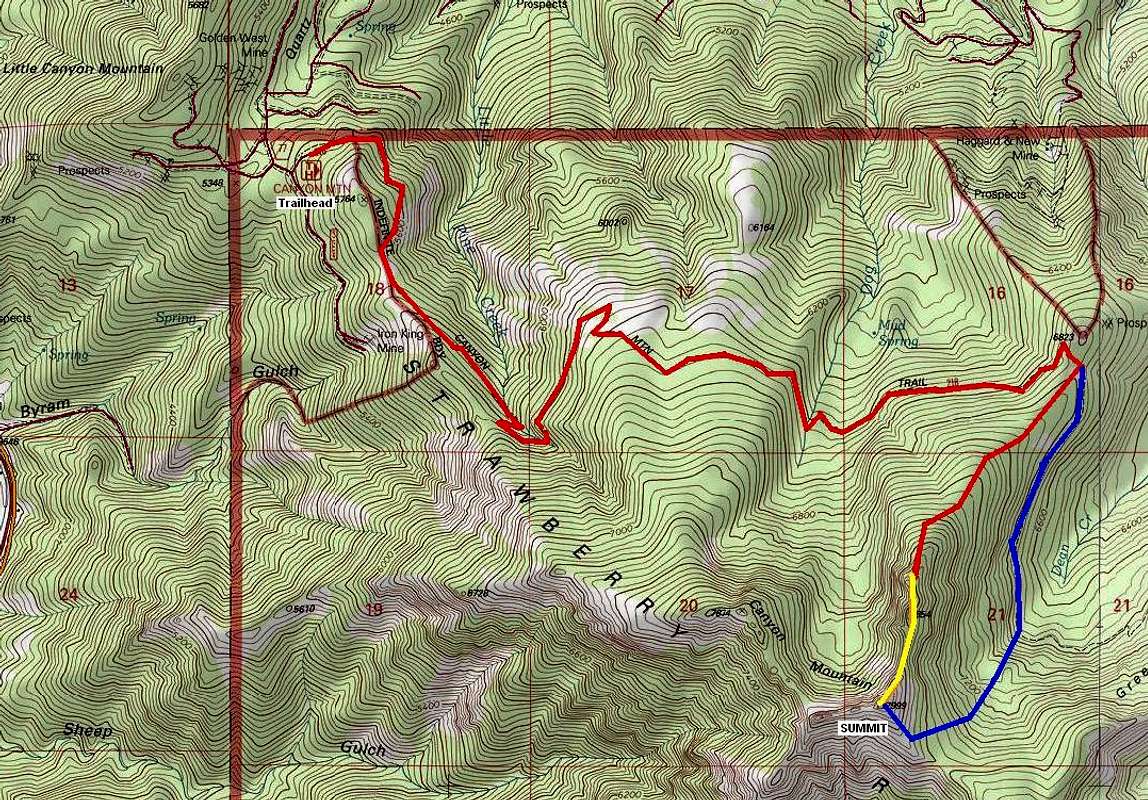
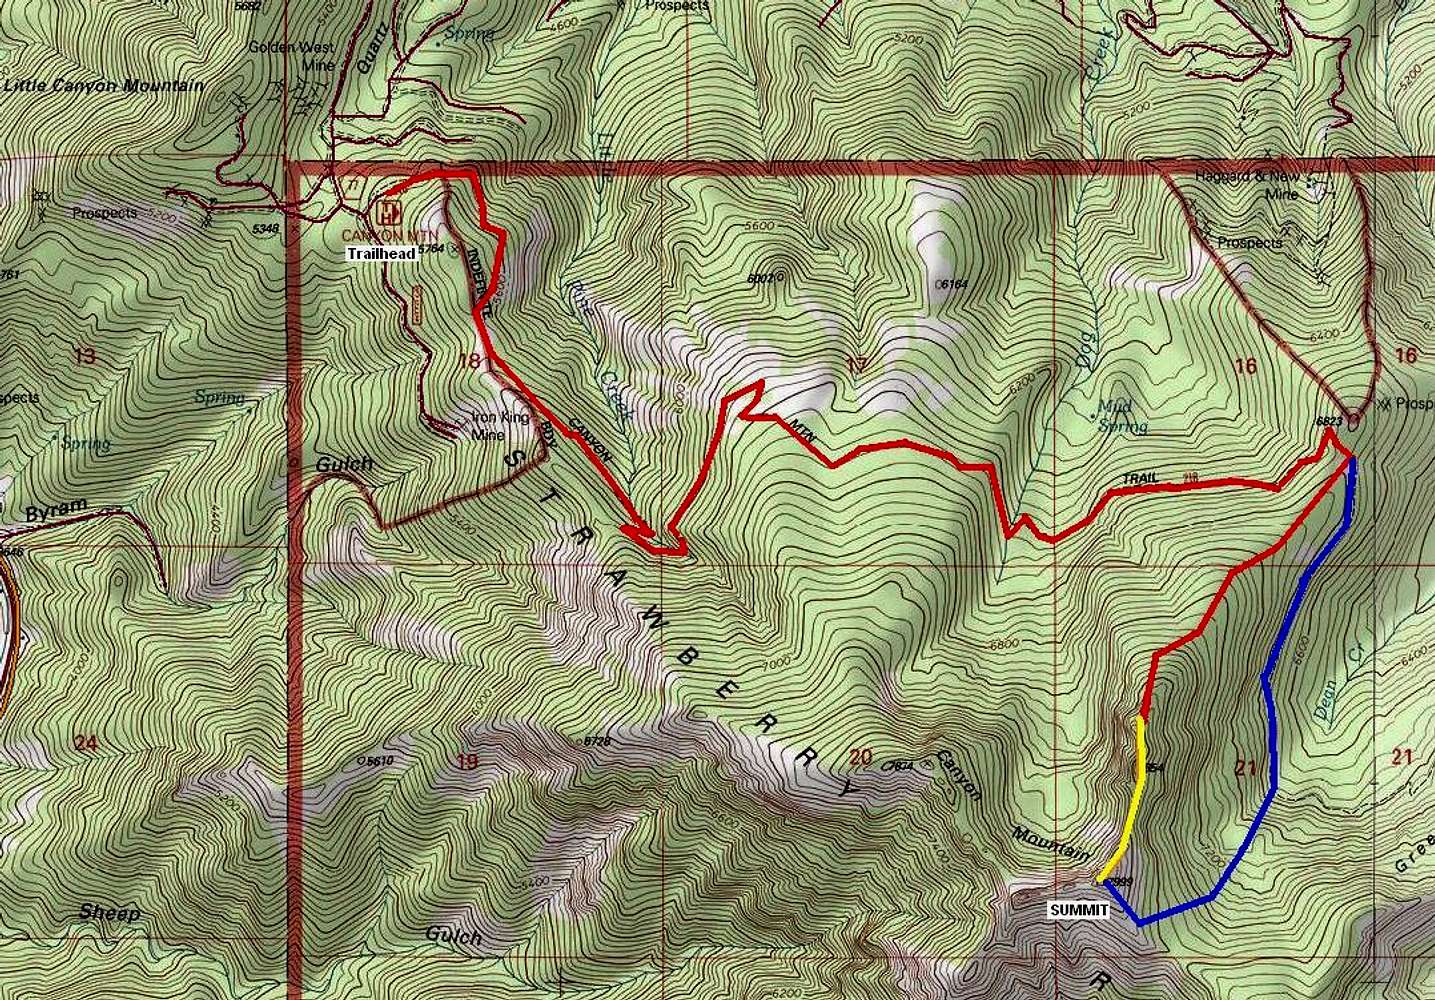
Red is the route in
Yellow is the semi-dangerous summit spine traverse
Blue is the optional descent path should you not wish to return via the spine.
Looking at this map you may see obvious short-cuts such as directly southeast from the trailhead. It was my experience that these routes would be more difficult, route find at your own discretion.


