Recently I have had several questions on how to make an animated gif. Animated gifs, whether to ‘spice’ up a user profile or to put together a sequence of back-to-back action shots, can add a nice touch to any project. In this article I hope to answer some questions about how animated gifs are made, what software to use and what SummitPost will accept.What SummitPost Accepts
To my understanding SummitPost accepts all picture formats as long as the size of the picture is less than 8mb, but GIF is one of the files that is best for animation. There are two different types of gifs (still and animated), but they have the same file suffix, “.gif”. Gif’s can be animated by using a number of different software programs (I use Adobe Premiere Pro, Photoshop). When you make an animated gif, you have to make sure the size doesn’t exceed 8mb, so I use 3 frames per sec (I will explain this later).
What to Get
There are several animation programs you can buy; unfortunately, to my knowledge, none are cheap.
Alchemy Mind Works,
Ulead GIF Animator,
Easy GIF Animator, and several products from Adobe, are just a few of the programs on the market. I am partial to Adobe products because of their streamlined integration and numerous photo and video editing applications. In this article I will show how to make an animated .gif in Photoshop (a somewhat expensive, but fairly common program) as well as in Adobe Premiere.
GIFs in Adobe Photoshop
1. Create a new image and separate the layers you want to have your GIF scroll through. In my example I want the phrases “welcome to” and “a mountaineering community” to show up together. I also want the two yellow bars and each letter of summitpost.org to show up separately. Notice how I made a different layer for each different frame I want to appear.
![]()
2. Then click (window --> animation). You should now see a window on the bottom of your screen.
3. Duplicate as many layers as you want using the “duplicates selected frames” icon. In my example I want eighteen different layers.
![]()
4. This is the tedious step. Select the layers you want to appear in each of your frames.
![]()
5. Below each frame is a pull-down menu where you can change how long you want each frame to hold.
6. Once you have finished this, press the play button to see what your animated gif will look like to make sure you have all the frames the way you want them.
7. Now click (file --> Save for Web). This function comes straight from Image Ready. In this application you have lots of options which you can play around with, including file output…for summitpost, make sure you leave this setting on GIF.
![]()
8. As you can see in my example the file size is small. All you have to do now is upload it to SP!
![]()
GIFs in Adobe Premiere Pro
I personally like this application better, if you have it…use it!!!
1. Create a new project (New Project --> DV-NTSC --> Standard 48 kHz).
![]()
2. Right click inside the project palette and select “Import…”. From here import all the files you want to use inside your GIF.
![]()
3. Now drag, drop, and edit the files in the order you want them to appear.
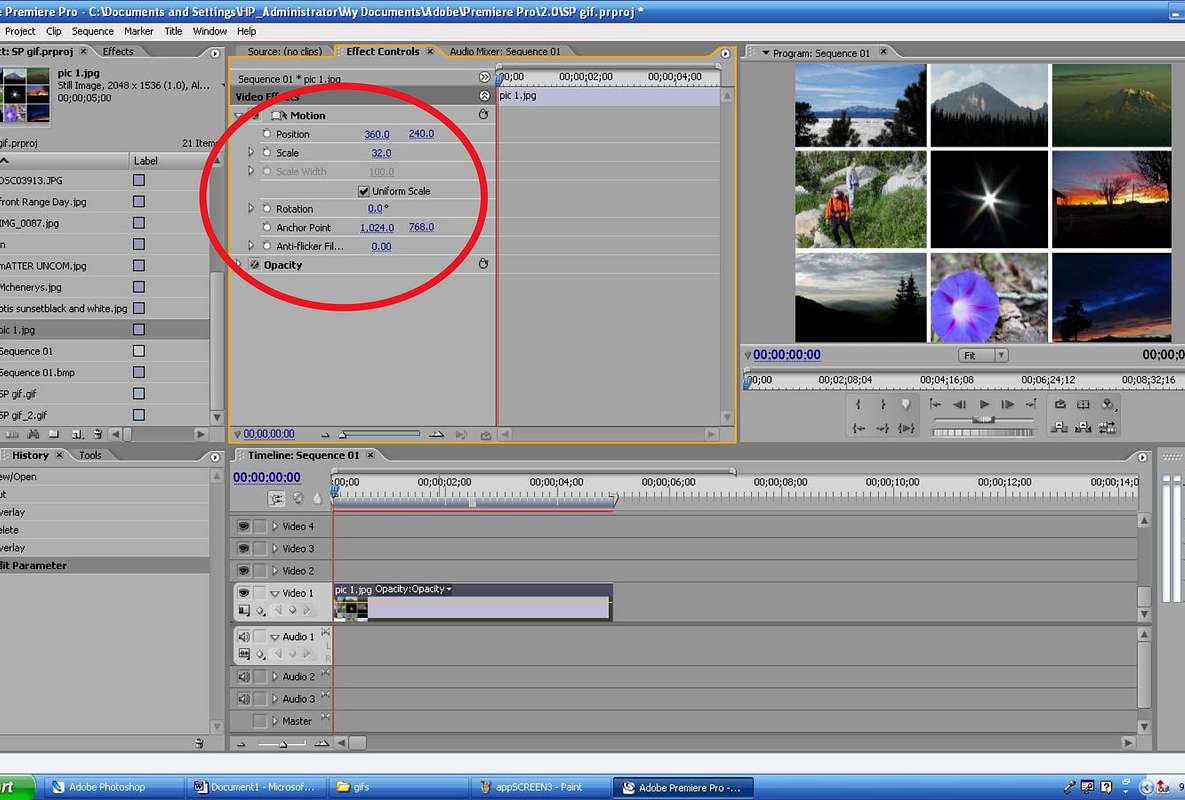
4. You can edit the properties of each picture by clicking on the effects palette. You can also add transitions by dragging and dropping over the desired clip. (The uses of Premiere go far, far, far beyond what I can cover here. If you own this program please study the owners’ manual.)
![]()
5. Once you have the order of pictures set, and your transitions and overlays in place, play the project to see if it is the way you want.
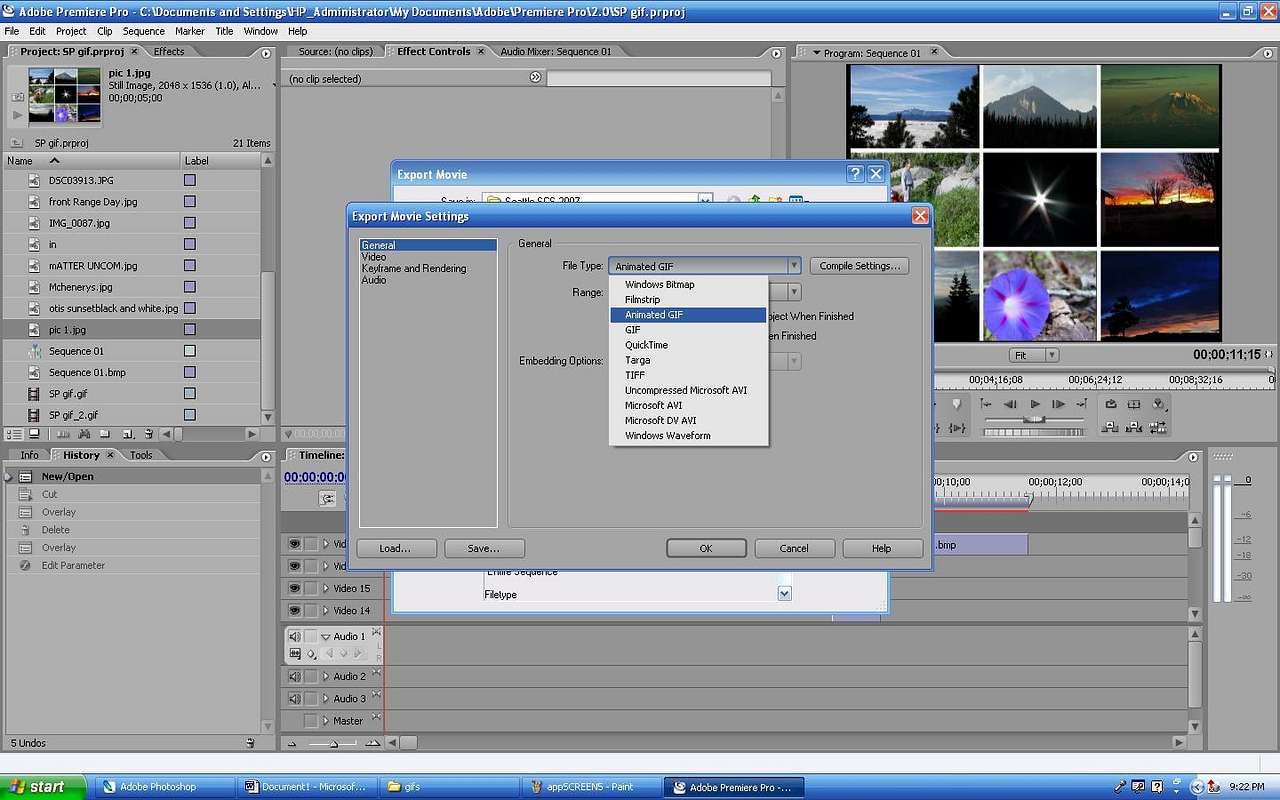
6. Then click (file --> export --> movie --> settings…).
![]()
7. Under “General” make sure file type is selected as “Animated GIF”.
![]()
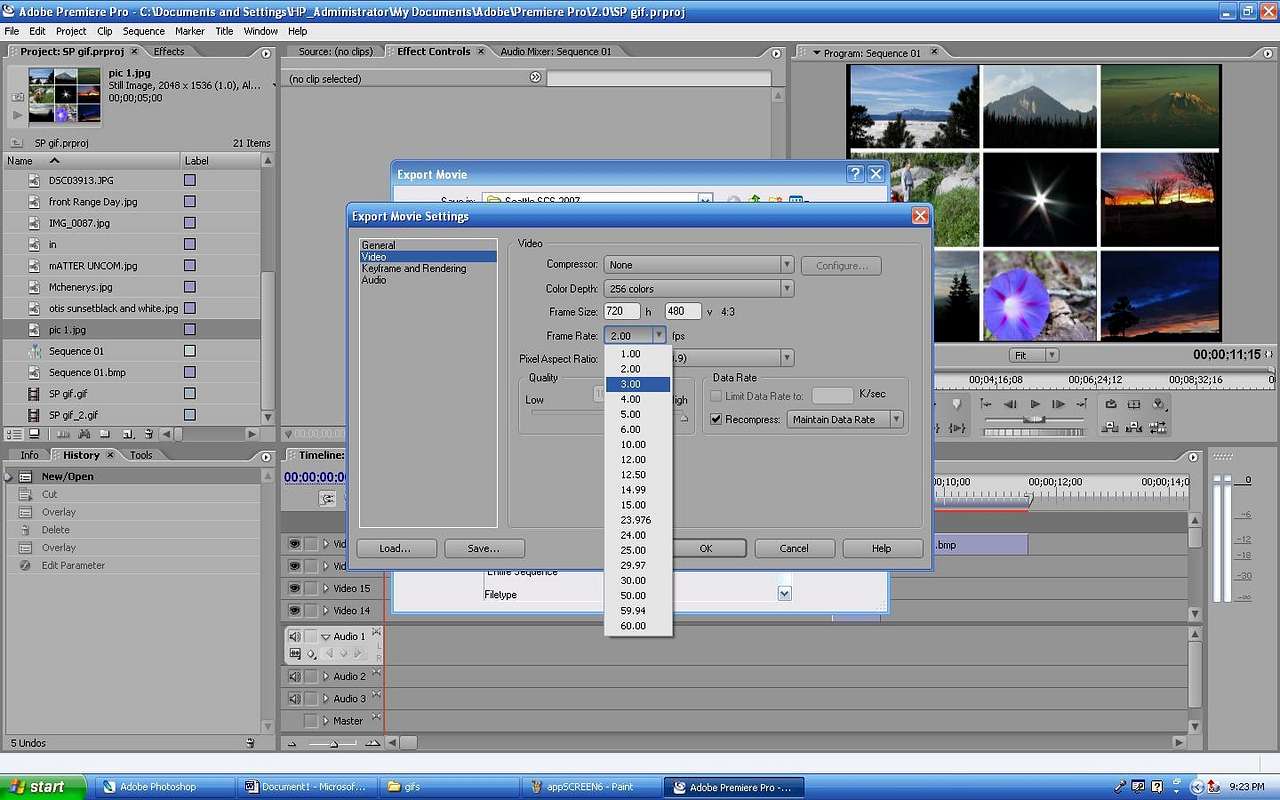
8. Under Video select a frame rate of 3.00 fps. The reason I chose 3 is it keeps the file size low (under 8Mb), depending on the length of your project you may need less(2fps,1,ect.).
![]()
9. Select OK, save your GIF, and upload it SP! It should look something like this.

I hope at least one of these two examples helps you and if you have any questions please feel free to PM me.
Links
Please add your animation to this
album.
For more information look at this
forum.


Comments
Post a Comment