My First Experiences With HDR Imagery

My First Experiences With HDR Imagery

Page Type Page Type: Article

What Is HDR?

From Wikipedia: "In computer graphics and photography, high dynamic range imaging (HDRI) is a set of techniques that allow a far greater dynamic range of exposures (i.e. a large difference between light and dark areas) than normal digital imaging techniques. The intention of HDRI is to accurately represent the wide range of intensity levels found in real scenes ranging from direct sunlight to the deepest shadows."

By taking more than just one photo of a scene, the technique enables you to record a greater range of tonal detail than a given camera could capture in a single photo. You can find more theory about HDR elsewhere on the web, here I'd just like to present the 'how to do it' and a few of my first experiences.

When To Use HDR?

One prerequisite for HDR is, that the scene is static. As this technique requires more shots of a same scene, there shouldn't be much movement - or the flowing water will be blurred, walking people will look like ghosts etc.

In normal conditions, when your camera can capture the whole brightness distribution of a scene, you don't need HDR technique. It is different however, when there are big contrasts, where inevitably a part of your shot will be either overexposed or underexposed. A typical example is taking a photo of a bright summit from a dark valley. In such conditions your camera can not only adapt to the contrast but is because of that high contrast also not able to reproduce the whole range of colours.

Take Several Shots Of A Scene

When decided to do a HDR image, plan first how to take 3 - 5 (or more) pictures of the same scene:

1. Use a tripod. Having with you a small and light tripod is possible also in mountains. Remember - when handling with your camera, there should be no moves! Even with the 'bracketing' function (see below #2) you can never take more completely identical pictures without a tripod.

2. If your camera has a 'bracketing' function, use it. It enables you to take for example 3 consecutive shots, where the first one is properly exposed, the second one is overexposed (you can set the amount, for example 2/3) and the third one is underexposed. If you don't have a 'bracketing' function you will have to change exposition manually - let's say on +1 and on -1, or on +2/3 and on -2/3. Doing it manually, it's worth taking more than 3 pictures - 5 for example.

3. To make sure not to move your camera when releasing the button, use self-timer, for example setting it to 2 seconds. Then release the button and take hands off.

Doing so, you will bring home for example 3 pictures of a scene, like shown below:

Creating HDR Image With Photoshop CS2

You merge your pictures with the command: File -> Automate -> Merge to HDR...

The PS prompts you to choose your set of pictures and to decide whether to take it for granted that they are aligned or to make the program to align them if some movement occured when taking pictures. I found sharpness to be one serious problem of HDR images, so I almost allways use the program to check alignment, even if this procedure takes really a lot of time (many minutes - depending on resolution).

After the program is done with computing on your set of pictures, you can preview the outcome. You can exclude one or more pictures in the set, see if excluding a (bad) picture will improve sharpness etc. Then you confirm the outcome and make the program to compute one single HDR image.

The resulting HDR image will be a 32-bits image (as opposed to the usual 16 or 8-bits). These extra bits are well used to cope with the dynamic range, using floating point numbers for that. But here another problem occurs. Your computer display (or print out) can only show a fixed brightness scale. That's why the HDR image which appears on your screen doesn't look any special at all. The next step will be to convert it into an ordinary 8 or 16-bit image, which can be displayed on a monitor. This process is referred to as tonal mapping.

So, having your original HDR, save it to be able to play with it later. It has only an archiving purpose for now. Don't be surprised if the file is very large - you have to save all those bits.

Converting HDR Image To A Normal Image

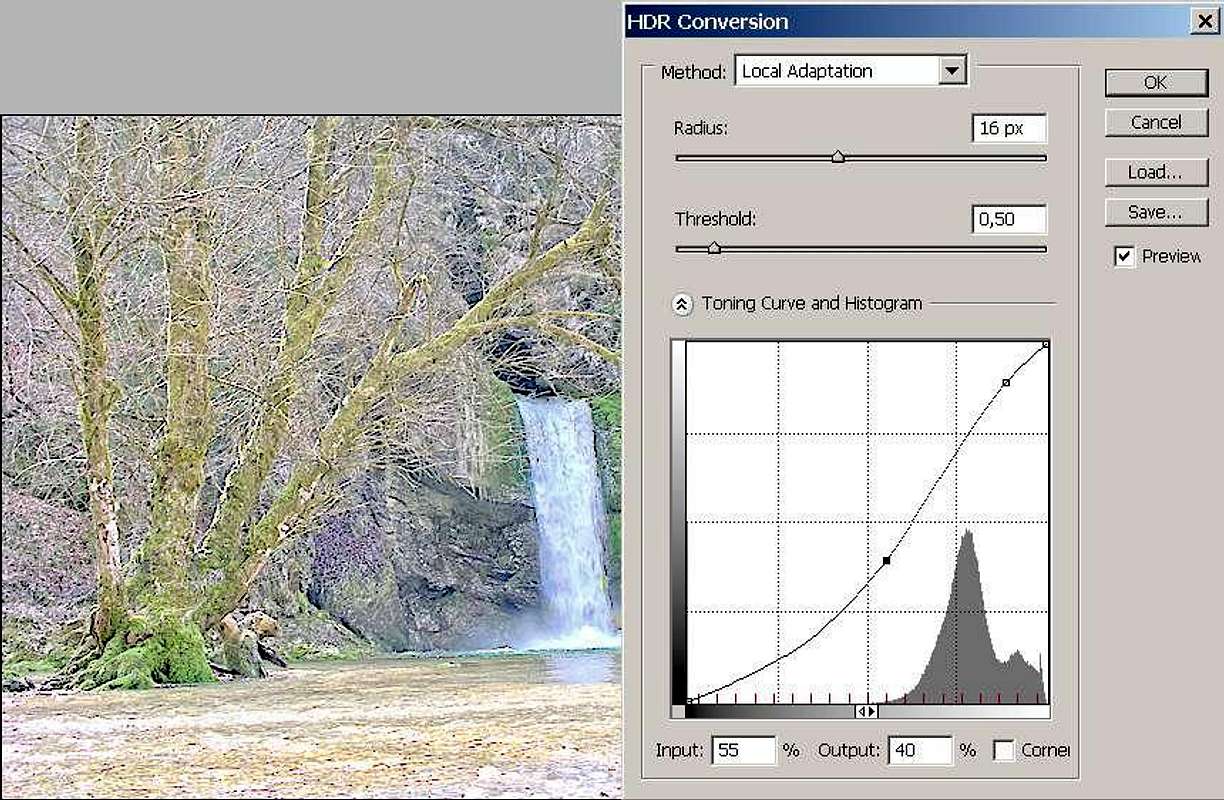
Now use a Photoshop command: Image -> Mode -> 8 Bits/Channel... (or 16 Bits/Channel...)


You can choose among 4 methods: Exposure and Gamma offers you to play a little with exposure and gamma, the Highlight Compression and Equalize Histogram method are fixed. But the fourth method, Local Adaptation changes the scene dramatically. You get an unusually bright preview, but as it originally is, it will offer you very vivid, unnatural colours. Play with the outcome. Don't change the curve at all and see the outcome. You can later decrease the saturation and luminance of colours to make your photo more natural. But it will still look very unusual. Below is one of its examples:


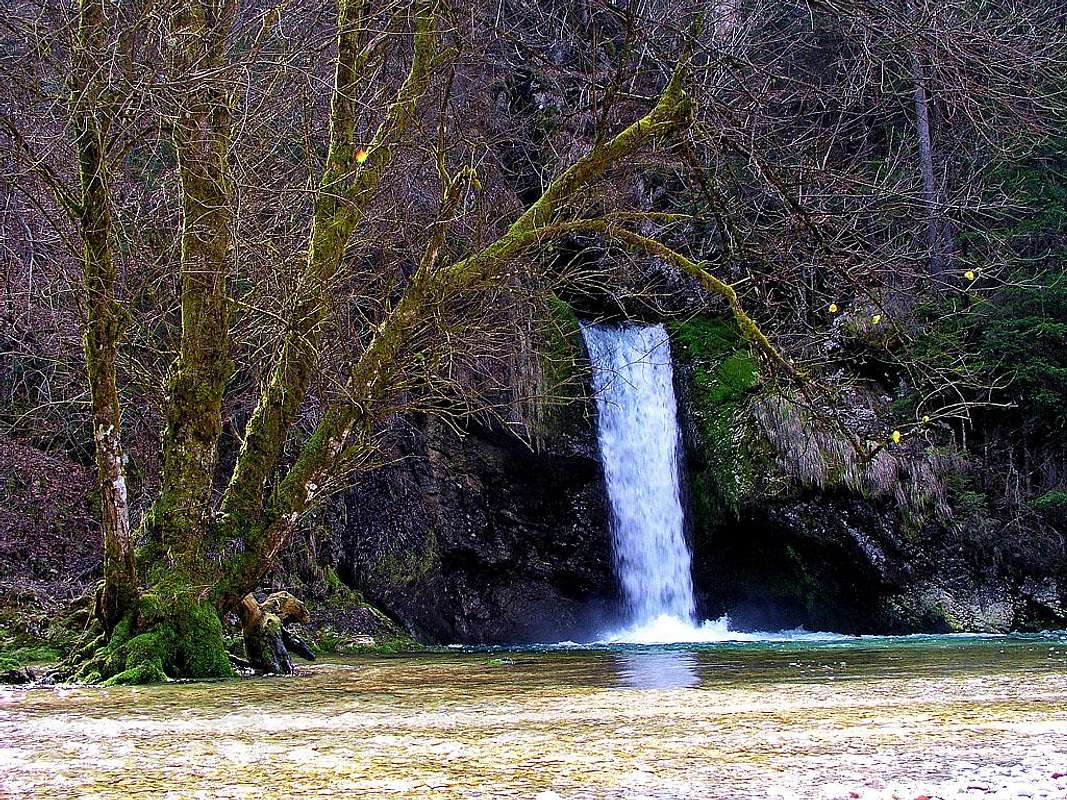
The converted image is shown on the left. Then I immediately apply the Image -> Adjustments -> Levels command. The result is in the middle. Then I play a bit more with curves, colour vividness, saturation etc., sharpen the image and get something out of it. The picture on the right looks very unnatural, but I wanted to show the extreme. See how colours are vivid, how there's no black rocks in the cave behind the waterfall and how there's not much overexposed sands. Contrasts were handled even too much, the picture is flat, lacking depth.

On the other hand, if you use the curve and make your conversion more close to a normal scene, it will not look unnatural any more. But still, the contrast of the scene will be handled and the colours preserved. Below is a comparaison between a non-HDR image (on the left) and a HDR image (on the right). The latter still shows vivid colours and a better contrast handling. However tastes might be different.


HDR images look like paintings. They resemble water colour paintings or other graphical techniques. So, why not playing a bit further? You can use your HDRs as a starting point to create some painting-like effects. Below you cane see a simulation of: oil painting, graphic and water colour painting. Have fun!

A Few Examples

Here are a few HDR examples on SP: 1 2 3 4 5

P.S.: A few days ago I also used HDR technique for photographing old dias. I have a tube to put the dia at the end of camera lens. No movement can occur (I can do it without a tripod) and it's easy to make 5 shots of different exposure. I was very satisfied with the result, even if the resolution was lower than obtained by using a scanner. One example is here.

External Links

Sean T. McHugh: http://www.cambridgeincolour.com/tutorials/high-dynamic-range.htm

Comments

Post a Comment
Viewing: 1-20 of 28
12
MoapaPk

MoapaPk - Apr 1, 2007 1:10 pm - Voted 10/10

must try this

Good info. I have lots of shots of people in the woods on the edge of mountain gullies. Looks great in the viewfinder, crappy when developed.

PS this is a check of SP services. I tried posting to this report before, but the post vanished in a few minutes... so if you get this twice, you know the reason.

Vid Pogachnik

Vid Pogachnik - Apr 1, 2007 1:46 pm - Hasn't voted

Re: must try this

Didn't get it twice :)

morceaux

morceaux - Apr 2, 2007 8:15 am - Voted 10/10

Me too...

Thank you for posting this article!
Now I have another stuff to work for - recently I made tons of photos for making panoramas on Forno glacier, but almost all of them went wrong. I think of pillow distortion due to too wide setting of the zoom on my machine.
But this HDR imaging gives me a new opportunity to make some different pics. The problem is now I don't have crude images for this task.

Vid Pogachnik

Vid Pogachnik - Apr 2, 2007 12:50 pm - Hasn't voted

Re: Me too...

For training you can try it anywhere, you don't need to go on mountains :)

zenalpinist

zenalpinist - Apr 2, 2007 1:20 pm - Hasn't voted

a few other things to note..

In landscape photos, say like sunsets where there is a clear distinction between sky and ground...you are better using Graduated Neutral Density filtering techniques to get similar results.

HDR would be great in areas like taking a photo inside a cave out towards the entrance, allowing you to get the lighting/color of the cave walls while down-toning the brightness of the entrance.

It's great to play around with in artistic sense, but takes some practice to get good, natural looking results from it.

Nice article.

Vid Pogachnik

Vid Pogachnik - Apr 2, 2007 2:43 pm - Hasn't voted

Re: a few other things to note..

You're right! Agree completely.
Cheers!

jwproulx

jwproulx - Apr 2, 2007 1:54 pm - Hasn't voted

back in the day...

People used to use all kind of processing techniques for these purposes. In addition to using lens filters (graduated ndf, polarizing, colored, etc) you might mess with the exposure time and development time of both the negative and the print; dodge-and-burn; or use different contrast filters for the print, possibly for different parts of the same image. Ansel Adams's famous Moonrise over Hernandez, NM photo is a classic example. Because it was so hastily taken and unbracketed, it was one of his most difficult prints to produce. We've largely lost those techniques, and replaced them with new ones. Lots of fun either way.

It's fascinating how the human eye and brain do all of this automatically.

Vid Pogachnik

Vid Pogachnik - Apr 2, 2007 2:46 pm - Hasn't voted

Re: back in the day...

'It's fascinating how the human eye and brain do all of this automatically.'

Yes, we have a very flexible machine - our brain. It compensates a lot with past experiences (long and short term).

brendon

brendon - Apr 2, 2007 5:21 pm - Voted 10/10

Coincidently

...my last two photo submissions have mild HDR treatment.
Winter Scene
Sunset

Either the sky would be washed out or the forest would be too dark in the first one. In the second one, the reds on the bottom and the blues in the clouds would not have turned out in the same shot.

I hope we don't see any blantantly over-processed shots on SP, because they are popular on flickr.

Vid Pogachnik

Vid Pogachnik - Apr 3, 2007 12:36 pm - Hasn't voted

Re: Coincidently

Nice two examples, Brendon :)

gulo

gulo - Apr 4, 2007 2:00 am - Hasn't voted

hdr

I took this image using HDR. That allowed the sky being still nice and blue without making the canyons too dark

Vid Pogachnik

Vid Pogachnik - Apr 4, 2007 1:44 pm - Hasn't voted

Re: hdr

Another good example :)

mgeo

mgeo - Apr 6, 2007 2:20 am - Hasn't voted

National Geographic

The last issue of National Geographic I looked at had HDR images for about 1/2 the photos. Done right, it can be absolutely surreal and very engaging.

Vid Pogachnik

Vid Pogachnik - Apr 6, 2007 3:54 pm - Hasn't voted

Re: National Geographic

Very interesting!

Gangolf Haub

Gangolf Haub - Oct 5, 2007 9:22 am - Voted 10/10

You got me started...

... or maybe I should say you Dovski Kriz pictures got me started with hdr again. I found two scripts for The GIMP, with which you can make HDR-Photos from a set of three.

As you know I'm not too interested in the impressionist effects you can achieve but rather with increasing visibility in dark sections of the photo. So far I only used the contrast mask techniqu, with which you lose much of the contrast of the photo. By reducing the HDR effect to a minimum I now might be able to achieve what I want. We'll see...

Vid Pogachnik

Vid Pogachnik - Oct 5, 2007 10:20 am - Hasn't voted

Re: You got me started...

Yes, that the appropriate approach, Gangolf. It's worth experimenting a bit. And remember - also vivid colours :)

Gangolf Haub

Gangolf Haub - Oct 5, 2007 10:35 am - Voted 10/10

Re: You got me started...

Not sure I like the colours - your Triglav photos are interesting though. Say, could you send me the pancake photos in a large version - I simply forgot to take photographs. And maybe also Mali Matterhorn and the summit shot? And Gangolf kicking up a lot of dust?

No reason to hurry though.

Gangolf

friday

friday - Feb 7, 2009 10:30 am - Hasn't voted

Re: You got me started...

The scripts for GIMP really don't do the HDR very well. I've found that by using either Enfuse (part of the Hugin panoramic stitching package) or QTPFSGUI, I get a better results. These results get ported into GIMP for further processing.

MegasAlexandros

MegasAlexandros - Jan 6, 2009 8:43 am - Voted 10/10

RE: My First Experiences With HDR Imagery

To excellent result! As always...thanks for a very interesting article. I really have to sit down and learn PS...
Cheers

Alex

Vid Pogachnik

Vid Pogachnik - Jan 6, 2009 9:44 am - Hasn't voted

Re: RE: My First Experiences With HDR Imagery

Thanks Alex! Don't learn PS systematically. Just start using it. I think that for normal photos one must only have a look on contrast (getting out some dark areas details and perhaps darkening a bit too white clouds, snow etc.) and do some corrections if pictures fail high quality standards (sharpness, colours, contrast etc.). HDR is a special procedure though.

Cheers!
Vid

Viewing: 1-20 of 28
12