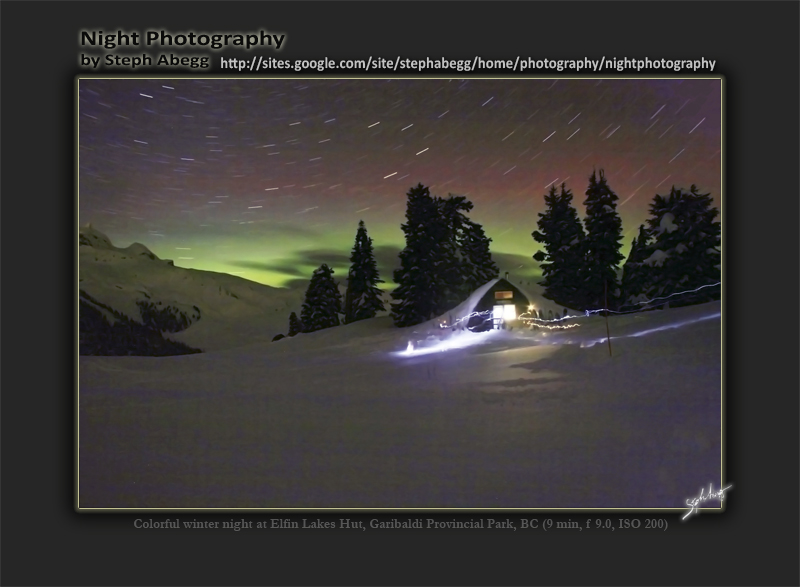
 Colorful winter night at Elfin Lakes Hut, Garibaldi Provincial Park, BC. Colorful winter night at Elfin Lakes Hut, Garibaldi Provincial Park, BC.
(9 min, f 9.0, ISO 200) |
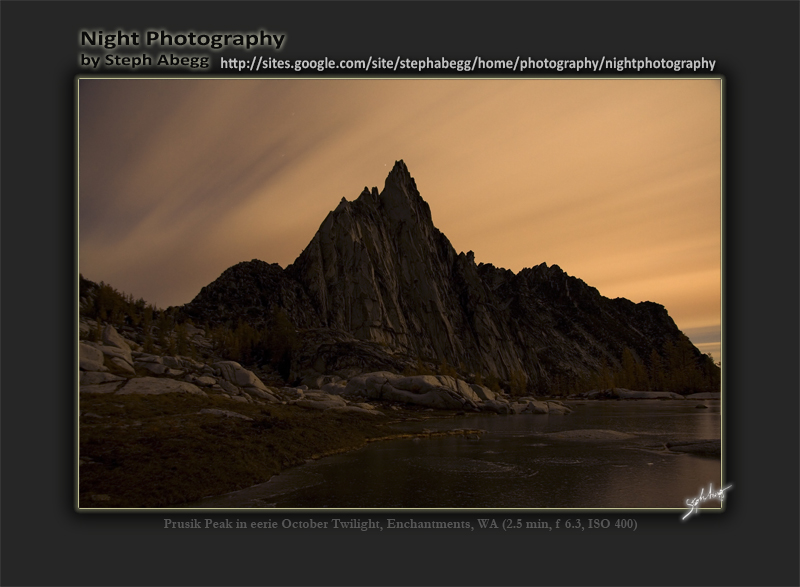
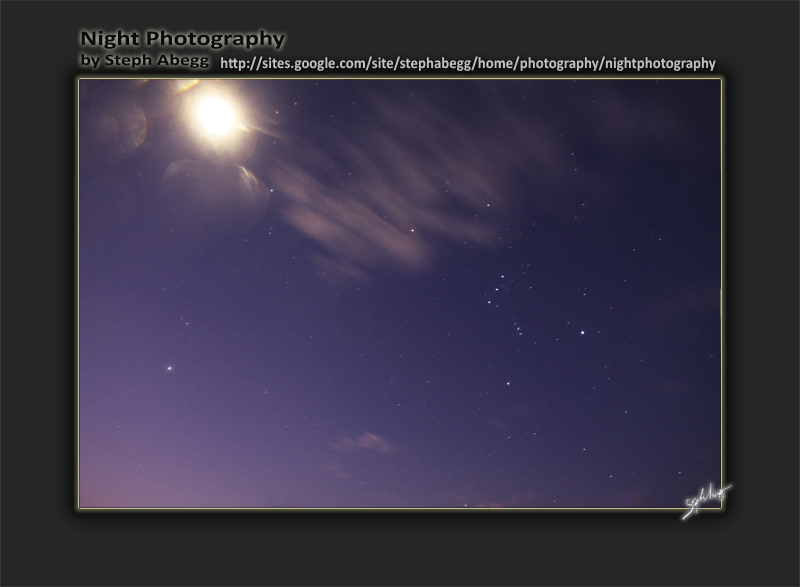
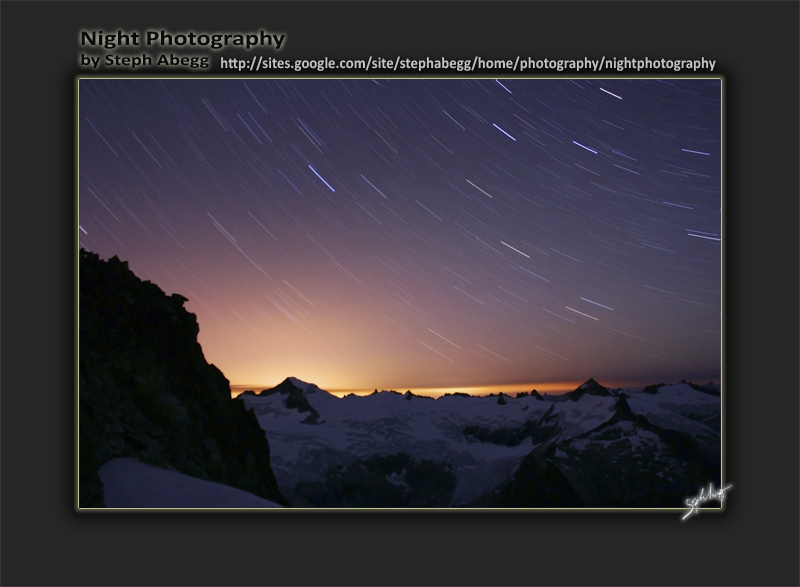
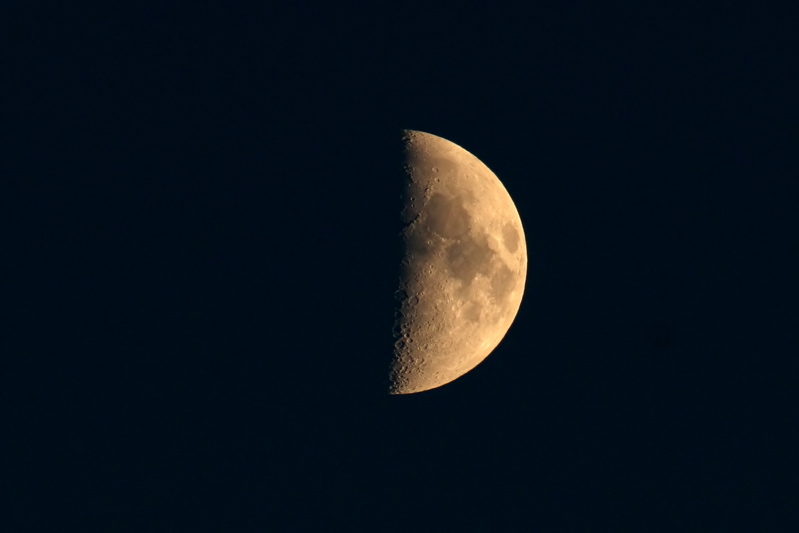
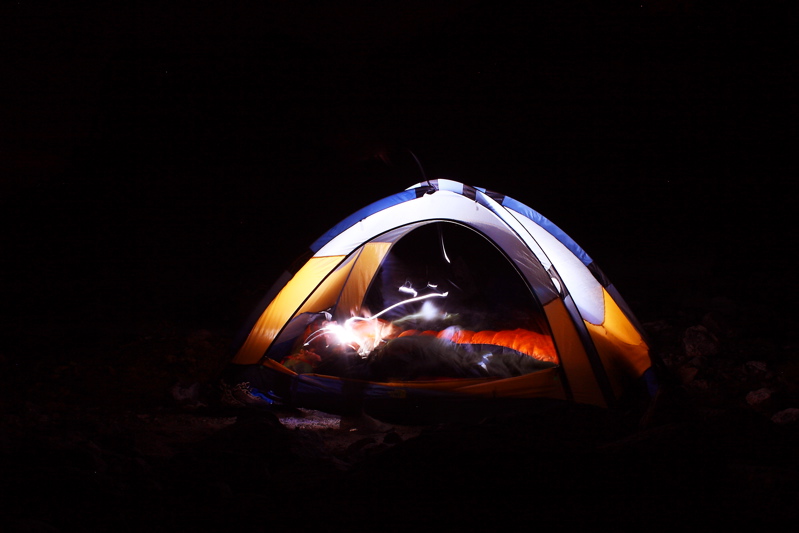
A TEASER OF SOME OF MY FAVORITE NIGHT PHOTOS
INTRO
A night scene is one of the most rewarding and unique photographic subjects. A photograph taken at night can unveil subtle colors and impart an ambiance absent in any daytime exposure of the scene, or capture astronomical phenomena realized only upon an extended exposure. A candle becomes a glowing beacon in a warmly lit room; stars become colorful streaks through an inky sky; a dimly moonlit mountain becomes blanketed with glowing light and deep shadows.
Night photography has become one of my favorite forms of photography. My skills have been entirely self-taught, developed through countless sleepless nights fiddling with my camera under a blanket of stars. This page gives a sampling of some of my favorite night photos.
Night photography requires a good understanding of camera exposure and use of long exposure times. Understanding the simple physics of photography opens up a realm of new possibilities for the night photographer (or any photographer, for that matter). So, before the photos on this page, I discuss some of the technical aspects of night photography, such as what manual exposure settings to use and how exposure works. In addition, all photos on this page are accompanied by their exposure settings. To jump past this discussion directly to the photos, click the link below.
GO STRAIGHT TO THE PHOTOS (which are below the following technical discussion)
CAMERA SETTINGS FOR NIGHT PHOTOGRAPHY
Night photography involves long exposure times. Camera settings (i.e. the shutter speed, aperture, and ISO) depend on the photographic subject (e.g. the stars, the moon, or a lit object like a tent), how dark the night is, and the desired effect (i.e. star trails or star pinpoints). The table below summarizes the typical exposure settings for various types of night photographs. Hopefully, this provides some guidelines so that taking a night photo is only a literal shot in the dark!
After this table, I give a more detailed discussion on understanding exposure, which is one of the key technical aspects of night photography.
| CONDITION | EXAMPLE PHOTO | SHUTTER SPEED | APERTURE | ISO SPEED |
| Photo of MoonDifficult to achieve a correct exposure of both moon and surroundings due to large difference in brightness. | 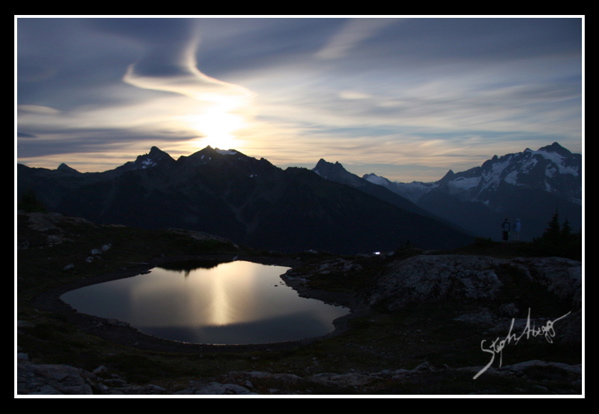 Moonrise from Yellow Aster Butte, WA. (2 min, f 5.0, ISO 200) Moonrise from Yellow Aster Butte, WA. (2 min, f 5.0, ISO 200) | 1/100 seconds - 2 minutes (to see details on the moon, faster shutter speeds are required; with longer shutter speeds, the surroundings might be better exposed, but the moon will overexpose, loose definition, or even start to streak across the sky, although this can be an interesting effect) | ~ f/5.0 - f/14.0 (adjust depending on shutter speed) | 100-400 (varies depending on darkness of the surrounding scene; try to minimize to reduce noise) |
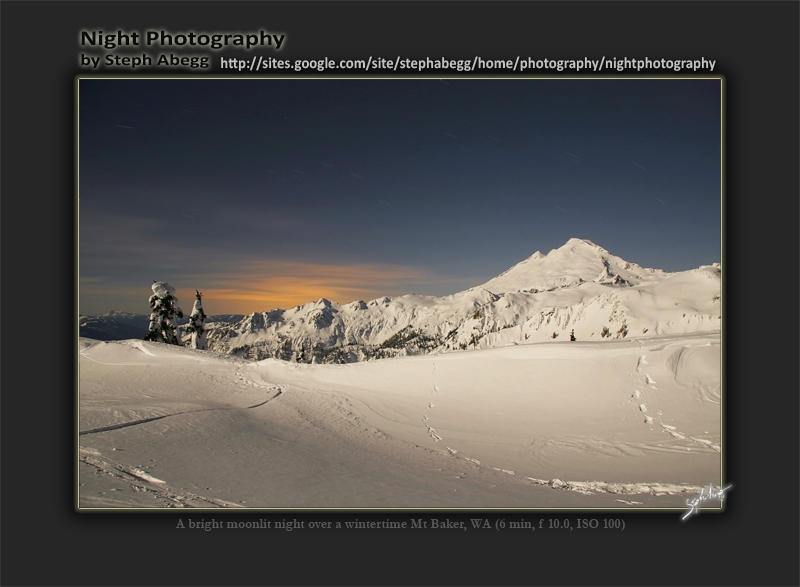
| Moonlit Landscape Moonlit surfaces can be colorful and bright. | 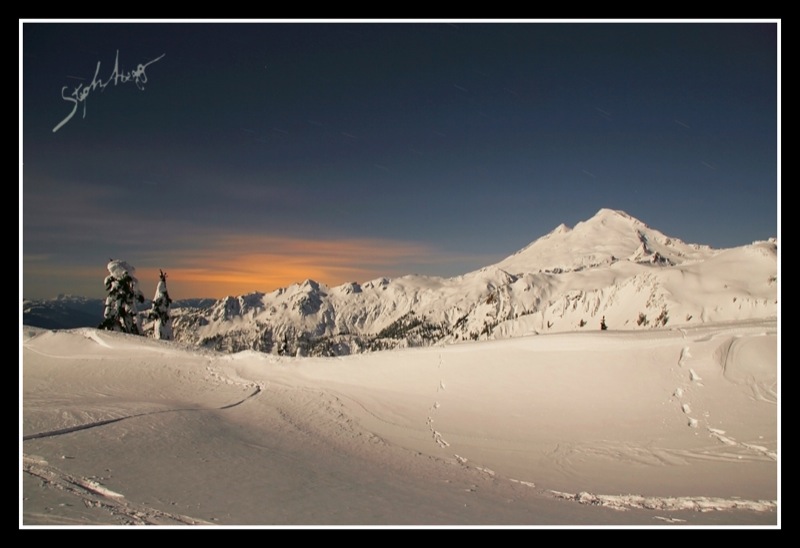 Moonlight on Mt. Baker, WA. (6 min, f 10.0, ISO 100) Moonlight on Mt. Baker, WA. (6 min, f 10.0, ISO 100) | 1-10 minutes (the moonlight becomes more pronounced and colorful at longer exposure times) | ~ f/8.0 - f/14.0 (try to use a relatively narrow aperture in order to achieve enough depth of field) | 100-400 (varies depending on brightness of the lit surface; try to minimize to reduce noise; moonlit surfaces can be bright enough to use a low ISO) |
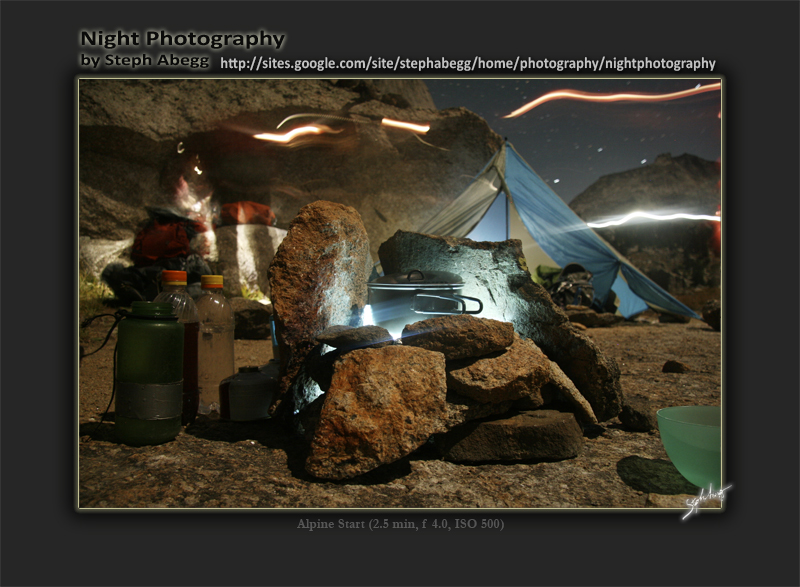
| Artificially-lit object or Urban Light Building, tent, city skyline, etc. | 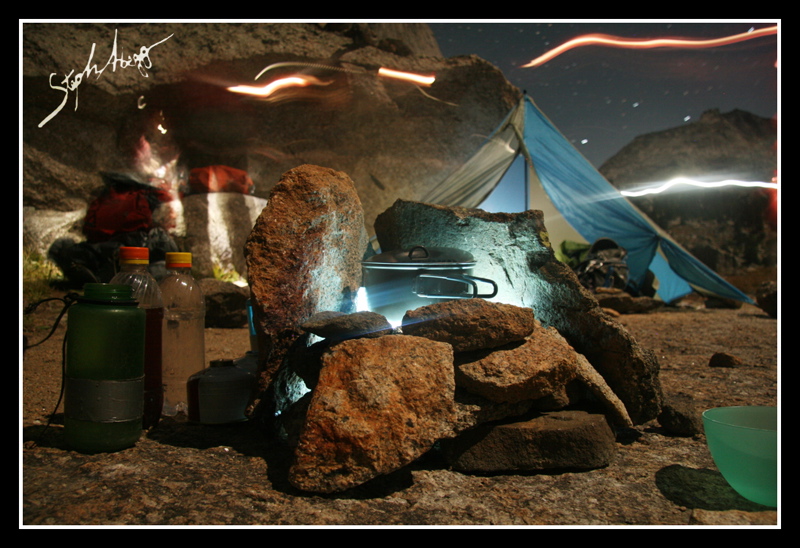 "Alpine Start" in the Cirque of the Towers, Wyoming. (2.5 min, f 4.0, ISO 500) "Alpine Start" in the Cirque of the Towers, Wyoming. (2.5 min, f 4.0, ISO 500) | 10 sec -10 minutes (exposure time depends on how bright the light sources are—direct lighting such as a city skyline requires shorter exposure times than muted or indirect lighting such as a glowing tent). At longer exposure times, artificial lighting becomes more pronounced and colorful and motion can also be captured. The artificial light source is not always present during the entire shot, especially if the photographer has control over the light source (for example, for a tent lit at night, the tent might only be lit for a quarter of the duration of the shot). | ~ f/6.0 - f/14.0 (if the scene contains foreground and background objects, use a relatively narrow aperture in order to achieve enough depth of field) | 100-800 (varies depending on darkness of night and amount of artificial lighting; try to minimize to reduce noise) |
| Photo of Stars as pinpoints Photographing stars is best on a dark night, when the moon is below the horizon. | 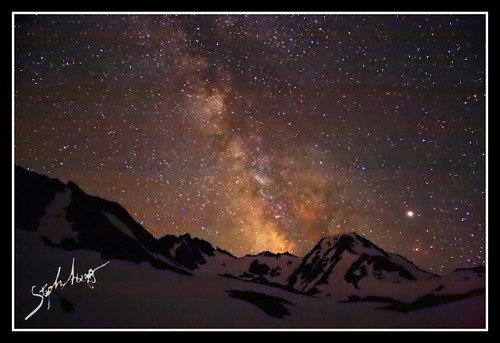 Milky way and planet from our campsite in the Bailey Range of the Olympic Mountains, WA.(30 sec, f 4.0, ISO 1000) Milky way and planet from our campsite in the Bailey Range of the Olympic Mountains, WA.(30 sec, f 4.0, ISO 1000) | Exposure time for shooting still stars is typically between 10-30 sec, usually near the upper end of this range in order to capture enough light to get a correct exposure. The maximum shutter speed you can use without the stars appearing to streak across the photo can be approximated by dividing 600 by the effective focal length of your lens. For an effective focal length of 20mm, this gives an exposure time of 30 seconds. (Some math: if you assume that 5 pixels - or 0.1% - of movement on a 5D's 12.8 mp sensor (equivalent to 4 pixels of movement on a 30D's 8.2 mp sensor) is the maximum without streaking and recall that the earth makes one full rotation in 86400 sec, shutter speed = [(180/pi)*(5 pixels x (35 mm / 4368 pixels)) / f] / (360 degrees / 86400 sec)). Another aspect to consider is that further away from Polaris, stars trace out longer paths in the sky. Hence, slightly longer exposure times can be used to photograph stars closer to Polaris without registering the stars' movement. | ~ f/4.0 - f/6.0 (aperture needs to be wider to let in more light since exposure time is short and the night is dark) | ~800-1600 (ISO needs to be high to register more light since exposure time is short and the night is dark; on a really dark night, the camera's highest ISO might be needed, which unfortunately means more noise in the photograph) |
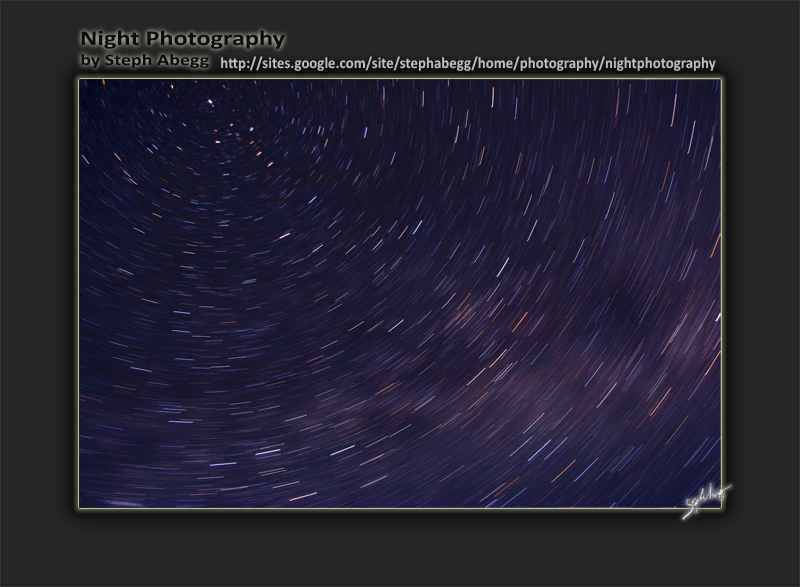
| Photo of Star trails Photographing stars is best on a dark night, when the moon is below the horizon. | 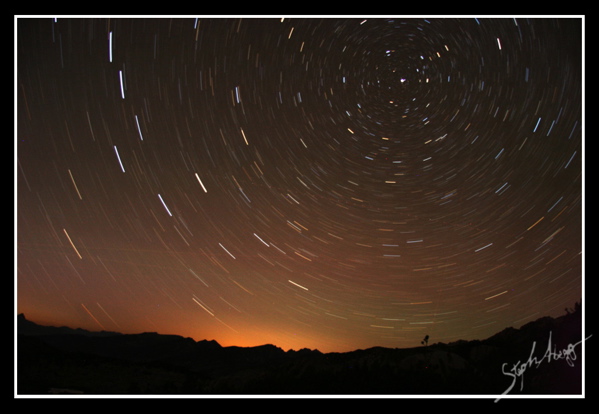 Rotation of stars around Polaris, John Muir Trail, Sierra Nevada Mountains, CA. (23 min, f 4.0, ISO 200) Rotation of stars around Polaris, John Muir Trail, Sierra Nevada Mountains, CA. (23 min, f 4.0, ISO 200) | 20 minutes to 2 hours (or longer if the battery can last!) | ~ f/4.0 -f/10.0 (the longer the exposure, the narrower the aperture can be, but typically star photos are taken on dark nights so you can't make the aperture too narrow) | 100-800 (varies depending on darkness of night, I usually try to minimize ISO to avoid registering too much noise during the lengthy exposure) |
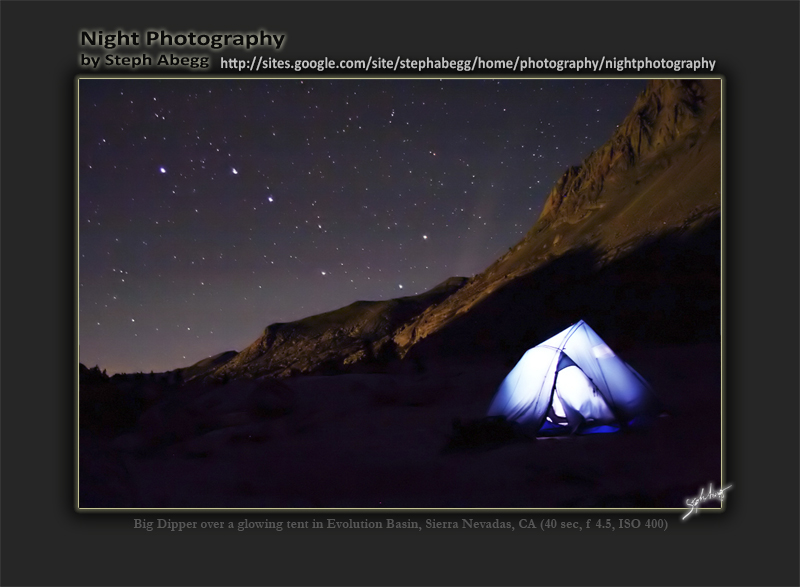
| CombinationCreativity is key! |  Big Dipper, Moonglow, and Tent in Evolution Basin, John Muir Trail, Sierra Nevada Mountains, CA. (40 sec, f 4.5, ISO 400) Big Dipper, Moonglow, and Tent in Evolution Basin, John Muir Trail, Sierra Nevada Mountains, CA. (40 sec, f 4.5, ISO 400) | 30 seconds-2 hours (whatever gives the effect you want) | adjust aperture based on shutter speed and lighting; if there are foreground and background objects, use a narrower aperture to achieve a larger depth of field | adjust ISO based on shutter speed and lighting, but try to reduce ISO to minimize noise |
SOME PHYSICS OF NIGHT PHOTOGRAPHY
The following section discusses some of the key technical aspects of night photography. I've put together a worksheet on exposure settings to help you understand the following discussion; click here to download the worksheet on exposure settings.
Key Concept = Understanding Exposure
The exposure of a photograph is a function of the amount of light entering (or being recorded by) the camera. For a given scene, the amount of light entering (or being recorded by) the camera is controlled by three settings, which can be adjusted independently of the others:
1) Aperture: (the area of) the opening through which light travels into the camera; wider apertures (which are non-intuitively represented by smaller f-numbers) allow more light to enter the camera. A standard sequence in one-stop increments of f-numbers from a narrow aperture to wide is: 32.0, 22.0, 16.0, 11.0, 8.0, 5.6, 4.0, 2.8, 2.0, 1.4.
2) Shutter speed: the length of the exposure; longer shutter speeds allow more light to enter the camera for a given photograph. A standard sequence in one-stop increments of shutter speed (in seconds) from short exposure to long is: 1/2000, 1/1000, 1/500, 1/250, 1/125, 1/60, 1/30, 1/15, 1/8, ¼, ½, 1, … (much higher for night photos).
3) ISO speed: in film cameras, ISO refers to the film speed; in digital cameras, it represents the sensitivity of the sensor; higher ISO corresponds to higher sensitivity and allows the camera's film or sensor to record more of the incoming light. A standard sequence in one-stop increments of ISO from low speed to high is: 50, 100, 200, 400, 800, 1600, 3200.
Reciprocity of Camera Settings
There is a reciprocal relationship between aperture, shutter speed, and ISO speed:
Exposure ~ Aperture Area x Exposure Time x Film/Sensor Sensitivity (ISO)
These three camera settings are calibrated in stops, or doublings and halvings. For instance, for a given scene, doubling the amount of light entering or being recorded by the camera can be achieved by:
1. Doubling the area of the aperture (i.e. decreasing the f-number by one stop)
2. Doubling the shutter time
3. Doubling the ISO
Reciprocity also means that a variety of aperture, shutter speed, and ISO combinations can produce the same exposure. A change in one camera setting can be counterbalanced by changing the other camera setting(s) by an equal number of (combined) stops in the opposite direction. For example, let's say a photo is correctly exposed with a shutter speed of 30 seconds, an aperture of f/8.0, and an ISO speed of 800. We might want to keep the shutter speed the same, but increase the depth of field (i.e. decrease the aperture size). In order to maintain the exposure, each stop in aperture requires the ISO to be increased by one stop. For example, the photo will be identically exposed with a shutter speed of 30 seconds (same), aperture of f/16 (2 stops), and ISO of 3200 (2 stops).
It is important for the night photographer to know that there is an exception to the direct linear application of reciprocity for situations that involve low light and longer exposure times. Termed "reciprocity failure," this occurs when the light levels decrease out of the reciprocity range. At low light levels, i.e. fewer photons per unit time, photons impinge upon the photographic medium relatively infrequency, and the partial charge created as the photons arrive is not stable enough to survive before enough photons arrive to record a permanent latent image. The usual tradeoff between aperture and shutter speed is no longer proportional, and the increase in duration, and hence of total exposure, required to produce an equivalent response becomes higher than linear reciprocity predicts. In other words, in low light when exposure times are greater than about 1 second, the exposure time must be more than doubled to double the exposure.
Exposure Values
Based on the reciprocity of the camera settings, the exposure value (EV) is a mathematical construct that denotes all combinations of camera shutter speed and aperture that give the same exposure at the same ISO speed. The concept was developed in an attempt to simplify choosing among combinations of equivalent camera settings, although practice and experience usually replaces the need for tabulated exposure values.
Mathematically, exposure value is a base-2 logarithmic term defined by
EV = log2(N^2/t) where N is the f-number related to the size of the aperture, and t is the exposure time in seconds. As indicated by the formula, the EV increases as f-number increases (i.e. smaller aperture opening) or exposure time decreases (i.e. faster shutter speed). Hence, greater EV correspond to more brightly lit scenes, while lower EV correspond to dimly lit scenes. Typical values of EV range from -6 to 16, with EV 0 corresponding to an exposure time of 1 s and a relative aperture of f/1.0. Most night photography takes place in situations with negative EV. Exposure value is also used to indicate an interval on the photographic exposure scale, with 1 EV corresponding to a standard power-of-2 exposure stop.
Every scene—a Full Moon casting a beam of light over the ocean, the colorful reds and greens of Aurora Borealis, the Milky Way in a starry night sky—has a characteristic EV related to the brightness of the scene. Some photographers use a light meter to determine the EV. However, natural light, as well as many scenes with artificial lighting, is predictable, so the EV of a scene can often be determined with reasonable accuracy from standard values. Tables of standard values are provided below. As an example of how to use them, consider a nightscape under a half moon (i.e. Gibbons moon). The EV table shows that this scene has an EV of around -4. Using the second table, for a given ISO the EV value can be used to determine a combination of shutter speed and aperture—for example, ISO of 800, f/4.0, and 30 seconds would give the correct exposure.
| Exposure Settings and Exposure Values (click to enlarge) |
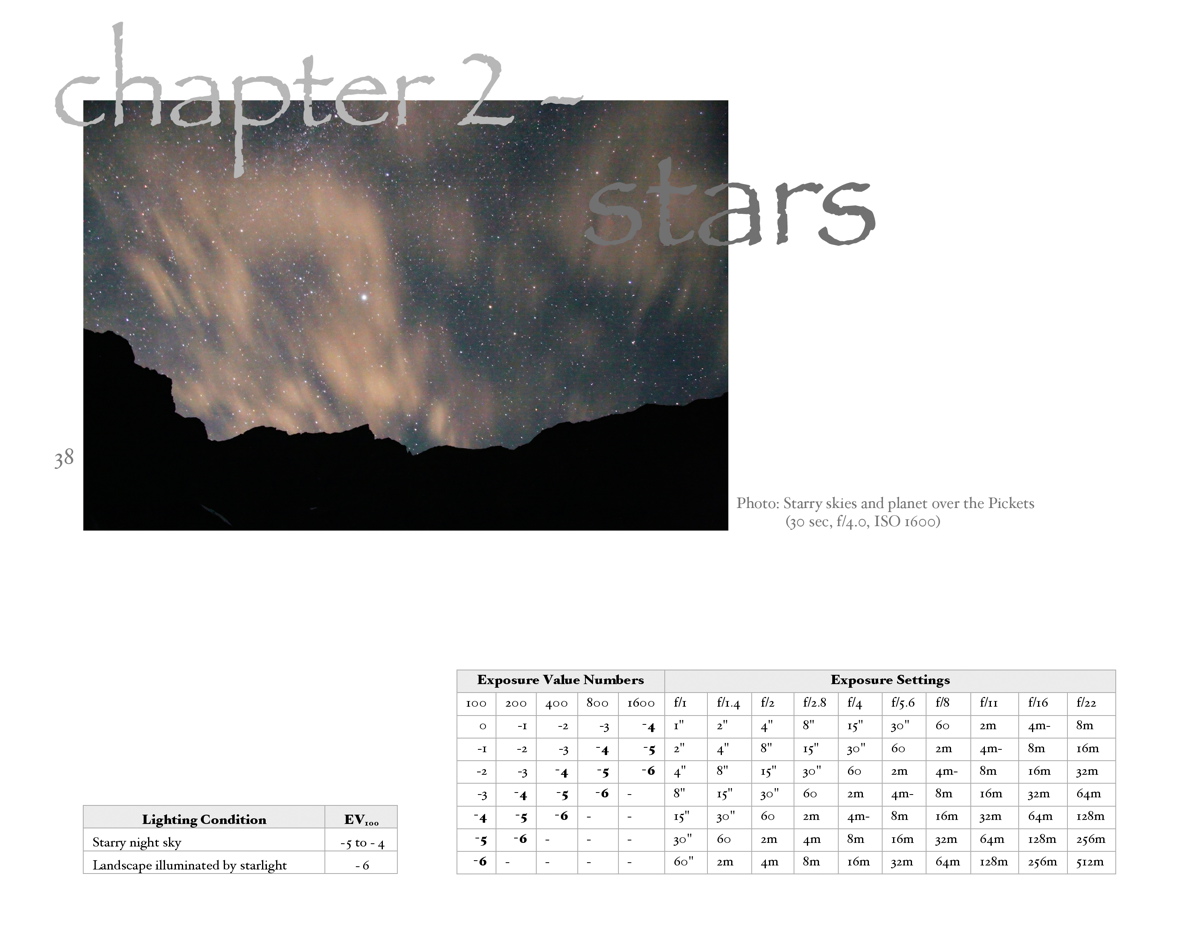 Stars Stars |  Moon Moon | 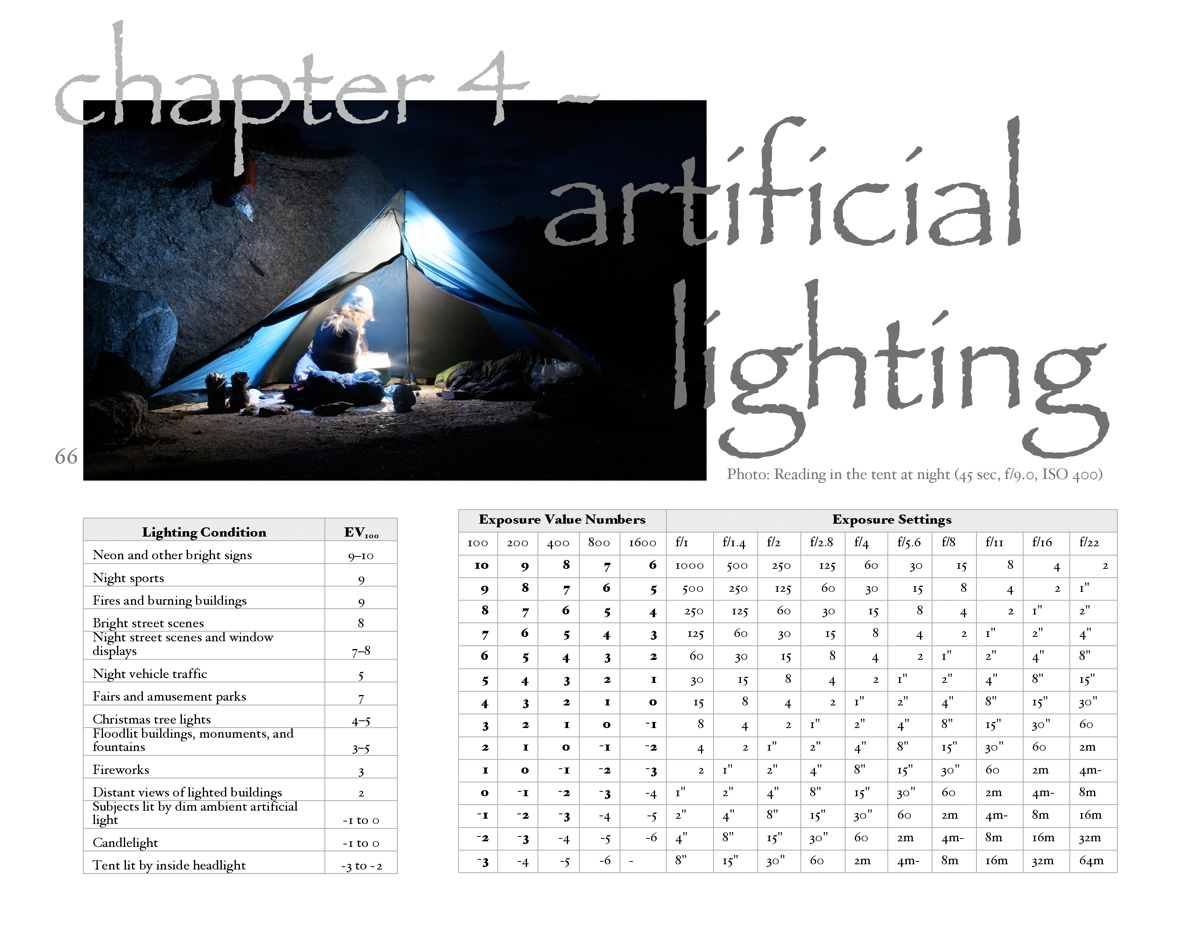 Artificial Lighting Artificial Lighting | 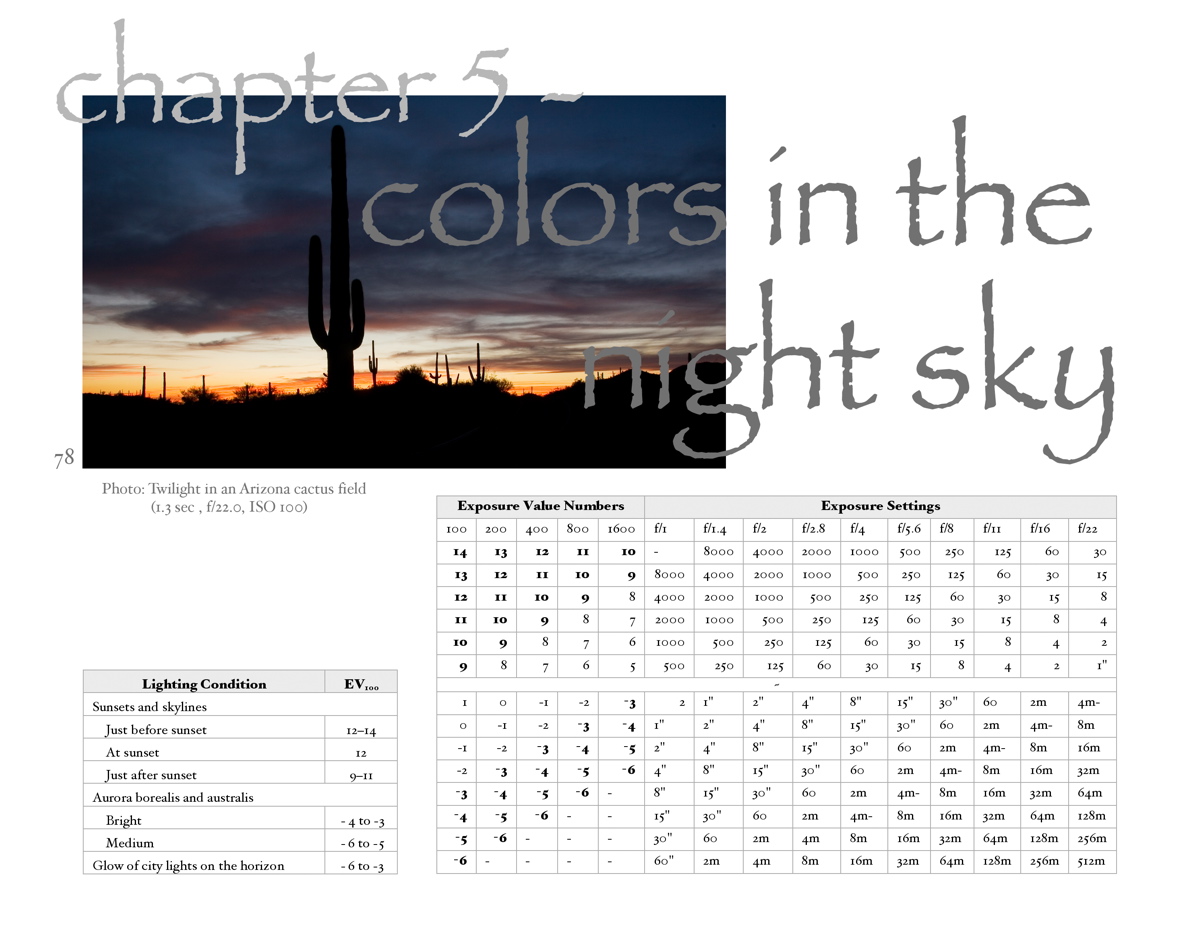 Colors in Night Sky Colors in Night Sky |
These charts are good to know about, but with a little practice choosing a suitable combination of camera settings (i.e. EV) becomes quite intuitive, and most photographers don't even think about the EV value their chosen combination represents.
Although all camera settings with the same EV nominally give the same exposure, they often do not give the same photographic result. For example, a 30-second f/1.4 exposure of the Big Dipper is nominally equivalent to a 16-minute exposure at f/8; the first will show the pinprick stars, while the second will show star trails. In night photography, the exposure time plays an important role in the overall outcome of the photo, so often it is just a matter of choosing the appropriate aperture and ISO setting to suite the desired exposure time and EV of the scene.
It is typical in night photography to use a higher ISO setting to increase the sensitivity of the camera to incoming light. The downside is that high ISO leads to noise—the appearance of random "bad" pixels scattered over the photo. It is a similar effect as "grain" in film photography and it degrades the photo quality.
A bit of physics: The camera's electronic sensor is built from many tiny pixels that are hit with incoming photons of light and in this way register the image. There is always a level of background noise, largely caused by free electrons from the image sensor itself that contaminate the photoelectrons from the incoming light. Several phenomena can cause the natural noise from the sensor becomes more pronounced: (1) Higher temperature causes more electron excitement (so a photo taken on a cold night will have less noise than a photo taken on a warm night). (2) Low light causes the amount of light energy measured by each pixel of the CCD to be low; some pixels can appear as noise because the energy level measured for them is significantly close to or higher than the actual light intensity. (3) Long exposure times cause the CCD to accumulate more light in each pixel, but at the same time accumulate more noise. (4) High sensitivity modes, such as a high ISO setting, cause the sensor to amplify the measurements it takes, amplifying its own natural noise as well as the incoming light. Noise can be reduced by addressing any of these causes, although this can be particularly difficult in night photography where often all four sources of noise are present). One useful technique is to take a dark frame (which records the amount of noise collected on the sensor) for the same length of time as the exposure and subtract this from the photo.
Manual Focus
In low light, the camera's automatic focus typically will not work. So when setting up a night photo, you usually need to use manual focus to make sure the main subject of the photograph is in focus. For landscapes and stars with no foreground objects, setting the focus to infinity is usually best. If you have a chance to set up your photo while it is still light enough to use automatic focus, you can set the focus this way and then turn off the automatic focus for the night photograph.
Handy Tip
If you are not sure what combination of exposure settings (shutter speed, aperture, ISO) to use, here's a quick-and-dirty technique that works pretty well. Set your camera at its highest ISO setting, its widest aperture, and a shutter speed of 30 seconds. After taking the photo, examine the photo's histogram on the camera (sorry film users, this trick only works with a digital camera). If the image is underexposed, increase the shutter speed until you get the correct exposure; if the image is overexposed, decrease the shutter speed (or decrease the ISO) until you get the correct exposure. Once you find the desirable exposure, "stop down" the ISO (since a lower ISO is desirable as it results in less noise) and "stop up" the shutter speed (towards longer exposure) or aperture (towards narrower aperture) by the same number of stops used to stop down the ISO. For long exposures, you usually need to add an extra half-stop to the exposure time, due to reciprocity failure at longer exposure lengths.
Photo Examples
In the next section, (finally!), I give a sampling of my favorite photos, each accompanied by its exposure setting.
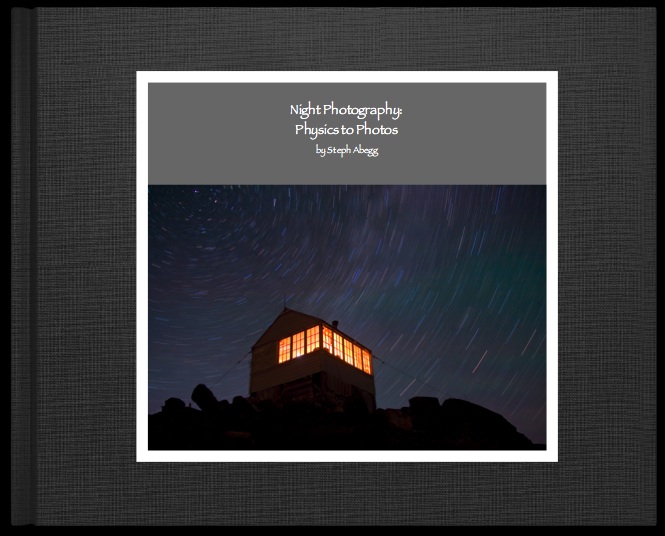 | (Since starting this website, I have started to pick away at a book titled "Night Photography: Physics to Photos", which gives several interesting articles on the technical principals of night photography and astronomy phenomena, along with several of my favorite night photographs. I'd love to publish it someday.) |
A SAMPLING OF MY FAVORITE NIGHT PHOTOS
My website gives a sampling of my favorite night photos. I've arranged the photos into four sections - (1) Stars, (2) Moon, (3) Artificial Lighting, (4) Colors in the Night Sky. However, you'll notice that there are a myriad of ways these categories can be overlapped by merging various techniques. Creativity and experimentation is a key aspect of night photography!
For each photograph, I've noted the exposure settings (shutter speed, aperture, ISO speed).
Click the links below to see photos of a specific category.


Comments
Post a Comment