


Comments
No comments posted yet.
|
|
Trip Report |
|---|---|
|
|
37.97972°N / 105.6025°W |
|
|
Aug 9, 2014 |
|
|
Mountaineering |
|
|
Summer |
After a fun time on Kelso Ridge last week, I was feeling confident about tackling some of these “Class 3” 14ers. I told an out-of-state climber on Torrey’s last Sunday that I’d post something about this hike here since he plans to do it next week (again, from out of state) with his girlfriend who is slightly more averse to exposed scrambling. Then I figured yet another TR about some well-climbed peaks might be a little useful, especially if I point out some tips I picked up on the way. So, hopefully he reads this (especially Tip 6) and/or somebody else benefits from my ramblings!
We hit the trail from Willow Creek TH around 3:20 pm Friday. The parking lot wasalready pretty full with probably less than 4 spots open. Even with the gentle breeze at 9,000 ft it was still a pretty warm afternoon. We only crossed paths with a handful of people, so ost of the cars were for groups on another trail or ahead of us. In fact, even after arriving to our camp, we saw several some more campers arrive (probably 6-8 more!). I imagine beautiful Friday nights can make for a packed Willow Lake area and finding camp sites that don’t encroach on “personal space” a little more challenging.
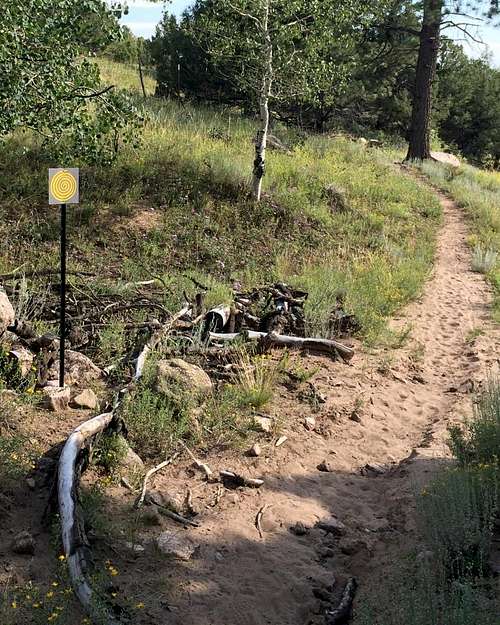
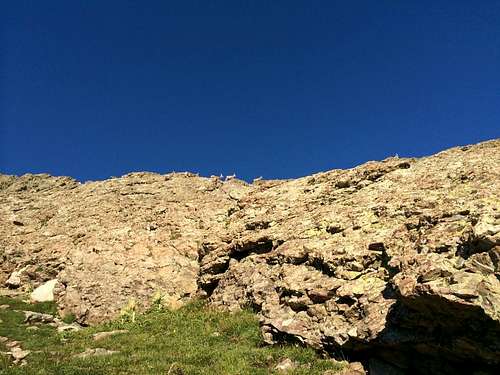
The trail is well maintained and would be easy enough to do in the dark with just a headlamp. One word of caution, after you cross the stream in the beginning there is a marked trail junction. Don’t go this way shown in the photo… you will get sleeeeeepy…
Instead, go to the left as indicated by the brown vertical sign with the up arrow.
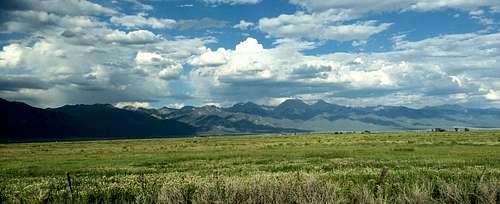
After lots of switchbacks you finally get up a ridge. As you are greeted with an aerial view of a beautiful green meadow (lush this time of year) at the bottom of the valley, you lose some elevation. While thankful for this little break while I finally get used to the weight of my heavy pack, I cringed at the thought of looking forward to this on the way back to the car in 24 or so hours. (Spoiler alert: it really wasn’t as bad as I thought it would be.)
Now even though this hike would make a great night hike, I recommend it be done in daylight, at least one way, so that you can enjoy the majestic mountain views and waterfalls.
After more switchbacks mixed with scenery we finally arrived to Willow Lake around 6:45 pm. I was quite ready to set my pack down, cool off and rest my legs, but just as the parking lot indicated, lots of campsites were already taken on this Friday night of a beautiful weekend.
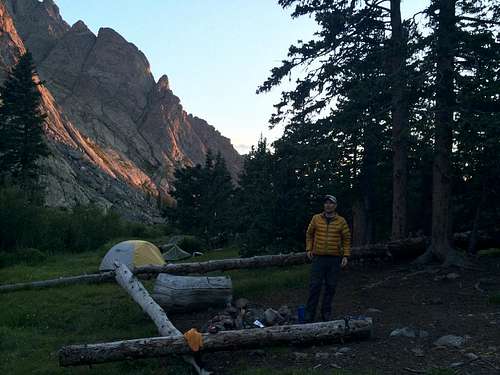
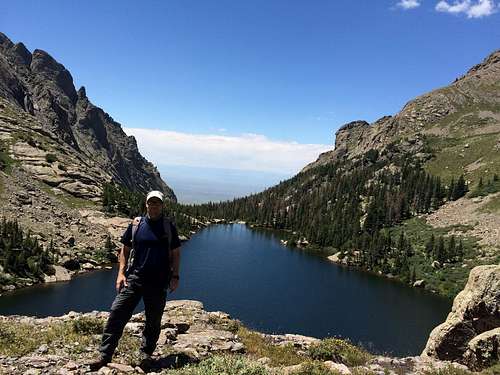
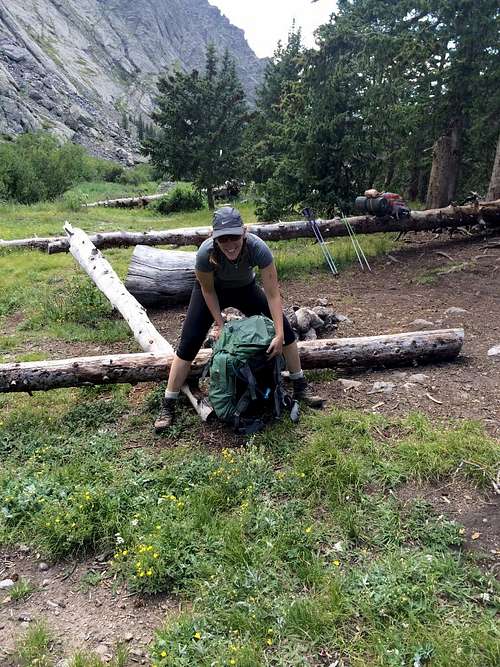
So we went further up to the lake in search of potential campsites. After a quick look for sites and admiring the lake (it is filled by a 200-ft waterfall on the west and emptied by another waterfall on the east! How cool is that?!), we turned back due to lack of comfortable selection (and no camping within 300 feet of lake) and found a great spot near the stream just below the lake... and due to the proximity of the rushing water, just outside of hearing distance of a few other tents. We had shade, a fire circle, soft grass, trees to hang our food in, and the soothing sound of the moving water just outside the tent – perfect! The only photo I have of our campsite is actually of the site next door, but you can see the “kitchen” we shared with them and get an idea of what to expect for your campsite.
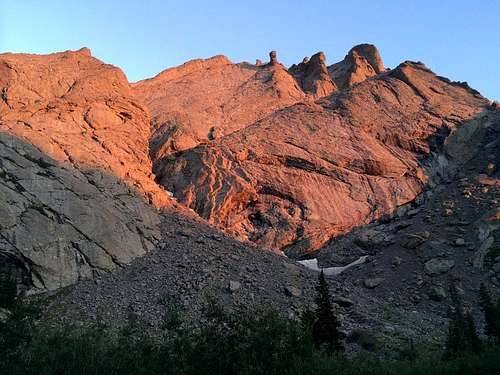
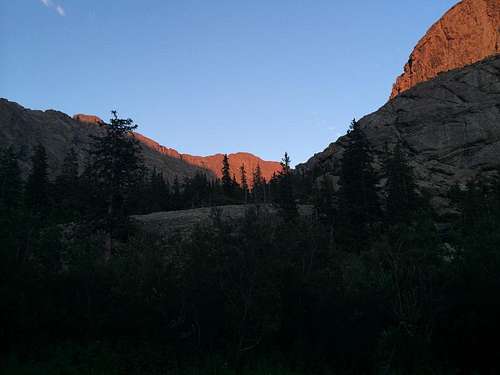
These sites are located just on the right side of the trail when you are facing the lake. There are little paths to the creek right below the waterfall (where the lake kind of just spills out to the creek). We set up camp, cooked and ate dinner, and then enjoyed the reflection of the setting sun off the nearby rocks before calling it an early night at 9:00 pm.
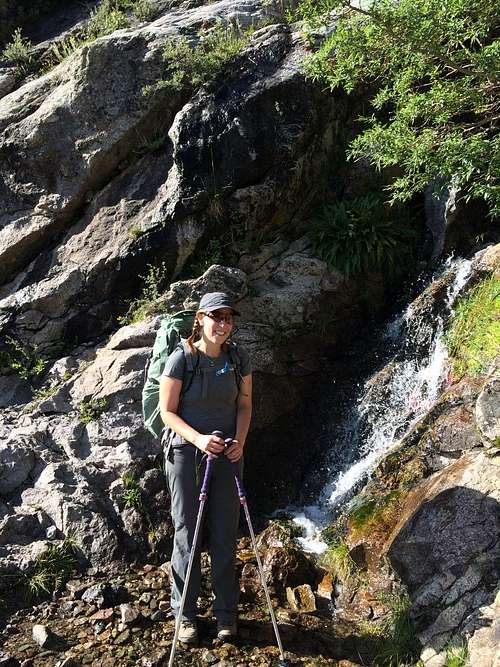
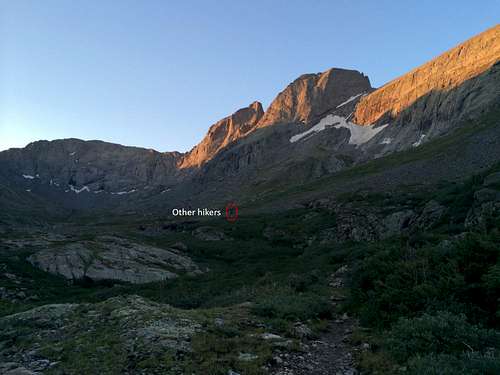
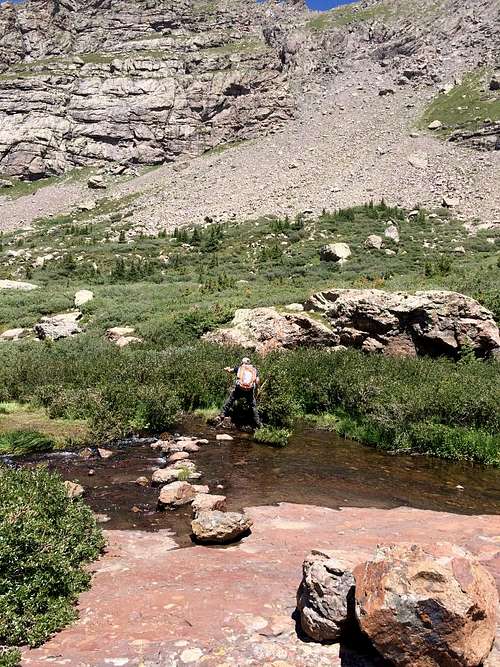
Even though the moon was full and bright, we chose to leave the campsite around 6 am to avoid using headlamps. We were pretty close to our goal and left around 6:10 am. Some reports make it sound very confusing to get around the lake. Perhaps because we hiked to the lake the previous day, we found no problems getting around to the north side; there is even a sign telling you where to turn. After hiking through some willows and mud you get above the waterfall that’s filling the lake and you can see the North Slope that you are about to climb and Kit Carson; Challenger is still hiding behind its ridge. There is a stream you have to cross with rocks conveniently placed for stepping on. (Photo near end, with descent description.) At this time of year it was pretty simple to cross with only a small jump to the first rock.
We could see ahead of us another couple starting their way up the North Slope and a guy with a small dog a little ways behind them. Summitpost.org’s Red Tape section for Kit Carson says that pets are not allowed, but you should look into that more if you are wanting to bring a dog. We saw lots of dogs on the Willow Creek Approach trail on our descent.
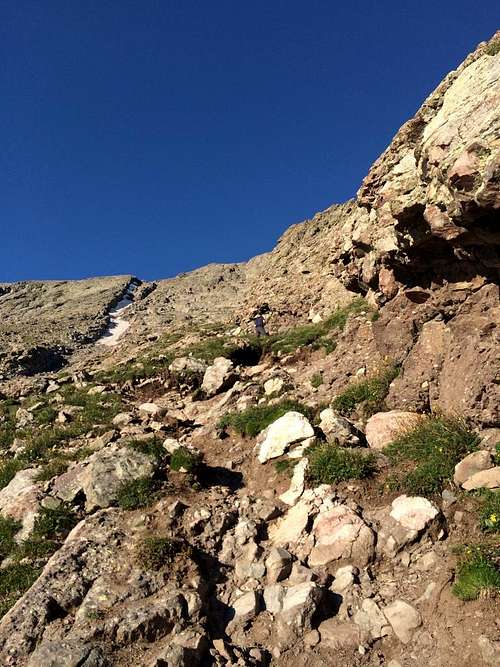
The climb up the slope from above the lake looks quite doable (and it is). But unlike other climbs up the ridge I’ve experienced, this one actually is more challenging than it looks. Technically it was not really a problem, you can find ways to minimize the climb in the loose rocks. It just took longer to climb than I expected it to. Of course photos of the slope make it look more straightforward than it really is, and there is more than one way up/down it. Before you start the ascent you can see the snow-filled gully near where you should gain the ridge. See next photo taken from about 2/3 the way up.
Sometimes you’ll see cairns and depending on where you end up, you may not. But there is no need to worry as long as you are comfortable and heading up towards the ridge. On the descent it was easier to see the worn-route and the trip overview on 14ers.com documents this climb pretty well although I probably should have followed it more closely. You kind of start to the left in the gully; it is pretty wide at the base of the North Slope. You eventually make your way over to a wall to the right – the wall shown in the photo above. Then about 2/3 the way up when you can see the snow gully (and your exit point), you start making your way across and up. About 15 minutes into the climb I put on my helmet as I was worried about rocks knocked down from my climbing partner (EricD) above me. During one of my breaks I noticed some large moving “rocks” and watched them make climbing up that wall look really easy.
As we gained the ridge, we lost sight of the snowfilled gully but knew that we were on the right side of it. Plus we could see a great exit point as shown in the photo below.
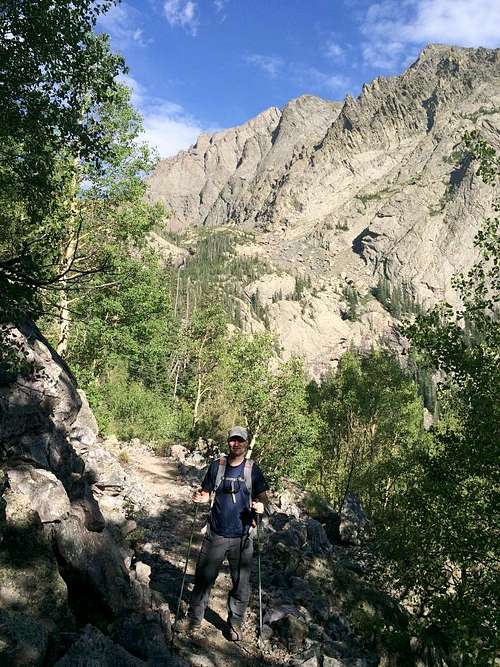
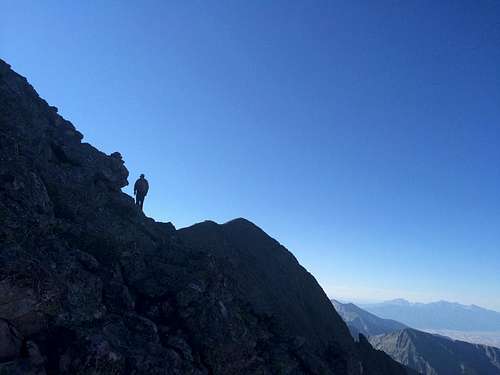
Once over the ridge you can finally see your destination – Challenger Point and the ridge you will hike to get there.
From here you scramble up to the ridge and if you are not fazed by the view (aka exposure) can either walk the ridge the rest of the way to the summit or descend a few feet on your left to a more comfortable path where you can grab on rocks if needed. The large rocks are quite stable up here and either option gives great views.
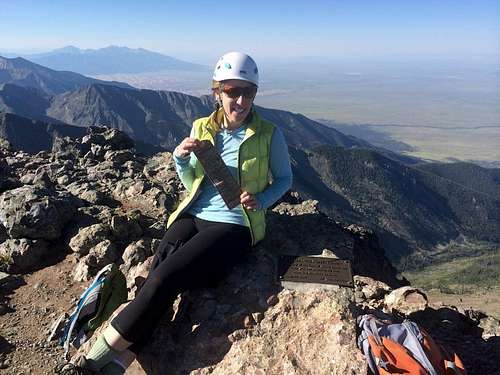
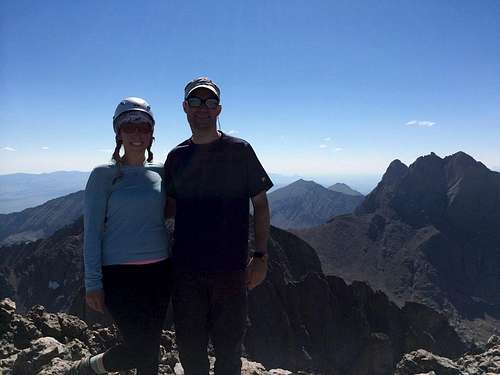
We summited Challenger Point by about 10 am. We had a snack, enjoyed the view, signed the register, took some photos and then focused on our next destination – Kit Carson.
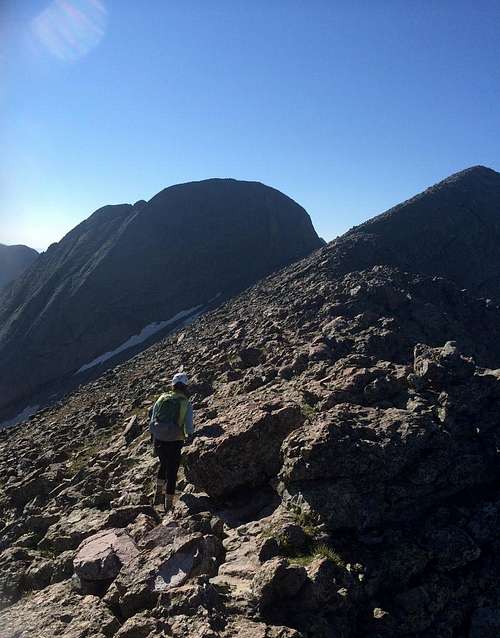
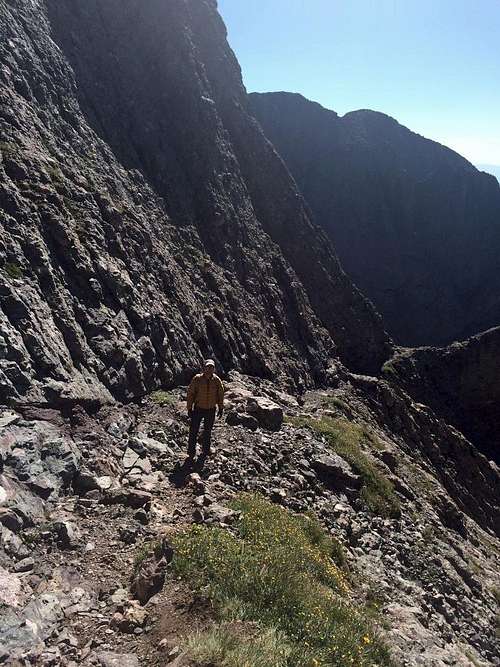
The way to Kit Carson is very well defined and documented so I won’t get long-winded about it; plus I didn’t take many photos (darn it!). You have to descent a few hundred feet to reach the saddle between Challenger Point and Kit Carson. Then you walk on a wide simple ledge (called Kit Carson Avenue) that wraps around the peak, out of view from Challenger. The ledge is quite comfortable to walk on; if anyone has a fear of heights they should just look forward. But this ledge is wide enough that two people can walk side-by-side (if they are careful) as shown in the photo below.
There is nothing tricky to go around or over on these ledges and it really is Class 1 terrain. It gets even wider once through that notch in the previous photo. You can see how wide it is in the next photo.
You continue to descend along this ledge until you see a cairn that marks the gully to take to the summit. I initially felt the elevation loss was quite annoying but I was pleasantly surprised with how fun the scramble up the gully was; at least the way I went… I’m not sure how the other trip reports or 14ers.com route says to go, but I deliberately took a Class 3 way for fun and put my helmet on because I expected the climbers ahead of us to start their descents. Eric complained about some loose rocks in some places as he tried to keep his scramble at a Class 2. I highly recommend the stable rocks for the descent. The slope of this gully is quite tame so I never felt the exposure, especially as I focused on climbing up to the ridge.
We summited Kit Carson about 1 hour after leaving Challenger, a little after 11 am.
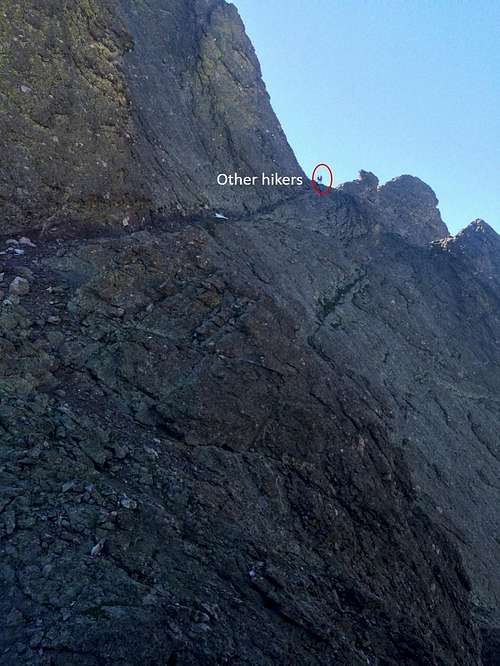
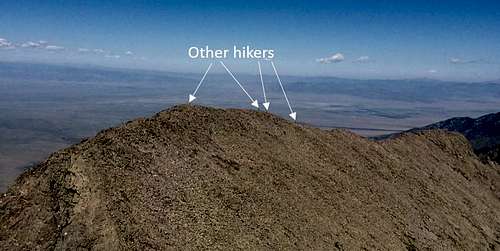
We had a snack, looked at Challenger’s hikers, took some photos and then about 11:30 am we started our descent to camp.
I emphasize the other hikers not because of the lack of solitude that others complain about, but for the safety awareness that is important on these and other mountains. As careful and conscientious as we and (we hope) our fellow hikers are, it is very easy to knock down rocks on them or for them to send our way. This should be considered when planning and timing your hikes.
On the way down Kit Carson I stuck to my Class 3 rock as much as I could until I reached the Avenue. We passed several climbers on their way up. The largest rock I saw knocked down was here and it was due to an adventurous climber going up a wall that was not on the direct route. Fortunately, nobody was in the path of the rock.
Once back at the saddle, I chose to approach Challenger’s ridge via a traverse of the North Slope, instead of going back up to summit. Eric pretty much went back up the way we came down and gained the ridge near the summit. His way may have been better (the grass is always greener, right?) than mine as I constantly worried about a rock fall taking me with it. I may have been needlessly worrying, but if I did it all over again I’d opt for heading back to the summit instead. After waiting for me to catch up on the ridge, we hiked back to the same point of the North Slope ridge where we crossed over in order to start the hike down. By this time we were just above the hikers that were ahead of us including the dude with the dog (now in his backpack). (And safety soapbox speech starts now!) There was something about the defenseless dog that made me even more paranoid about accidentally sending rocks down to them. We gave them what we thought was enough space before starting the journey down. They were going a bit slower than us so we caught up with them and I tried to go down a different way in order to avoid them… that is when I saw the biggest rock that I knocked down! My side-routing was not such a good idea afterall as I discovered more challenging terrain. Again, fortunately nobody was in the path of the rock. Watching out for climbers beneath you is necessary, but trying to find a route to avoid them can also be dangerous. At some point the guy with the dog took a break and we were allowed to pass him. My suggestion is to let those hikers that are faster than you pass you up and then wait a while to allow for a safe distance. And while I love seeing dogs on 14ers, please consider the situation you are putting your dog in – I’m just not sure they have the same situational awareness about their safety and falling rocks, and their helmetless heads are a lot closer to the tumbling rocks than ours are. Thanks to the other couple we eventually caught up with - they let us pass as soon as we were near them. (End of safety soapbox speech).
We were relieved to get off that slope and back on the flatter terrain, a nice relief for my leg muscles! The welcoming view of Willow Lake from above was breathtaking.
Once you get to the headwall you have to cross the creek again. With tired legs I wasn’t sure I could trust, I borrowed Eric’s trekking poles just to make sure I didn’t go swimming in the creek. Eric had no problem jumping across and I probably would have been fine without the poles... maybe.
We took one last look above the lake’s high waterfall before heading to camp.
We arrived to the camp site by 1:30 pm. After eating a snack and resting we broke down camp and hit the trail at 2:40pm. This is the only time I needed insect repellant; it took two mosquito bites (one of which I discovered later…) before I decided to finally apply it.
We made our way in the warm afternoon back down all those switchbacks. We passed lots of hikers on their way up. That short ascent I was dreading 24 hours earlier was not at all bad, and it was actually a refreshing break from the downhill walk. We were back to the trailhead by 5:10 pm with tired legs!
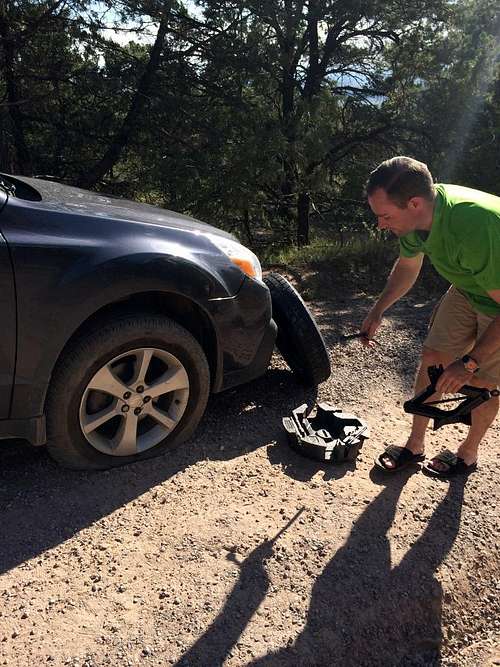
My trip report should end here but unfortunately our adventure continued. The road to the trailhead is considered Class 2, only because it’s not paved. While avoiding ruts in the middle of the road, we veered too far over and struck a large rock. Fortunately the weather was nice, we were able to get to a flat spot in the road (almost to shade even!), and Eric is handy at changing flat tires! Glad the spare tire was able to handle the road!
And hopefully we didn’t piss off too many people on our <60mph drive back to Denver! So comes to a close another beautiful Colorado weekend for EricD and me.