
-
 19001 Hits
-
 90.48% Score
-
 32 Votes
|
|
Route |
|---|---|
|
|
46.58699°N / 12.28636°E |
|
|
Hiking, Scrambling, Via Ferrata |
|
|
Summer, Fall |
|
|
A long day |
|
|
Easy Via Ferrata |
|
|
Overview
 Cime Cadin dei Tocci with Rif. Fonda Savio to the left Cime Cadin dei Tocci with Rif. Fonda Savio to the left |
You will find Sentiero Bonacossa in most guidebooks about the eastern Dolomites graded as an easy via ferrata. However, protection on the trail is scarce and except for a few ladders not strictly necessary. On the ground - on signposts and markers - it goes as Sentiero attrezzato, a protected trail and this is rather more fitting. Still, don't expect easy going, there are some outright dangerous sections. But more in a moment.
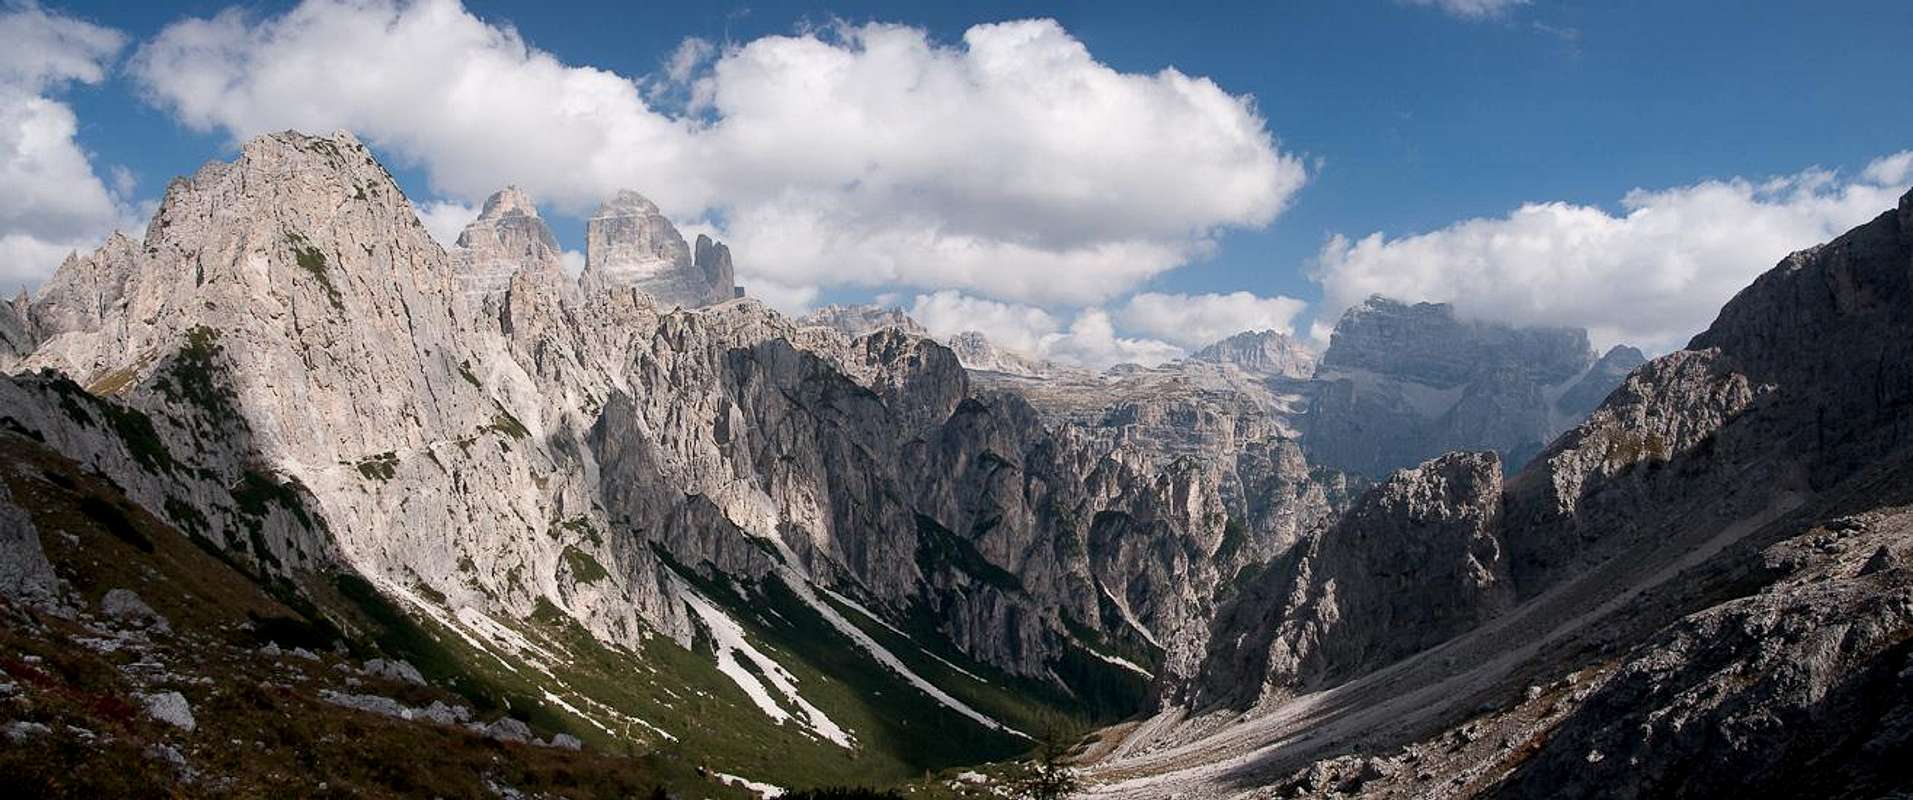
Sentiero Bonacossa runs along the western and northern parts of the Cadini di Misurina, a small mountain group, made up from numerous bizarre towers and spires. The trail is usually started at Misurina Lake in the south and ends at Rifugio Auronzo at the southern base of Drei Zinnen / Tre Cime. It is often called the most wonderful hiking route in a stunningly beautiful area. And it certainly comes close.
Usually the route is divided into two sections, a southern and a northern one. The obvious separator is at Rifugio Fonda Savio, close to which two hiking trails can serve as exits from Sentiero Bonacossa. In guidebooks the southern part of the route is considered to be the easier one which can be misleading. Ferrata guidebooks usually rate ferrate only from their protected sections, ignoring the route difficulties in between. On Sentiero Bonacossa the northern part boasts a 40m near vertical step, which has to be scaled with the help of ladders and cables. Thanks to the protection this section is easy but rather exposed. In the southern part all you do is scramble across steep saddles. Here the lack of protection together with huge amounts of scree turn the descents into dangerous undertakings. Moreover, in one place at Forcella di Misurina, rockfalls have taken away much of the protection, damaging the little which remains.
Even so, if you happen to be in the area on a fine day - don't hesitate to hike the route. You won't regret it...
Getting There
  |
Sentiero Bonacossa can be started either at the southern end of Misurina lake or at Rifugio Auronzo at the base of Drei Zinnen / Tre Cime. Since there is a toll to pay for the road to the Auronzo Hut, most hikers start at the lake.
From Veneto
- Take motorway A27 from Venezia (Venice) to Ponte nelle Alpi
- Take SS51 (Alemagna) to Cortina d'Ampezzo
- Take SR48 across Passo Tre Croci
- Turn left on SP49 to Misurina Lake
- Park near the cable-car at the southern end of the lake or take the toll road to Rif. Auronzo from the northern end
From Südtirol / Alto Adige
- Take Brenner motorway A22 to Bressanone (Brixen)
- Take SS49 through Val Pusteria (Pustertal) until you reach Dobbiaco (Toblach)
- Turn south onto SS51 to Cortina d'Ampezzo.
- At Carbonin (Schluderbach) turn left onto SS48bis to Misurina.
From Trentino
- Take Brenner motorway A22 to Trento
- Take SS621 or SP71 into Val di Fassa
- Take SS48 across Passo Pordoi to Arabba
- Stay on SS48 and drive across Passo Falzarego to Cortina
- Take SR48 across Passo Tre Croci
- Turn left on SP49 to Misurina Lake
Route Statistics
 Route Statistics Sentiero Bonacossa
- Start altitude: 1750m
- Highest point: 2500m (Forcella di Diavolo)
- Prevailing exposure: All directions
- Type: Hike / Ferrata
- Protection: Several cables and ladders
Southern Part
Stage 1: Lago di Misurina - Rifugio Col de Varda
 Drei Zinnen / Tre Cime mirrored in Lago di Misurina
Strictly speaking, this stage is not part of Sentiero Bonacossa. However, to reach the starting point at Col de Varda (2115m) something has to be done. The easiest and quickest way to reach the rifugio is to use the chair/ski lift from the southern end of Lago di Misurina (1750m) to the trailhead. However, the lift starts operation only at 9 a.m. so that early birds need to get by without it. Moreover it is only oprerated during the ski and summer season and closes down after the first weekend in September.
 |
There is a maintenance road, which leads to Rifugio Col de Varda and which starts a bit to the south of the ski lift. It winds its way up the slopes in wide sweeping curves, several times crossing the ski run which the lift serves in winter. At 1800m you reach an intersection. The right hand trail leads to Rifugio Citta di Carpi and Sentiero Durissini (see last section). Turn left and you'll reach the rifugio in 15 further minutes.
Stage 2: Rifugio Col de Varda - Forcella di Misurina
 Signpost for the Sentiero
From the Rifugio (2115m) follow the signposts (marked 117) to Sentiero Bonacossa. A big memorial for Alberto Bonacossa (famous Italian sportsman) can be found at the starting point. The first few steps are a bit ambiguous as the path winds through a patch of dwarf pines but since further on the trail is plainly visible, you can simply aim for it.
 |
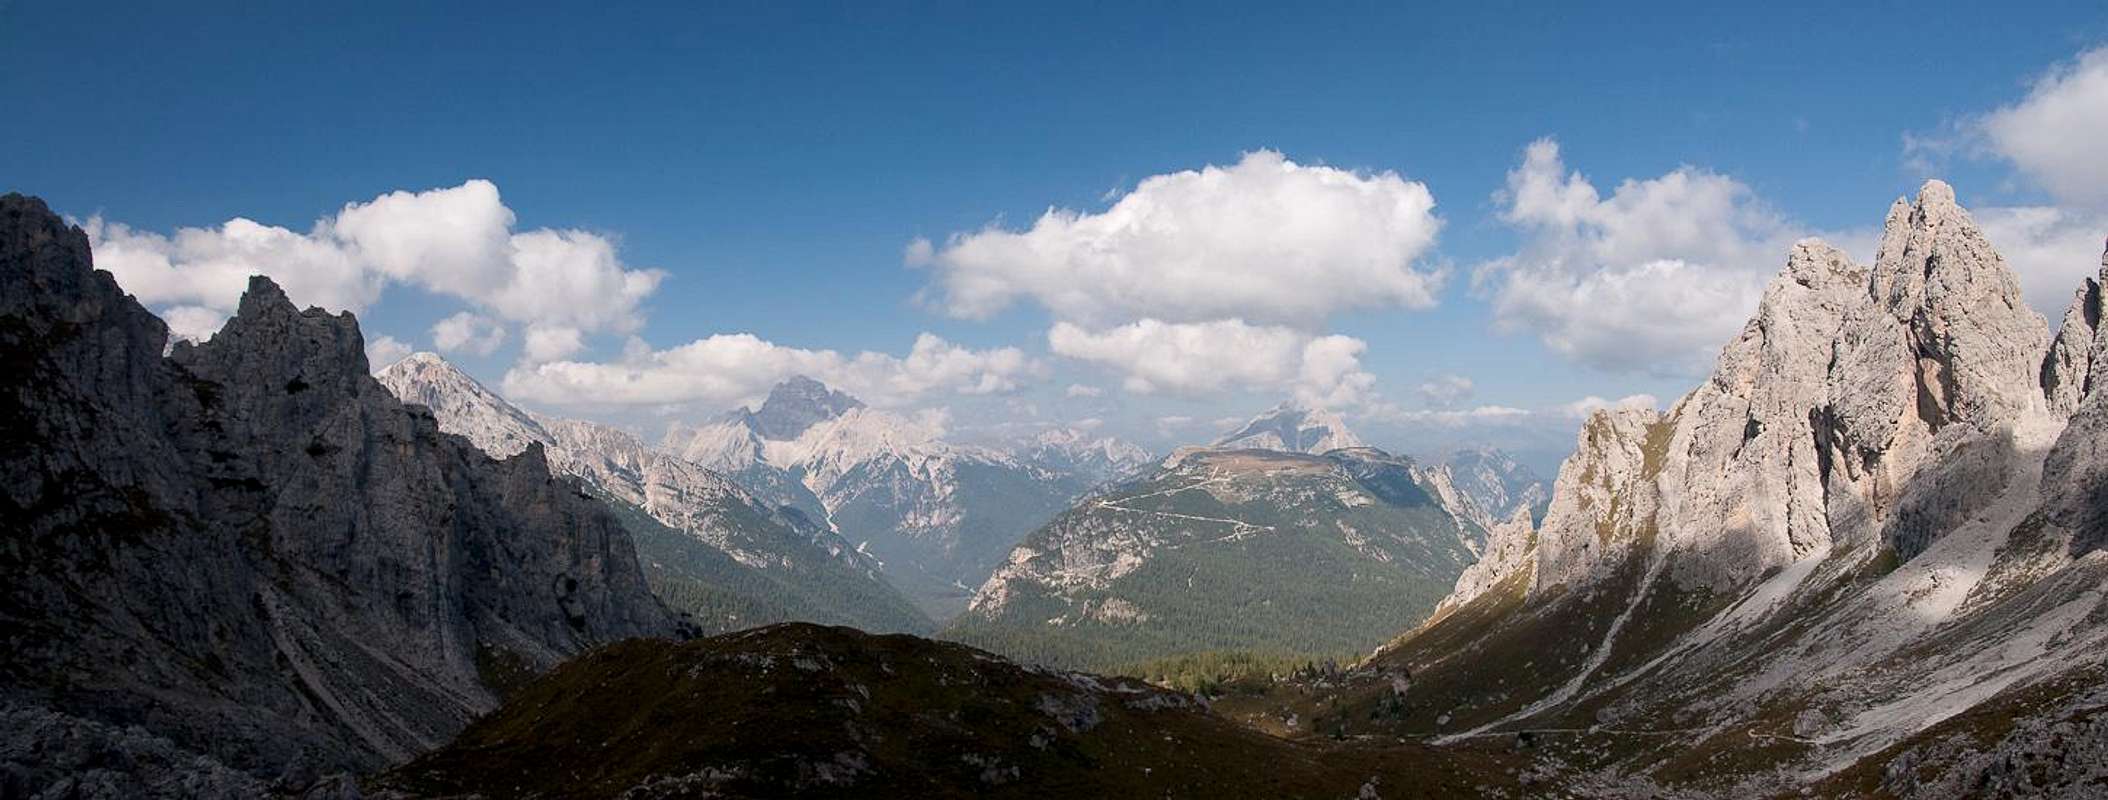
The path gradually rises in direction of Forcella di Misurina (2395m), offering wonderful views down to Lago di Misurina and the Cristallo Group in the west. The path crosses a huge scree and a look behind reveals the Sorapis Group, Croda da Lago and Marmolada. As the path draws close to the forcella, it reveals a very steep scree covered gully. The path heads up on the right hand side with a short 5m cable for protection. Be prepared for breathtaking views from the pass: Sorapis in your back, Drei Zinnen / Tre Cime up front.
 |  |  |
Stage 3: Forcella di Misurina - Cadin della Neve
You are now entering the most difficult and dangerous section of the route (at least in my book). The path, which leads down into Cadin della Neve, is in a very poor condition. There are cables in many places but they often lie at your feet while some of the bolts have already been torn out. There used to be two ladders protecting the descent but rockfall has done away with them (as you can see by the jumbled metal debris beside the route.
The topmost part of the descent is relatively well protected. A cable guides you down for some 50m. Here, however, a recent rockslide has changed the route completely so that you have to scramble across the gully without protection. The "path" heads for a rib, where further cables (and the distorted former ladders) can be found. Tread with care as the whole area tends to slide away underneath your steps. Finally the rib ends and the path turns right.
 |  |  |
A few ups and downs bring you underneath a rock face where another protected section (cable) leads through a cave like overhang. The path is very steep but well protected. After the overhang, steep switchbacks finally take you into the centre of Cadin della Neve (2150m). Take care here: two trails are visible. Follow the narrower one, which keeps elevation and heads into the Cadin. The other (left hand) one is an escape route, which finally leads back to Lago di Misurina.
Stage 4: Cadin della Neve - Forcella di Diavolo
 Cima Cadin di San Lucano and Satellites
Right in the centre of the Cadin there is another intersection. Trail 118 heads outward from Forcella Cadin della Neve and crosses our path. At the intersection don't follow the marks which force you to scramble across a small pile of rocks. Rather pass this pile on its upper side, where a few switchbacks bring you to the path to Forcella di Diavolo (2498m).
 |  |  |  |
"Switchback" is the term you need to get used to, as the trail winds its way out of the Cadin. This section is one of the highlights of the whole route with the many towers around the forcella contrasting beautifully with the outreaching view through the mouth of the Cadin. As usual in the Cadini, the trail to the forcella gets increasingly steep until finally several large chock stones bar the way. Two ladders lead to a small ledge which negotiates between the chock stones. Then a second set of ladders leads back into the gully to the forcella. Another exceptional saddle view awaits you: Cima Cadin di San Lucano in your back, Cime Cadin dei Tocci and Drei Zinnen / Tre Cime in the front. Take your time to enjoy.
 |  |  |
Stage5: Forcella di Diavolo - Rifugio Fonda Savio
 |  |  |
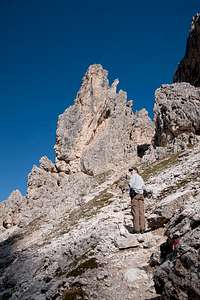
After all this scrambling the next stage turns out to be rather easy. However, the exceptional views turn out to be distracting so please take care. From Forcella di Diavolo a few switchbacks take you to the end of the steep section, from where a scree slope traverse heads into the central part of Cadin di Nevaio. The path is easy, only at its end, where a large step leads into Cadin dei Tocci, the route gets ambiguous. Too many hikers have left too many paths here.
 Cime Cadin dei Tocci
Basically head for the base of a buttress (shadow to the right in the picture above). All of the paths combine there. A short ascent leads across a slightly pronounced saddle and into the centre of Cadin dei Tocci. Here a trail joins from the west, heading up to Rifugio Fonda Savio from the northern tip of Lago di Misurina. The southern part of Sentiero Bonacossa ends here and many hikers use this trail to return to their base. Instead, turn right in direction of the rifugio. A few protected sections lead to the plateau, on which Rifugio Fonda Savio (2367m) has been built. Again there are wonderful views to be enjoyed.
 Rifugio Fonda Savio
Northern Part
Stage 6: Rifugio Fonda Savio - Forcella di Rinbianco
After half a day of (almost) solitude the next part of Sentiero Bonacossa will seem like rush hour on a city highway to you. Naturally Rifugio Fonda Savio, thanks to its beautiful location - is very popular. Moreover, several important hiking routes join close by. Apart from the two branches of Sentiero Bonacossa, Sentiero Durissini joins east of the rifugio and three more hiking trails head up either from Misurina in the west or Auronzo in the east.
 |  |  |
Follow the signs 117 a bit to the south, where the trail heads across a shoulder and down into the topmost Val de le Cianpedele. The route is protected by chains and cables here as it well must be thanks to the polished rocks across which it runs. Further down polished rocks make way for deep scree and finally a snowfield (even in summer) needs to be crossed. Right behind the snowfield Sentiero Durissini turns off to the right and with it much of the crowd that accompanied you from Fonda Savio.
 |
Sentiero Bonacossa follows Val de le Cianpedele and descends rapidly to the base of the valley. Again, the trail is ambiguous - take care not to end in a wrong branch of the valley. It stays on the western slopes of the valley which drops off to the north-east. The path stays more or less level, until it reaches Forcella di Rinbianco (2176m). Here trail no 119 crosses, leading from Cadin di Rinbianco in the west to Val de le Cianpedele in the east.
Stage 7: Forcella di Rinbianco - Monte de le Cianpedele
 |  |  |
From the forcella, at first Sentiero Bonacossa follows a ridge, which heads directly for Cima Cadin de Rinbianco. However, it soon descends to the east, where a beautiful ledge traverse awaits you. The ledge passes the mountain on its eastern side, always high above Val de le Cianpedele. Views open up towards the south-eastern Sexten / Sesto Dolomites while in your back the scenery of the Cadini gains dramatic momentum.
 |  |  |
Finally, the ledge ends. To the left a set of 3 ladders and a lot of cables lead you across a 40m step in the east face of Cima Cadin de le Bisse. The section is very well protected, however, the topmost part can be wet and slippery, especially after a week of rainfalls. It tops out on another airy ledge, from where views are simply breathtaking. The ledge runs through the upper east face of Cima Cadin de le Bisse and finally ends in another (though unnamed) forcella.
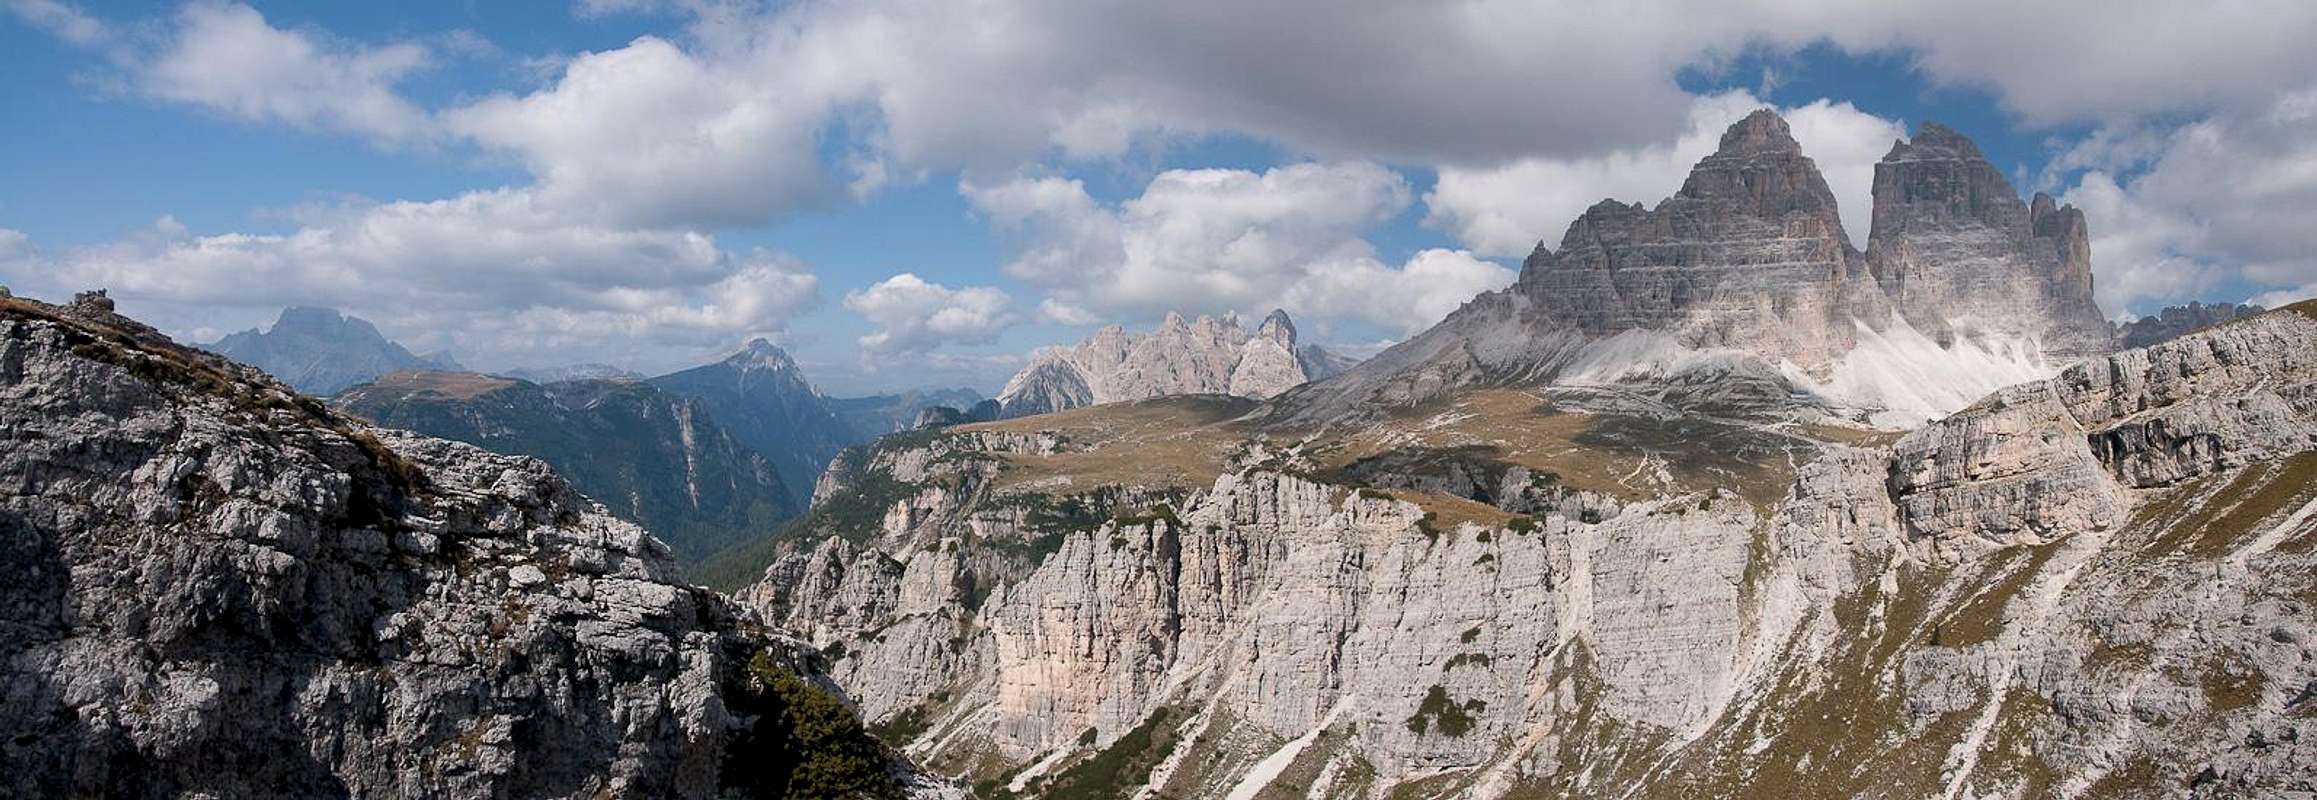 |
Suddenly Drei Zinnen / Tre Cime jump at you as you negotiate the far side of the forcella. There another ledge-like trail awaits you, which takes you through very broken terrain to Monte de le Cianpedelle, a slightly pronounced summit with a huge, broken south face. Several gullies open into Val de le Cianpedele offering wonderful views towards the Cadini di Misurina. The top of Monte de le Cianpedele (2345m) offers a wonderful 360° panorama which you shouldn't miss.
Stage 8: Monte de le Cianpedele - Rifugio Auronzo
 |
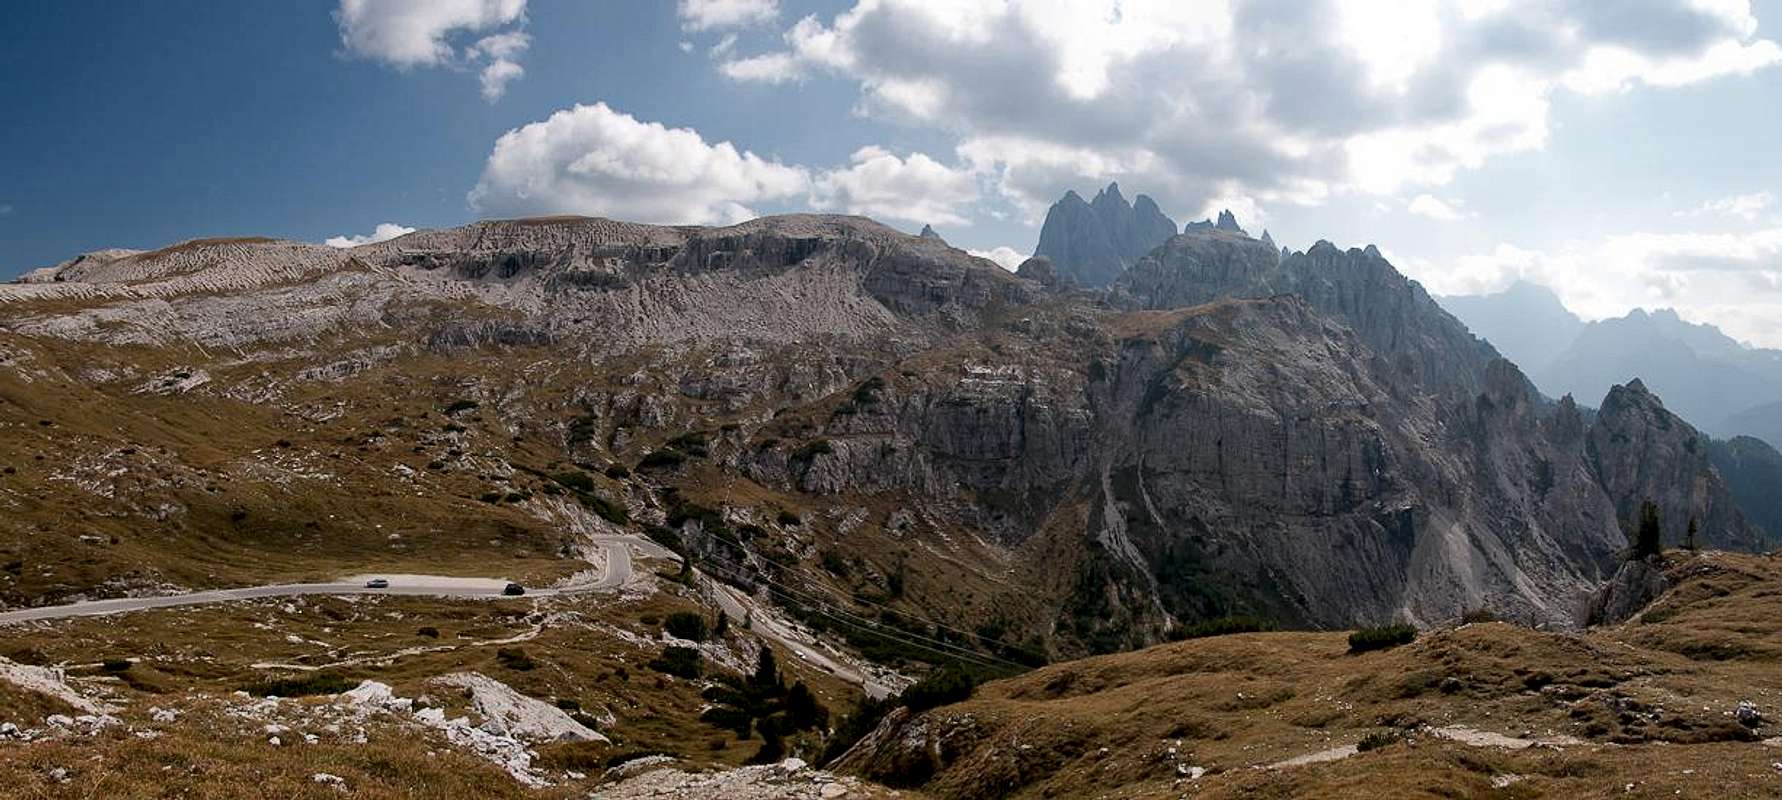
Follow the old WW I trail through the south face of Monte de le Cianpedele. It ends on a high plain which gradually drops to Forcella de Longeres, a slightly pronounced saddle at the southern base of Drei Zinnen /Tre Cime. Follow the final part of the trail, which runs alongside the toll road to Rifugio Auronzo (2320m).
Stage9: Rifugio Auronzo - Lago di Misurina
 |
Though Sentiero Bonacossa ends at Rifugio Auronzo, those who started at Lago di Misurina need to return to their base. The easy and obvious way is to follow the toll road to its end. However, the road is well used so that hiking it is no fun at all. Instead, follow trail 101, which starts some 400m to the south of the rifugio.
The trail cuts short several long bends in the road by steeply descending the slopes to its west. Where it re-joins the road, cross the road, head up a few metres to the left. Here the trail turns to the south-west, negotiating the western slopes of Cima Cadin de le Bisse and Cima Cadin de Rinbianco. It soon plunges into a dense forest. Finally, from the east, trail 119 joins from Forcella Cadin di Rinbianco. The path turns into a dirt road, which joins the toll road south of the toll station.
 Cima Cadin de Rinbianco and Cime Cadin dei Tocci
Again, you have the choice of hiking the road. Rather stay on an unmarked path in its east, which runs in parallel to the road, passing Lago d'Antorno. Where trail 115 joins from Rifugio Fonda Savio you have to hike the road for about 1km until you get to the northern outskirts of Misurina. Here turn onto the road to the left, which leads you to the northern tip of Lago di Misurina (1750m). Follow its eastern shore to the parking lot near the Col de Varda Lift. Enjoy the views.
 The end of the journey - Monte Piana in Lago di Misurina
Essential Gear
If you want, you can use ferrata gear. However, even guidebooks admit that it is of little use on Sentiero Bonacossa. Good, thick soled boots are far more essential.Note
If you can spare a very long day, rather than hiking the southern part of Sentiero Bonacossa, start out towards Rifugio Citta di Carpi and Sentiero Durissini. This route circles the Cadini in the east before joining the Bonacossa route close to Rifugio Fonda Savio. Stay on Bonacossa for the northern part of the sentiero.You won't regret it!