
-
 19001 Hits
-
 84.82% Score
-
 19 Votes
|
|
Route |
|---|---|
|
|
48.68733°N / 120.87158°W |
|
|
Download GPX » View Route on Map |
|
|
Hiking, Mountaineering, Scrambling |
|
|
Summer |
|
|
A few days |
|
|
Glacier Travel and Exposed Loose Rock |
|
|
Class 4 |
|
|
Overview

Climbing near the Summit
 Stormy Atmosphere |  The Approach to Jack |  Steep Rocky Traverse |  Hiking up Crater Mtn. |  Lovely Place to Camp |
 Hiking up Jack |  Lower Section of Crater |  Waterfalls on Crater |  Creek in the Trail |  Thunder Cloud |
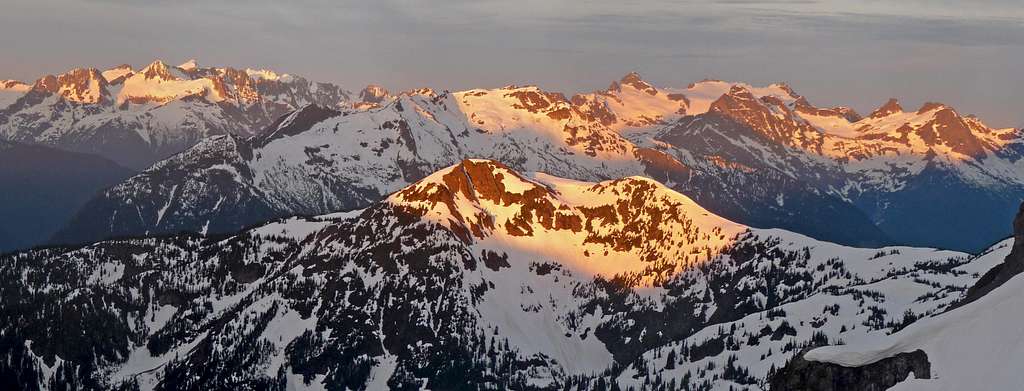
Sunrise from Jack Mountain on July 10, 2011
Getting There

Diablo Lake on the Way
Getting there from Seattle: Drive North on I-5 until you get to Arlington which you take a right at exit 208 onto highway 530. The highway briefly takes a left in down town Arlington onto highway 9 which a few seconds later be sure to turn right back onto highway 530 east to Darrington. At Darrington where the road pretty much ends you take a left onto highway 530 which goes north. In about 19 miles the highway ends, take a right onto highway 20 towards Marblemount. The city of Marblemount is the last place to get food and gas. Keep following highway 20 past Newhalem towards Diablo Lake. At about 10.8 miles past "Thunder Arm" is the trailhead on the left side of the highway. Thunder Arm is the part of the highway where the road goes over Diablo Lake. The trailhead is titled "Canyon Creek trailhead" which there is a nice parking lot (gravel) and a restroom.
Getting there from Mazama (East of Highway 20): Head East on Highway 20 for about 40 miles (depending on your starting location). Right after the highway curves the trailhead will be on your right which it's known as the "Canyon Creek Trailhead".
Route Description
The trip starts out as a casual walk in the woods on flat ground. The trail goes over 2 bridges at the start, after the second one there appears to be a fork in the trail where they go opposite directions. Be sure to go right here. As you hike up the trail you'll start to see fallen over trees that you have to duck under or climb over. This marks the beginning of the 62 switch backs up to "Crater Lake" with about 3,900 feet of gain.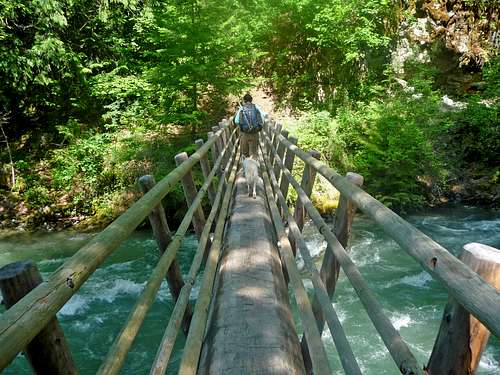
The 2nd Bridge Crossing
On the way up you can look down below and see highway 20. Later on up the trail you come across a large creek which requires you to take off your shoes for crossing it. So cold, but so refreshing. Later on the trail gets muddy in spots making approach shoe hikers have to be careful. Shortly after this the trail forks, take the left fork towards "Crater Lake". You will see a big nail in a tree at the fork. With just a little more hiking you arrive to the end of the trail part of the trip at Crater Lake.
 Popping out of the Clouds |  Washington Pass Area |  Highway 20 Down Below |  A Very Gloomy Atmosphere |
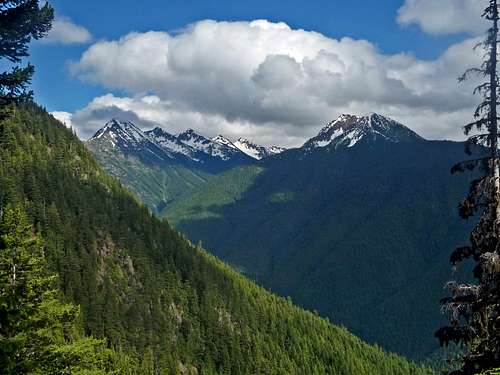
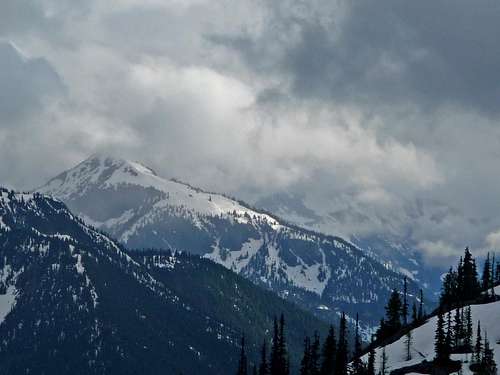
Majestic Mountain in Great Weather
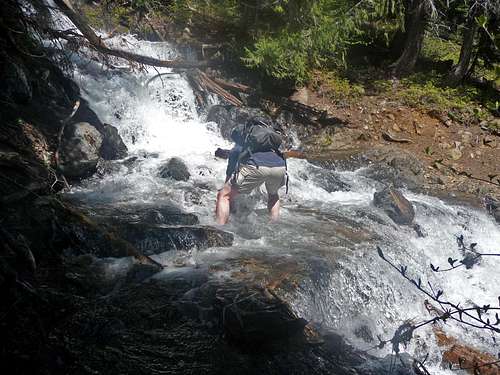
Crossing the Large Creek
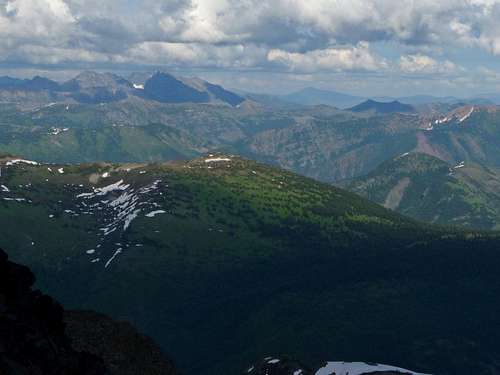
Views to the South
At the lake head to the right as you go up towards the Jerry Glacier Saddle. Depending on your route finding you may end up on class 3 terrain, or get lucky and get tedious class 2. Either way, it's no big deal. You'll have a little bit of traveling though trees to avoid the cliffier places. After this, the traveling gets easier and traverses to the left as you go up towards the Saddle. At the Saddle take a rest and rope up for the Jerry Glacier.
 Looking toward Crater Lake |  Scrambling above the Lake |  Kimtah and Cosho Peak |  Heading towards the Saddle |
 Waterfalls on Crater |  Looking up at Crater |  Jack With Wavy Clouds |  Jackita Ridge during Evening |
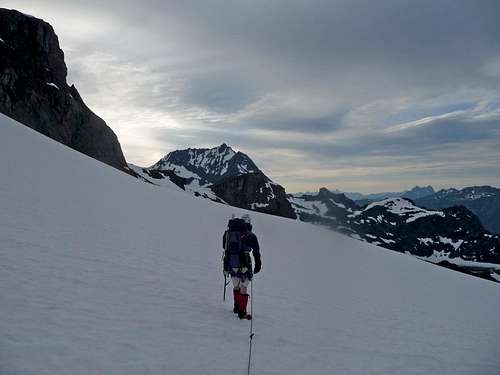
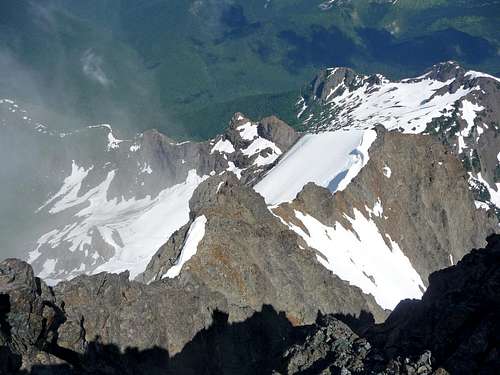
Hiking on the Jerry Glacier
The upper west part of the Jerry Glacier seemed to have the most crevasses so to make the traveling as safe as possible head down with a slight westward direction, but not too much west. Once you get down to the lower Jerry Glacier traverse over to the saddle above the Jerry Lakes. Getting to the lakes is straight forward, aim for the spot between the 2 big lakes. Inside the trees is a hidden mini lake that has a good flat camp spot.
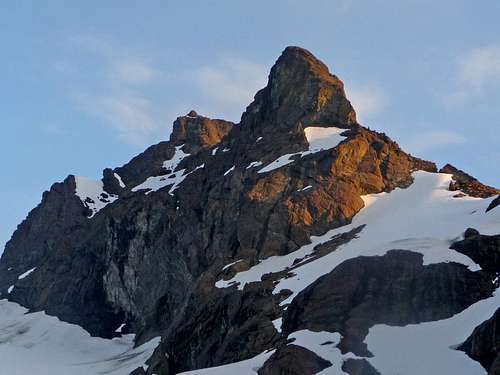
Alpenglow on Crater Mountain
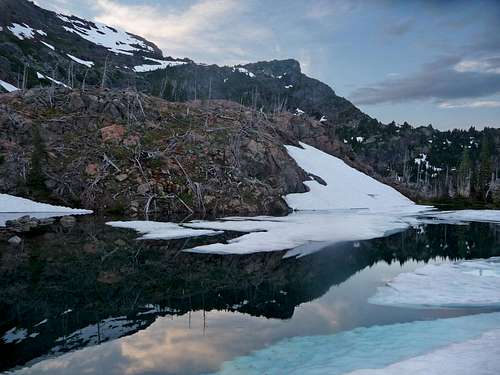
Jerry Lake Reflection
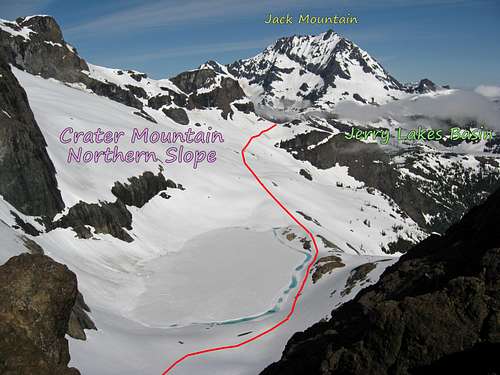
From the mini lake, go a little bit left towards the big lake on the left and follow it's shore towards the right. Once past the lake ascend the snowfield up towards the saddle but staying to the right. Near the top it becomes steep, ascent to the left just below the snow on dirt ground. Then go up to get to the saddle. At the saddle head down to the right towards Jack Mountain.
 Crater Mountain's Summit |  Crater Mountain Clearing Up |  Scrambling Up |  Hiking up to the Saddle |

Diagram of the Route to the Saddle from the Lake
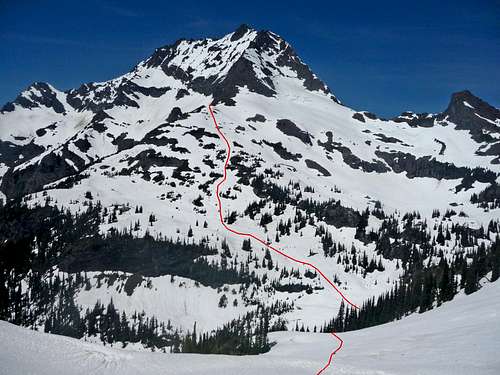
Diagram View from the Saddle looking at Jack Mountain
If the snow is melted out, there may be some bushes that you have to hike though. Be sure to aim for the flat section and not too far to the right. At the bottom you finally set foot on Jack Mountain. To avoid going though trees go left and follow snow where ever you see it. Eventually you cut back right going though a little bit of trees to get to the main snow slope that has a saddle looking formation above. After this it goes to the first major snowfield on Jack Mountain.
 Crater's West Face |  Point 7292 |  Waterfalls on Jack |  Jackita Ridge Below |
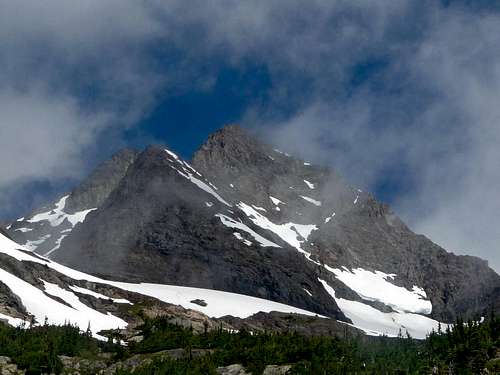
Jack Mountain Clearing Up
Just before the first Major Snowfield
The first Snowfield on Jack Mountain
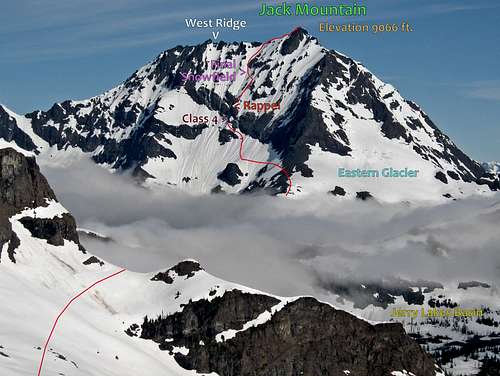
Jack Mountain South Face Diagram
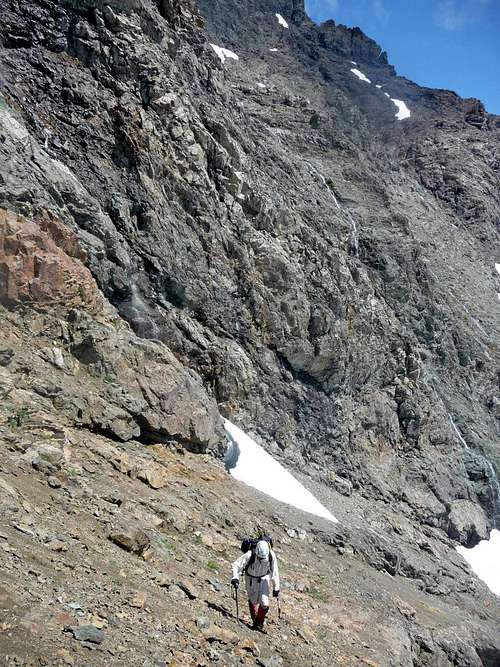
Carefully traverse the snowfield until you get below a large rock that splits the snowfield (see diagram above). Head up towards the cliffs and mini waterfall and take a left. The route goes off the snowfield and wraps around a large corner. In later season it's loose class 2, in early July it's snow covered. Around the corner you have a choice of up or around. Either way works, but the scramble up is better which is one move of class 3. You may see a few cairns to help guide the way as you go up. After a few hundred feet it becomes class 3 which leads up to the class 4 section.
Looking Down from the First Major Snowfield
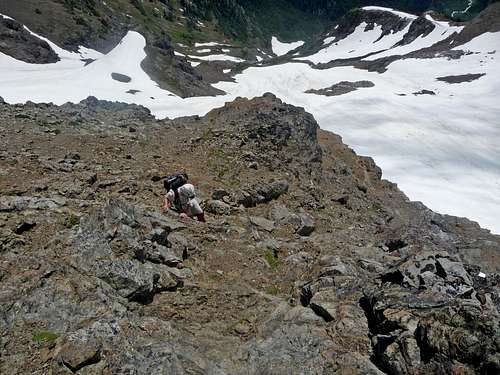
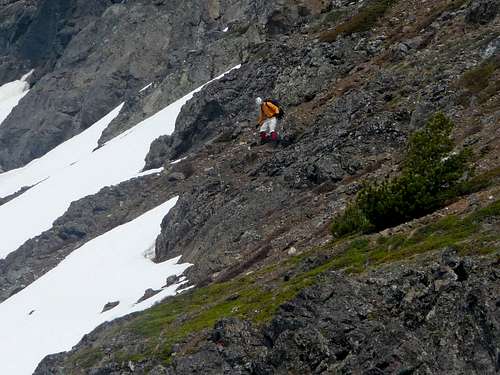
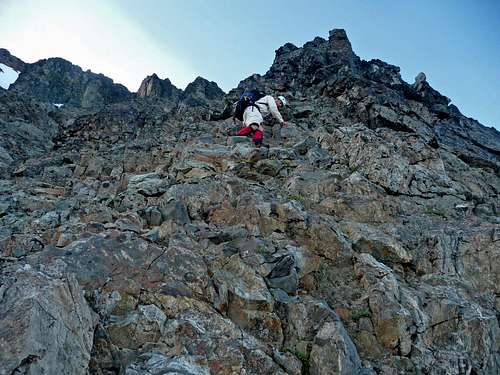
Class 3 Scrambling
Looking up Jack Mountain
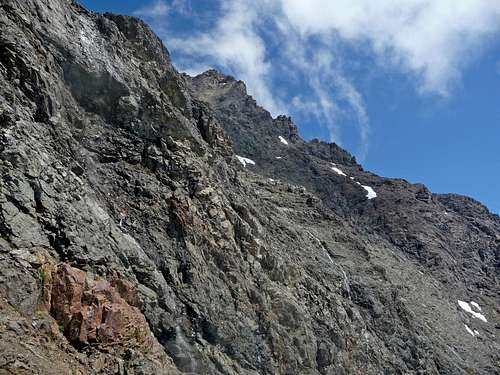
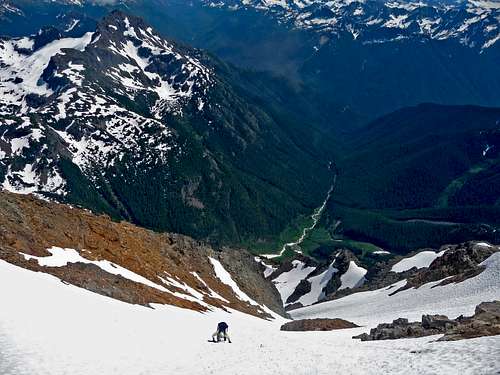
Be very careful here, this is where there is loose rock, high exposure, and tedious holds. This section is mostly traversing which it is often best to stay near the edge where the foot holds are better, but is scarier. This is the crux of the entire climb.
 Hiking Above the First Snowfield | 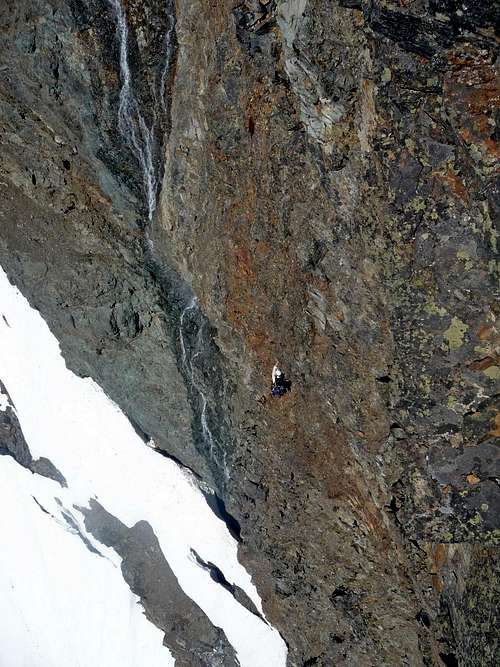 Class 4 Traverse |
After the class 4 section the route gets some what ridge like ranging between class 2 and 3. Eventually you want to be on the snowfield on the left. When I was here it was best to find a snow section that traversed to the left snowfield by going slightly downward.
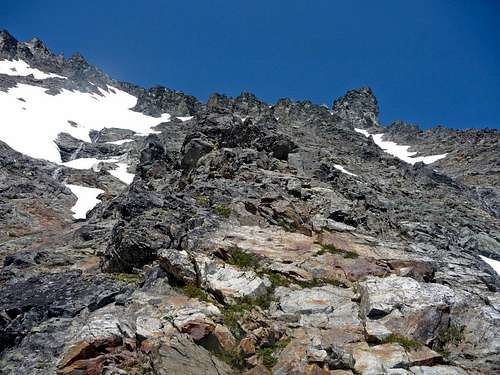
The Ridge Up
Hiking on the upper Mountain
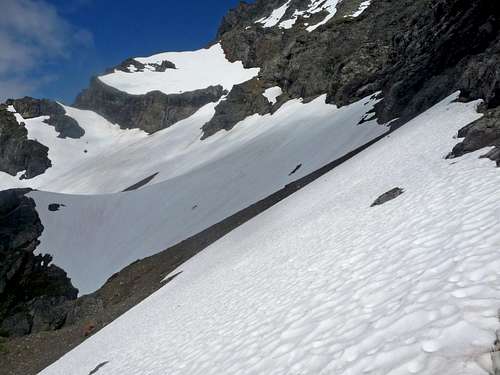
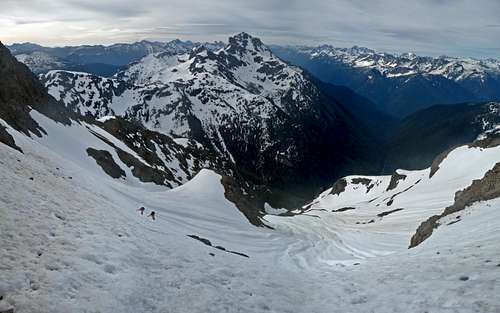
Once on the snowfield head up all the way to the ridge. The route curves a little but is very straight forward. You will most likely have a lot of snow kicking and ice axe placements. This section when snow covered is exhilarating. Some of the best snow climbing I've ever had. Just below the top is where you take off your crampons and scramble onto the ridge.
Climbing the Final Snowfield
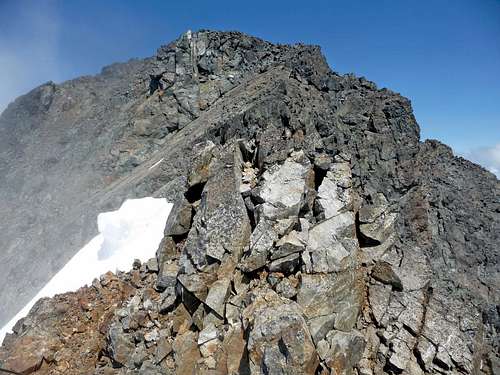
The Summit Ridge
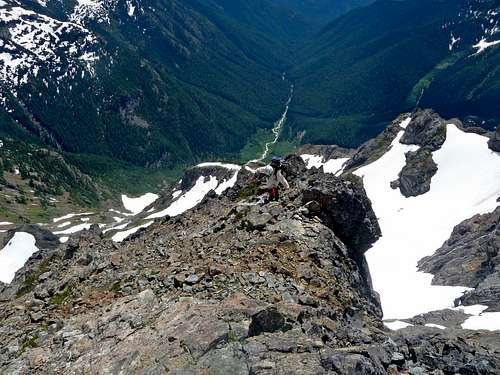
The summit ridge is easy going and goes east towards the gentle summit of Jack Mountain. Below you will see the massive Nohokomeen Glacier. The last section is almost ramp like until you arrive on the summit. The views from the top are quite rewarding, but the accomplishment itself surpasses the views. There is plenty of room on top, I could not find a summit register.
 Nohokomeen Glacier |  Snowfield Peak with Clouds |  Snow Patch near the Top |  The Last few Steps |
 Mount Logan's North Face |  Mount Buckner |  Black Peak to the South |  Pyrimid Peak with Clouds |
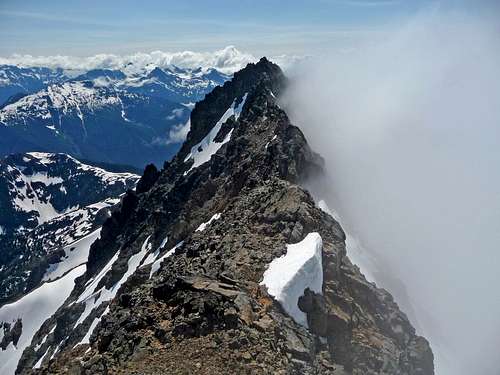
Jack Mountain's West Ridge
Cloudy Atmosphere over Forbidden Peak
Looking Down the East Side
Descending
Getting down this mountain is more dangerous than going up. The ridge down is an easy scramble to the snowfield. At the snowfield carefully down climb while plunging in your axe(s) and kicking your steps in well. It is advised that you make good time going down to escape night fall and avoid an unpleasant bivy. There is a place to fill your water in later season near the turn off from the snowfield. Keep in mind it's a little dangerous to get to. As you scramble down be mindful about your partner with knocking down rocks. Unfortunately it is pretty much inevitable to knock rocks down, so keep your partner close. After carefully scrambling down you arrive at the rappel section. Forbidden Cleared Up |  Golden Horn and the Needles |  Traverse Section |  Light Clouds during Evening |
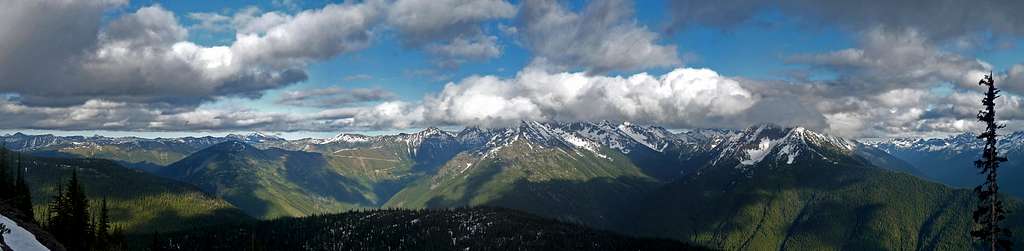
Green Scenery in the Pasayten Wilderness

Mount Goode to the South
This is by far the sketchiest rappel I've ever done. Make sure you have at least 45 meters of rope, our 30 meter rope left us having to down climb the final section. Make sure the sling is on good considering that it slides a bit. You may have to go right, cross a overhanging ledge while holding the brake hand, and then proceed with the rappel. It's not as easy as it sounds. There is a very good chance that you'll knock rocks down which you should be careful about it hitting the rope below. At the bottom either down climb the last class 4 bit or if your beyond that down climb the class 3 section.
Scrambling Down
From here the rest of the route is straight forward, go back the way that you came.
Route Variation
There is an alternative route for those who do not feel comfortable with glacier travel or simply want to go up another way. Technically speaking this route will make a rope not required. However, it would be a good idea for the rappel section on the upper part of Jack Mountain. The main difference with this variation is that instead of going over the Jerry Glacier saddle, it goes around Crater Mountain. This unfortunately adds more distance and more elevation gain.Here's a map of the Variation:
The route starts out on the crater mountain trail going up to "Crater Lake" (just like the standard route). Because it was snow covered both times I was here I'm not entirely sure if the turn off is at the lake or just before it. Either way it will be totally obvious if not snow covered. And if it is snow covered, the trail wouldn't do you any good anyways. The trail goes northeast towards a point called "Lookout No. 2" (point 7,054). This is a good place to camp if needed.
 Heading up to Point 7054 | 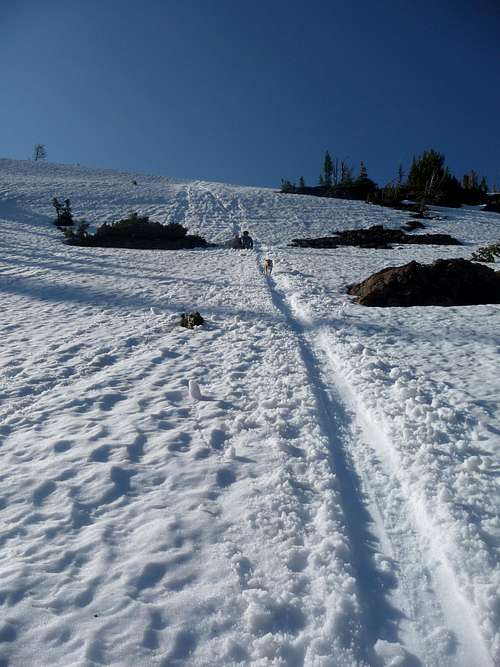 Glissading down the Mountain |
 Traversing Crater Mountain |  Hiking up Crater Mountain |  Looking Down to the Lake |  Morning Clouds on Crater |
The Second Part of the Route Diagram
Walk west along the ridge for a short distance until you find a good place to decent down towards a small lake below. Be sure to go around it on the right side (north eastern). Then traverse your way across Crater Mountain heading slightly north and going west. This will take you to a saddle just above Jerry Lakes. From here you are back on the standard route.
Red Tape

Filtering Water below Crater Mountain

The Lake below Jerry Glacier
The Marblemount visitor center can be reached at 206-386-4495 ext.11. During the winter months it may be more difficult to contact them over the phone which has been my experience. You can also contact them on the Nation Park Service Website.
Water Sources: Water can be found at many places on this route. The first water sources are near the trail at either of the 2 bridge crossings. Further up the trail are two creek crossings. The next water source is "Crater Lake". Above that you might find streams if you look around. The next major water source is Jerry Lakes. After that is at the bottom of Jack Mountain where there are mini waterfalls. Beyond here it becomes more difficult to find reliable water sources. Either use snow or find a water source on the upper mountain if available.
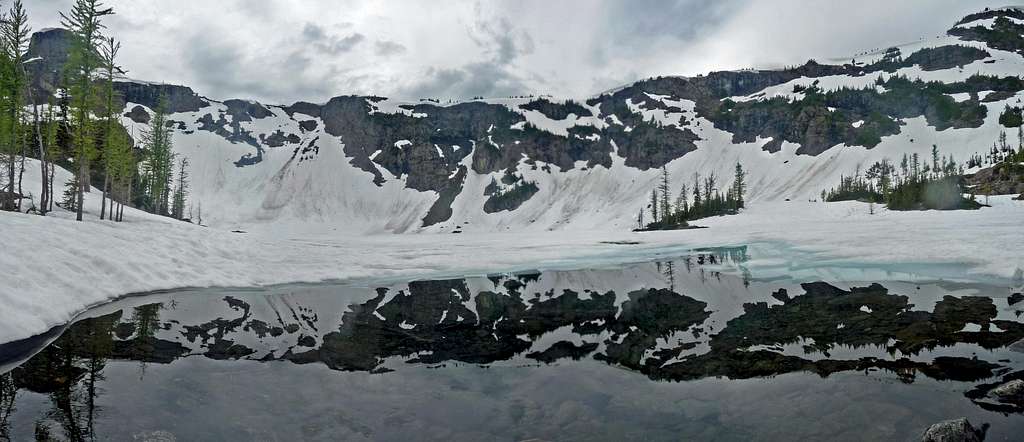
Crater Mountain Reflection from Jerry Lake
Camping

Camping near Jerry Lake

Spots near "Crater Lake"
Hazards

Jack's Steep Face

Down Climbing Steep Snow
2) Rock Fall - Jack has a reputation for it's loose rock. Some places are quite nice, but others not so much. On the class 4 section the rock is crumbly and loose. Rocks from the upper mountain come showering down making a helmet a required piece of equipment.
3) Glacier Travel - Watch for crevasses on the Jerry Glacier. They may not be many, but they are still there. Hidden with hunger, ready to strike when you least expect it... ok maybe not quite that bad. But still watch out for them!
4) Unexpected Bivying - You never know what can happen on this mountain, so be prepared for a emergency bivy. It's more likely to happen than you might think on this mountain. All night long I was shivering wishing I had my long pants, don't make the same mistake I did.
When to Climb

Stormy Weather over Jack

Above the Clouds
Mountain Conditions

Jack Covered in Clouds

Storm Coming In
For current weather information on Jack Mountain check in with the Noaa Forecast.
For Avalanche Conditions, check in with the Northwest Avalanche Center. (Limited based on the season)
Check in with the WSDOT Website for more information on the current road conditions for Highway 20.
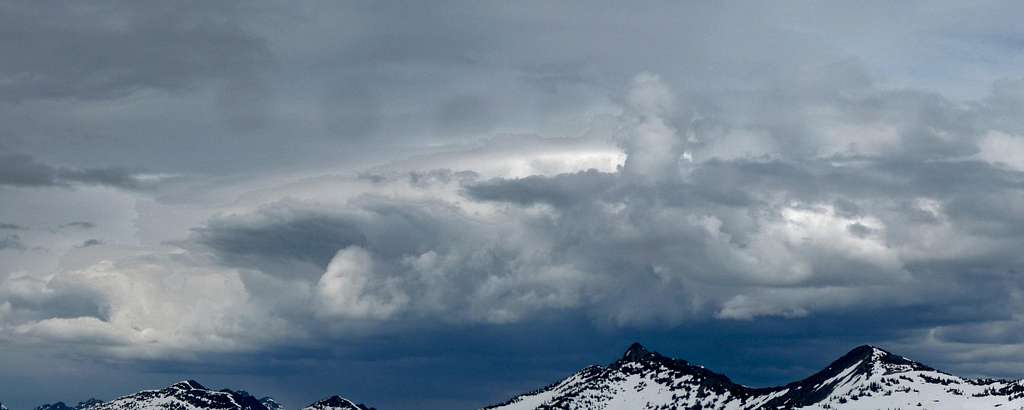
Thunder Clouds Building Up over the Pasayten Wilderness
Gear for the Climb
Wearing a Jacket

Using a Rope

Ice Axe, Gators, and Glasses

Using an Ice Tool
Mandatory Gear for the Climb:
- Ice Axe
- Crampons
- Helmet
- Rope (60 Meter)
- Glacier Rescue Gear (prusiks, carabiners, rappel device, ect.)
- 2 Snow Pickets (for standard glacier travel)
- Shell Jacket
- 2-3 Liters of Water Per Person
- First Aid Kit
- Glacier Glasses/Goggles
- Full Scale Mountaineering Boots (or plastics if your up to it)
- Plenty of Food
Recommended Extras:
- Nylon Shell Pants
- Sun Screen
- Map and Compass
- Long and Short Sleeve Shirt
Overnight Gear:
- Tent/Bivy
- Sleeping Bag
- Ground Pad
- Water Filter/Tablets
- Stove, Fuel, Pot, and utensils (for cooking)
Optional Gear:
- Bug Spray (Mosquitoes near the Lakes)
- Camera
- Cover for your Backpack
- Tooth Brush and Paste
- Shorts
- Approach Shoes
- Toilet Paper/Blue Bag
- Trekking Polls
- GPS
An Ice Tool is also recommended for the upper slopes of Jack for extra support.
Topographic Maps
 Jack Mountain Topographic Map | 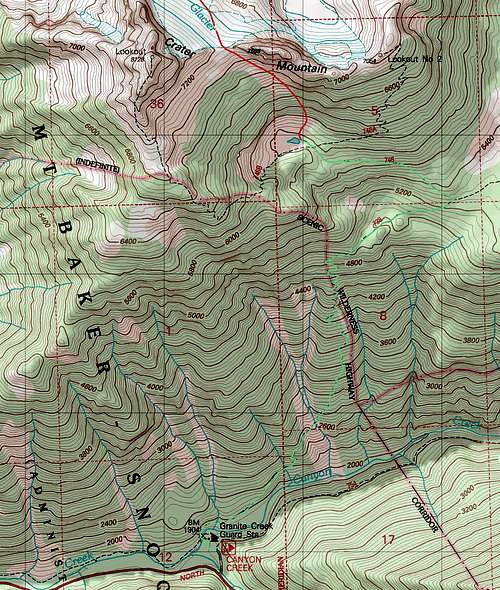 Crater Mountain Topographic Map |
Sunsets and Sunrises
 Alpenglow on Jack |  Forbidden Peak during Sunrise |  Pink Sky from Camp |  Sunrise to the South |
 Jack Mountain during Morning |  Sunset on Crater Mountain |  Jack's East Face |  Sunset to the North |

Morning Sunrise over the Pasayten Wilderness
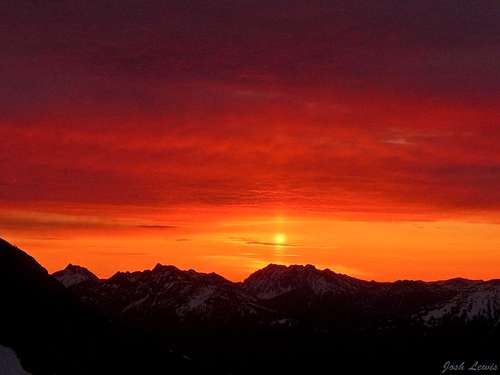
A Beautiful Morning on Jack Mountain
Views from Jack
The Views to the East from Point 7054
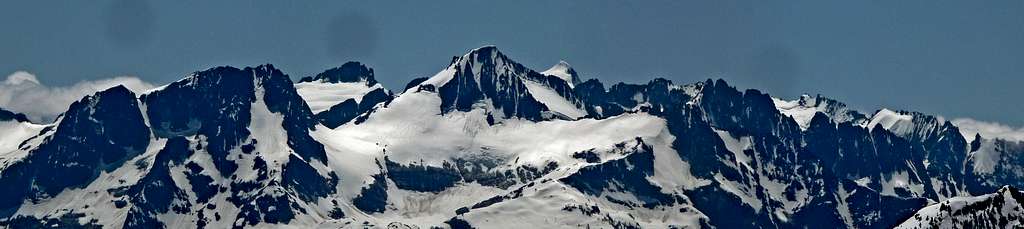
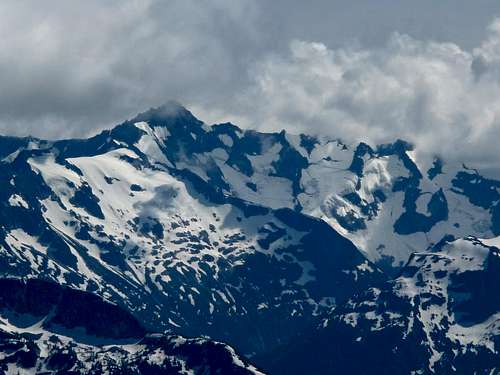
Tricouni, Eldorado, and Austera Peak
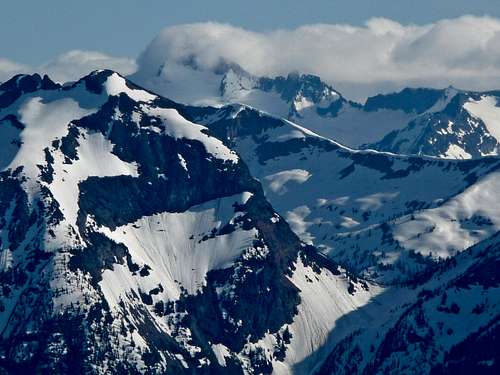
Apple and Boston Peak
Wildlife and Flowers
 Red Flower |  Purple Flowers |  Grass Hopper |  Orange Flower |
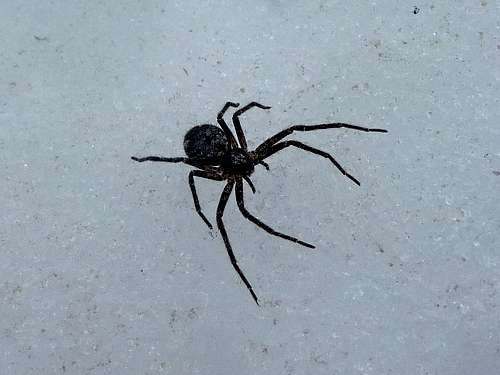
Spider on the Snow
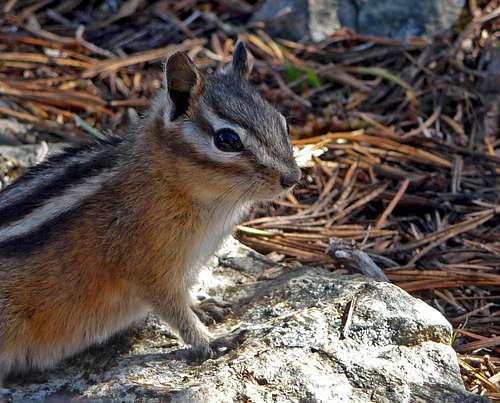
Cute Ground Squirrel
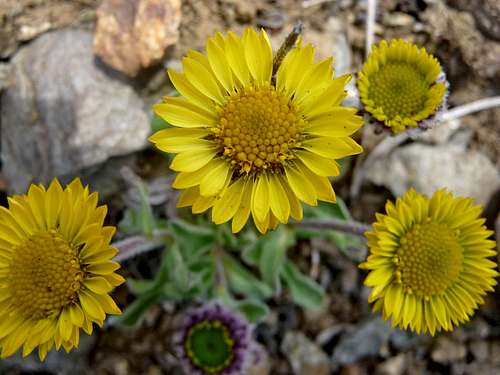
Yellow Flowers at Camp 3
Video Documentary
A 4 Day Climb up Jack Mountain. This video shows some scenery along the way.
External Links
- 8/11/2012 on CC - This trip report describes a short cut variation. Not exactly easy, but it does save elevation gain.
- 9/13-14/08 on NWhikers - Shows the route in late season with some nice pictures.
- 9/26/2004 on CC - This report shows a few diagrams with a brief story of the climb.
- Sept 21-23, 2002 on EBC - A well detailed trip report of the climb. In the report they mentioned skipping the rappel because of loose rock. Rappelling should be completely based on whether you feel comfortable down climbing this section.