
-
 729 Hits
-
 72.08% Score
-
 2 Votes
|
|
Route |
|---|---|
|
|
43.65927°N / 110.82182°W |
|
|
Trad Climbing |
|
|
Summer |
|
|
Most of a day |
|
|
5.10 (YDS) |
|
|
3 |
|
|
Overview/Approach

Despite being published as a 5-pitch route, more experienced climbers who establish routes would consider the last two pitches contrived. You have to cross a treed gully to reach them and they are not really in keeping with the line or the grade of the crux pitches below. I recommend completing this route as an add-on to the Snaz for the competent fast team, or a short climb for folks camping in the meadows below.
Park at the Death Canyon trailhead in Grand Teton National Park. You can make it there with any vehicle but there are bumps in the road. There is a rest room at the trailhead. Hike up Death Canyon trail for over three miles to reach a climbers trail to the base of Cathedral Buttress. After the initial ascent from the parking, the Death Canyon trail practically descends all the way to Phelps Lake to access the mouth of the canyon, then starts ascending long switchbacks to the top of the drainage. Near the end where it levels off, there is a climber’s trail on your right that takes mini switch backs up to the base of Cathedral Buttress for the Snaz route. Most approach beta, MP.com particularly, make this approach seem more complicated than it really is. Don’t worry about counting switchbacks or “corners”. Just hike past multiple buttresses on your right, on the trail. The last one is the largest, this is Cathedral Buttress.
The additional approach required to reach Aerial Boundaries, as described on MP.com and the local guide book, leaves much to be desired. There is no need to hike from where the Snaz approach trail leaves the main trail into Death Canyon to the “meadows” or ranger cabin (as MP.com suggests). Rather, in short order from where the Snaz approach trail leaves the Death Canyon trail, continue up the main trail along the creek and look for a grassy steep drainage on your right (cairn 2022). Hike up this grassy drainage avoiding the boulder field to the west. Turn right onto a ramp below the southwest corner of Cathedral Buttress. Scramble along and up this treed ramp until below the obvious red flake that marks the start of the first pitch.
Route Description
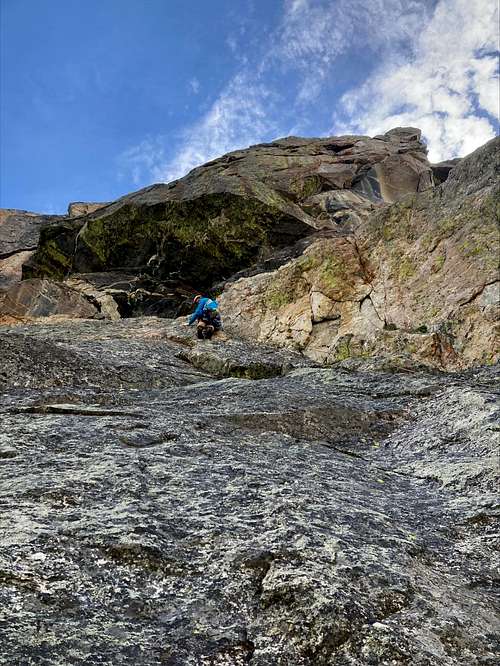
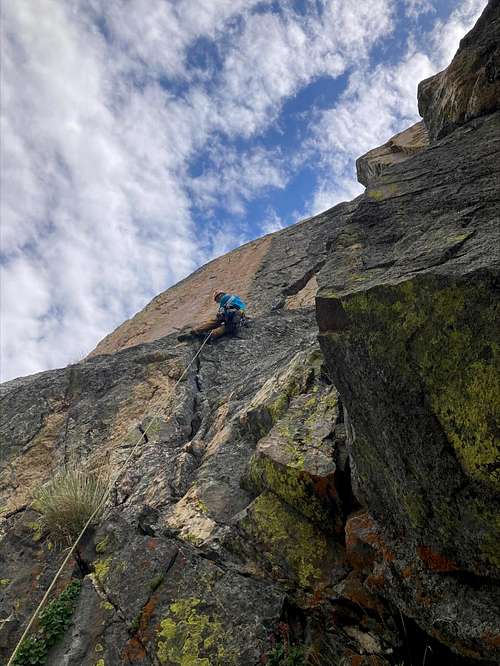
1st Pitch- 100’-5.10/ Although the local guide and MP.com have the 3rd pitch rated higher, this first pitch is just as challenging. I led the 3rd pitch. Most who have climbed the route on MP.com concur with this sentiment. Make a crux traverse below the red flake, right to left, placing gear under the flake. Turn the flake via sustained climbing at the grade and follow it up. Start traversing left under additional flakes and climb up the left end of the black rock band above. Do not climb a rightward ramp to a fixed bail nut (2022) into the black rock. Rather reach a comfortable belay below an obvious long 5.7 traverse pitch above.
2nd Pitch- 80’-5.7/ Climb up to the obvious right to left traverse. Make an awkward traversing move to land into broken black rock. Make another awkward traversing move through the broken black rock to a comfortable belay ledge on the other side (slung rap-2022).
3rd Pitch- 100’-5.10/ Some on MP.com refer to this pitch as 5.10+ and I concur. It offers several unique crux sequencing moves. Climb up the nicely featured hand crack up and left. Start traversing the wide (#4-#5) horizontal crack above, left to right, as it leads you into the middle of the corner to the right. A #5 would give more comfort than a #4 on this first crux. Once in the overhanging corner, climb it to its exit above. Which way you face your feet can be critical in terms of alleviating difficulty (difference between 5.10 vs 5.11). Placing both feet on the right wall is my suggestion. The exit is physical and the crux move of the climb. Easy ground above leads to a slung tree up and right.
Climbing Sequence

|
|
|
Descent
Again (like the Snaz), the local guide and MP.com are referencing dated beta regarding the descent. The rappels on the lower wall are quite simple. Rap from a slung tree to the base of the third pitch. Rap from slung rocks to a broad ledge below. Scramble off of this ledge to the west to the treed approach ramp below.
Essential Gear
60m rope. Single to #3 + a #5. Double from #.3 to #1. Small selection of offset cams and/or wires. Alpine draws. Route stays shaded longer than the Snaz.