
-
 2991 Hits
-
 74.01% Score
-
 4 Votes
|
|
Route |
|---|---|
|
|
44.07072°N / 115.04288°W |
|
|
Mountaineering, Scrambling |
|
|
Spring, Summer, Fall |
|
|
Half a day |
|
|
Class 4 |
|
|
Class 5 options |
|
|
Overview of "Arm and Hammer"
Monte Verita is probably my favorite mountain to look at or climb, although I might change my mind by tomorrow. But it is one of my favorites, and this route is a great mixed climb and scramble that was a highlight of my summer in 2013. This is a variation on the East Face described as the standard route on the excellent home page for the peak, and I think, the superior line to take, if you don't mind complicating things a bit. Depending on the season, and time of day you begin, the true high point of Monte Verita may be unreachable thanks to deadly steep slushy snow. Not to worry, as there is a comparable and memorable uplifted Hammer of Thor's you can reach for stunning views of the Feather Lakes, Packrat Peak, Warbonnet, Baron Lakes, and Myan Temple.Getting There
See the mountain's home page for more details, but you will need to hike to the Baron Lakes area. One option is to drive to Redfish Lake and take the Redfish Lodge shuttle speed boat across the lake to save 5 miles of tedious dead-forest hiking. This costs $16 and is done at scheduled hours of 9, noon, 1 pm, 3 pm, 5pm, and 7pm, I believe. If you have a group of 2 or more, they will take you any time you walk up- if the lodge is open. Usually opens from late May through Labor Day. From the head of Redfish Lake you would then have about 8 miles of excellent trail, going to Alpine Lake, Baron Pass, and then over. Grandjean would be the trailhead on the west side and I cannot speak for it accurately as I have not used it. Hike in would be about 12 miles and there is a dirt road to drive, which I read is okay for passenger cars.Route Description
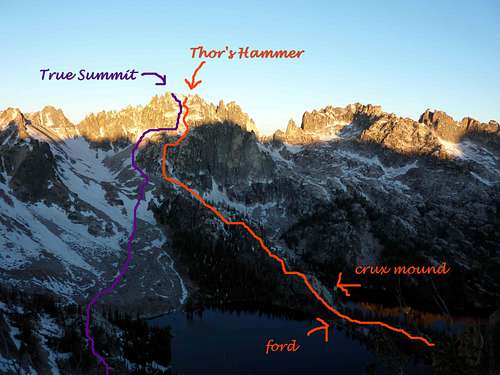 Route overview of Monte Verita Mountain. The summit "crown" is a cluster of little spires and peaks. Simpler 3rd/4th class route is in purple and is the approximate East Face Standard as described on the mountain's fine homepage. Orange is my "Arm and Hammer" variation. Taken from an obscure unnamed peak East of Baron Pass, sunrise. | 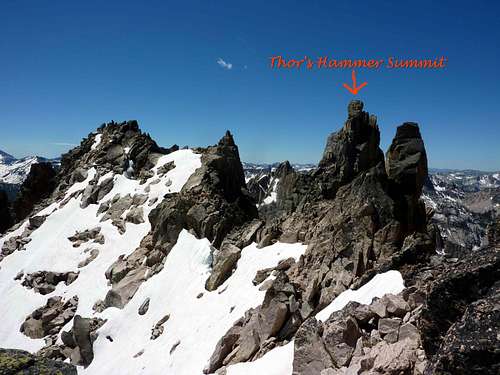 View South of the Summit "Crown". Taken from the Northern most spire, which offers a worthy view down to icy "Lake 9020", blocked from most of the spires. | 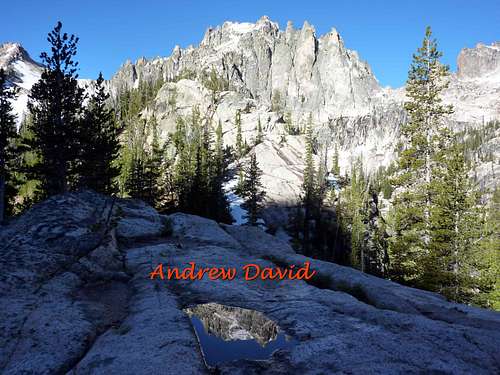 My favorite picture of 2013 I think thus far, though this take did not fit the moon which was still out just over the summit. Summit crown is captured in the little puddle of water. Arm route crux mound visible in mid background. |
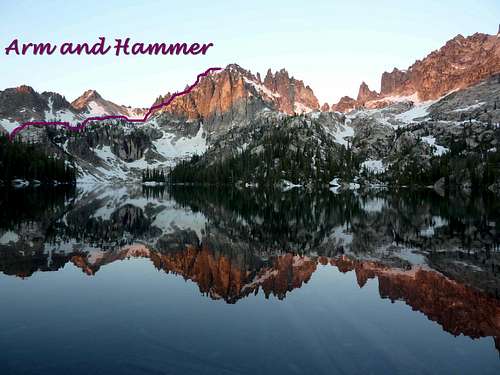 Sunrise on Monte Verita, with the arm approach variation inked in purple. Taken from the North "shores" of Middle Baron Lake, just off the through trail where the best camping in the area is available. This spot is also the beginning of the route to "Zebra Falls", and one option for a scramble start to "Lake 9020" (the other being the purple line and the arm in the photo). | 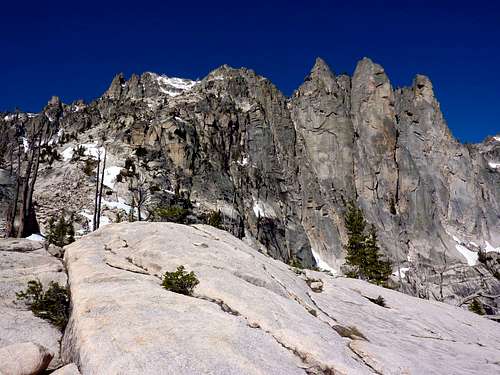 From near the end of the arm section. Keep left for easier terrain and don't be fooled by the Pitchfork Group on the right. From the summit crown, they are comically small. | 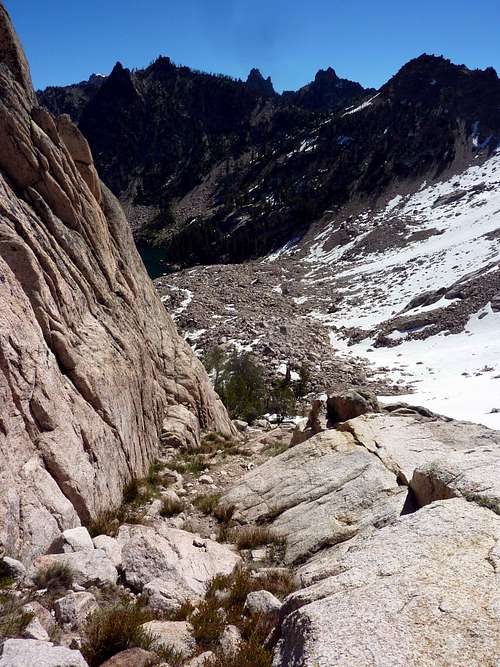 Looking east from where the arm and the standard routes meet. This is the boulder field South of Upper Baron Lake which is more straight-forward approach. But not as fun. |
divides Upper Baron Lake from Baron Lake, thus keeping one bright blue
lake on your left, and another (down an airy few hundred feet) on your
right for your approach, skipping a tedious boulder field. There is
prime camping on this arm, though only a few spots for tents. Bivy
baggers will have many options, with water easy to reach and purify from
the Upper Baron Lake. Solitude is likely, excepting the usual Sawtooth
deer nibbling about your ears under the moonlight. There is one small
and mostly simple water crossing where the Upper Lake drains via waterfall to
the Middle Baron Lake. I did this without getting feet wet, though
depending on how far you can jump, how high the water is, and how many
jammed logs are piled up, you may have to switch into water shoes or
just go barefoot for a minute. Alternate camping is a few miles North at the North end of Baron Lake, also out on an arm. Crowds are possible, as there is a stock tie, and quite nice pit toilet 1/4 mile from the main through trail. This offers another excellent view of Monte Verita, especially at sunrise, and there are many more tent sights.
The crux of the alternate arm
approach comes right after the crossing, which is within 1/4 mile of the
trail down from fabulous Baron Pass. You will have already woven through some tame granite mounds and rolling "domes" common to this lake basin area, but now before you is an intimidating specter: a much steeper and slicker mound, likely streaked and wet. Take any line you like. There are several quite simple after you swallow that initial hesitation. No real danger, and there are grassy forested slopes to the left (south) which you can use to avoid rock nearly all together.
The arm rises through thin trees, crossing granite and grass, in and out of shadow, the view improving even as you think it cannot. Watch for watering places and shade as beyond the arm you will find little. After 45-60 minutes easy gentle walking you should reach a boulder field that flows into the one for the standard approach (south of Upper Baron Lake). From here you have many options. I think there are several gullies of 4th class travel, though the line from 4th to 5th is a personal one usually. One man's 5.3 is another's 4.5. I climb routinely without partner or rope and so paid little attention to finding the easiest route. I did have to make some bouldering moves. I will leave much of the adventure to you, dear readers, and say only this tip: when in doubt, head south to your left. I found on both the ascent and particularly the descent, while doing some ant zags (going every which way to scout) that the terrain is generally, if not always, easier to the left.
Depending on the season you will eventually encounter either a steeper scree and boulder section or some very vertical snow. Altitude is eaten up quickly and you get your 4th class crampon work in. I recommend this route and the Sawtooths in general earlier in the year. May or June is ideal for many areas. This means cooler temperatures, more snow (and thus less scree), better views (because snow adds contrast with grey rock, and because fires are so common to Idaho in later summer). I also advise an early start. I did what I could, which was not ideal, and started on the arm around 11 am, because of rain complications that kept me in a bivy sack at Middle Baron Lake for 15 straight hours! Luckily, I could use the sleep. Unluckily, it meant that when nearing the summit cluster, the true high point was impossible to reach by snow, at least, if I wanted to do as little dying as possible that day. A ridge traverse would have taken a long time, and it was hot. The true high point is the Southern most of what I counted as 4 peaks grouped. But as you can see from pictures, one man might call it 5 and another might call it 6.
If the true high point is unreachable, or even if not, then the hammer which gives my little route its name is a great destination in its own right. I cannot imagine the true summit provides a finer view, and from 2 other peak tips I slapped on my way to the Hammer (guessed wrong on the high point, having not read the Summitpost page before going), the view from the Hammer is much improved. It offers a squeezed but open view down to the obscenely isolated Feather Lakes, truly a memorable vista!
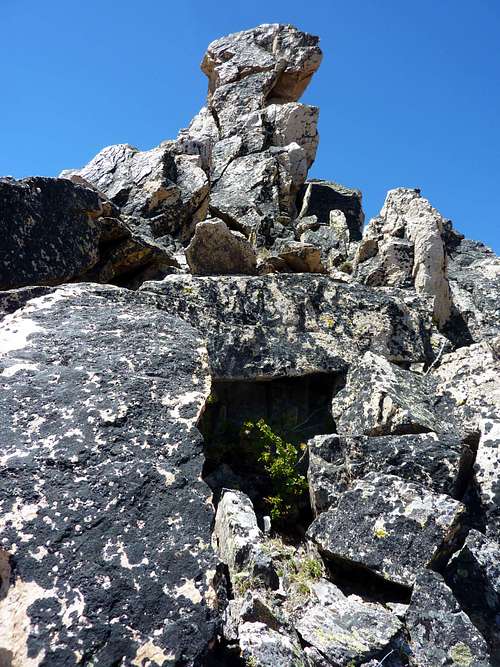
The Hammer is easy to spot from far below and especially as you close in. It looks just as if Thor were stretching his arm straight up and holding the mallet high to bang home some thunder and rock slides. If you have a partner and some minimal protection gear, you could bully straight up the East face all the way. Otherwise, round your way up the East, then sneak around on the South to a sloping ledge with shocking exposure on the West, just feet below the very top rock. As with many Sawtooth peaks, you may have to content yourself with slapping at the peak. I spent a half hour here and did not realize how much air was under me. The ledge is several feet wide and you likely will be shielded from wind, so it makes for a pleasant spot. I even shot a little panorama movie. Dawdling will not make that snow get any stiffer though.
Be careful in the ascent, and either retrace your path, or better yet, go South and avoid the gully or gullies you took. There are descent lines that require little hand over hand, at least until that crux mound near the ford.
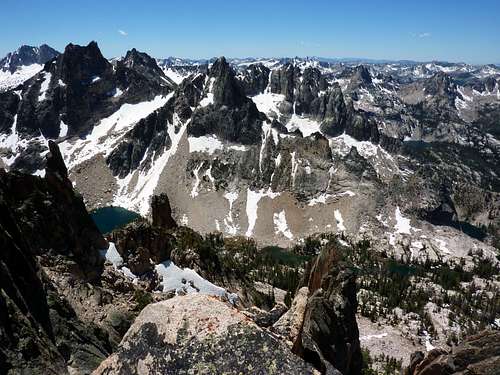 From left to right you can pick out Warbonnet Peak and Mayan Temple, as well as the Blue Rock Round, and for lakes, one of the Warbonnet Lakes, all the chain of Feather Lakes, and Blue Rock Lake. I think one or two of these are a "Bead Lake" also. If you really want a challenge, go hike to those some time. The Arm and Hammer Route is much easier! The Hammer Summit provides the best overview of the Feathers valley. | 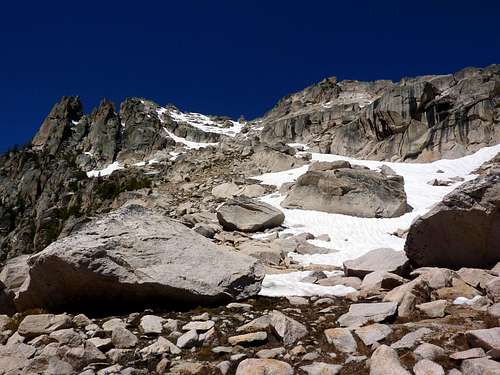 javascript:void(null); javascript:void(null);You can spot the hammer dead center along the skyline. Still a long way to go after crossing the arm. | 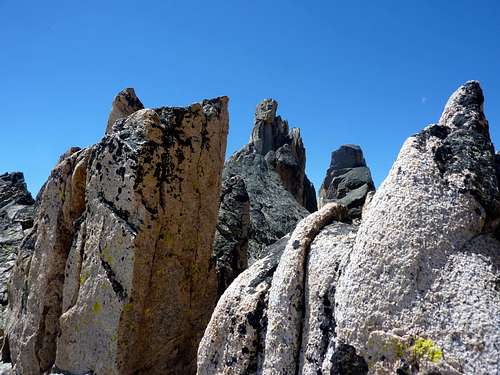 Monte Verita summit crown during the scramble between several spires. |
 Thor's Hammer from the last 20 feet. East face is 5th class vertical, but work arounds are possible on the South and North. I chose South onto the sloping ledge seen in Photo #8. | 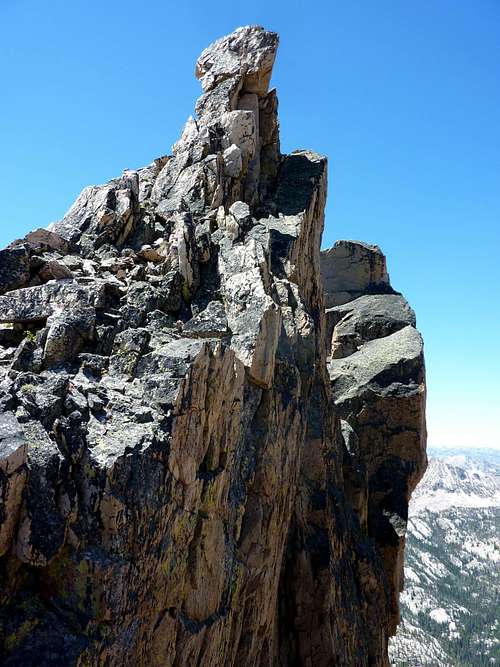 Plenty of exposure. Taken from North. From this angle, it looks more like a Lombardi Super Bowl Trophy. | 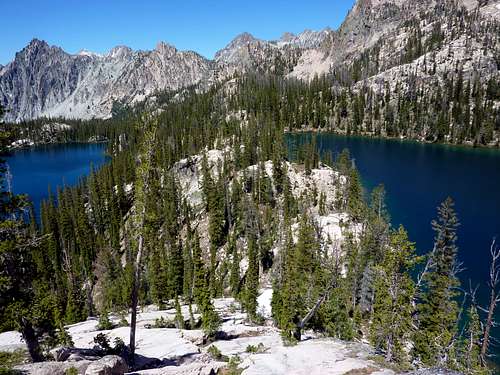 The arm section viewed from near its terminus, on the descent. |