

-
 13232 Hits
-
 74.9% Score
-
 5 Votes
|
|
Route |
|---|---|
|
|
36.03500°N / 115.46639°W |
|
|
Scrambling |
|
|
Half a day |
|
|
Class 4 |
|
|
Approach
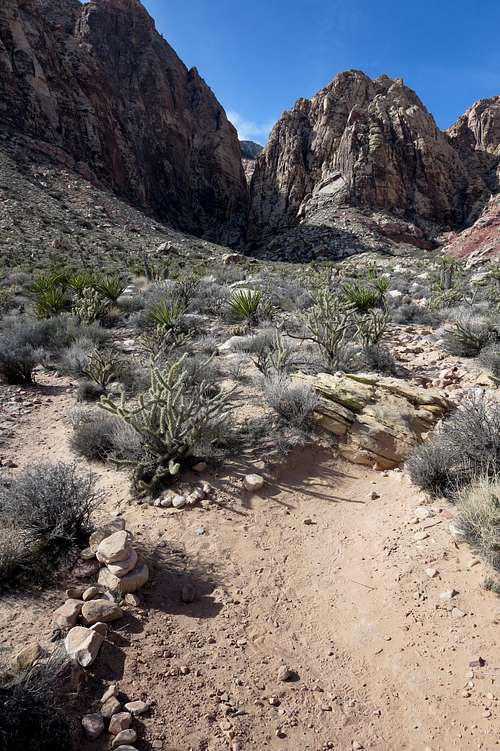
The fastest and easiest way to the summit of Black Velvet Peak is a somewhat convoluted clamber/scramble from the trailhead for Black Velvet Canyon up to the saddle between Black Velvet Peak and Whiskey Peak and from there up the mountainside to the south ridge of Black Velvet Peak. A longer but more interesting and more challenging way goes up via Black Velvet Canyon.
Here we have a loop that combines both routes and provides a beautiful tour of both the canyon and the peak. It begins and ends at the trailhead. While it can be done in either direction, I am describing it the way that I went, which also is the way I recommend-- ascending via Black Velvet Canyon and descending via the other route.
Why do I recommend this way? The harder scrambling and climbing are along the canyon route, and it's usually easier and more enjoyable taking on such terrain on the ascent. Also,
Get up out of the canyon bottom as soon as you reasonably can; as the canyon gets closer to its head, it keeps gets narrower and steeper, meaning that the boulder obstacles are more numerous, more challenging, and more tiring.
It is hard to estimate distance in the canyon. The numerous boulder and ledge obstacles that require you to go up, around, or sometimes under them throw off your sense of pace.
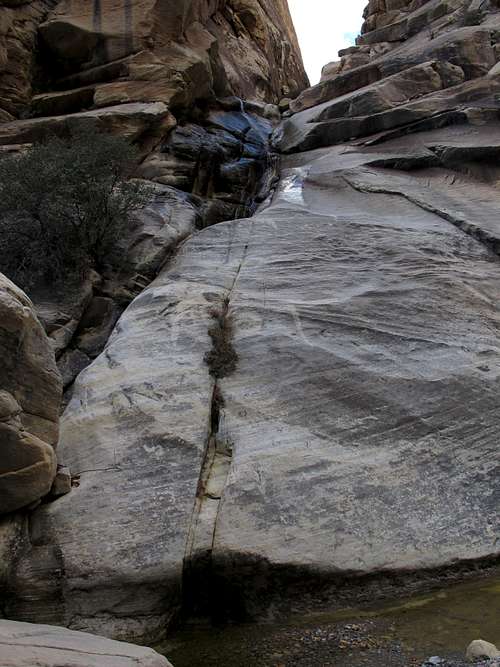
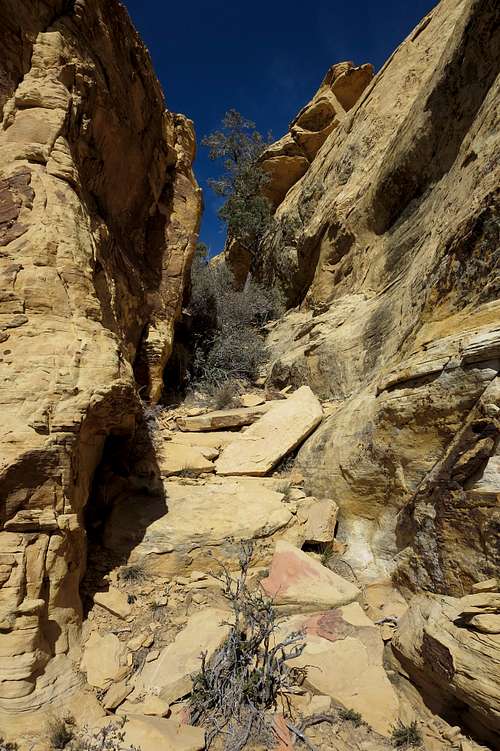
Anyway, about a mile from the trailhead is the first significant obstacle: a waterfall (see picture on left below). There is a fixed line next to this waterfall. I have also seen photos of people scrambling through here in drier conditions. Regardless, there is an exposed Class 3 workaround to the left a little bit back (see picture on right below).
Past the waterfall, drop back into the canyon bottom and continue to work your way up the canyon. The scenery gets better and better as you go and doesn't quit. The same can be said of the fun.
![Black Velvet Canyon]()
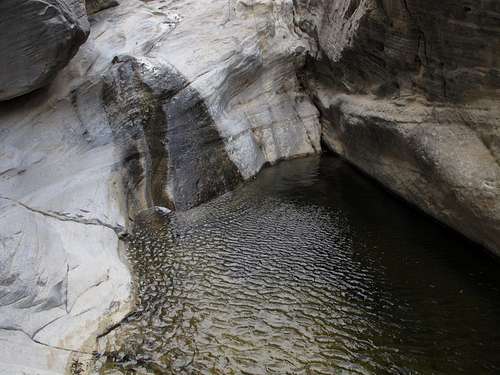
Maybe half a mile beyond the waterfall is an important landmark: another, higher waterfall on the left side of the canyon (see below).
![Waterfall in Black Velvet Canyon]()
Continue up the canyon. After about another half-mile, you may see a large cairn. Ignore it; it marks the spot to leave if you want to climb the Monument or Hidden Peak. Just continue up the canyon. Beyond this point, it gets steeper and narrower, meaning the going is slower, more challenging, and more tiring because the obstacles increase.
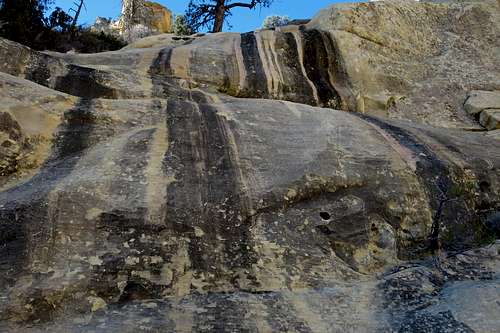
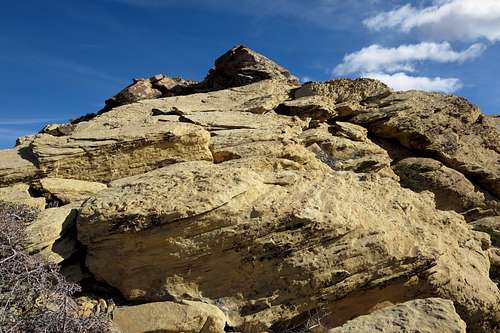
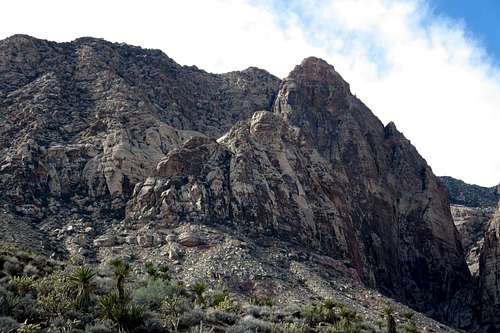
Before you will be the obvious limestone of the escarpment at the head of the canyon. Shortly before reaching it, notice that the angle of the canyon walls on the left side lessens somewhat. As soon as practical, start heading up these steep sandstone slabs, ramps and slopes leading toward user-friendly terrain above. (While navigating this portion of the route, I did not see any cairns or other markers pointing the way but found that the terrain tends to lead you in the proper direction.)
Aim for a prominent dry waterfall that can be seen from a good distance away. To the left of the base of the waterfall is where the route continues to climb up gullies and ramps and slabs to the ridge above. Figuring out the way isn't difficult, but cairns appear pretty frequently at this point to help people keep on track anyway. As you ascend, look for some small sandstone arches that are cool to see on their own merits but which can frame some nice pictures as well.
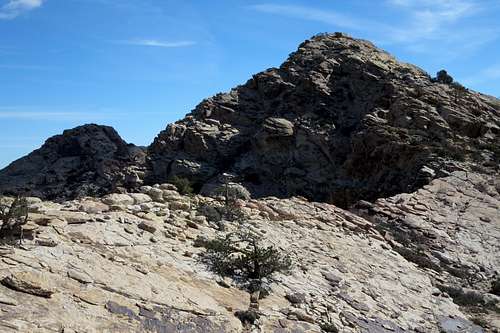
![Limestone Peak]()
Limestone Peak
From this point, your objective is clear and so is the route (kind of). There are two key spots early on. First is a narrow passageway which is marked by a cairn but which may still take a few minutes to find. Second is a semi-hidden tunnel. In February 2014, there was a cairn at the entrance to the tunnel, making it easy to spot, but if you don't know to look for the tunnel and the cairn is gone, it would be easy to miss this tunnel, which you'll have to take your pack off for and crawl through.
![View from the Other Side of the Hidden Tunnel]()
View from the Other Side of the Hidden Tunnel-- False Summit in View
Not far beyond the tunnel is a false summit. Normally, I am not a fan of cairns, but in this case, the cairns save a lot of time, for the route through this area is quite convoluted and not intuitive. Some of the moves in this section fall into the Class 4 realm.
![To the Summit]()
To the Summit
![North Summit of Black Velvet Peak]()
North Summit of Black Velvet Peak
To descend, continue south along the ridge, following cairns and going over a few false summits, for 20-30 minutes. Turn left (this spot is well marked by several tall cairns) and follow the cairned path all the way down to the desert floor. This is much quicker than retracing your steps, and it covers only about 3 miles.
Getting There
From the intersection of 159 and 160 (159 is Charleston Boulevard and 160 is a highway leading west out of Vegas over the mountains to Pahrump), drive west for 4.5 miles until you see a large, obvious trailhead and parking area on your right. This is just after a 4wd underpass of 160.
Turn into this parking area and follow the pavement east for 0.2 mi until the pavement ends. From here on out, high clearance is recommended, but I have seen passenger cars make the drive and have made the drive myself in such a vehicle.
2.5 mi of rough driving northward gets you to Black Velvet Canyon Trailhead. There is no sign proclaiming this, but the road ends there, so there's no mistaking it. About 1.5 mi from the end of the pavement, there is an intersection. Stay straight. In 0.2 more mi, the road bends sharply left (straight ahead is a gate closing the road to further northward travel by motor vehicles). Now it is 0.8 mi to the trailhead, and it is here that you encounter the roughest patches of road.
Route Description
From the trailhead, follow the closed road as it narrows to a trail and approaches the mouth of Black Velvet Canyon. Stick to the trail instead of yielding to the temptation to drop into the wash; it is faster to do the former, and it eventually dumps you onto the floor of the canyon, anyway.It is hard to estimate distance in the canyon. The numerous boulder and ledge obstacles that require you to go up, around, or sometimes under them throw off your sense of pace.
Anyway, about a mile from the trailhead is the first significant obstacle: a waterfall (see picture on left below). There is a fixed line next to this waterfall. I have also seen photos of people scrambling through here in drier conditions. Regardless, there is an exposed Class 3 workaround to the left a little bit back (see picture on right below).
 |  |
Past the waterfall, drop back into the canyon bottom and continue to work your way up the canyon. The scenery gets better and better as you go and doesn't quit. The same can be said of the fun.
Maybe half a mile beyond the waterfall is an important landmark: another, higher waterfall on the left side of the canyon (see below).
Continue up the canyon. After about another half-mile, you may see a large cairn. Ignore it; it marks the spot to leave if you want to climb the Monument or Hidden Peak. Just continue up the canyon. Beyond this point, it gets steeper and narrower, meaning the going is slower, more challenging, and more tiring because the obstacles increase.
Before you will be the obvious limestone of the escarpment at the head of the canyon. Shortly before reaching it, notice that the angle of the canyon walls on the left side lessens somewhat. As soon as practical, start heading up these steep sandstone slabs, ramps and slopes leading toward user-friendly terrain above. (While navigating this portion of the route, I did not see any cairns or other markers pointing the way but found that the terrain tends to lead you in the proper direction.)
Aim for a prominent dry waterfall that can be seen from a good distance away. To the left of the base of the waterfall is where the route continues to climb up gullies and ramps and slabs to the ridge above. Figuring out the way isn't difficult, but cairns appear pretty frequently at this point to help people keep on track anyway. As you ascend, look for some small sandstone arches that are cool to see on their own merits but which can frame some nice pictures as well.
 Dry Waterfall Above Black Velvet Canyon | 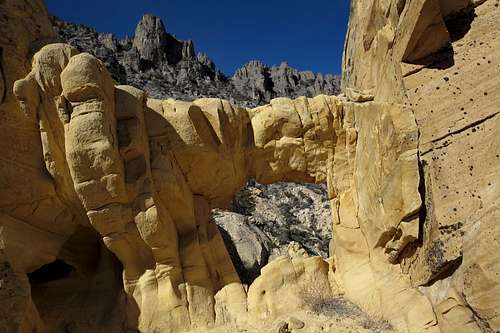 Sandstone Arch | 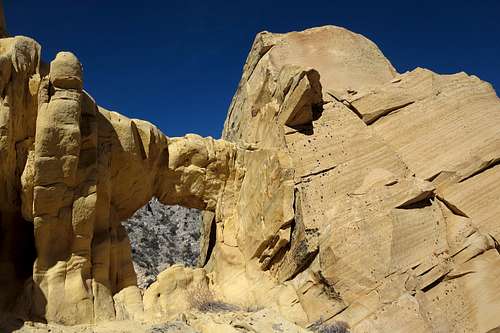 Sandstone Arch |
Once up on the ridge, about where the limestone and sandstone meet, you have a full view of Black Velvet Peak and much of Black Velvet Canyon below. Traverse over varying Class 2 (and easy Class 3) limestone/sandstone terrain until you find yourself at the toe of the sandstone ridge leading toward the peak.
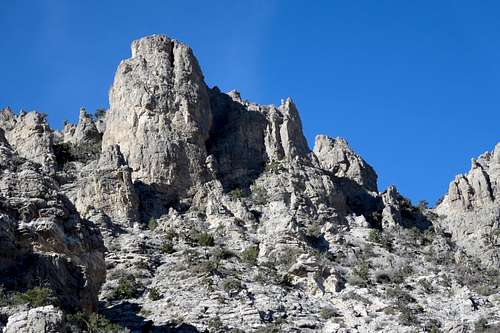
Limestone Peak
From this point, your objective is clear and so is the route (kind of). There are two key spots early on. First is a narrow passageway which is marked by a cairn but which may still take a few minutes to find. Second is a semi-hidden tunnel. In February 2014, there was a cairn at the entrance to the tunnel, making it easy to spot, but if you don't know to look for the tunnel and the cairn is gone, it would be easy to miss this tunnel, which you'll have to take your pack off for and crawl through.
 Narrow Passageway | 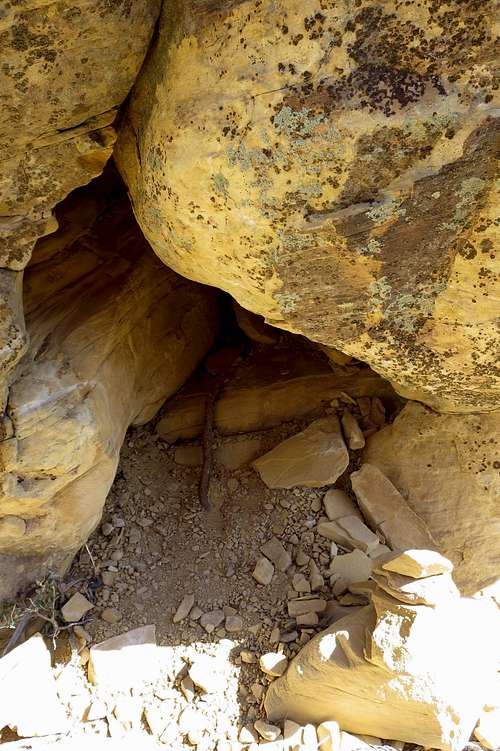 Hidden Tunnel | 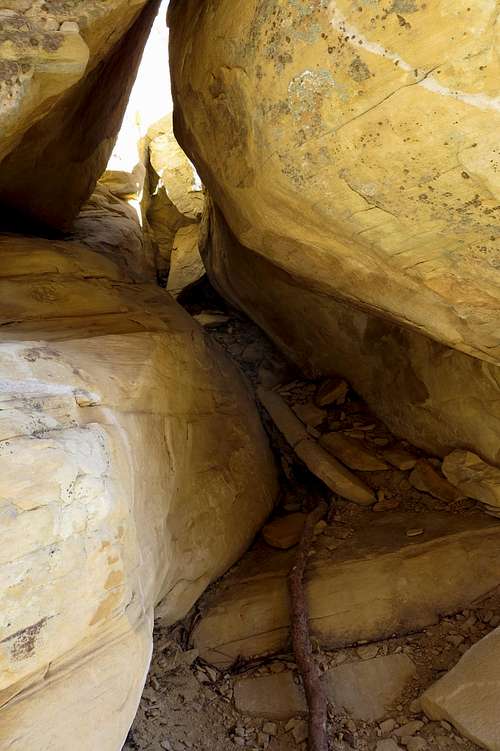 Looking Through the Hidden Tunnel |
View from the Other Side of the Hidden Tunnel-- False Summit in View
Not far beyond the tunnel is a false summit. Normally, I am not a fan of cairns, but in this case, the cairns save a lot of time, for the route through this area is quite convoluted and not intuitive. Some of the moves in this section fall into the Class 4 realm.
Once past this false summit, you will find that the rest of the way is both obvious and easy. Don’t expect to find a summit register; there wasn't one there in February 2014, and there reportedly hasn't been one there in past years, either.
To the Summit
To this point, it's been about 5 miles with around 2600' of elevation gain.
Not far away is the northern summit of the mountain, where there reportedly is a register and where there is an awesome view straight down Black Velvet Wall to the floor of Black Velvet Canyon. Going there is a detour from the route, so factor that in when considering time.
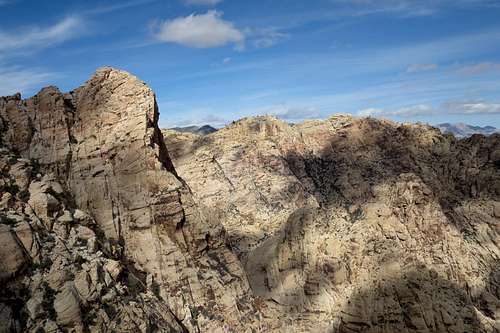
North Summit of Black Velvet Peak
To descend, continue south along the ridge, following cairns and going over a few false summits, for 20-30 minutes. Turn left (this spot is well marked by several tall cairns) and follow the cairned path all the way down to the desert floor. This is much quicker than retracing your steps, and it covers only about 3 miles.
Some notes, though, about that descent:
- This, too, is an instance where cairns are probably a good idea. Although someone with good route-finding skills would find the way, the route doesn't follow a watercourse or other obvious natural feature. Spare yourself some time and energy and look for the cairns even if you hate yourself for doing so.
- There are basically three legs to this route. The first is from the summit to where you leave the ridge. The second is down to a saddle between the Black Velvet Peak massif and a subpeak known as Whiskey Peak (take the little bit of time to scramble up Whiskey; it's Class 3 and took me under 5 minutes each way). The last is from there back to the trail from the Black Velvet Canyon TH; this third part does get a bit vague in places but follows a drainage for much of the way. After the drainage, if you lose the cairned route, it's still pretty easy to figure out where to go.
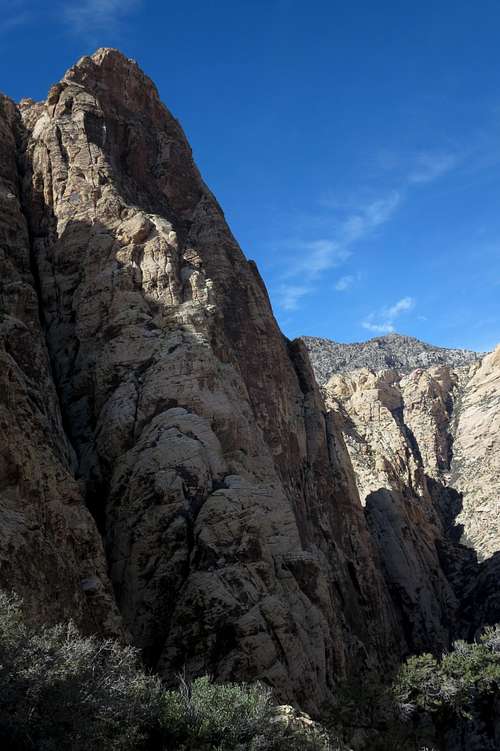
Black Velvet Wall
The following pictures might prove useful to anyone reversing the route as described on this page.
Route to Black Velvet Peak and Whiskey Peak
Leave Trail Here
Route Landmark
BranchWhitney - Oct 20, 2008 9:00 pm - Hasn't voted
register placedI placed an ammo box at the better of the two summits October of 2008. This summit looks straight down the 2000 foot Black Velvet Wall. Why hikers don't take the extra 15 minutes to scramble over there is beyond me.