
-
 4736 Hits
-
 85.8% Score
-
 21 Votes
|
|
Route |
|---|---|
|
|
38.71659°N / 109.29955°W |
|
|
Aid Climbing |
|
|
Spring, Fall, Winter |
|
|
One to two days |
|
|
5.8 (YDS) |
|
|
C2+ |
|
|
9 |
|
|
IV |
|
|
Overview
The Finger of Fate is the trade route on the Titan. It provides the most casual way to the coveted summit. Though more difficult and involved than the Colorado Northeast Ridge on the King Fisher, the amount of effort to finish this route pales in comparison to the other routes on the Titan. If you want to summit the Titan but still haven't ventured into hard aid in the Fishers, this will be your route up the formation.
The Finger of Fate was first climbed in 1962 by Layton Kor, George Hurley, and Huntley Ingalls. A truly visionary route for its time, Kor led his pals to the summit over a two day struggle that tested the most experienced climbers of the time. It was so revolutionary that National Geographic featured the climb in their issue at the time, complete with aerial photography taken from a plane. For years the route existed as a test-piece nailing route, until the mid 1990s when Europeans Stevie Haston and Laurence Gauoult climbed the route using clean aid, later free climbing pretty much the whole route at around 5.12d. Only a handful of other climbers have repeated the impressive feat of free climbing the route, and most climbers today use clean aid to ascend this route. No hammer or iron is needed to climb this route, nor should be brought on the climb. Decades of climbers pounding pins into the soft rock has provided more than enough scars that fit tri-cams and offset cams quite well. Though this route will test your creative clean aid skills, it is not too bad compared to some of the other "trade routes" found on the other towers here. A common strategy of climbing this route is climbing the first 3 pitches the first day, which gets the aid crux done with, fixing, and finishing the climb the second day. Many parties have done the route in a day, and if you are a proficient aid climber and have experience in the Fishers, it should not be too difficult to finish the route in a day with an early start.
While the actual climbing is not much to write home about, the general nature, position, history, and logistics of this route make it a very worthy objective for any desert tower climber. You get a little bit of everything: thin aiding, splitter hand cracks, chimneys, offwidth, slab, and a bolt ladder. Climbers new to the Fishers may find some of the aid and free climbing sections a little dicey, but in all honesty, out of the few big lines I have been up here, this was certainly one of the most casual. A relatively high amount of traffic keeps the rock fairly clean. Get your aid head on, grab some buddies and get out and do it!
Getting There
Follow directions to the Fisher Towers campground and trailhead on the main page. Follow the trail past Ancient Art, Cottontail, Echo, and eventually the Titan. Leave the trail south of the Titan and turn back north, following faint climber's trails that follow shelves to the southeast of the Titan (there are cairns here and there...). Ascend a steep loose talus slope to the base of the Oracle, turn left (west) and follow a ledge system to the saddle between the Oracle and the Titan. The base of the Finger of Fate is pretty obvious in the alcove on the north end of the tower, and is identified by a crack system towards the left side of the large gully/alcove. You will see the first and second pitch anchors from here.

Map to the Titan (Courtesy of Brian C)
Route Description

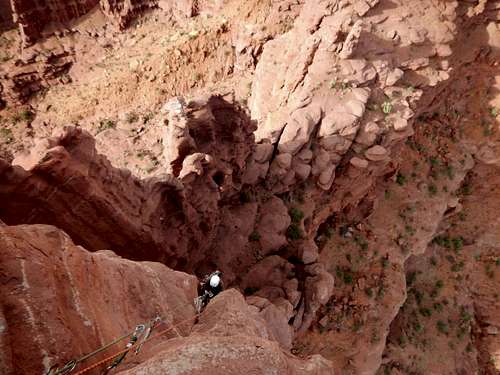
Looking up Pitch One, Two, Three
Pitch 1: Start up a large hand crack and free climb or french free to an intermediate anchor. Once above the intermediate anchor, aid climb/mixed free to the first belay. Heavy on 2-3 cams. 5.8-10 C2, 140 feet.
Pitch 2: Tricky aid climbing moves off of the belay lead to a better crack. C2, 80 feet.
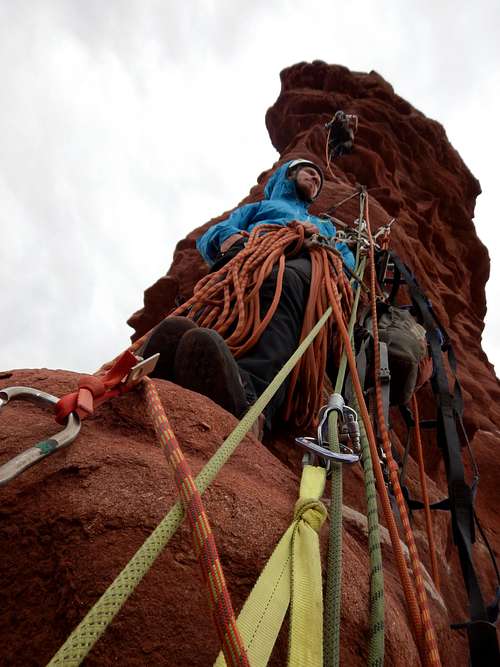
Pitch 3: Two fixed pins lead to an interesting section of aid. The crack improves until 20 feet below the chains. Tricky aid up a dirty cobble crack leads to a scary mantle (the route crux). A few more aid moves lead to the chains. C2+ 70 feet.
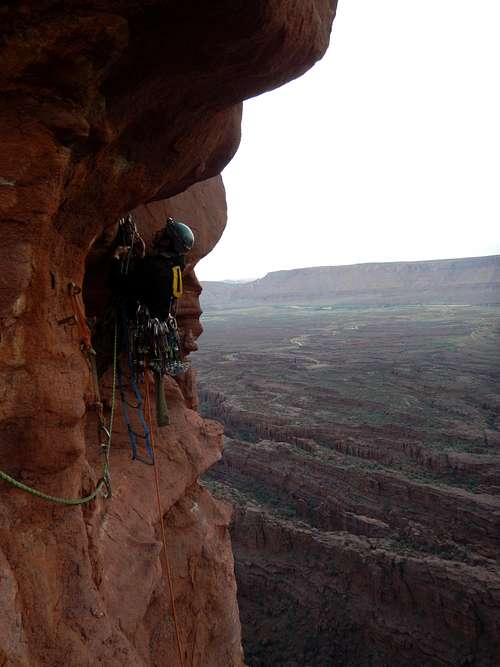
Paul cleaning Pitch 3
Pitch 4: Traverse 15 feet right (5.6) to a fixed bolt. Aid through a roof on fixed tri-cams which could be difficult if tri-cams are missing. A short off-width ends the pitch. 5.8 C1 (C2/3 if tri-cams are missing), 50 feet.
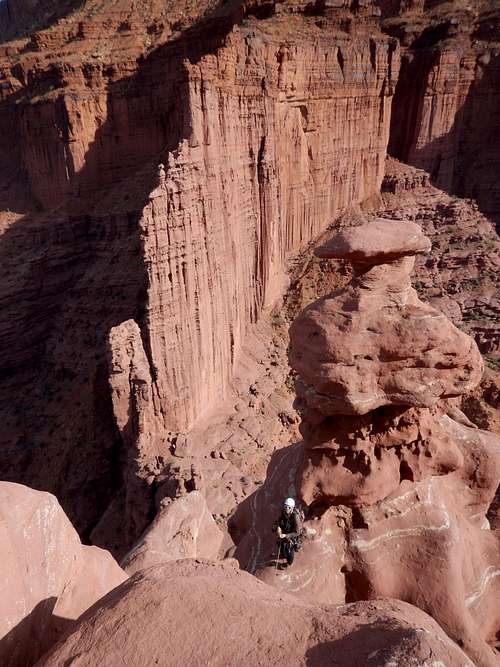
Me on Pitch 4
Pitch 5: A short slab climb on the arete (two bolts) leads to a short aid section followed by a flared off-width. The OW can be freed at 5.9+ or aided. A beached whale at the top leads to the anchor. 5.7-9, C1 (80 feet)

Pitch 5
Pitch 6: Traverse on the east side of The Duck (5.4++) to the rappel chains. Continue traversing into a somewhat dirty 5.8 chimney leading to a Bivy Ledge. 5.8, 90 feet.
Pitch 6 Duck Walk
Pitch 7: Traverse right from the Bivy Ledge to an exposed jump/step across onto the west face of the Titan. Follow 2 bolts up from the traverse into a C2 seam with questionable rock. Once back on the arete, free climb/mixed aid up bolts to the well bolted belay. 5.8 C2, 90 feet.
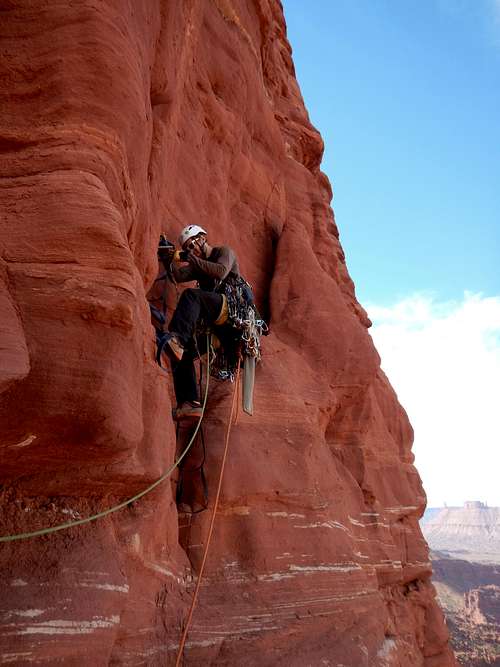
Pitch 7
Pitch 8: Climb up the arete with mixed free/aid on spaced out bolts. A stick clip will be handy, otherwise expect mandatory free climbing between bolts. Once at the Moenkopi caprock, free climb up a wide crack until it ends at a small ledge and original Layton Kor bolt. From here, head up either left or right and fire up scary, unprotected climbing to the anchor. 5.8 C1, 100 feet.
Looking Up Pitch 8
Pitch 9: Proceed up 4th class blocks to the summit. Class 4, 50 feet.
Descent: From the top of the eighth pitch, make a double rope rappel to the anchor atop pitch 7. From there, rappel to the anchor at the Duck. Three more double rope rappels on good anchors down the chimney deposit you at the base of the route.
Conditions of all belay anchors are good, enforced with at least two solid bolts. Rappel anchors are all solid. Fixed pieces on the route range from bomber bolts to sketchy old, half pulled angle pitons and bolts. The fixed tri cams on the 4th pitch seem OK, but their slings are a little fuzzy. Who knows how long they have been there or how long they will remain.
Essential Gear
Absolutely no pins or hammers are needed for this route. Here is a fairly common rack used for this climb:
- 1 set Tri cams
- 1 Set Offset Nuts
- 2 sets Offset Cams
- 2 Sets C4 Cams from .3 to #4. Triples are handy in sizes 1-3.
- 2 Sixty meter ropes
External Links
Photo Credits go to Derek.