Approaching the Ridge
Joe and I headed up to Whitney Portal on a July Friday evening to climb the North Ridge of Lone Pine Peak, a great route that is easy to access and includes a lot of decent Sierra granite and interesting route-finding in a spectacular position. I think most people who do this route take 12 or 14 hours to get from their car to the summit and back. By the time we'd made it back to the car at 2:30am on Sunday morning, we'd been on the move for 21 hours without much more than a 10 minute break here or there.
We started in at 5:30am on July 28, and took the nice, easy, Meysan Lake trail (well marked from the big "Meysan Lake Trail Parking" sign on the Whitney Portal Road until you're on the trail) until we got to a little flat around 9,800 feet (after the first hundred-foot downhill section of trail) where we left the trail and took a diagonal ledge system that goes up and left to the ridge (
Thanks Bob Grow!).
![Here s How we Gained the Ridge]() Here's How we Gained the Ridge
Here's How we Gained the Ridge
It actually surmounts a subsidiary ridge to the west of the true North Ridge. From the point where we gained the subsidiary ridge, it was an easy scramble east to the true North Ridge.
On the Ridge
![Slabby Scrambling]() Slabby Scrambling after Gaining the North Ridge
Slabby Scrambling after Gaining the North Ridge
We followed the ridge over easy second and third class terrain to the point where you can see the Giant Flake that you see in almost every trip report online.
![First Sight of the Giant Flake]() First Sight of the Giant Flake
First Sight of the Giant Flake
After a fun fourth-class downclimb, we climbed up to the giant flake.
![Traversing To the First Fourth-Class Downclimb]() Me, Traversing to the first fourth-class downclimb
Me, Traversing to the first fourth-class downclimb
Instead of going down and left before the flake, as most beta recommends, we went up through the notch formed by the flake and traversed the tower's east face beyond it, which included some enjoyable route-finding challenges and funky downclimbing.
![Climbing Into the Notch]() Climbing Into the Notch Formed by the Giant Flake
Climbing Into the Notch Formed by the Giant Flake
We spent a lot of time on the ridge contriving traverses on the towers where we could have dropped down and left to quicker "trails" to the next obstacle.
![Our Traverse below the Third Tower]() Part of our ridge traverse above the Giant Flake on the Way to the Third Tower
Part of our ridge traverse above the Giant Flake on the Way to the Third Tower
This tower-traversing eventually got us to the first real obstacle, the Third Tower. Dropping low to what looked like a trail probably would have been much quicker and much less fun.
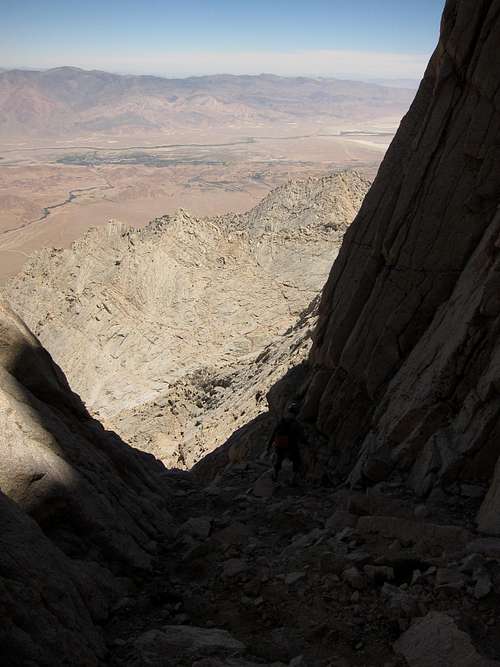
![The Notch at the Base of the Third Tower]() Looking Up the Gully at the Notch below the Third Tower
Looking Up the Gully at the Notch below the Third Tower
At the Third Tower we spent a long time testing out some options near the notch that we'd read about (Alois Smrz, in the route description here on SP, calls for some "5th class cracks/steep face" 20 feet down from the notch), but either we were looking in the wrong place or the description is inaccurate.
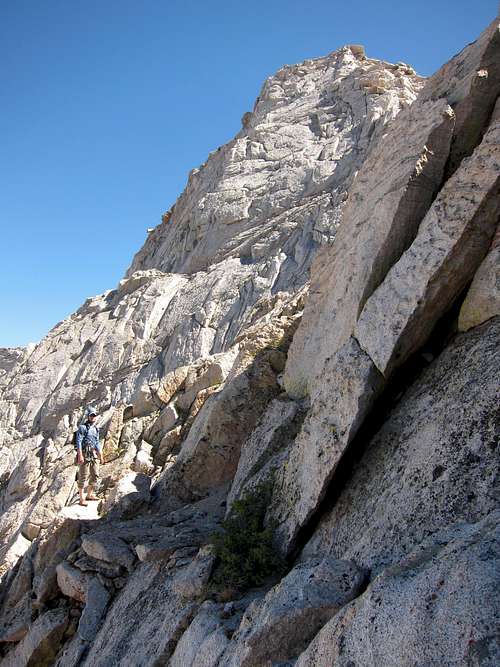
![The Steep Face of the Third Tower]() The Wall on the Third Tower Where I Backed off a Couple Dirty Leads
The Wall on the Third Tower Where I Backed off a Couple Dirty Leads
I backed off of two lichen- and moss-covered leads, one of which eventually headed out on a steep face with no pro and insecure sloping holds. Then another, on which I gained a ledge/notch via 5.7-ish climbing that "should" have led around a corner to 4th class rock, but instead led to nothing but a near-vertical face. Some spicy downclimbing in both retreats! It was a little frustrating, since we'd thought these variations might be a short-cut to a burger at the Portal Store that evening, and that possibility was evaporating.
![Joe, Headed Back Down to the Slabby Side]() Joe Heads Down-Gully After We Got Denied...
Joe Heads Down-Gully After We Got Denied...
We scrambled back down a gully we'd just come up (this happened more often than I care to recall) about 200 feet and ran mostly un-roped up slabs that looked steep from below, but turned out to be quite easy 3rd and 4th with a little 5th class climbing mixed in.
![Easy Climbing on the Slabby Northeast Face of the Third Tower]() Somewhere on the Third Tower on Lone Pine's North Ridge
Somewhere on the Third Tower on Lone Pine's North Ridge![Me, Somewhere on the Slabby face of the Third Tower]() Me, Somewhere near the top of the Third Tower
Me, Somewhere near the top of the Third Tower
This eventually got us to a little 4th class downclimb and a short descent to bypass a smaller tower which took us right up to the summit headwall.
![Turning the Corner at the Summit Headwall]() Just before the downclimb to the notch below the summit headwall
Just before the downclimb to the notch below the summit headwall![Muir, the Needles, and Whitney]() A sublime scene from the notch below the summit headwall.
A sublime scene from the notch below the summit headwall.
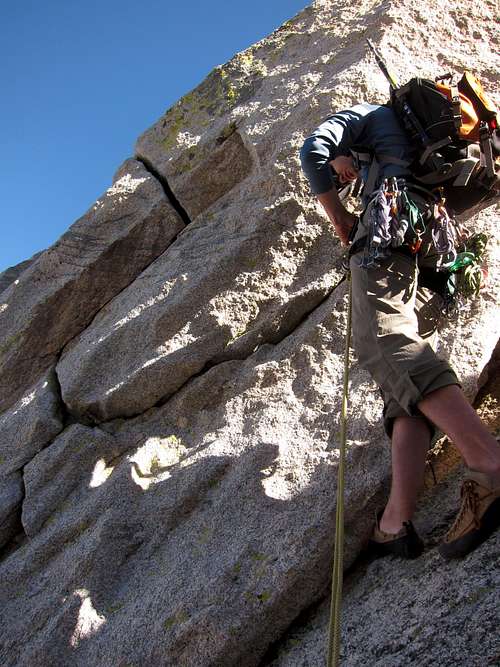
From the notch below the summit headwall, everything went according to "plan" and we were able to get onto the headwall via a cool, steep, and easy couple of handcracks just below the notch (thanks again to Bob),
![Good Beta: These are the Cracks...]() The crack system that is your passage to the summit headwall.
The crack system that is your passage to the summit headwall.
then ran up the right side of the headwall's northern prow to the summit in five or six mellow pitches.
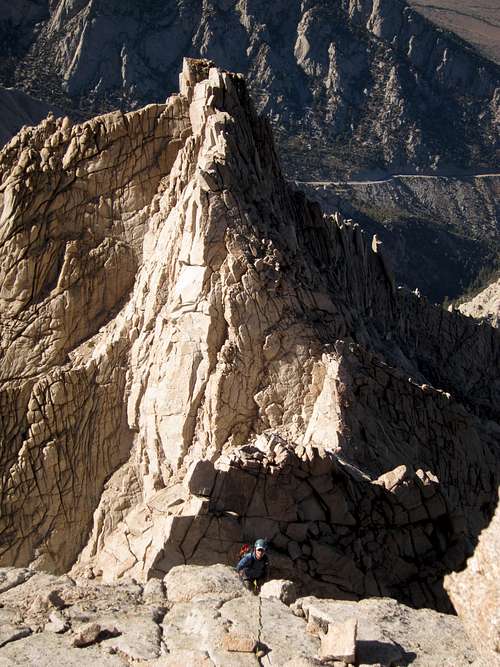
![The Awesome North Ridge of Lone Pine Peak]() The awesome North Ridge of Lone Pine Peak frames Joe, high on the summit headwall
The awesome North Ridge of Lone Pine Peak frames Joe, high on the summit headwall![The Incredible Sierra Vista]() Incredible Sierra Views Just Below the Summit
Incredible Sierra Views Just Below the Summit
The last pitch was up a boulder-filled gully in between the prow and a ridge to the right. This gully was composed of many giant boulders which were all scary loose. One, about the size and shape of a coffin, actually came loose when stepped on and rolled to the next ledge down. Should have stayed on the prow!
![Me, Just a Few Feet Below the Summit]() Turning the last obstacle below the summit.
Turning the last obstacle below the summit.
The summit was everything I'd thought it would be.
![Me and Joe on the Summit of Lone Pine Peak]() Me and Joe on the summit of Lone Pine
Me and Joe on the summit of Lone Pine
One advantage to our missteps and wanderings was that it landed us on the summit in the magic hour of light when the sun is setting. We had fantastic view. It was sad to have to leave in just a short half hour.
![Sunset Panorama]() Sunset Panorama on the Summit
Sunset Panorama on the SummitBeginning the Descent (and some "okay" descent beta)
We were a bit concerned about the descent, since we'd read that it's easy to pick the wrong talus chute above Peanut Lake and get cliffed out. So we headed off the summit around 7:30 and after picking the correct chute (thankfully!) got caught by darkness in the huge boulders at the base of the chute.
![Our Descent]() Descent route and wandering in the dark
Descent route and wandering in the dark
To get in the right chute, go west off the summit to the first saddle you can see from the descent from the summit. At the low point of the saddle, drop down on a well-used trail (cairned as of July 2012) that goes just below the saddle and contours across westward past a number of possible descent chutes. One of these has a lot of foot-traffic going down it, but it's a sucker chute. You want to go all the way to an improbable-looking (and well cairned) chute; the west-most of the chutes. You'll know you're there when you can see high, vertical, south-facing walls on your right and slabby, steep cliffs that block westward progress up high then close in on the chute near the bottom of the descender's left side of the chute. This chute is pretty nasty, but there's plenty of class 2 ways down, and you can follow the trail of previous descenders pretty easily.
For some reason, this chute seemed more "endless" than other talus chutes I've gone down. Maybe that was because I knew it was going to get dark before we got to the bottom and we had no idea how to find the trail after we got back into the bottom of the valley.
Darkness
From the boulder field at the base of the chute, we found our way to a (mostly dry) boulder-filled tarn where we followed Polaris, knowing that we needed to go mostly north get to Peanut Lake and the trail back to the Portal. This included scrambling over giant boulders until getting to a swamp south of Peanut lake.
By this time, I had been out of water long enough that the swamp water looked good enough to drink, which I did. Talk to me in a week to see how that worked out. We eventually ran into a tent and a camper who told us that we'd find the trail by "following the north star and keeping the moon to our back." That worked. Many breaks were taken on the way out, as we were both exhausted from a day of high adventure. The swamp-water never did get completely settled in my stomach, and bouts of queasiness dictated the timing of our short rests, which we took at about every 6-700 feet of lost elevation. Lying down on the trail in the warm evening air looking up at the crystal-clear sky full of stars was a nice bonus. Missed the burgers at the Portal Store, but that's okay. It was a great day!
Dubious Beta to Add to Your Collection
Neither of us have a lot of mountaineering experience, and neither of us had been on Lone Pine before. If this is you too, be sure to budget a lot of time for route-finding mistakes and roping up and unroping. We had climbed the Sunshine Peewee (East Buttress) Route on Whitney a month or so early, and it was a much simpler and less strenuous undertaking than the North Ridge, for sure.
Be aware that there's a ton of beta out there, and it's all of limited usefulness. For example, we were able to identify the Giant Flake (how could you miss it?), the Third Tower, and the summit headwall, but we didn't see any of the typical "crux" sections that you read about and see photos of. We saw a stuck nut and an old hex, but nary a piton, nor any sort of "lieback" section, though we did a couple of unnecessary liebacks and mantles just for good measure. Unfortunately, I'm pretty sure we missed a good bit of what would be the "regular" route up the ridge, but we never got far below it. Also, don't be frustrated by references to "The Notch" as this refers to any one of a dozen or so notches and you'll rarely be sure of which one is being discussed anyway.
Be agile in your plan, because beta is only helpful if you know where you are, and for a lot of the time, all you'll know is that you're on the ridge, and you haven't made it to the summit block yet. Be flexible and consider every possibility carefully before discounting it. We lost a lost a lot of time at the Third Tower because at first glance the tall slabs down-gully and to the left looked steep and the arching, rough dihedral/roof near the top looked intimidating. Neither turned out to be the case. Lastly, the ridge is so big and complicated that trying to provide turn-by-turn directions would be a total fool's errand.
Probably the best info I could give someone looking to do the route is to stay high on the ridge as much as you can, and pass all towers/obstacles on the left side of the ridge. I don't think we were on the right side even once before the summit headwall. Between gaining the ridge and arriving at the Third Tower, stay just below the top of the left side of the ridge. If this starts to look too difficult for your liking, look down and you'll see foot traffic below the ridge. Find your way down there and you can skip difficulties. At the summit headwall, get to the right side of the prow and stay there. The climbing there is easy and fun; the jumbled, giant boulders are mostly clean hard granite, and the few fifth class sections are easily protected and not exposed.
The beta for the descent chute above is the only "real" specific beta I can think to offer. We took about eight cams (#1 Metolious Mastercam to #2 Camalot in size), a single set of nuts,and one double rope, which we doubled over for the "real" fifth class leading and climbed on the full-length single strand for the low fifth. This was more than enough gear. Enjoy!
August 1 - Added tracklog from Joe's GPS which died just as we made the summit. Could have used it in the dark. If I'd known that he had it with him, I'd have offered to bring a couple extra AA batteries! Ha!


Comments
Post a Comment