
|
|
Route |
|---|---|
|
|
44.57445°N / 114.49591°W |
|
|
Scrambling |
|
|
Summer, Fall |
|
|
Half a day |
|
|
Class 3 |
|
|
Strenuous |
|
|
Overview
The North Ridge of White Mountain is a fun and challenging class 3+ route over some very colorful and scenic terrain. It offers the shortest yet most difficult approach to the summit gaining about 1200 ft. over 2 miles. Most of the elevation is gained in the last ½ mile to the top.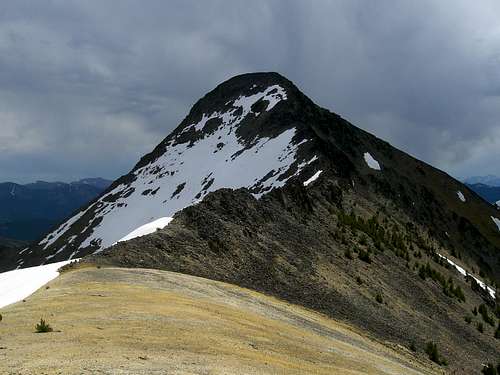 The North Ridge.
The ridge is composed of a series of knife edged rock towers and fins with loose talus and scree filling the spaces between them. Some of the towers can be avoided but most must be climbed over to avoid more difficult terrain. When snow is present this adds to the difficulty forcing you onto class 4 terrain unless you come equipped with at least an ice axe.
 Towers
The West side of the ridge is in the Frank Church Wilderness
Getting There
From Challis take highway 93 East (towards Salmon) and turn left on Clinic Road. This will intersect with Challis Creek Road after curving around the town’s medical clinic and assisted living center. Turn Right on Challis Creek Road which will eventually enter the Challis National Forest and turn to dirt. This road will split and the left fork will take you to the Challis Creek Lakes where White Mountain’s South Ridge can be accessed. The ridge above the lakes presents no major obstacles but the road to the lakes is said to be pretty nasty.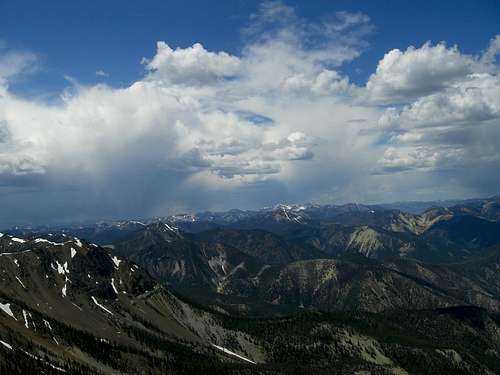 The view to the West.
The right fork will be labeled as Sleeping Deer Road and will take you up Bear Creek Canyon towards the pass between North and South Twin. Beyond the pass the road will continue for 24 miles into the heart of the Frank Church Wilderness, eventually ending near Sleeping Deer Mountain. This road will take you closer to White Mountain than the other fork but it will require you to climb the more difficult North Ridge. Continue up Sleeping Deer road and eventually you will come to some houses. Just before the houses the road enters a pasture where a herd of horses and pack mules are kept. They like to stand on the road so you’ll probably need to coax them out of the way. At the edge of the pasture the road is gated to keep the animals in. Open and pass through the gate and remember to close it as soon as you’re through. Just beyond this the road splits again. Stay on Sleeping Deer Road which at this point has become a narrow two-track road. The farther up the road you go the better it will get though. Here it begins to parallel Bear Creek as it heads towards the 9,183 ft Twin Peaks Pass. Just before you get to the pass there will be some abandoned cabins where the road will split again. Take the left fork here up the narrow, rough road leading to the Twin Peaks lookout. After curving around to the peaks South Face, park at the first major switchback where a ridge connects White Mountain and South Twin. It appears as though there was once a sign here but all that remains now are two posts. The North Ridge of White Mountain is clearly visible from here. This is where this route begins.
Route Description
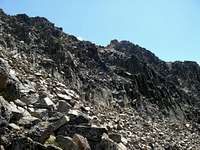
This climb actually starts with a descent to the saddle between South Twin and point 9872. From the saddle, climb towards point 9872 but angle around it to the East to avoid unnecessarily going over the top. At first you’ll pass through some small trees with a lot of deadfall. This is the most difficult part of this section because of the deadfall and the unstable dirt on the side of the hill. Try to stay just below the 9800 ft. contour. Eventually you’ll enter a large, stable talus field. The Talus Field.
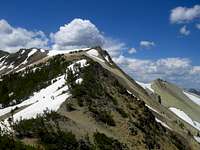 Point 10,111.
 The upper ridge.
 The base of the towers near the top.
 Route Map.
Essential Gear
You'll want to have some sturdy hiking boots and possibly some gloves to protect you from the sharp rocks.An ice axe is also a good idea in the early summer as the upper section of the mountain can still be choked with snow. Without one you'll either be forced onto dangerous class 4 terrain or have to figure out how to get through the snow without slipping. I know this from experience because I forgot my axe and almost had to turn back but I found a way through.
I would also suggest bringing a pair of binoculars as the view from the top is incredible.
 Looking down the North Ridge from the Summit.
External Links
Salmon-Challis National ForestThe Idaho Outdoors Forum is where you can talk to others interested in Idaho's mountains.
This is the website for Tom Lopez'sIdaho: A Climbing Guide, the premier guide to Idaho's mountains.
Some info about the Frank Church-River of No Return Wilderness