This is described in the guidebook as a climbers scramble and is one of the hardest scrambles in Alan Kane’s book. The crux step and two other steps are downclimbed on the way up. The summit ridge is class 3 and 4 with the downclimbs being class 4 with sections up to YDS 5.3. A rope, protection and the ability to use them properly is recommended for anyone who is not comfortable scrambling class 4 and easy class 5 routes. As of June 2018 there is a rappel bolt/ring at the top of the first downclimb just to the left of the nose. The left side of the nose (looking down) has become the preferred way to down climb and climb back up. The round trip is about 28 kilometers(17.5 miles) and 1570 meters(5150 ft) of elevation gain. We took 14 hours but there are reports of 10 to 18 hours.
Unroped scrambling is a dangerous activity and everyone should read the complete introductory section of Alan’s book before rushing off to do any scramble. As with many other scrambles books, Kane's scrambles rating system is unique to his book (and to the Canadian Rockies) so take the time to relate it to your experience level. Always scramble well within your abilities and be prepared to back off if you are unsure of your route, the conditions or your abilities. You are responsible for the consequences of your decisions.
Getting There
Travel west from Calgary on the Trans Canada Highway #1 for 45 minutes. Turn South on highway #40 for 30 kilometers(x miles) to the Evan – Thomas Creek turn off which is on the left (East) just past the turn off for the golf course.
Mountain bike the trail which starts along the left side of the Evan – Thomas Creek. The trail is used by horses and is covered with rounded river rocks to head sized. The trail crosses the main creek many times as well as various side creeks. There is a campground(horse packers)that you pass as well. A GPS is usefull as you are travelling along the bottom of valleys so it is hard to locate where to leave the trail.
Route Description
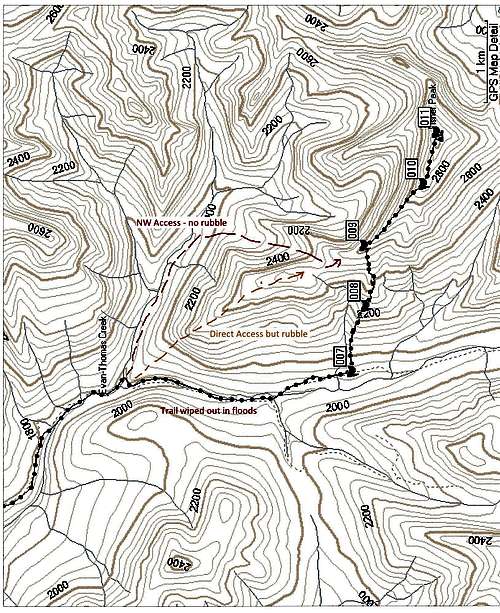
NOTE - Approach changed with floods in 2013. Approach along Evan-Thomas Creek on trail. Leave your bikes before fork in the creek versus at the last main creek crossing which is the bottom of the last hill. Previously it was easiest to leave the trail close to the highest point on the trail which is 2 to 300 m past the large drainage coming off the North West ridge. See map. We left the trail near highpoint of trail at waypoint 7.This is farther along the trail than recommended by either guidebook but we successfully guessed it to be a faster and easier approach before the flood damage to trail. Travel upward on a ridge through trees. Waypoint 8 is the Brown Point, Waypoint 9 is on NW ridge, Waypoint 10 is West summit and waypoint 11 is Summit.
NEW - As of 2018 an alternative choices are now is cross creek and go up West end of ridge on rubble(Kane route) or go left at Forks and follow creekbed and access the col in ridge by a drainage from the NW.
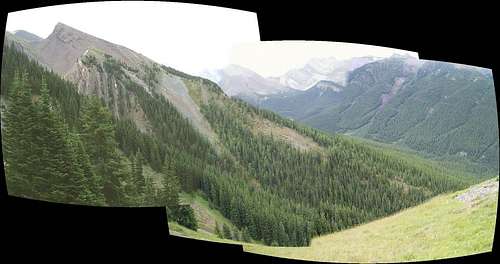
South side access - follow old trail along RH side of creek until trail crosses creek to east and follow old trail up hill to near highpoint(#7 on map). Now can go up through trees and stay to left of rubble. Bushwack up hill on a treed ridge until come out on brown shale which leads to a brown point. Ignore the open slopes beside the treed ridge as they are broken talus rubble and more difficult to go up. pic shows NW side of treed ridge and brown point.
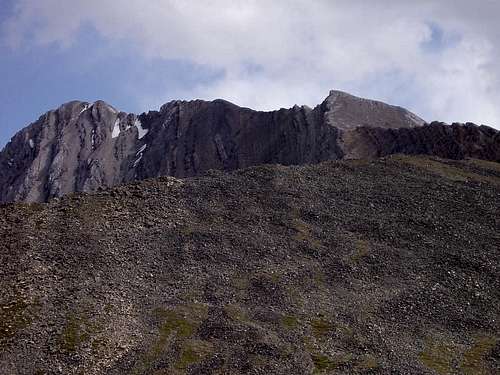
Downclimb point or easiest is to go around righthand side on dirt and then pound rubble up to ridge. Follow ridge to West summit.
Picture below shows Brown point in lower right and Northwest ridge leading to summit ridge.
The alternative way to gain the ridge is the Northside access to ridge- follow left creekbed at the Forks to a grassy drainage that comes up at the saddle or low point in middle of ridge - shaded/sun boundary on pic.
Major advantage is to bypass rubble/talus on lower ridge so much easier up and down.
Fisher Peak kananaskis NW Drainage access
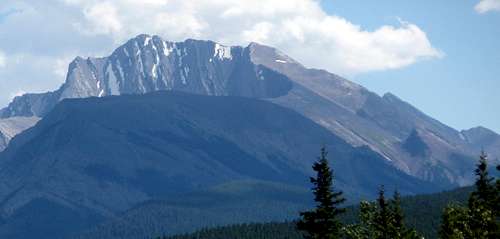
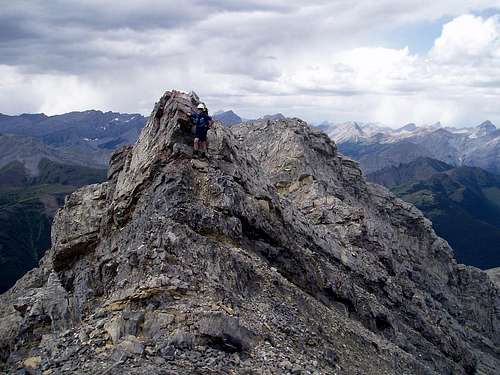
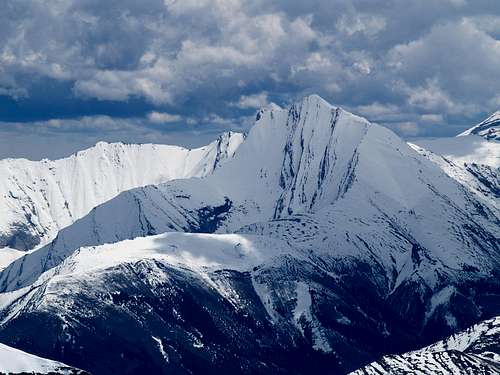
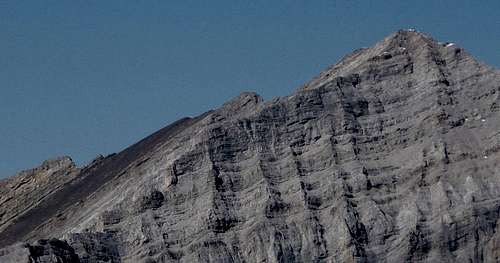
Summit ridge showing downclimbs. Main summit on Left and Lower West summit on right. See the final picture by Ferenc Jacso for perspective on the elevation differences between the summits.
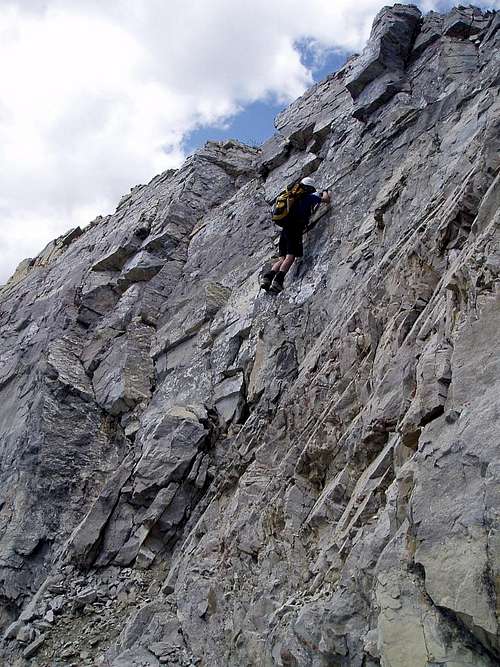
Next Pic is downclimbing crux step by Kane route which is to right if standing on west summit( a bit sketchy with route finding issues. We went down this way but came back up the nose of the crux which is now preferred route. Now also has bolt at top. Then follow summit ridge downclimbing steps and crossing slabs and scree to summit.
Next downclimb with crux in background. We went up the nose of the crux on the way back which was maybe more exposed but more straight forward than the Kane route. Positive hand and foot holds. The nose can also be downclimbed and is recommended.
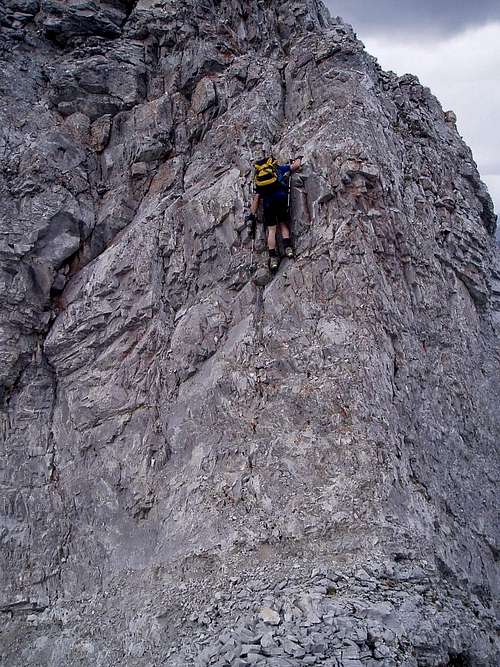
Another downclimb(#3) that is as hard as first one. Picture was actually taken on the way down when he was climbing up this but he still should have put his poles away. The telephoto makes it look steeper than reality.
Descent
Retrace your steps back along the ridge. You get to climb up the steps and the crux which is easier than the down climbing. We went straight up the nose of the crux versus the recommended Kane route. This was maybe more exposed but not really much harder and had solid foot and handholds. It is shortest and easiest to go back down over the brown point and down through the trees to the trail and your bikes or down the NW drainage if you came up that way. Do not be tempted by the rock fields which are rubble which is slower and hard on ankles.
New route
Note there is a third way up that involves going further South on the old trail past the highpoint and then up a drainage to a small valley. Then steep scree slopes can be ascended which come out close to the summit and past all the climbing. see this video bu Adran C. https://www.youtube.com/watch?v=E9To5do7jaM
Great picture by Ferenc Jacso which shows the downclimbs along the summit ridge and the whole NW route including the brown point in the lower right of the picture. The true angle on the downclimbs is not as vertical as the climbing pictures make them look. Note the elevation difference along the summit ridge between the west summit and the final summit.
Telephoto shot of summit ridge from the East from Mount Romulus which shows the downclimbs.
Essential Gear
Mountain bike with at least front shocks required for approach unless you do a two day trip.
Standard scrambling gear. Boots, poles, pack, helmet, etc.
We did not take a rope or any protection and saw no fixed gear or slings on route. As of June 2018 there is a rappel bolt at the top of the first crux downclimb just on the left of the nose. Some people may feel more comfortable with a rope and some protection.
Parents refers to a larger category under which an object falls. For example, theAconcagua mountain page has the 'Aconcagua Group' and the 'Seven Summits' asparents and is a parent itself to many routes, photos, and Trip Reports.