
|
|
Route |
|---|---|
|
|
37.62579°N / 107.59366°W |
|
|
Mountaineering |
|
|
Summer |
|
|
Half a day |
|
|
5.10 or 5.5 C1 |
|
|
5.10 (YDS) |
|
|
1 |
|
|
I |
|
|
Overview
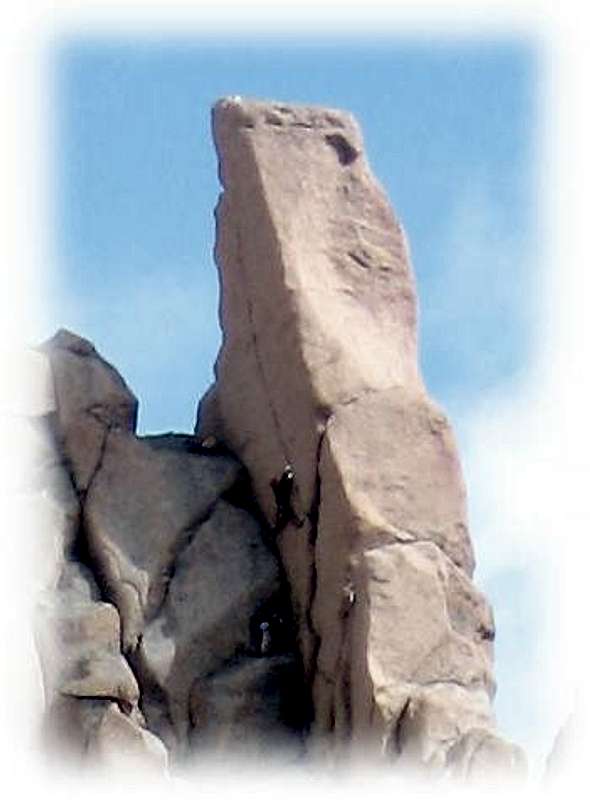
Sunlight Spire is the distintive tower just to the East of the main summit of Sunlight Peak. For years it was marked on the map as 13,995 feet, just shy of the magical 14,000 foot line. However, with recent revisions in the altitude of Colorado Mountains, the Spire in now recorded as an even 14,000 feet. As such, it is the most difficult of the 14000 foot summits to reach in Colorado. In addition, since the prominence is nearly identical to that of Thunderbolt Peak in California, an argument could be made that it is the most difficult 14,000 foot summit in the contiguous USA (although the climbing is very well protected). The vertical rise of approximately 220 feet, though, is insufficient for it to be considered a true 14er. There is a great photo of the spire by jhansen007: Sunlight Spire from the South.
Getting There
Approach Chicago Basin as described in either the Sunlight Peak or Sunlight Spire pages. In order to climb the spire from the camping spots in the lower basin, tun north, and climb up a steep trail on the left (West) side of the creek to reach twin lakes at 12,500 feet. From the lakes, head east into the basin between Windom Peak and Sunlight Peak. Turn left and angle up a mixture of slabs and scree towards the saddle between the Spire and Sunlight Peak. The route for the Spire leaves the Peak's ascent route 100 feet or so below the Saddle.Route Description
 Jeff Lord on the Summit Spire. Photo by Aubrey Laurence
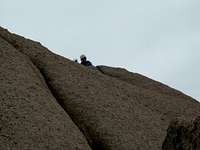 On the summit with the Jamcrack below. This is the best photo I have of the crack which is directly below climber, not angling up to the left of the picture - does anyone have one that's better to place here? This photo was taken by Steve Conrad.
 Sunlight Spire
The summit tower is a single block of stone, split by a single 1 - 3 inch crack that angles up and to the left for about forty or fifty feet to the summit. As of 2006 there were three fixed pieces in the crack. The route is obvious and and has been free climbed at the 5.10 level. If you have a long reach, it would probably be possible to scramble up sloped rock to the small saddle beneath the crack, then reach up and right and join the crack about half way up. Although many will find the crack of perfect handcrack size, it is slighly overhanging, rough and angles severely to the left so that it is difficult to keep your feet within the crack. Alternately, the route makes an enjoyable and straight forward aid climb that is easily accomplished using Cams and stoppers. For more photos and a second description of the climb, check out Jeff Lord's wonderful web page here.
 Photo of the summit crack by Jeff Lord.
When we climbed the Spire, we followed the ridge up from the Saddle past the high rocks to the West of the tower. Eventually, we were forced to descend down, reaching the end of the second class ledge described above. This was a scenic tour, but more involved than if we'd just gone on that ledge.
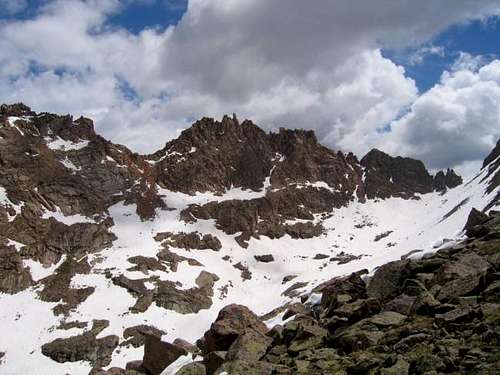 The approach to the technical climbing can be seen in this photo by Sisyphus. Sunlight Spire is in the center of the photo, with the slopes of Sunlight Peak on the left. Just below the Sunlight Peak Sunlight Spire saddle, there is a snow covered ledge angling around to the right (East) around a portion of Sunlight Spire. Follow this ledge. Even above where there is no snow on this picture, the general line of the ledge can be followed as it angles up, ending a bit below and west (left) of the summit tower of the Spire. There is a lower line of snow that eventually angles up in a ramp/gully to the right of the summit. This is not the route.
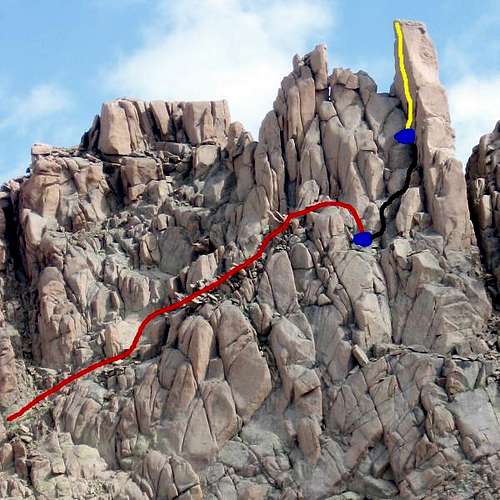 The route on the upper portion of Sunlight Spire. Photo by Aubrey Laurence.
Essential Gear
Rope - you could get by with a single 9 mm rope, since the pitches could be made quite short enabling you to even double this rope up for the leader if desired.Several large stoppers. The fact that three of them were stuck in the crack tells you just how good the crack is for this type of gear.
A number of Cams, from about a 1.5 Camalot to a 3 Camalot. I would double up several of these sizes if you are planning to aid the crack. I brought a #4 Camalot and used it, but could have gotten by without it.
Tape - if you are planning to free climb the crack, the rock is extremely rough with huge crystals. You might get lots of cuts without tape.
Extra slings or etriers - the summit rock is dead vertical, and the crack angles such that your feet are on the face below the crack.
Harness, warm clothes, etc. It was spitting snow when we were there in mid June.
 Sunlight Peak (Right) and the Spire to its left.
mtsuji on 14ers.com recommends the following rack: "We couldn’t find an in depth report or rack description from anyone who had previously climbed it so here’s approximately what we used in case anyone wants to know what to bring
-1 #1 C4
-2 or 3 #2 C4’s
-1 #3 C4 for the anchor
-1 .75 C4
-1 grey Super Cam
TJ placed a #8 nut as well. Although we used lots of cams, the crack looked like it would take quite a few medium to large nuts as well. New webbing would be a good idea as well as the existing webbing had a decent amount of UV damage." See Here for the report.
External Links
There are a couple outstanding photos of the summit crack in the book:Rosebrough, R., Climbing Colorado's San Juan Mountains, Falcon Press, 1999, Pgs. 137 and 241.
Photo of spire: There is an amazing photo of the spire HERE.
The following is a great trip report of the route.
A description of the first ascent of the spire by George Bell, David Michael, and John Marshall in July 1961 can be found in the February 1962 Trail and Timberline.
George Bell, the son of the first ascentionist, wrote a route description for Sunlight Spire on Mountian Project.
A VERY detailed photographic tour of the summit tower can be found here.
Several photos of the summit block and crack can also be seen here. The first one is taken from on the 2nd class ledge.
Photo Help
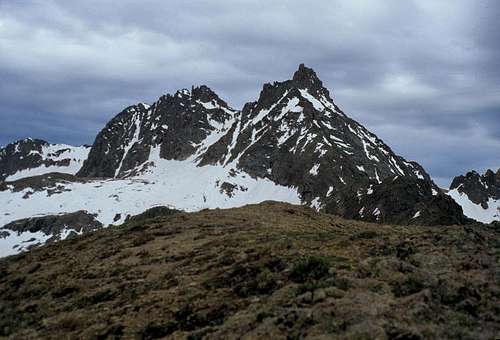
 Sunlight Peak and Spire from Windom. Photo by xskier77
I would like to thank Sisyphus for generously allowing me to attach his picture of the spire to this web site. It shows the position of the 2nd class ridge very clearly. I would also like to thank jhansen and Steve Conrad and xskier77 for graciously allowing me to place their pictures on the website. Thank you also jfox for pointing out the 14erfun website!!
I'd like to give a special thanks to Jeff Lord, Deborah Romero, and Aubrey Laurence for providing pictures of the summit block for use on this web site.