
-
 8655 Hits
-
 76.47% Score
-
 7 Votes
|
|
Route |
|---|---|
|
|
48.41641°N / 121.06618°W |
|
|
Hiking, Mountaineering, Trad Climbing |
|
|
Summer, Fall |
|
|
A few days |
|
|
5.6 (YDS) |
|
|
III |
|
|
Overview
This route will never be a classic, but it IS a great adventure on a rarely climbed face. It was included in the American Alpine Journal in 2003 after Loren and Jens did the first ascent in July of 2002. Dane and I did the second recorded ascent in July 2013...over ten years later. It includes spectacular glacier travel, moderate rock to 5.6, and an AI2+ pitch in a hidden couloir. If you are looking for a mountaineering adventure on a rarely climbed face on an incredibly remote big Cascade peak this is for you!
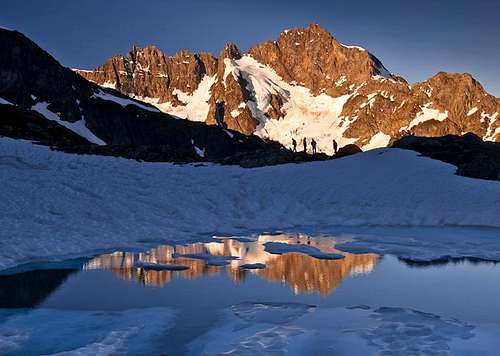 Sunrise on Formidable with the NE face in the sun Sunrise on Formidable with the NE face in the sun |
 Mt. Formidable from Kool Aid Lake Mt. Formidable from Kool Aid Lake |
Getting There
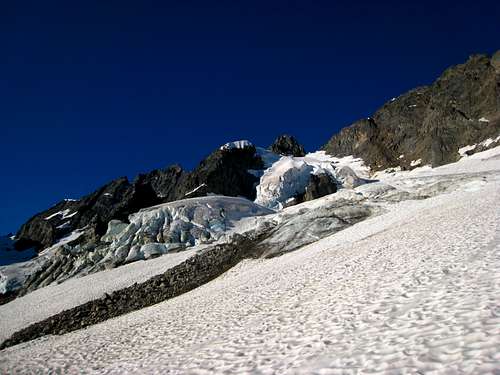
From Seattle head north on I-5 to Mount Vernon and continue east on WA Highway 20 (North Cascades Highway) to Marblemount and veer right onto the Cascade River Road just as the highway makes a sharp left turn. Go 23 miles on this road until its end at about 3,600 feet elevation. The final 3 miles are steep. From the trailhead, hike the "stupidly inclined" Cascade Pass trail which ascends 1,800 feet in 36 switchbacks to 5,400 foot Cascade Pass. This is the most popular climb in the North Cascades National Park so expect to see other people and rangers patrolling the area. From the pass, take the small trail to the south passing the "Toilet" signpost and continuing up through heather bushes and traversing on the slopes below Mixup Peak. At some point you will probably hit snow and many people use crampons on this traverse which marks the start of the Ptarmigan Traverse (if going north-to-south). Round the rib, drop 100 feet to the Cache Glacier and ascend the glacier to 6,950 foot Cache Col. This col is the higher, left col you see when on the Cache Glacier. The lower, more rugged right col is Gunsight Notch. Do not ascend to this col. It usually has a nasty bergschrund as well.
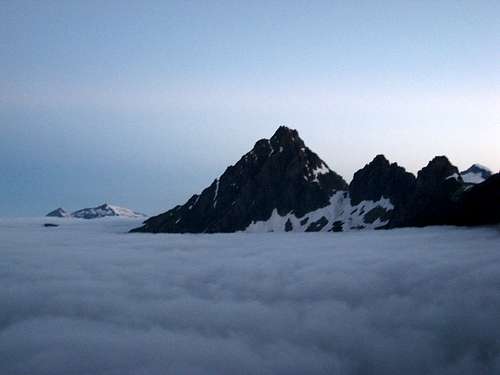
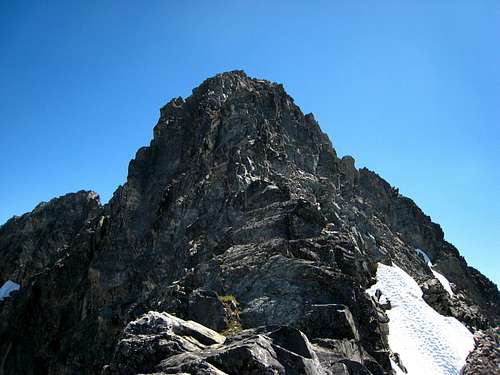
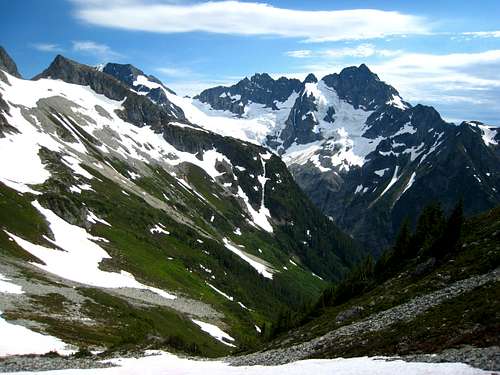 Mount Formidable and Arts Knoll from Cache Col
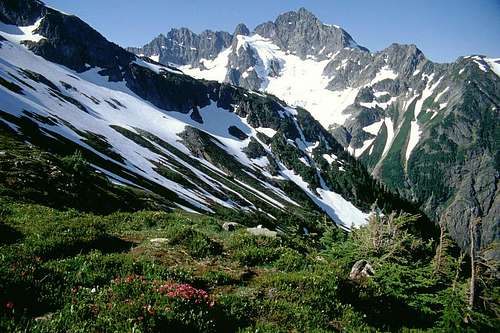
Once at Cache Col, locate the small trail traversing down to Kool Aid Lake, a small pond at 6,100 feet. This is the only logical place to camp in the entire area and this is also the typical first camp spot for people doing the full traverse. From Cache Col you can see Arts Knoll and once you arrive at Kool Aid Lake, it is the most noticeable peak you see above the lake. The hike from the trailhead to Kool Aid Lake typically takes between 5-8 hours.
 Mount Formidable from Kool Aid Lake
Route Description
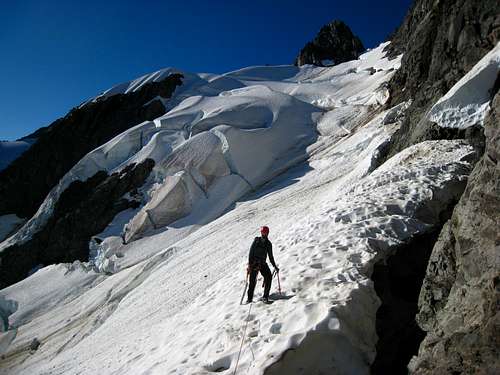
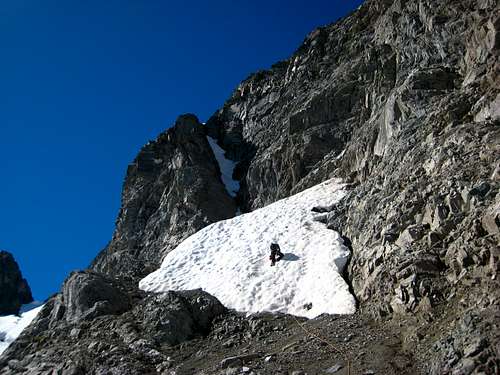
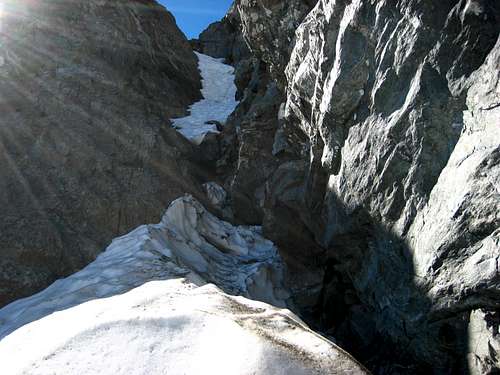
From Kool Aid Lake, hike on the Parmigan Traverse path and cross the Red Ledge. This ledge crossing can be somewhat difficult in early season. About a quarter mile past the ledge, descend down 600 feet to the 5,500 foot bench on the Middle Cascade Glacier between two huge icefall sections. Cross this bench and continue to the foot of the Formidable glacier. Ascend the Formidable glacier to the NE Face which is best done by traversing right to the northern end of the glacier and ascending the easier, safer section. There are many large cracks to weave around. Once at the top of the glacier look for a spot to cross the large moat. Be VERY careful here, consider an anchored belay for any crossing you may find. Late in the season, crossing this moat may be impossible.
 Climbing the Formidable Glacier Climbing the Formidable Glacier |
 Navigating the large moat Navigating the large moat |
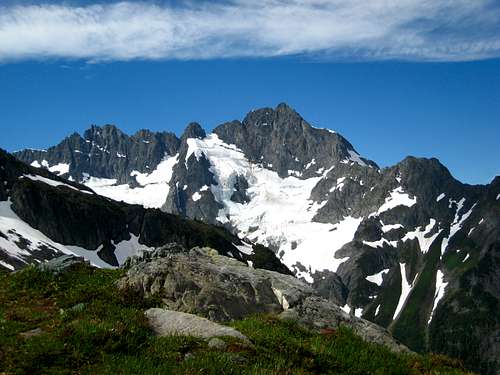
 Looking across the valley to J'burg Looking across the valley to J'burg |
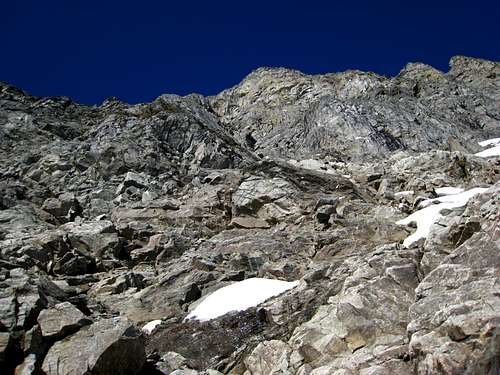
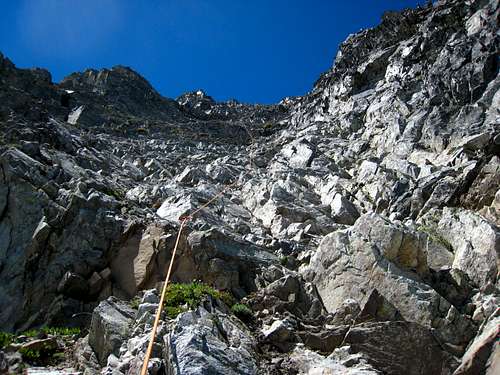
Gain the rock climber's right of the fall-line from the summit and begin up loose class 4 rock covered in kitty litter. The rock is actually quite solid here but beware the scree that covers it. Below I will describe the way we broke out the climb...There are many ways to break it out depending on the length of your rope, and how much you simul-climb on each pitch. We used a 70 meter rope, made 8 pitches, and simul-climbed on a few of them.
| Pitch | Photo | Length (Meters) |
YDS |
Description |
| 1 |
 Pitch 1 Pitch 1 |
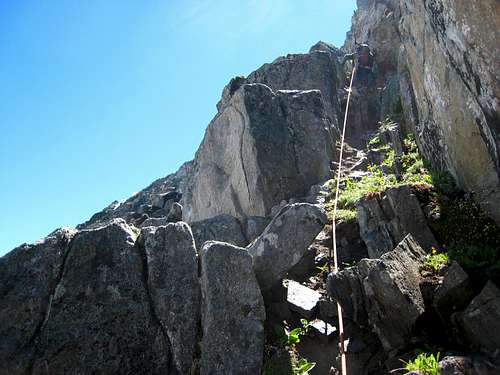
80 | Low 5th | Once you cross the moat, anchor yourself on any of a few small ledges and make a very long 80 meter lead up the low angle scree covered rock. It's mostly 4th class with a bit of low 5th class at the last 10 meters up a horribly loose gully. At the top of this gully (which trends left) there is a large ledge to set up an anchor. The hidden couloir can be seen just to the left from this ledge. Protection was very sparse and I only bothered placing one piece for the entire pitch. The final 10 meters we simul-climbed. |
| 2 |
 Pitch 2 Pitch 2 |
60 | Class 3 | From the large ledge, traverse left towards the couloir on a series of narrow ledges. There will likely be a snowbank to either traverse around or climb over. Belay at the base of the steep snow couloir. No protection. |
| 3 |
 Pitch 3 - The Couloir Pitch 3 - The Couloir |
75 | AI 2+ | Climb the shady steep snow couloir which reaches about 65 degrees midway up using the right rock wall for rock protection. Pickets can also be placed in the snow. Either exit the couloir by pulling through the overhanging chalkstones at the top (5.6) or exiting left on some easier ledges just below the chalkstones (Class 4). A few feet above the couloir is an awesome ledge to belay from in the warm sun. We simul-climbed the final 5 meters. |
| 4 |
 The LONG 4th Pitch The LONG 4th Pitch |
160 | Low 5th | Once above the couloir, traverse a few feet left on an exposed ledge around a corner and locate a huge section of low angle 4th and low 5th class on the face. Lead out your rope and simul-climb just over 2 rope lengths to where the terrain steepens to near vertical. This long section is solid, easy and fun with good exposure below. Protection is somewhat sparse but solid. Belay at the base of a 30 foot vertical step just below the "Duolith" which is the huge 3 foot wide crack you can see just above. |
| 5 |
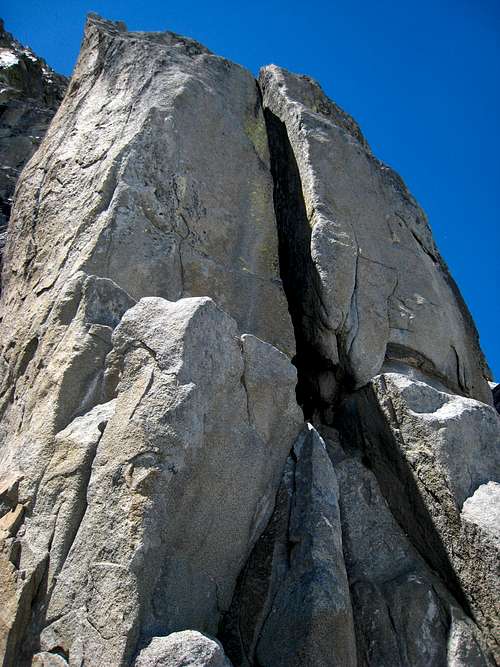 Passing by the Duolith Passing by the Duolith |
30 | 5.6 | Climb up the vertical step by weaving up small ledges reaching easier terrain just above. This 30 foot section was one of the two cruxes. Pass just to the left side of the Duolith and belay on another granite step just above the Duolith with a gully leading up and to the left. |
| 6 |
 Leading up the 30 foot gully Leading up the 30 foot gully |
35 | 5.6 | Continue up the gully to the right for 30 feet then continue up and back to the right. The climbing on this pitch weaves back and forth from one ledge to the next to pull over the vertical steps. Find a sketchy place to belay when the terrain above becomes low angled once again or the rope drag becomes impossible to continue. Protection is pretty good until you reach the easier terrain. Note: It will be better to belay from the top of the 30 foot gully making the 5th pitch 30 feet longer to avoid terrible rope drag on the 6th pitch. We didn't do this and had a close call making the 6th pitch. If you do it this way, you can reach the crest of the north ridge on the 6th pitch and do the climb in 7 total pitches. It would also be much safer since there are NO good belay anchors between the top of the 30 foot gully above the Duolith, and the crest of the north ridge. |
| 7 | No Photo | 25 | 4th | Climb easier terrain with little pro for 25 more meters to reach the crest of the north ridge. This can be combined with Pitch 6 if you continue up the 30 foot gully at the top of Pitch 5. Sling a horn on the crest for a belay. |
| 8 |
 Pitch 8 on the Ridge Pitch 8 on the Ridge |
70 | 4th | Once on the ridge crest, turn left and finish the final 120 feet to the summit. This final pitch on the ridge is exposed and loads of fun. Views are spectacular the rest of the way. We simul-climbed this entire pitch with the follower tied into the middle of the rope to reduce drag. There are lots of tiny rock towers to weave through. Once on the summit, enjoy the views! |
Note that the First Ascent party in 2003 took a different route for our pitches 6 and 7. Once at the Duolith atop the 5th pitch, they continued through a notch right behind it, and continued to the north ridge to the right of the route we took. We met the ridge slightly closer to the summit.
 FA Party line of ascent with their belayed anchors marked FA Party line of ascent with their belayed anchors marked |
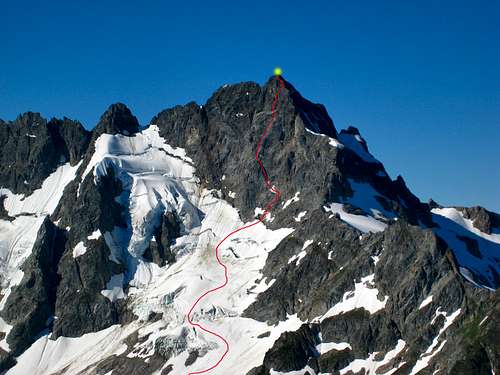 Our line of ascent - July 2013 Our line of ascent - July 2013 |
Descent
Descend the standard South Route described very well by Klenke. Dropping down the south side of Formidable may require a couple rappels if you have never done the route before. Once you reach the Crossover Saddle, drop 100 feet down the other side to the Ptarmigan Traverse path and continue over the Spider/Formidable Col and back to Kool Aid Lake down the Middle Cascade Glacier.
Essential Gear
Crampons, 60 or 70 meter rope, ice axe, Single set of BD Camelots 0.3 - 3", set of nuts, some small Mastercams, helmet, 2 pickets worked wonders in the hidden couloir. Bring stiff mountaineering boots, leave the rock shoes at home.
External Links
See the TR of the First Ascent party: First Ascent
See our TR here: Second Ascent