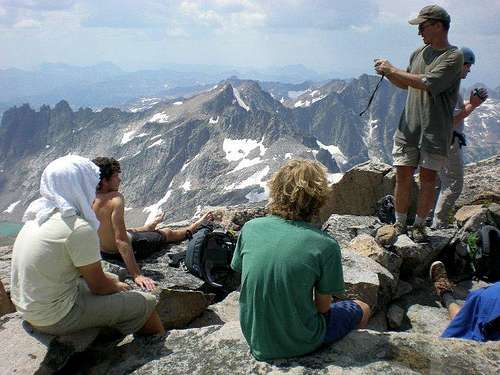
![Unnamed Image]() My sons and nephews on Froze-To-Death Plateau
My sons and nephews on Froze-To-Death PlateauI've made four climbs on Granite and decided to write up my experiences to help future first time climbers have a successful end enjoyable experience. This is basically a tutorial for first time and maybe second time climbers on the standard route with some basic options described. The approach is from Froze-To-Death but the info is useful for anyone using the Avalanche Lake approach as well.
I've posted photo albums of each of the four climbs.
https://www.summitpost.org/granite-peak-route-description-for-first-time-climbers/albums/p-975503
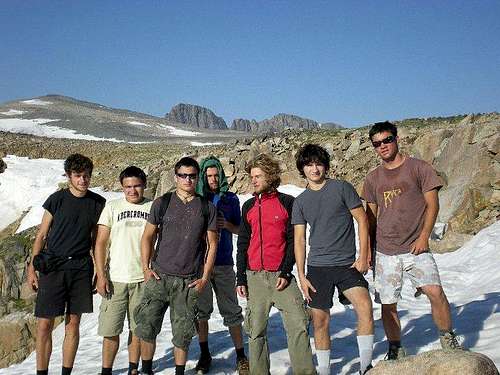
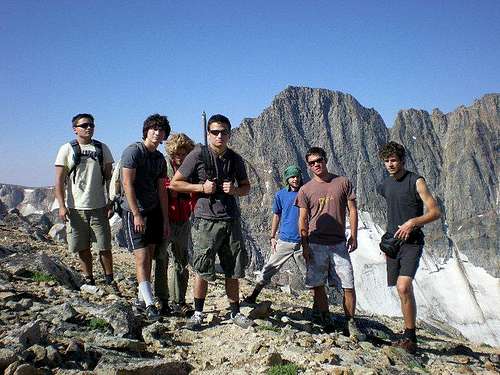
The first ascent was with my son, Sep 2002. Neither of us had any technical climbing experience but made the summit none the less. The next was solo, Aug 2006. The next, Jul 2007, I guided my 3 sons, 3 nephews and a friend. Only one had any previous climbing experience. The last was solo Aug 2008.
The best time to attempt a climb would be mid to late summer, mid to late Aug being the best to avoid thunderstorms and an easy Snow Bridge crossing. Winter like weather is very possible from end of Aug on. Snow is possible all year long. Every morning I awoke on the plateau or by FTD lake, 11 in all, there was frost. It's good to plan at least one extra day and two or more is better in case of weather. On two of my climbs the first planned day to summit was not possible due to weather. Always check the forecast.
Words of caution. Granite Peak is challenging but pretty much a straight forward approach and climb when using the standard route. That said, all it takes is a moment of complacency for everything to go very wrong. On my last climb, Aug 2008, I entered the last chimney on the down climb. As I got myself into the chimney, I became complacent and had a momentary lapse of concentration. Both feet were solidly set in footholds and as I started to move down, I took one hand off and then without thinking took the other off before having a good handhold with the first hand. I instantly realized my mistake, but too late. My upper body started falling backward and in a split second a thousand thoughts raced through my mind. I thought, 'This is it... I'm on my way down for a short/long drop with a bad ending', while also thinking, 'how careless and stupid could I be?'. And then my day pack came to rest against the back of the chimney, stopping my fall. I can't describe the feeling of relief that came over me and the realization of how close I came to becoming a statistic and a headline.
On my second trip, bushwhacking down a talus boulder slope on the way out, just below Phantom Lake, I stepped on a large flat boulder maybe 3-4 ft in diameter. As my weight with full 60 lb pack came to rest on it, it shifted and slid downward sending my feet upward and my backside downward. My posterior slammed hard against the rock, breaking my tail-bone. Fortunately, that was my only injury other than my pride. It was a painful trek out, but I was still able to travel.
On another occasion, a friend of mine and his brother were coming down from the summit and crossing the snow bridge. It was still intact but there was a path across it which they had crossed on the way up without drama. As my friend's brother was just about make the other side of the Snow Bridge, his foot slipped and he took a long slide followed by a violent, painful tumble when the snow turned into boulders. He believes his helmet saved his life. The incident was written up in "Outside Bozeman", "Falling Off Granite Mountain". http://www.outsidebozeman.com/summer-2007/granite-peak
One last experience. I made a 5th trip to Granite, Sep 2011. As I arrived at Bivouac Saddle, I found two climbers there. One was covered with a sleeping bag with only his feet showing. His partner explained that he was a diabetic and on the way down the day before he lost his intravenous insert and was in bad shape from blood sugar and hydration issues and there was no way he was going to make it out without help. They had already spent the previous night there in the saddle. Long story short, I already knew that there was no cell service on the summit so I reversed course and got back up onto FTD to make a cell call out for a rescue where I knew I had cell service on previous trips. The rescue was effected but they spent one more night in the saddle. A chopper dropped them supplies and meds and pulled them off the following morning. It was too late for me to return to make the climb after making the 911 call and I needed to be out by early the next morning. So I just kept heading back to base camp, packed up and headed down trail to the trailhead.
Bottom line, don't get complacent and be prepared for an emergency. If you're going solo, let someone know your plans including route and planned camps. A good thing about the Granite trip is that there is usually a good bit of traffic unless you use a nonstandard approach/route, and there will usually be someone along to assist in an emergency before too long, but don't bet the farm on it. The back country is very unforgiving of mistakes, especially when there's vertical rock in the mix.
Misc gear. I would recommend a wool base layer, warm gloves and light weight rain gear in your day pack. Weather can change very quickly. You can go from balmy 70's to blowing, sleet/rain 30's in a matter of minutes. Hypothermia is the number one back country killer and Granite Peak has the classic the mix of elements for hypothermia. Prepare accordingly. Carry a little extra snack food and water just in case. I like a 50/50 Gatorade/Water mix and I pack Gatorade Powder mix. Gatorade mix helps the water to taste good which helps encourage me to drink and stay hydrated as well as replenishing electrolytes. There is always water on the plateau, so I pack only enough to make it to base camp and fill up on the plateau and use purification tablets to purify. There's also water on the lower part of the Phantom Creek Trail near Mystic Lake. The second creek crossing is the last water going up the switchbacks.
Climbing gear. Most of the climb is class 4 scrambling with a few class 5 moves. The most difficult maybe 5.5. Some folks rope up and some don't. I never used ropes for any of my climbs. when I took my sons and nephews, I took a 100' ft rope, two harnesses, carabiners and some anchors just in case but never used them. Foot and hand holds are good on dry surfaces but if surfaces get wet, it changes everything. So I recommend bringing climbing gear in case of a shower or storm or take your chances. Helmets are always recommended although I never used one. An ice ax might be useful to traverse the Snow Bridge early or late in the season. Crampons aren't a bad idea either, but if you're climbing mid to late summer they'll probably be extra weight unless a freak snow storm blows through, in which case you might not make the climb at all.
Note: The last time I was up there, there were slings at almost every rap location.
Approach. 3 out of 4 times I used the Mystic Lake - Phantom Creek Trail approach up the West Rosebud Drainage. Camping is available at Mystic Lake 3 miles from the trailhead. The advertised distance up the switchbacks on Phantom Creek trail is 3 miles. I believe it is closer to 4 1/2 or more. The last run alone to the plateau is a good 3/4 mile and many of the other 28 switchbacks are a quarter mile or longer. Elevation gain from the trailhead to Mystic is 6700 to 7700 and to the plateau, 10,200. Once you get to the plateau, turn right to the Southwest and hike directly toward the peak of Froze-To-Death Mountain, about 2 miles away. About a half mile from the peak, correct right, to the West and stay to the North of several small peaks on the South side of the plateau. Just past (to the West) the last of these peaks, slowly correct to the South and hike a little to the right of Tempest Mountain. The descent point off the West end of the plateau is about a half mile to the North of Tempest. There's a visible change in grade below and to the North of Tempest's peak. That's the jump off point and is marked with a large cairn and several rock wall shelters. There is water along most of the plateau but the West most part is dry. The terrain is mostly ankle busting rocks and boulders. There are numerous stacked rock wall wind shelters on the plateau and if you base camp on the plateau it's a good idea to pitch your tent behind one of these as winds can exceed 50 mph, which my son and I experienced on the first trip. The distance across the plateau is a rugged 4 miles and gains 1900' elevation from 10,200 to 12,100.
On the second trip, I took the East Rosebud approach up Phantom Creek. Several miles up, I jumped off the trail and bushwhacked up to Phantom Lake. It was hellish. I've heard there's a better trail to Phantom lake but have no experience on it. (There is a good description of this trail on the Phantom Creek approach to Mount Peal. https://www.summitpost.org/mount-peal/247123) Phantom Lake is a beautiful spot if you want to take the extra time and effort to go that way and the fishing is reportedly good. From Phantom Lake you bushwhack up Phantom Creek. over much more open and easier terrain than below the lake. Stay to the right of the stream once you get past the waterfalls upstream from the lake. You'll eventually come to the East of end of Froze-to-Death Lake. Follow the North side of the lake around to the West end of the lake. There are a number of spots to camp along the lake. There are two more lakes up stream from FTD Lake with good spots to camp as well. The way up to the plateau is a steep talus bowl to the North of the two upper lakes.
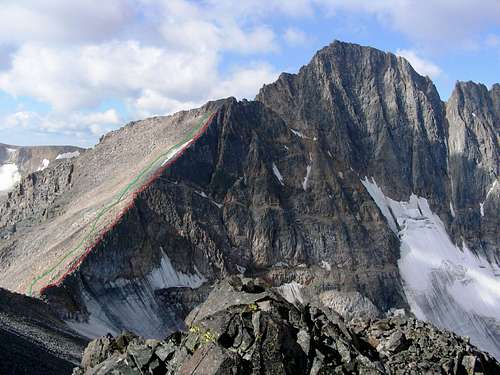
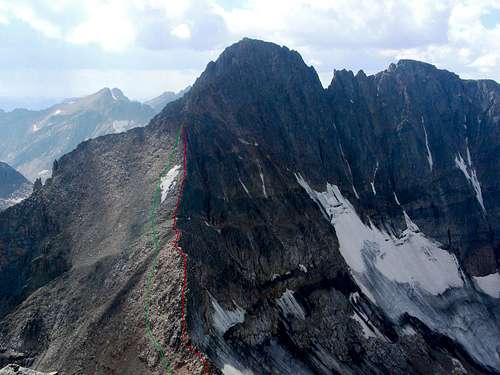
At the FTD Plateau jump off point there's an intermittent trail across a steep ankle busting talus slope to the Tempest-Granite Saddle, also know as Bivouac Saddle. It's about 3/4 of a mile and drops about 600 ft. At the saddle, the standard route goes down to the South a few feet and parallels' the East Ridge on a well worn to intermittent trail. Follow the trail to a large talus boulder field known as the Triangle. It's called the Triangle because of it's shape that narrows at the top. It's tedious class 3 scrambling and gains 800 ft in elevation. Don't take the Triangle lightly, it's a good place to twist or break an ankle or something else. There's an alternate way directly up the East Ridge from the saddle that provides some fun class 4 scrambling. I've used both ways twice. The route up the East Ridge leads to the top of the Triangle where the standard route is joined again. From the top of the Triangle there's a trail that parallels' just below and to the South of the East Ridge and leads to the infamous Snow Bridge. I've seen other climbers miss this trail after the Snow Bridge on the way out, following the contour of the spur ridge to the South, visible in the photo below.
![Unnamed Image]()
North Face of Granite with a view of the Triangle with the green standard route and red East Ridge route
View from Tempest Mountain
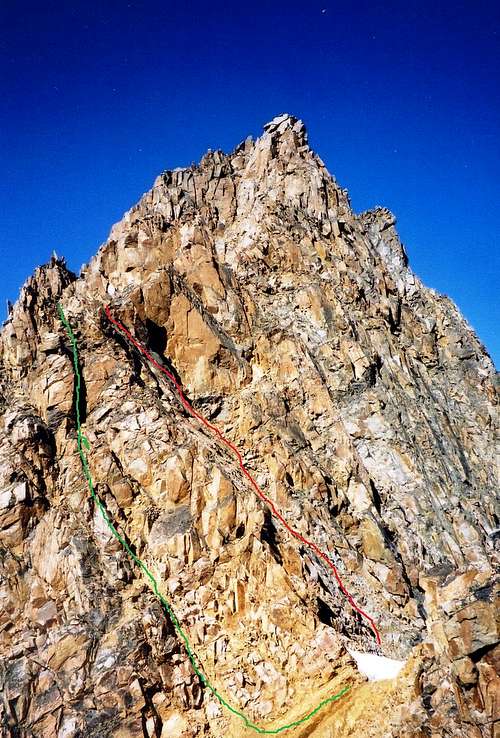
The Snow Bridge is like a notch in the East ridge that drops off sharply to the North and South. Depending on the year and time of year, the Snow Bridge might be melted off or intact. Typically, from mid/late July to Sep it will be a dry crossing. My son and I made our first climb in early Sep and it was melted off to the South with a dry crossing but a good bit of snow left on the steeper North side. On my second trip 4 yrs later in late Aug, it was completely melted off both sides. On the third trip the following year we went in late July and it was melted off on the top for a dry crossing with snow to both sides. On my last trip in late Aug it was still very much intact but had a well worn trail across it. I have photos of these in each of the four albums. Early or late in the season, this can be the most treacherous part of the climb and an ice ax and crampons are recommended.
After the Snow Bridge the real climbing begins. You can go right to the North or left to the South. The standard route goes left to the South and is a little easier with mostly class 4 scrambling. There are a series of three pitches on this route. The first pitch starts out as a chute, then turns into a chimney. At the top of the first pitch, there's an area big enough for several climbers to stand. You make a turn to the right for a couple of steps then back to the left facing West and you're at the base of the second pitch. This is a chimney all the way up and at the top there's a notch in a spur jutting to the South. At this point the route dips down, then back up. Most of this is walkable for about 100 ft across the South face. The path is visible if you look for it. Then you enter the last pitch up which is another chimney.
The North side route from the Snow Bridge is a little more difficult and exposed. After the snow bridge, traverse carefully across the North Face to a couloir. The couloir slopes up to the East Ridge and has a good bit of loose rock in it. It's mostly class 4 scrambling but very exposed. Make the East Ridge and follow it for some class 4-5 climbing over and around large rocks. The route is not defined, so you'll have to pick your way as you go. Go as far as you can up the East Ridge, then work to the South side. At this point you should join the standard route at the top of the second chimney where you'll be in a notch. As described in the standard route from the Snow Bridge, the route dips down here and then back up into another chimney.
The Snow Bridge and top 500 ft of Granite Peak. The green standard route to the South and the red alternate route to the North leading to the East Ridge.
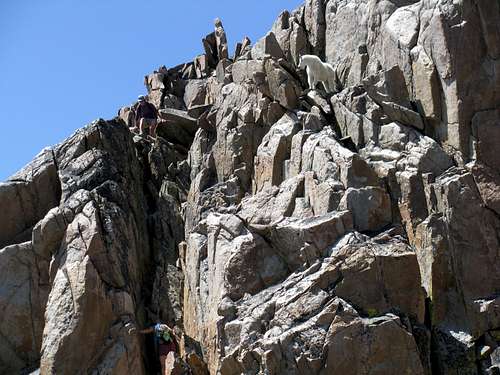
At this point (pictured below) the top 200-300 ft of the South Face below the peak opens up into full view ahead and to the right. It's the most technical and challenging part of the climb. I should mention that on my first trip I had kind of a tunnel vision, meaning I was narrowly focusing without quite seeing the big picture. The reasons for this were the intimidation of the mountain, unfamiliarity and not knowing what lay ahead which had me a little stressed, which in turn leads to focusing and tuning out the bigger picture. I'll mention again that neither of us had made a climb even close to this level before. I had studied a few trip reports on-line before the climb. They were similar in some respects and differed in others. One thing common was mentioning the Keyhole and that it was the way to the summit. The Keyhole is below a large sloping rock, maybe roughly 20 ft long, 10 ft wide and a few feet thick (visible in the photo below). It rests on some other large rocks leaving a window like opening below it. It's just a few feet below the top, to the South. At the top of the third chimney, the standard route goes right, to the East of the peak. Study the rock face carefully. Approach the face and you'll see a horizontal crack ledge sloping slightly up to the East. Traverse the ledge then climb upwards until you reach a ledge sloping slightly upward to the West. This is mostly lower class 5 climbing. A few steps up the ledge there's a vertical fissure, about 10 ft. Climb up the fissure - a 5+ maneuver. Then make a fairly easy traverse across the face below the peak toward the Keyhole. Work up and around to the left of the Keyhole and then back toward the peak. Then walk a few steps up to the summit.
Another more challenging route from the top of the third chimney is via the Keyhole Chimney, and easily visible from this point (top of the third chimney). It is directly under the Keyhole, I climbed it solo on the second trip without ropes but recommend roping up as it is rated 5.7 The hardest move is at the very top of the chimney where the rock hangs out slightly resulting in a bit of a precarious crawl over it with about a 40-50 ft vertical drop below.
Green standard route, Orange the more difficult Keyhole Chimney Route
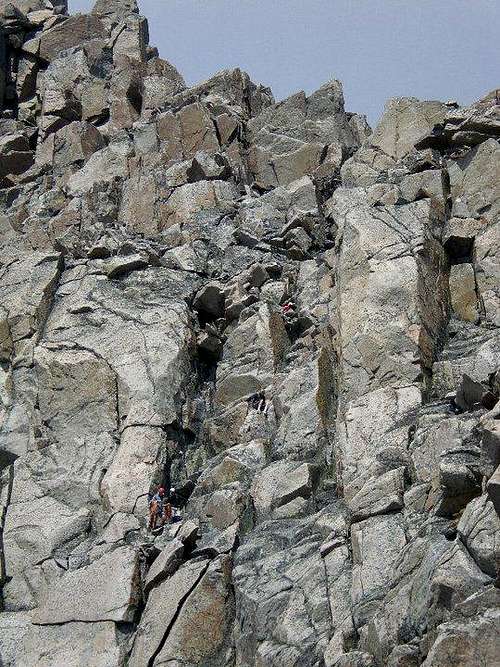
![Unnamed Image]() Climbers making the final pitch
Climbers making the final pitch![Unnamed Image]() Climbers down climbing the third chimney
Climbers down climbing the third chimney![Unnamed Image]() Looking from the direction of the second chimney to the third chimney. One climber down and one down climbing the third chimney.
Looking from the direction of the second chimney to the third chimney. One climber down and one down climbing the third chimney.
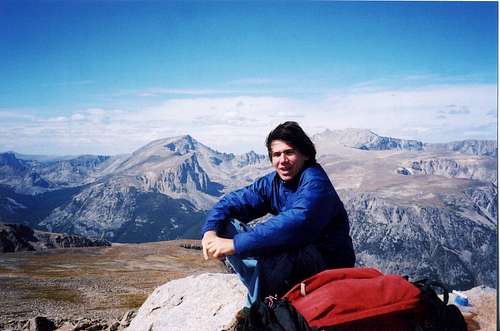
![Seth on Froze-To-Death Mountain]() Seth on Froze-To-Death Mountain with Mount Wood in the background
Seth on Froze-To-Death Mountain with Mount Wood in the background
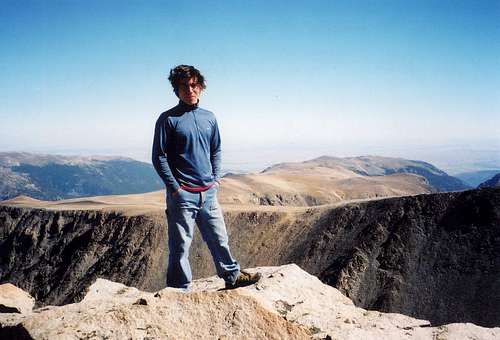
![Unnamed Image]() Seth on Granite - FTD Plateau in the background
Seth on Granite - FTD Plateau in the background
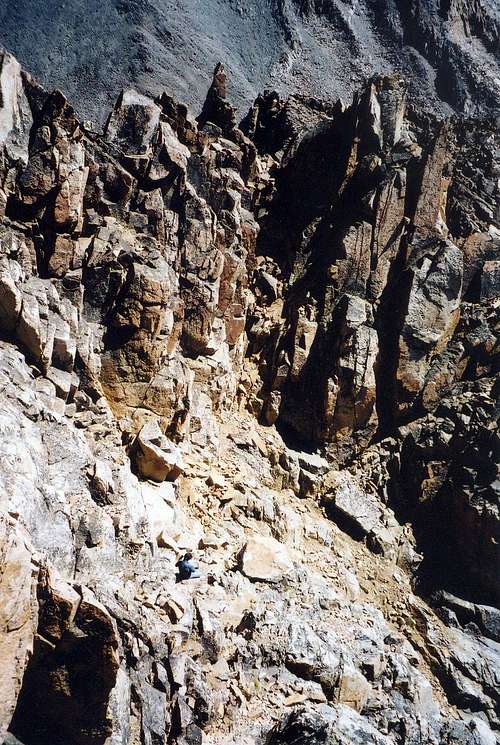
Seth down climbing the upper South Face
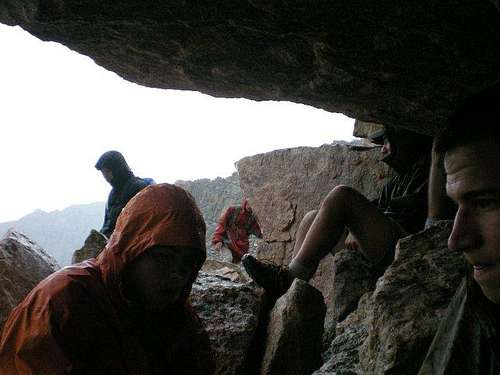
![Unnamed Image]() Ducking for cover from the elements on the Triangle
Ducking for cover from the elements on the Triangle
![Unnamed Image]() Rock wall shelters on West side of the plateau just before the jump off point.
Rock wall shelters on West side of the plateau just before the jump off point.![Unnamed Image]() Plateau jump off point down to Tempest - Granite Saddle
Plateau jump off point down to Tempest - Granite Saddle


Comments
Post a Comment