-
 9358 Hits
-
 79.04% Score
-
 10 Votes
|
|
Route |
|---|---|
|
|
36.09360°N / 115.4836°W |
|
|
Trad Climbing |
|
|
Spring, Summer, Fall, Winter |
|
|
A long day |
|
|
5.9 (YDS) |
|
|
9 |
|
|
IV |
|
|
Overview/Approach
I had just climbed Sunflower, my 7th route up into Oak Creek Canyon. My partner turned to me and asked why we had yet to hit anything on Mount Wilson’s stoic east face across the way. Thus, began the search for our first route up Wilson. Lady Wilson’s Cleavage, someday to be classic? Or dirty off-width not worthy of the several thousand feet bushwhack approach? What attracted me to this route was its inclusion in Larry De Angelo’s (“Scary Larry”) Red Rock Odyssey guide book to “classic” traditional (trad) climbs at Red Rocks. His book only details 13 climbs half of which I had already done. Jerry Handren also gave the route a two out of three star label in his new outstanding guide book, “Red Rocks, A Climbers Guide”, published in 2007, which means he thought it was a worthy route to pursue as well. However, his approach beta and description of pitches 8-9 has led me to believe, he might have given it two stars due to Larry’s inclusion of the route in his book. Swain gave it no such recognition in his guide book and I believe it does not deserve any special recognition. It is really just another route to do for those of us obsessed enough to tackle every route we can in the park.
Another of many trad lines put in at Red Rocks by Jorge and Joanne Urioste along with Joe Herbst, Lady Wilson’s Cleavage navigates the last 1115’ towards the summit of Mount Wilson. Anybody familiar with the size of Mount Wilson (highest peak in Red Rocks), realizes this means a long approach is in order, particularly by Red Rocks standard. Not only is the approach long, but the route rarely done, thus no obvious trail or clearance work done. The relentless bushwhacking actually surprised me. Although I am used to intense and remote approaches in the Canadian Rockies, normally I expect a “paved” trail to the base of most routes in Red Rocks.
The night before the climb my partner and I individually did a Google search for beta. All we each really found was one distinct (and hilariously written) trip report from a young man who described somewhat of a nightmarish route. We neither one discussed this trip report until we were at the base of the climb wondering why we had just thrashed our way through oak scrub, cacti and holly for four hours (count a little time for being lost on this one, we started too far left).
The bottom line is I basically like routes of all nature, but do not recommend Lady Wilson’s Cleavage (I have climbed an ice route by the same name up on the Icefield Parkway in the Canadian Rockies that is fantastic, so do not confuse the two) unless you are on a quest to climb all free routes in Red Rocks. Lady Wilson’s Cleavage is totally free of bolts (including the stations) and that is a refreshing as well as rare experience at Red Rocks.
Access is via Route 159 at the Old Oak Creek Campground pullout. Handren references using the First Creek pullout, but that parking area does not make sense. Trust me, we used it. The start of the approach up Mount Wilson is to the north of the east face, behind the Wilson Pimple. The First Creek pull out puts you too far south. Your descent will be even further north of where you start the ascent.
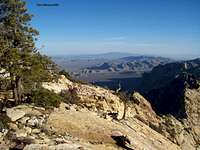
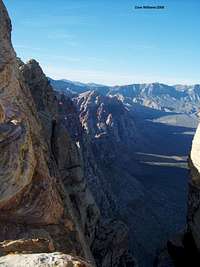
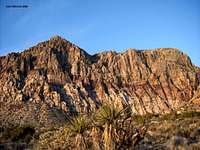
From the Oak Creek Campground pull out, follow a trail that circumvents the Wilson Pimple to the south. Once at the Wilson Pimple, leave the trail and start scrambling up to the base of a heavily vegetated gully to the southwest of the pimple and ascend this gully to its terminus at a saddle. Turn left and look for a fixed rope to ascend a short 5th class section. Continue scrambling and angling rightward finding ramps and gullies that avoid slabs. You end up venturing quite right on a rightward ramp that eventually has you below a deep arch in the huge wall above. Descend adjacent to the wall to your left until below the route. The route comes into full view at the saddle (photo). Lady Wilson’s Cleavage is a distinct single crack/chimney that splits the upper north east face. In mid March, there was snow at the base of this northeast facing route.
Route Description
1115’, 9 Pitches, 5.9
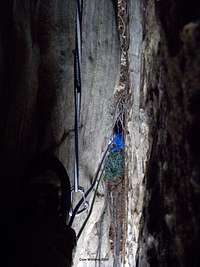
1st -2nd Pitches- 200’- 5.9/ We combined these first two pitches. From the deck, you start out climbing an off width crack/chimney system. The 5.9 moves basically employ chimney technique without facial features to assist in uneven chimney space that constricts from time to time. Carrying a pack through any of this terrain is practically impossible. Either hoist the bag on a pulley or have the 2nd hang it below his feet as he/she climbs. The climbing is pretty sustained and dirty. If you are not fighting bushes and their dirt pods, you are pulling off suspect holds or losing your footing on the sandy rock. The most secure you feel is when the chimney is wide enough to wedge in from time to time. The gear call for this route is the largest I have ever seen for a free route at Red Rocks (double of everything from #2-#7’s!). Of course we did not even take any 7’s ourselves and only 1 #6 and were fine with what we had. We did use our double 5’s quite a bit though. The first pitch belay is at a solid ledge approximately 120’ up. The 2nd belay (and first if you are combining the pitches as we did) is in a small sandy hole of sorts below a steep and deep section of the chimney with a crack for medium gear. There is some bail tat on a small tree in this cove for retreat with double ropes.
3rd Pitch- 140’- 5.9/ A steep start out of the cove where you can place a small piece before you challenge a few trees (they get in your way quite a bit on this route) for space in the crack. Continue up steep and constricting ground on the most sustained pitch of the route to a large comfortable belay ledge with a crack for medium gear and more tat on small trees used for a previous bail.
4th Pitch- 150’- 5.8/ A steep looking wider chimney section above the belay taking large gear. Facial holds here and there help make this section a slightly easier grade even though it is slightly overhanging. Fight trees again, until you are into a deep slotted chimney for the belay.
5th and 6th Pitches- 200’- 5.9/ Quite run out (if you follow my variation which allowed me to combine the two pitches) and the crux pitch. Climb the deep slotted chimney above, easy at first, then all features run out and you are constricted rather severly and forced to look for holds to the outside that do not exist. Stay in the off width and snake up until the steepness eases and you can move out to the face on your left. Place all larger gear down low except for the two #4’s which you can use for your station. Run out 5.7 face climbing takes you to several boulders where you can set up a belay station with one #1 and two #4’s. You only get two placements for 100’! if you follow this plan: a precarious #1 placement and a better #2 placement towards the end where the face climbing gets steeper and the rock worse. This pitch is not for the faint of heart. You can stay in the crack for easier and safer climbing via two pitches versus one.
7th Pitch- 125’- 5.9/ The only climbing on this next pitch is after you scramble back right into the gully that now opens from the crack/chimney system below it. You come to a short and steep section right below a dirty and bushy tree. It is best to bring in the belayer to the base of this section. There is a rope (2008) tied to the tree that can be used as pro, but it has been there awhile. Climb an otherwise unprotected short chimney section, facing out and making a dramatic move to your right to reach a finger ledge with no feet. Mantle on up and traverse right by the tree. Bring up the 2nd at the larger trees above.
8th Pitch- 50’- 4th Class/ Not really a pitch and not really 5.6 as Swain mentions. But Handren has it wrong as well as these final two pitches are not 150’ each, but rather combine for 150’. I believe he got confused copying Swain’s description. Lead up the gully on easy terrain with barely if even a 5th class move anywhere to the base of the wide and dramatic chimney finish. Bring in the 2nd and set up belay at the base of this chimney.
9th Pitch- 100’- 5.9/ First real pure chimney climbing without so much off width, but a hard chimney ascent as it constricts towards the end. Hard to place any gear earlier, but if proper chimney technique, the lower section goes easier. Start to place large gear as the going gets tough. Once your surmount this chimney, you will see one more scramble chimney above. Belay at the large pine tree that marks the top of this route. The last chimney is more difficult than the published beta leads you to believe, but can be soloed by competent parties to the top of Mount Wilson (where the wind awaits).
Climbing Sequence
Descent
This is a long descent. I advise looking for a different one down into First Creek Canyon if it exists. Hike the summit plateau ridge west towards Limestone Mountain. As you circumvent around and start to descend the summit ridge to the west, you will see a treed saddle. You are going down to that saddle, but might as well angle right every chance you get until you find a stream and then you can follow it down until it falls off the summit ridge. Continue west into a wide obvious gully. We descended the left side of the gully. The first rap was a short rap over a steep section where we cut away old tat and left new (2008). The next rappel is a large double rope rappel that has been set up with an existing rope strung out over the lip of a large wet (March) slab. Rappel to the base of this slab. Continue to one final short rappel off of a very large tree where we left new tat in 2008. From there continue north down to the bottom of Oak Creek Canyon. You will be across and up stream from Black Orpheus when you reach the bottom. Walk out the canyon floor past Solar Slab and catch the trail up on the left bank. Find a small fork off right of the trail less than a mile from the Oak Creek parking area off of the loop road. Follows this single track until it turns into an old road. It will take you out to the highway, where you can walk back down to the Oak Creek Campground pullout.
Essential Gear
Double 60m ropes. Single rack to 7” if you have it. Doubles from #2 to #7. We only had one 6” and a big bro and never used the bro and got along fine with just the one 6”. Set of nuts, although I only ever used one placement. Several double runners to avoid rope drag as you can do some combinations for long pitches. Full pants and long sleve shirt is a must for the approach. So are comfortable tennis shoes for the descent. If you are going with a backpack, bring a pulley to haul it or just know the 2nd will be bitching quite a bit. Chimney shoes and helmet. It is a dirty and loose route.Several liters of water if warm, but well protected from the sun in March and plenty of water on the summit as well as the descent.
External Links
Over 300 routes detailed from first hand successful accounts by me or others at Red Rock Canyon. GET OFF THE TOURIST ROUTES and explore!Red Rock Canyon National Conservation Area, BLM
Red Rock Canyon Interpretive Association
Best True Technical Clothing and Accessories in the Outdoor Industry, Hands Down....the Legit Climbers Gear at Real Prices
Scarpa has surpassed La Sportiva in terms of quality, function, value and actually stand by their warranties
Osprey Backpacks, Not a Second Choice
Great Outdoors Depot


