
-
 15241 Hits
-
 73.06% Score
-
 3 Votes
|
|
Route |
|---|---|
|
|
37.64620°N / 107.5844°W |
|
|
Hiking, Mountaineering, Trad Climbing |
|
|
Spring, Summer |
|
|
A few days |
|
|
5.2 (YDS) |
|
|
North Face Overview
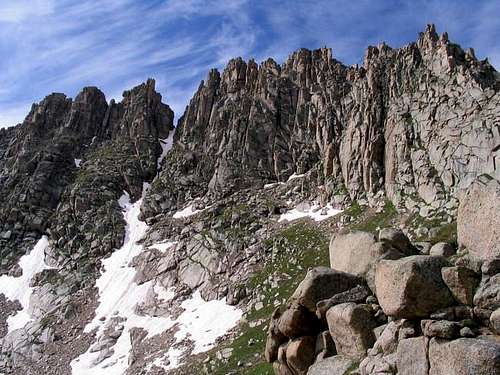
Jagged Mountain from Jagged Pass
The North Face route on Jagged is a complex routefinding objective. For those prepared for this route, you will be greatly rewarded with this awesome peak climb. The North Face is not only the easiest summit route, but it is also the only reasonable route. Although the cruxes are rated at low 5th class with lots of class 3 in between, this route should not be underestimated. The exposure is deadly from beginning to end and most of the class 3 consist of ledges covered by slippery ball-bearing gravel. The cruxes were often loose and unprotectable. I wouldn't suggest this route for those just getting into roped climbing.
It is easy to get off route and care must be taken. Study the route both on paper and from Jagged Pass before going ahead. The remote location along with the nature of the route make for one of the best summit climbs, by a standard route in all of Colorado.
Gerry Roach put alot of effort into describing this route in his 13er book. Out of respect for his work and my wishes not to plagerize his work, I will only give a brief description of the route. Those seriously considering this route should get the book as it proved invaluable in staying on route.
Approach
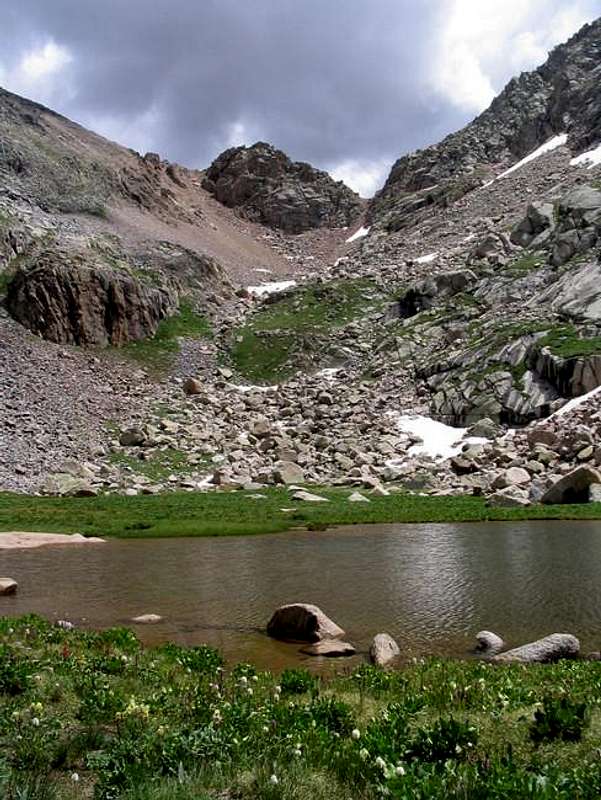
Looking east to Jagged Pass from the tarn in upper Noname Creek
The approach for the North Face Route is an undertaking in and of itself. Start at the Needleton TH (8212ft) which is along the Durango-Silverton Narrow Gauge Railroad. This popular TH is also the starting point for the remote 14ers of Windom, Sunlight and Eolus. See the main page for information on reaching this TH and train information.
From this TH, most parties will still have a rugged, steep hike into one of Colorado's most rugged and scenic valleys. At about 6.5 miles and nearly 3000 ft to the best campsites, the day has just begun. For those not wishing to put such an effort in after the drive and train ride, there are other camping options along the first 2.5 miles of this approach. After 2.5 miles, there are few until around mile 5.5.
Start at the Needleton TH and cross the Animas River on the excellent foot bridge. Immediately after crossing the bridge take a spur trail to the left and pass between the river and a few cabins in the first 200 yards or so. The trail is easy to follow for the first 0.5 miles or so to a meadow. This Meadow has been dubbed "Camper's Meadow" by Gerry Roach and is the key to maintining the proper trail.
Near the north end of the meadow you will pass on old dead tree that has fallen into the meadow and has been cut in two to allow the trail to pass. Immediately after passing this tree you must located a very faint trail to the left. The main, obvious trail continues on straight but must be avoided. Follow the faint trail as it descends a little rise in some trees and enters a second meadow in a 100 yards or so. In this meadow stay near the right treeline as you pass some old camp structures and continue on a faint trail back into the trees. From here the trail is a bit easier to follow.
Soon after leaving the second meadow, you will cross N. Pigeon Creek without any real difficulty. Take your time as the approach is about to get interesting.
Near the 3/4 mile mark you will begin one of the most grueling parts of this approach. At this point the trail cannot stay close to the river due to steep cliffs. To overcome this you must make the painstaking ascent of Watertank Hill. The "easier" portion is the uphill northbound section ahead. Although steep in its 200 ft ascent, it is nothing compared to what you'll encounter on the other side. Make your way to the top and take some time to take in the sight of the namesake watertank and river below. Take a deep breath and start your descent. The trail drops sharply at first followed by an awkward rock step. Be careful with full packs on as it is slippery when wet. This is followed by a loose and often muddy slope to a fallen tree that must be overcome. Continue down on some loose rocks and a steep trail until near the river. The trail is easy to follow at this point.
Continue along the trail to mile 1.5 where you will have to cross Ruby Creek. In low water times you can use rocks nearby to cross. At other times, a ford may be necessary. Hike on until the trail fades into a rocky, flat area. The trail is almost non-existent at this point but continue north until you reach the Noname Creek just after 2 miles. There are some cairns marking the best place to cross. In August 2005, there were some logs across that made for easy crossing. Once across, locate cairns marking the trail and rejoin it. Do not turn up the creek just yet. Continue for about 100 yards along the trail to an old campsite with some old pipes laying around. This is a good campsite for those who've had enough as the next one is not available for about 3 miles and 2400ft of gain.
Upon entering this campsite, you must make a sharp left on a faint trail and continue for about 100 yards more below a small rock outcropping. It is through this outcropping that you must locate the trail up Noname Creek. A stronger trail continues along the bottom of the outcropping, your trail however will pass up and onto the top of this outcropping. Once on top, you can follow a faint trail and cairns through a few small open areas and at one time will pass an old phone pole. The trail becomes quite good as you re-enter the trees.
Once back on the trail, continue on this good and easy to follow trail as it makes its way east up the Noname Creek drainage. The creek stays some way below you as you climb steeply up the trail. It is not until about 5.5 miles-10,450 ft that the trail lets up and comes into the first open area. You will see Heisspitz to your left and will begin to see part of the Index and the Animas-Monitor Massif to the right. A few campsites may be found here, but if you've come this far you might want to continue on to better views and sites.
You will reenter the trees on the obvious trail and climb another steep hill until at last around 10,750 ft and 6 miles you finally enter a large open area near Jagged Cabin. It is at this point that you realize why you put so much effort into getting here. The surrounding views of Knifepoint, Sunlight, Monitor and Animas are amazing. The cabing isn't a suitable shelter and the best campsites are still about 0.5 miles ahead. Find the trail throught the willows and continue for about 1/2 mile to a large grassy meadow with some trees on the upper left end. It is in these trees that you will find some suitable camping with easy access to the river.
For those who haven't had enough, you can continue on for another 1000ft and 1.5 miles to a high meadow in upper Noname. The trail is steep and difficult and is best left for the approach hike to the climb the next morning.
After all this effort you have set the stage for an ascent of Jagged Mountain. However, the worst isn't behind you. There is still just over 3 miles and 3000 ft of hiking/climbing left before you reach the top.
From the campsite at 10,750 ft, regain the trail as it heads up the drainage. You will travel a few hundred yards and reenter the trees. Go up and over a small rise. You will begin to hear the Noname Creek ahead where it passes over a small fall. The route does not cross the creek at this point. Rather it takes a left just before the creek and begins a steep ascent on a easy to follow trail. After about 400 ft you will come to a meadow and the trail will ease up a bit. Continue along to about mile 7.5 in the middle of this meadow. Keep a sharp eye out for a faint spur trail that leaves the valley floor to the left and makes a steep ascent up to the left. This will take you from about 11,000 ft to 11,800 ft on a nasty trail. It is at this point that you will finally get a good look at the surrounding area.
There is a tarn as you exit the trees. There are many possibilities from this point to Jagged Pass. All stay on the left, north side of the valley ahead. When you exit the trees at 11,800 ft, you will encounter a marshy area with a tarn. Locate a rock outcropping in the marshy area and make for it. Contour along its left side and pick up a faint trail through the willows. The trail passes between a steep knoll and the tarn before encountering a talus slope that goes up to the left. I found the best route to be up this talus slope. Then locate a small notch through the cliffs above. Make your way through the notch or one of the others like it onto a nice flat bench above. Continue along now gentler terrain to a small lake near 12,200 ft. From here you can easily see Jagged Pass and the route ahead.
The best option is to stay left, north of the lake and climb a grassy ramp into the ever narrower valley. From this point you will cross boulders and talus on the moderately steep climb to Jagged Pass.
At 9 miles from the TH, Jagged Pass is the end of the hiking and the beginning of the climbing. Take some time here to look around as you have amazing views of the surrounding area. You get your first look at the objective, Jagged Mountain to the right. Leviathan and Vallecito are to the left and Monitor along with other Ruby Creek peaks can be seen behind you.
The climb from Jagged Pass to the summit is a measly 0.5 miles and 850 feet. DO NOT be mislead by these small numbers. If one is well equipped, experienced and manages to stay on route, it will take 5 hours round-trip from the pass to make the summit. The going is tough but the rewards are great. Take some time at the pass to preview the route. It looks straight forward from here, but once we got on the face we lost all perspective.
From the pass, make a traversing ascent towards the area where the large snow couloir enters the broad North Face.
Route Description
As stated before I will not give a move by move description of this route out of respect for the work and effort put forth by Gerry Roach in describing this route in his book "Colorado's Thirteeners-13,800 to 13,999 ft". Instead I will give a general description and provide some of the keys to staying on route. His guide was an essential for staying on this route, for a more personal account of the climb you can read my trip report.
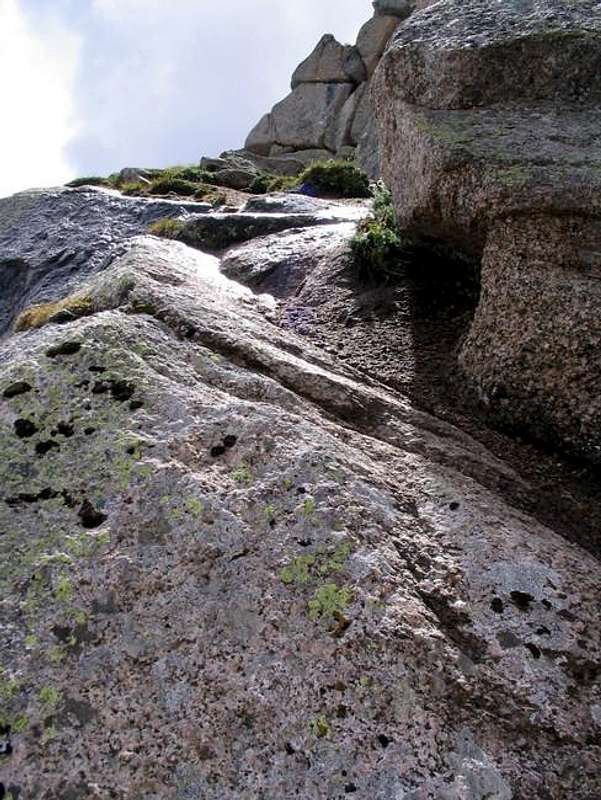
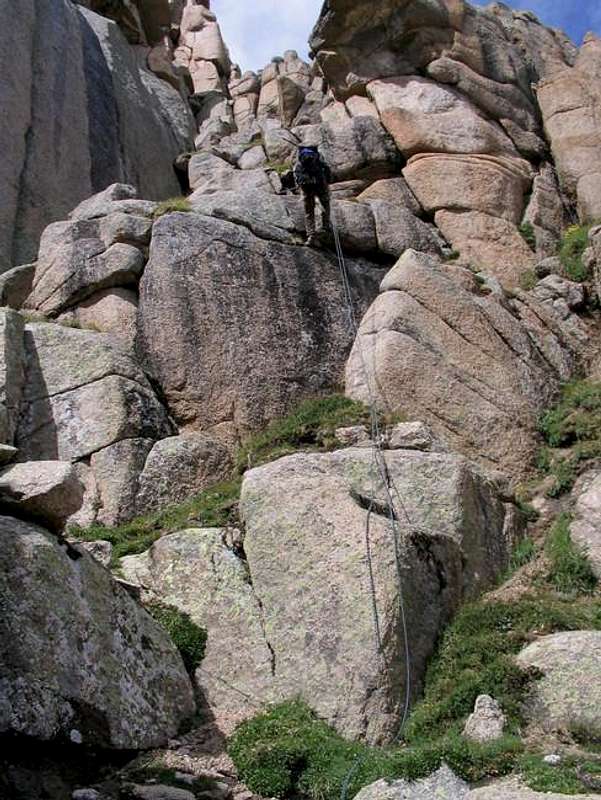
After the traverse to the base of the face, locate a small gully about 100 feet to the right of the large snow couloir. This gully is most often wet and full of ball bearing scree. This gully is the first crux and most parties will want to rope for this section. Gerry describes a gravel ledge that leaves the gully about 60 ft up. We found the ledge alright but it was far too wet and slippery. Instead we continued straight up the gully for about another 100 ft to the rappel slings at its top. (low 5th class)
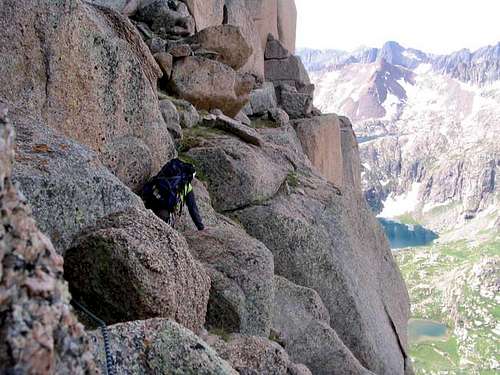
From the top of the gully you will find easier, though extremely exposed, grass slopes with foot platforms zig-zagging along the steep slopes above. There is lots of loose gravel in this section and a slip would be deadly. Resist any temptation to enter or get too near the large couloir. We found numerous cairns leading this way, but the climbing only gets more nasty over there. Instead, look for easier terrain.
Above you will be able to follow some cairns towards a small notch. You can either go over the notch or follow cairns around the base along an awesomely exposed ledge. Which ever way you choose, you will end up in a gully capped by vertical granite walls that are split by a large chimney. This is the second crux and we had trouble finding the route described by Roach at this point. Instead we went to the top of the gully to the vertical wall turned right and tackeled the crux near a 1 foot wide crack with a chockstone. Mike went over and I went under the chockstone. Either way is hairy and puts you on a down sloping ledge full of gravel. From here we continued up ever steepening grass ledges as they zig-zagged up and around to the third crux.
There are two options at this point. Both look about the same difficulty and ascend the steep wall towards the now slightly visible notch above. We roped for this section and climbed the left of the two crack systems. There was little to no pro and the ledges were full of the now familiar gravel. Near the top we made an exposed mantle onto a grassy slope and beheld the notch.
Climb easy terrain to the notch and get the breathtaking view across to Sunlight Peak and still further to Pigeon and Turret. Behind you will see giants like Vestal, Arrow and Storm King.
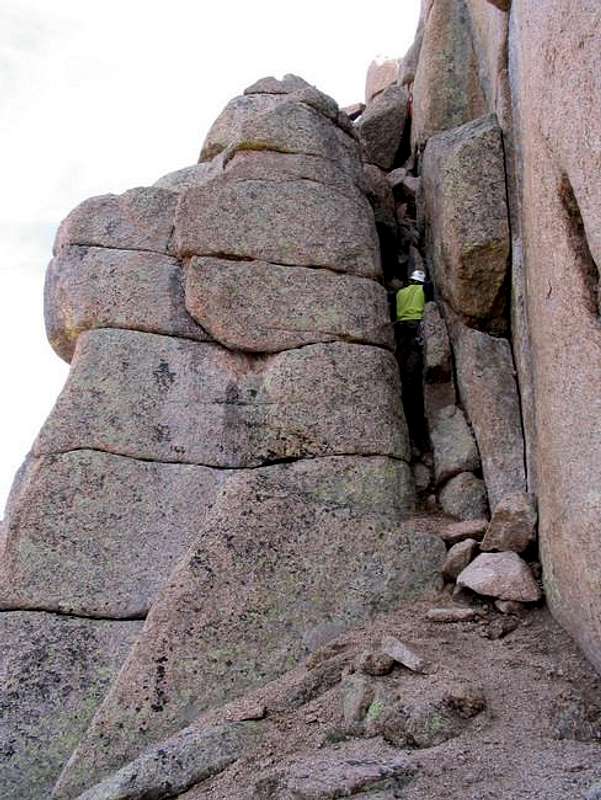
From the notch follow class 3 terrain to the left until you see the facinating travese across Jagged's south face. This 120 ft airy traverse, has your heels over nothing in several spots and caused us to break out the rope one last time. The rock was good along this portion and it deposited us onto a large sandy ledge below the class 3 chimney leading to the summit.
Climb the chimney and do a few acrobatic moves on solid, class 3 rock before pulling on the summit ridge. The high point is just a short scramble to the left. The summit is a huge flat, slab of granite which was very unexpected for this mountain. Finally you are here. We did not find a summit register.
 The first crux The first crux |
 Looking at one of the slabs Looking at one of the slabs |
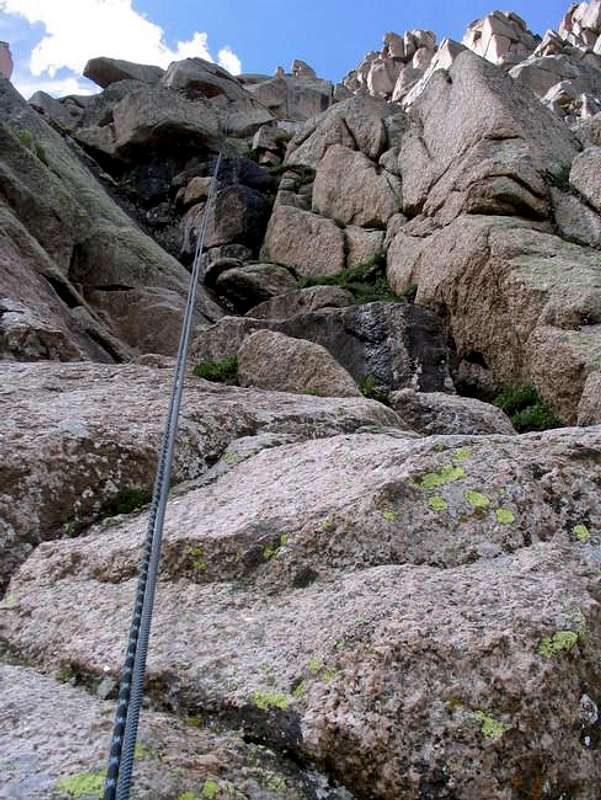
 Rapping the 2nd crux Rapping the 2nd crux |
 The airy 120 ft traverse across Jagged's South Face The airy 120 ft traverse across Jagged's South Face |
 Final class 3 chimney Final class 3 chimney |
Essential Gear
Sturdy hiking boots for edging. Approach shoes with sticky soles didn't work well in the wet gravel. A light 50m rope worked well for us on the rappels. We took a #'s 1,2 and 3 camelot and 5 nuts. We didn't use much pro except for belays. Take extra webbing in case the rappel anchors are old or worn. A helmet is a must and an ice axe will be handy in early season.
Descent Information
We descended the climbing route aided by 4 rappels. One was from the top of the chimney near the summit. The second was over the third crux. Then again over both the second and first cruxes. Anchors or slings were found at all locations although extra should be taken just in case they are old or worn. For those looking for a more thrilling descent. Climbers can do a two rope, 165 ft rappel directly from the summit over the North Face. There are rappel bolts on the summit. This rappel avoids the traverse and the third crux.
Map
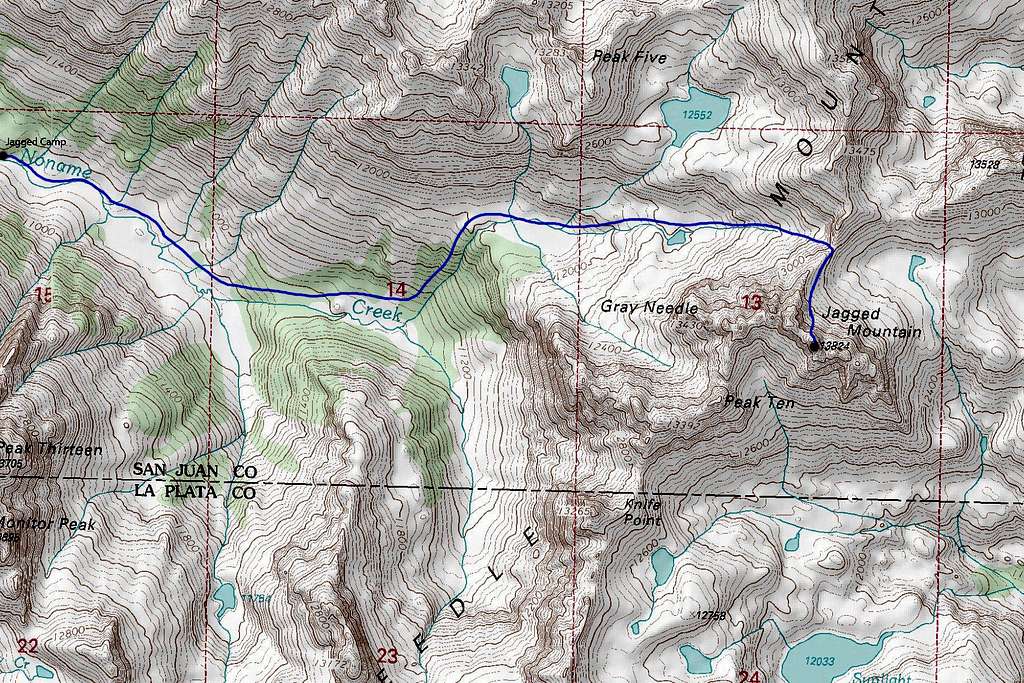 Map showing the location of the Jagged Camp and the standard route over Jagged Pass