
-
 6617 Hits
-
 78.09% Score
-
 9 Votes
|
|
Route |
|---|---|
|
|
27.18929°S / 109.42492°W |
|
|
Hiking |
|
|
Summer |
|
|
Half a day |
|
|
Class 2 |
|
|
Overview
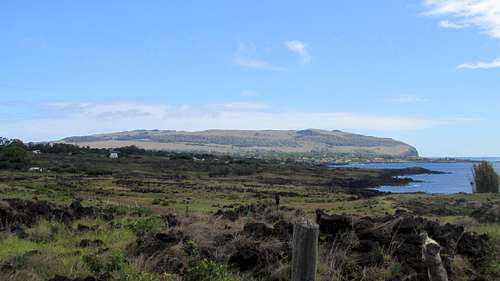
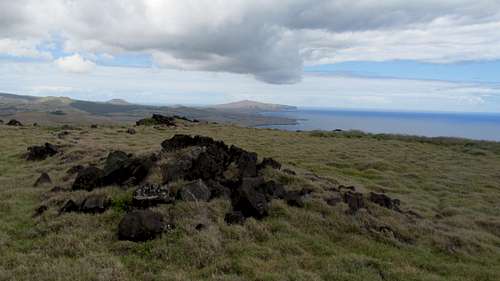
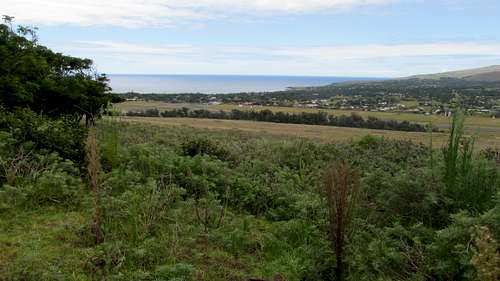
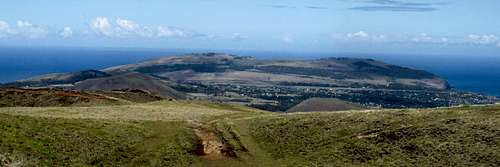
Rano Kau from north of Hanga Roa
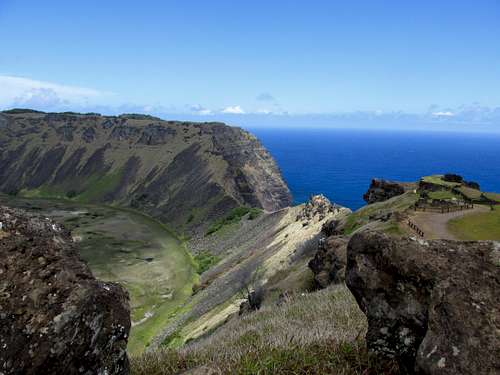
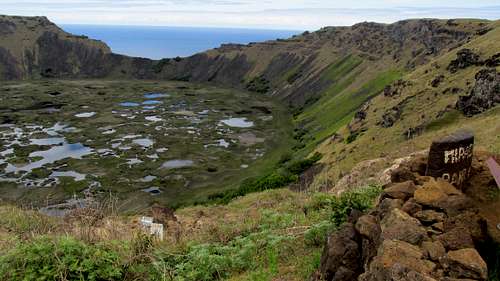
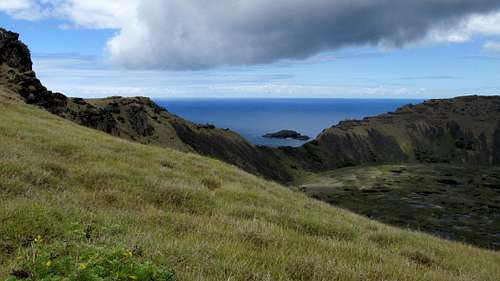
Crater rim from Orongo site
On the west crater rim is the Orongo Archeological site, which overlooks Moto Nui (Birdman Island.) This was where the Birdman Cult developed. Young men coming of age would climb down the steep cliffs, dive into the ocean and swim out to Moto Nui.
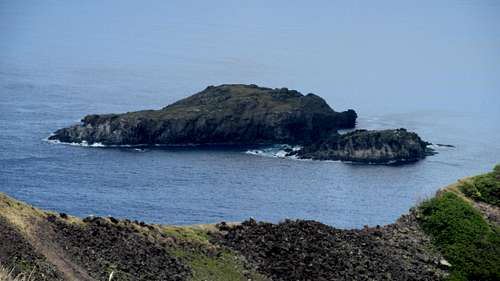
Birdman Island Moto Nui - Moto Iti
They would then return with a sooty tern egg. The winner was granted special privileges along with a virgin. Orongo is one of two sites on Easter Island that require a National Parks pass. The other being Rano Raraku, the quarry with many of the most famous Easter Island Moai statues.
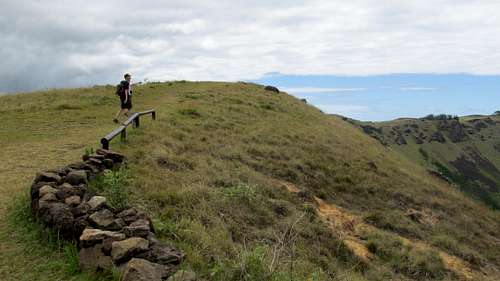
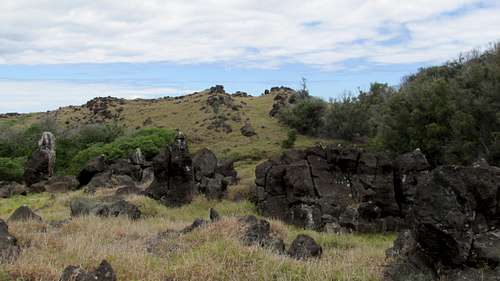
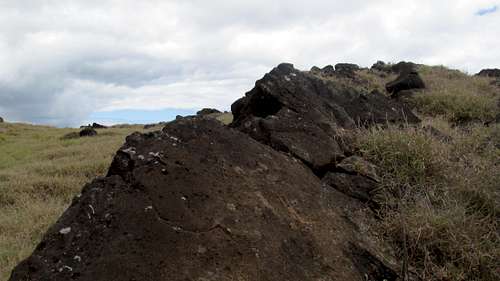
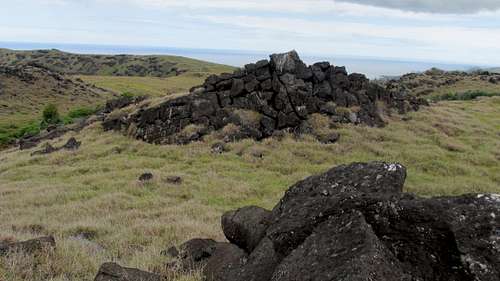
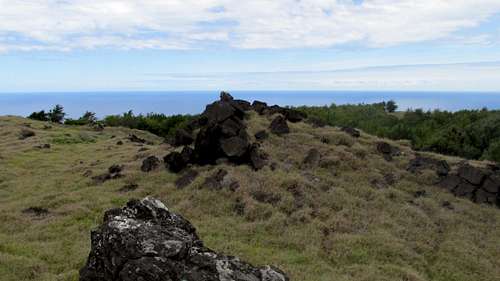
Rano Kau summit rock outcroppings looking across from the crater rim
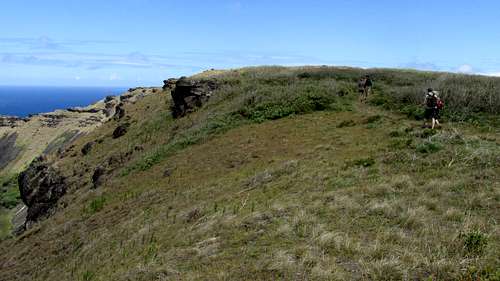
Although visited by many, the Orongo site on the west side of the crater is not the high point of Rano Kau. That distinction belongs to a rock outcropping east of the east crater rim. The lack of a beaten path from the crater rim to actual high point indicates this might be the least visited summit of the three main Easter Island volcanoes.
Getting There
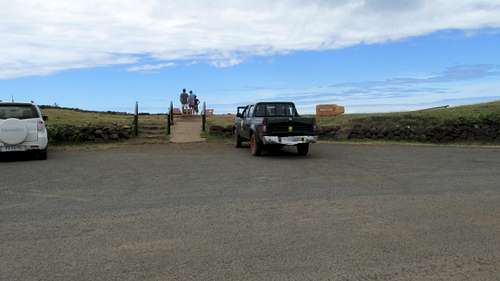
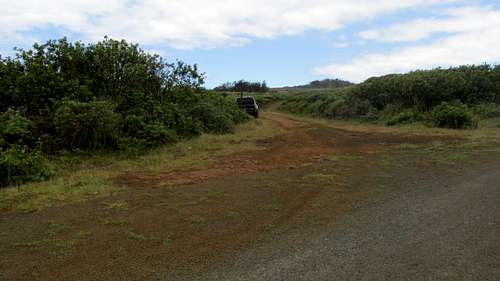
Rano Kau is immediately south of the town of Hanga Roa and the airport. From town find the road that passes between the airport runway and the western shore of Easter Island. It’s a short walk from town or if you are driving you can park at Ana Kai Tanata (Cannibal Cave.)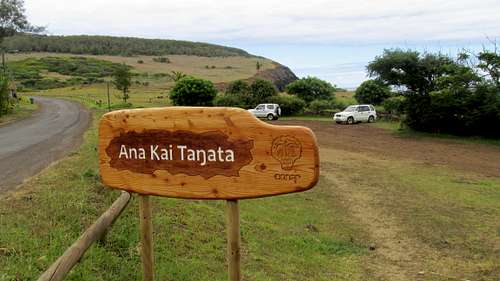
Ana Kai Tanata - Cannibal Cave parking area
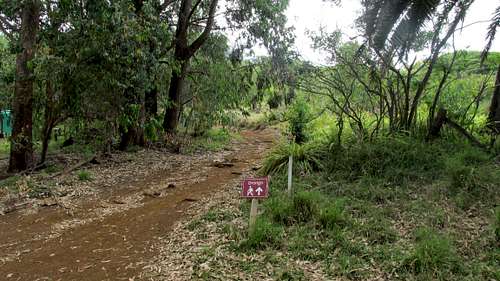
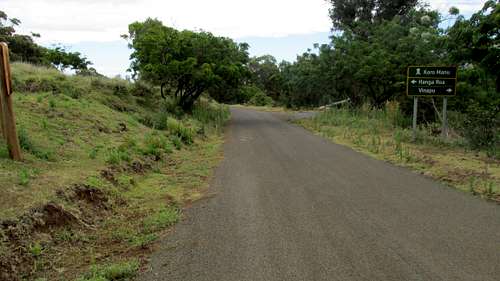
The signed trailhead is just a couple hundred meters past this parking area.
Rano Kau Trailhead - a couple hundred meters on the main road from the parking area.
Getting to Easter Island – Isla de Pascua. We flew LAN Chile from Miami to Santiago and then the next day LAN Chile to from Santiago to Easter Island. When booking our tickets we found LAN flew to Easter Island and back every day but Tuesday. The scheduled flight was 5 hours 40 minutes to Easter Island and 4 hours 50 minutes on the return.
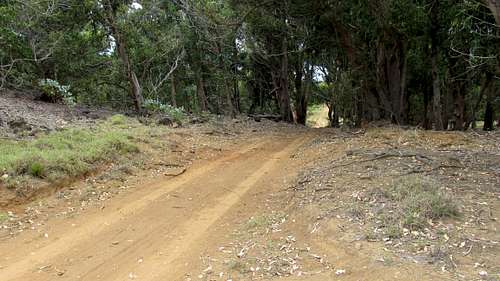
![Rano Kau Trailhead]()
Rano Kau Trailhead
![Rano Kau Trail]()
Rano Kau Trail - Follow these white rocks to stay on the trail through the groomed portion of the National Park Office yard.
![Rano Kau Trail]()
Rano Kau Trail - Some signs are placed to guide you.
Route Description
Rano Kau Trailhead
The first part of this hike as far as the crater rim is on a maintained trail. The beginning of the trail passes through the yard of the National Park office.
Rano Kau Trail - Follow these white rocks to stay on the trail through the groomed portion of the National Park Office yard.
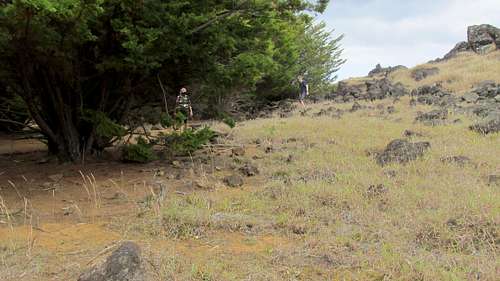
Follow the signs as the maintained trail heads up into the trees.
Rano Kau Trail - Some signs are placed to guide you.
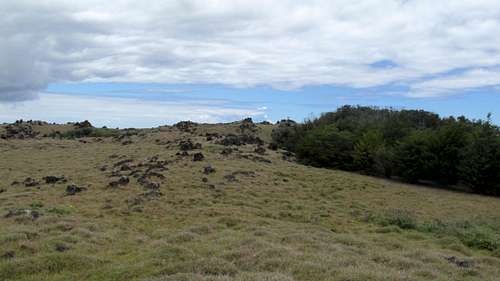
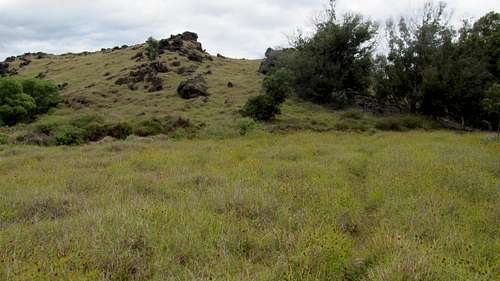
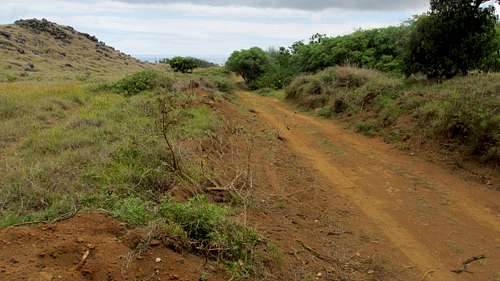
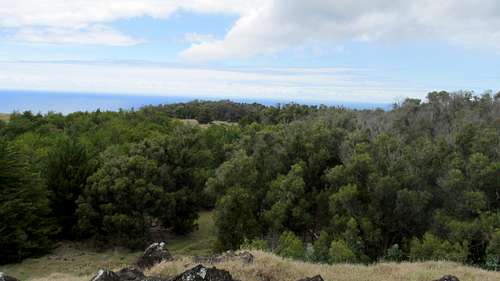
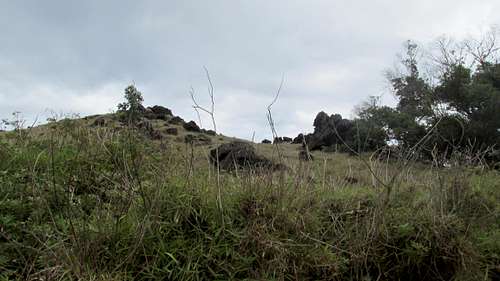
It’s well known that Easter Island was largely deforested. To our surprise there are now several large patches of trees on the island. You’ll get to pass through some of these on this hike. You will also contend with some obnoxious invasive species. The bush lupines are poisonous to horses and were planted by someone who wanted to reduce their numbers. The horse grass can combine with the lupines to make a formidable barrier or alone can be like post-holing in soft snow. After gaining the crater rim you’ll get to hike on social trials through these bushes.
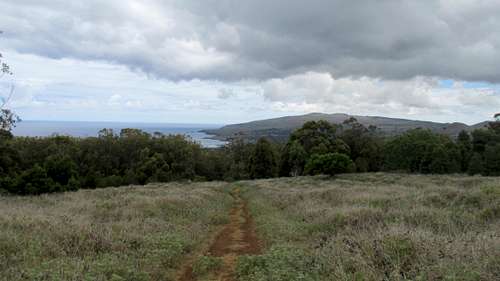
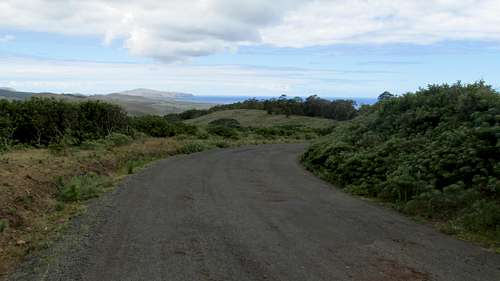
Rano Kau Trail - Breaking above the trees with Maunga Terevaka to the north
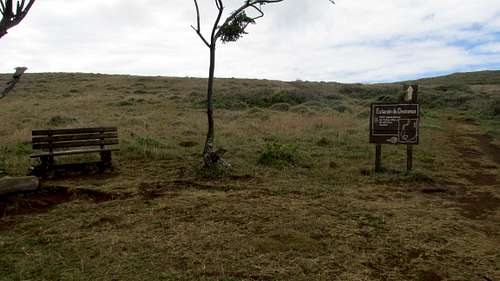
Rest Stop - This bench is at one the rest stops along the way.
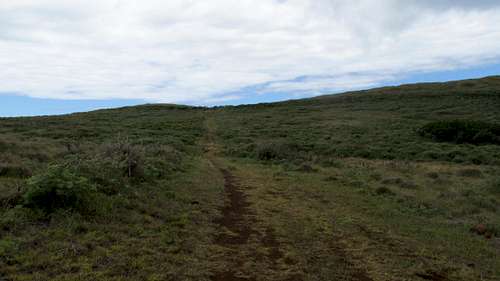
Approaching the road - The final stretch to the road crossing. The paved road to Orongo switches back and crosses the trail just below the crater rim.
Just before gaining the crater rim the trail crosses the paved road. The road had switch backed to the east before now passing back west on its way to Orongo.
Intersection Trail & Road - The Rano Kau trail intersects the road to Orongo at the crater rim.
Cross the road and take in the view of the largest crater on Easter Island.
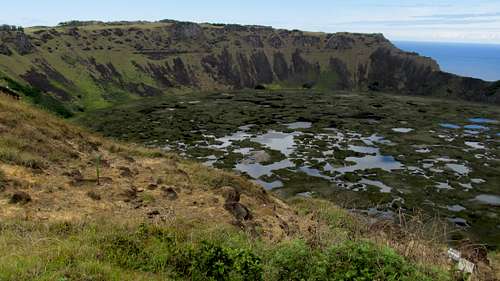
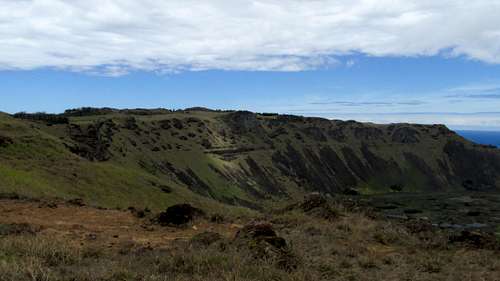
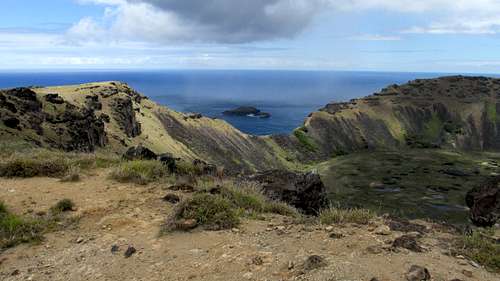
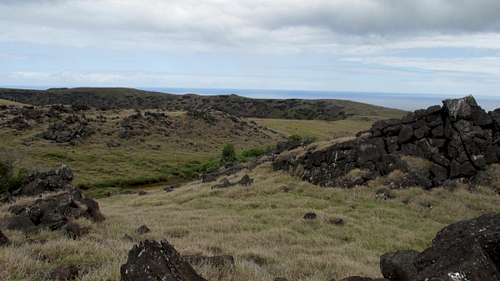
Rano Kau Crater
Rano Kau Crater
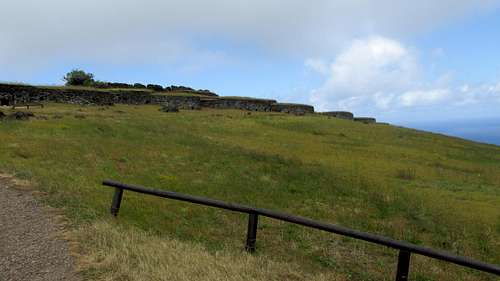
If your day includes a visit to Orongo, turn right and head around the west side of the crater rim to the National Park building.
Trail to Orongo from the overlook - To continue on to Orongo, turn right and follow the trail along the crater rim. The trail rejoins the paved road as it reaches the Orongo site.
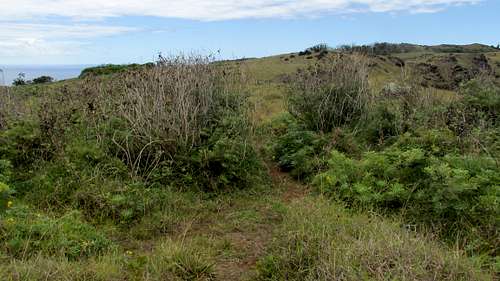
Unlike up to the crater rim, the trail is now just a social trail, but still easy to follow.

Orongo Trail looking back at the overlook with Maunga Pikatikei east in the distance and Maunga Terevaka to the north on the left.
Orongo Trail - The trail to Orongo follows the crater rim. Follow the path through the horse grass and lupines.
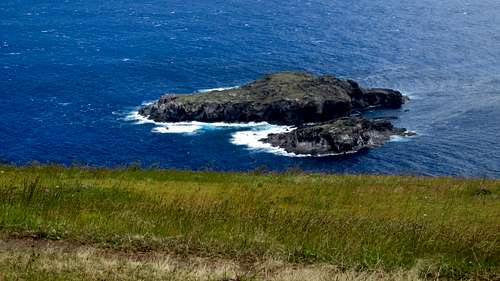
Birdman Island Motu Nui & Motu Iti
Orongo Site - Birdman Cult
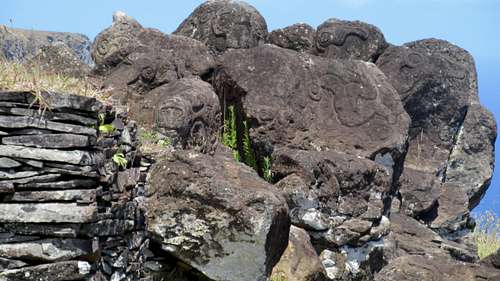
Rano Kau - Orongo - Birdman Moai
After touring Orongo return back the same way along the crater rim. If your primary destination was Orongo, then you can return the same way.
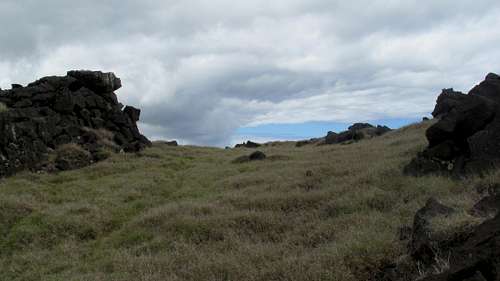
But since you are reading this on summitpost,you probably want to get to the actual summit of the mountain. So from the overlook, continue clockwise around to the east side of the crater rim.
Rano Kau Summit Trail from crater overlook - Turn left at the overlook to hike along the crater rim toward the summit.
From the original trail up from the National Park office, this would be a left turn after crossing the paved road. My pictures of the Orongo leg of this hike are actually from a few days earlier when we were on a tour of the island. So we made this left turn when we got to the overlook. This stretch is farther than the trail to Orongo, and not as established. The trail braids in places but you shouldn’t have any trouble finding your way.
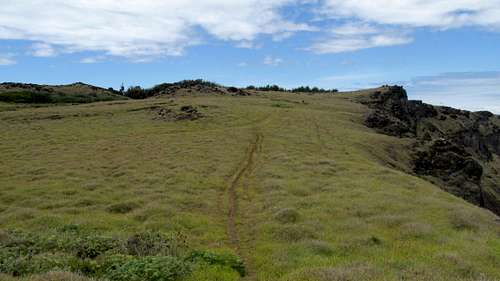
Rano Kau - looking towards east side of crater rim & the summit
Rano Kau path through the horse grass, lupines & other bushes
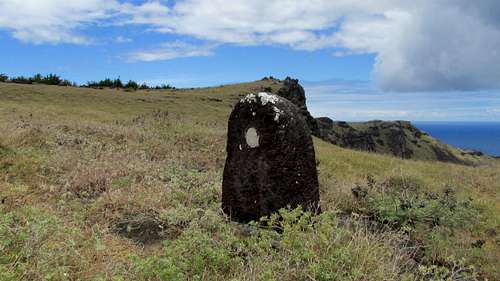
Moai along the trail
Rano Kau nearing high point of crater rim
Rain shower on Birdman from high point of crater rim
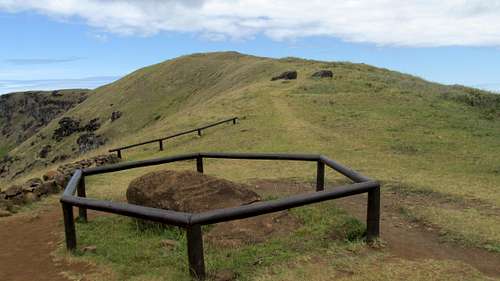
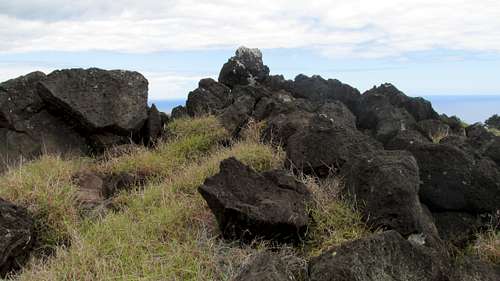
This slab is next to the high point of the crater.
I wanted to be certain we found the actual summit. There are a few bumps along the way but the high point of this side of the crater rim was fairly apparent. There were a few piles of rock fairly close to each other, but I didn’t stress which of those was the highest of group. For to the east we saw a pair of rock outcroppings that were apparently higher.
Rano Kau Summit looking over from crater rim
I had my Garmin eTrex Vista HCx with me which I used it to measure waypoints along the way. But my concern was these summits could be close enough in height to be within the amount a hiking GPS will vary. Also before this hike I wasn’t certain the highest summit was on the east or west side of the crater. I brought with along a Keuffel & Esser CO inclinometer.
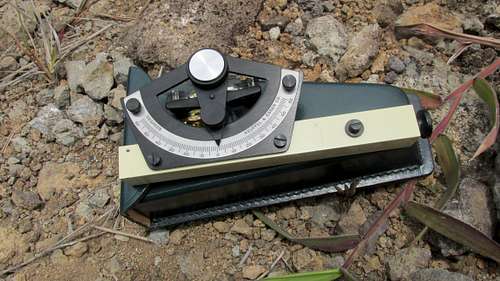
Keuffel & Esser CO Inclinometer. I used this to sight from the east crater rim to the west. Then I sighted over to what turned out to be the summit. After gaining the summit I sighted back and forth between the twin summit rocks
I used this to sight from the east crater rim to the west. Then I sighted over to what turned out to be the summit. After gaining the summit I sighted back and forth between the twin summit rocks. With the inclinometer level I was able to determine for certain the mountain to the east of the crater is higher than the west side of the crater rim near the Orongo site. I was also able to determine the summit is not on the crater rim, but a few hundred meters to the east. There were actually a couple high points about 30 meters apart that were very close to the same height. They were certainly closer in height than the few meters the GPS floated as I traveled from one to the other.
Looking toward the summit. There are a couple rock out-croppings that are about the same height. I sighted with an inclinometer in each direction and couldn't declare for sure. But I think the southern of the twin summits might be the higher one.
To get over to the summit from the crater rim required pushing through the tall horse grass. The footing was precarious with the jumble of rock hidden underneath.
Starting across from the high point of the crater to the summit of Rano Kau. The trees to the right offer easier than the tall grass covered rocks.
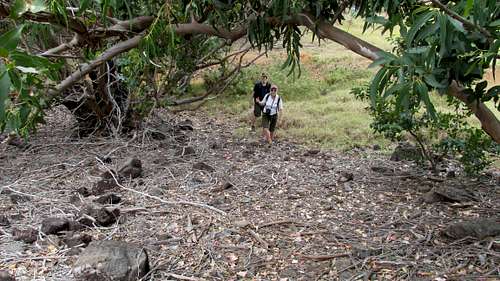
After having a trail to circle the crater rim, we had to bush whack over to the actual summit. The horse grass was like post holing in snow with a mess of uneven rock underneath. Dropping into the trees of a minor crater gave us a break from the grass.
A low area a little south of directly between the rim and the summit outcrops was filled with trees. By making our way over to the trees we found it much easier to travel. The surface was smoother than the rocky higher areas and the grass didn’t grow much under the trees.
There was a break from tall grass by passing through the trees.
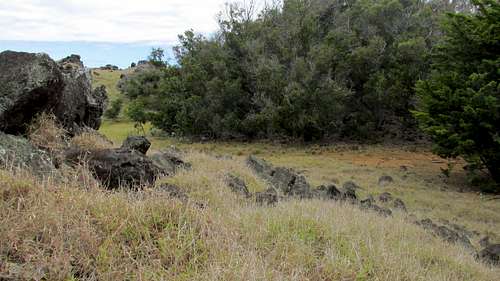
At the lowest point in between we crossed a dirt road. It was almost hidden from above by the tall grass and bushes. The road sloped off downhill in each direction. We knew it had to come from somewhere, so this had to be the road shown on some maps that would take us back to the main paved road.
We crossed this road at the low point between the crater rim and the summit. This view is to the south into the trees
Road that passes between the summit and the crater rim. This view is to the north and will take you back to the main paved road
First we had the summit to climb. We stayed with the clearing under the trees as far as we could and then went on as many exposed rocks as we could.
We stayed out of the tall grass and bushes as much as we could while heading up to the summit.
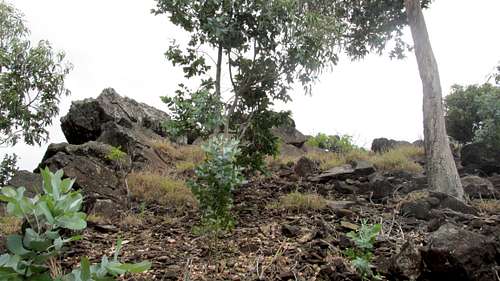
After breaking out of the trees we has a little scramble to get on the rock outcropping that lead to the summit.
It was very much like avoiding snow by walking on rocks to keep from post-holing. An easy scramble up the rocks brought us to the southern summit.
This rock rib leads to the summit
The saddle between the two summits. I was unable to determine for sure which was highest. But I think the southern summit (on the right in this picture) is slightly higher
Rano Kau - The summit. I sighted with an inclinometer to the other (northern) summit and couldn't determine for sure which was higher. I also sighted back to the high point of the crater rim and to the Orongo side of the crater and determined they were lower.
I sighted from this summit back to the near crater rim and also across to Orongo and determined it to be higher than anyplace on the crater. The only candidate I could see for higher land was the other outcropping about 30 meters to the north.
Looking over at the northern summit, with Maunga Terevaka in the background.
Looking across the summit area with Maunga Pukatikei in the distance to the east.
I will say some of the nearby tree tops were higher, but the land within the trees dropped away below.
Looking across the wooded area below the summit to the southwest
Looking down toward the dirt road that passes between the summit and the crater rim. We were able to walk this road back to the main paved road that switchbacks from Hanga Roa to Orongo.
I was able to see a definite visible down angle on the inclinometer scale as I sighted the crater rim. But when I sighted the nearby outcropping,my accuracy of my settling the bubble level was such I couldn’t be as certain as I wanted.
Looking across at the northern summit. Under the tall grass is an irregular jumble of rocks. It would be real easy to get hurt in this stuff.
We then pushed through the grass to get to the northern summit. I sighted back to the southern summit with the level and had the same uncertain experience. I also sighted across the two summit rocks against the ocean surface. Although I can’t claim to be certain, I think the southern of the two summits is higher.

The south and maybe higher summit. You can see hints of social trails in the grass, but nothing granting easy passage.
The south summit from the northern summit
After climbing down off the northern summit, this northern rock outcropping didn’t offer as continuous a stretch of rock back to the road as the southern rock outcropping. But knowing I only had to make it to the road to then have firm footing, I pushed through the grass while being careful of the footing underneath.
This was the grass we got to descend through to get back to the road.
Parting shot of the twin summits.
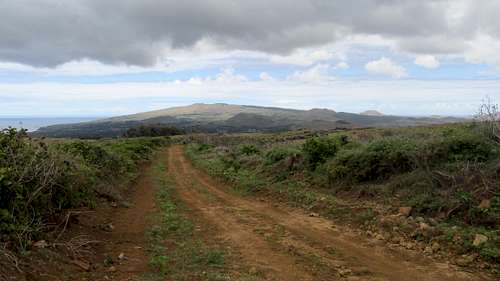
Heading down the road. Maunga Terevaka in the distance to the north.
When we got to the paved road it was below the point where the trail crosses at the crater overlook. So instead of regaining the elevation to the trail, we walked down the paved road.
The intersection where the dirt road from the summit meets the paved road to Orongo. This is below the overlook where the trial meets the crater rim. So unless we wanted to walk uphill again, our option was to walk down the paved road to return to the trailhead and parking area.
Heading down the paved road. Maunga Pukatikei in the distance to the east.
A small moai along the way
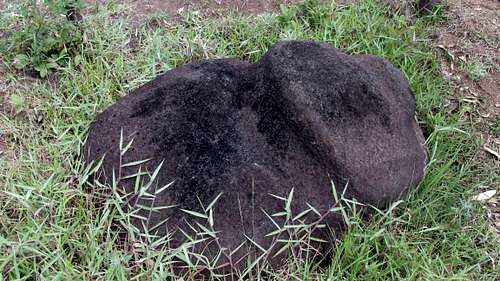
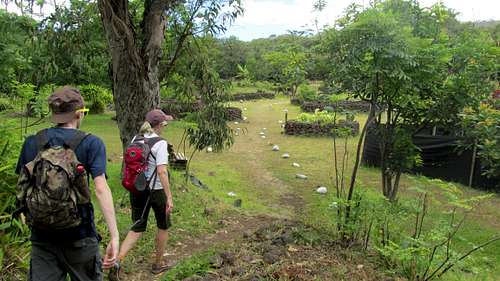
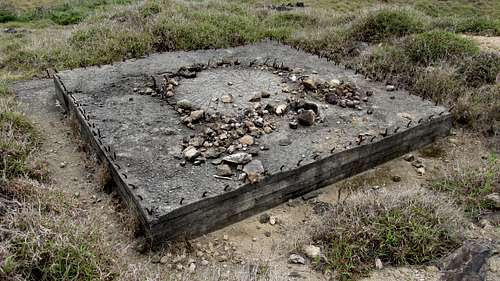
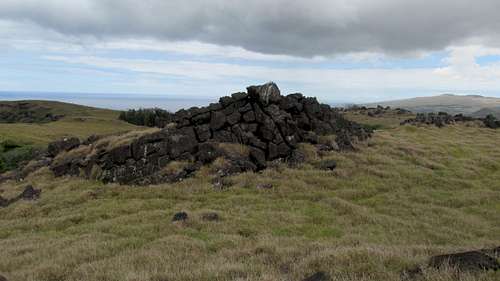
Some of the sites don't look like much. So when you are hiking, keep your eyes open, any pile of rocks on closer inspection could turn out to be a Rapa Nui site.
Intersection of the road that passes on either end of the airport runway. Note the left arrow for what is really staying straight (instead of turning right.) We saw that pattern on some other signs on Easter Island.
Instead of passing through the National Park office property, we stayed on the road all the way back to the Cannibal Cave parking area.
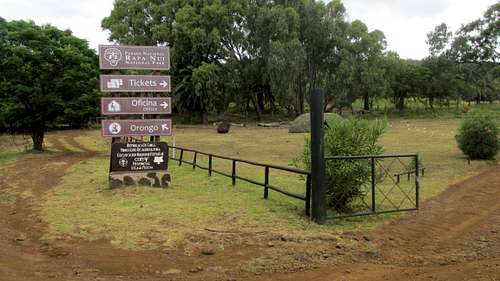
Entrance to National Park property. The first part of the trail passes through the park property, before the road starts a switchback and the trail heads more directly to the crater.
It took us about two hours and ten minutes from the parking area to the summit. From the second summit back to the parking area was around an hour and ten minutes. The whole trip was about three and a half hours without a side trip to Orongo. We of course could have moved faster, but why? We enjoyed the views and took lots of pictures along the way.
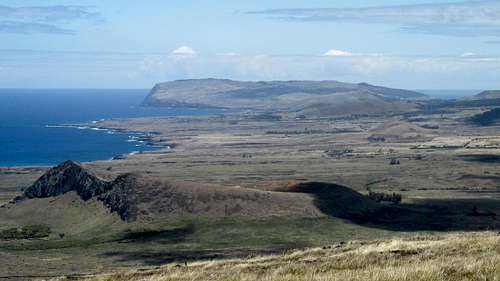
Rano Kau from the summit of Maunga Pukatikei with Rano Raraku in the foreground
Money changing: There are a couple ATMs in Hanga Roa, the only town on the island. We didn’t use them but changed our money at the gas station - PUNA VAI Mini Market - just off the main street on the south side of town. The exchange rate was reasonable and we exchanged on a few occasions. The rate can change daily. The gas station also has a large wine selection! If you have time in Santaigo you can get a better rate there. Downtown in the Central Banking District, on Agustinas between Ahumada & Bandera is a row of Money Changing storefronts with their Buy / Sell rates posted outside. We made it a point to have US dollars in good shape.
Map: Prior to going to Easter Island I ordered the International Travel Maps - Easter Island (Chile). It's a pretty good map with 20 meter contours and a 5 minute grid and 1 minute grid ticks. I used a straight edge to make a one minute grid. I wasn't able to identify the datum. The shift between the map and WGS 84 was mainly in longitude. My GPS has an Easter Island 67 datum that might have been a bit closer than WGS 84 but was still shifted in longitude. On Easter Island I was able to pick up a couple more glossy tourist maps that were also good to have. You will notice inconsistencies between real life and the road / trail patterns on the island. I get the impression the less constructed roads and trails have migrated a bit over the years. There are also contradictions with the elevations between the maps and various websites. This is especially true with Maunga Pukatikei, the volcano that anchors the eastern side of the island. You will also see inconsistency in feature names. Sometimes is English / Spanish / Rapa Nui - Easter Island / Isla de Pascua / Rapa Nui. Other times native names will be broken in different places with or without apparent spelling differences: Pukatikei / Pu a Katiki / Pua Katiki. Have fun!
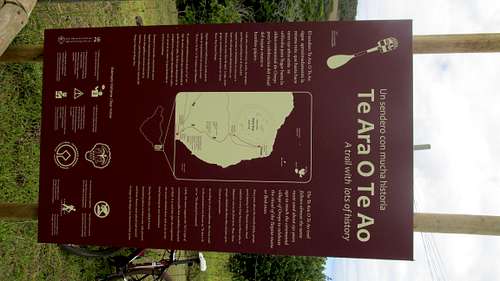
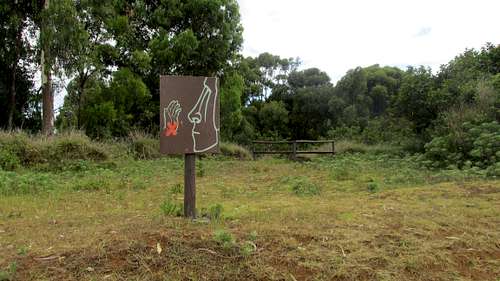
Trailhead Sign with Map
Weather: We had highs in the 70s and lows in the 60s all week. On a couple occasions there was a light sprinkle. I wore shorts and a tshirt the whole time. Even on the windy mountain tops it never got real cold. Some might want a jacket so it would be prudent to pack one. Sunscreen is a must! A hat for the sun is recommended. I wore trekking shoes on the hikes and they were sufficient. Hiking boots would have been good, especially on Rano Kau. Do not recommend only being in sneakers. There are some places, especially on Rano Kau where the horse grass is tall, the trail isn't established and the surface underneath is rough. There are no water options on the trails. Be sure to pack at least a couple liters, or three liters if you'll be taking a scenic way back!
GPS Boxing Day 12/26/14 WGS 84 Zone12 Latitude Band J
RanoPark 654477 6994646 22m 10:36:43am 27.16215 109.44088 71’
RanoTH 654539 6994476 28m 10:44:43am 27.16367 109.44022 91’
RanoTrRdInt 654616 6992743 280m 11:39:27am 27.17930 109.43924 919’
RanoCraterh1 655713 6991698 318m 12:14:27pm 27.18861 109.42804 1044’
RanoCraterh2 655708 6551708 317m 12:16:34pm 27.18876 109.42809 1041’
RanoHiRoad 655944 6991633 310m 12:37:19pm 27.18917 109.42570 1018’
RanoSummit 656020 6991618 332m 12:47:27pm 27.18929 109.42492 1089’
RanoSummit2 656010 6991647 328m 12:52:41pm 27.18903 109.42503 1076’
RanoIntHi/PaveRd 655867 6992856 247m 1:18:33pm 27.17814 109.42663 809’
RanoMoai 656385 6993226 193m 1:33:09pm 27.17475 109.42146 633’
RanoParkEnt 654678 6994353 49m 2:02:09pm 27.16476 109.43881 162’Magnetic declination is about 15 degrees to the east
Rano Kau looking south from Maunga Terevaka - this view shows the east side of the crater rim as higher - the Orongo site is on the west crater rim - Hanga Roa is in the foreground of the mountain to the right (west)
Time Zone: UTC -6 The longitude should put Easter Island in the same time zone (Mountain) as Colorado, but they probably don't want to be the extra hour different from the mainland. UTC -6 is the same as the Central Time zone in the US which includes Chicago & Dallas. Interestingly Easter Island observes Daylight Savings Time at the opposite time of year as the northern hemisphere. So for Standard Time in the winter, Easter Island is on the same time as Daylight Savings Time in Colorado. (summer) When it is Daylight Savings Time on Easter Island in their summer, they are the same as Eastern Standard Time in the US! (Miami, New York)
Looking at Moto Iti & Moto Nui (Birdman Island) through the low point of the crater rim.
Essential Gear
The standard advice on Easter Island is to take lots of water and sunscreen! Hiking boots or trekking shoes recommended along with sunglasses and a hat! It's possible the wind might pick up or there will be a shower, so a jacket in case a t-shirt proves not to be enoughExternal Links
We stayed at Kainga Nui cabin at Hotel Tekarera. Our host Paul picked us up at the airport. Paul drove us around town pointing things out to get us oriented. The next day Paul was our guide for a full day tour of island. Paul is very knowledgeable of the history of Easter Island. As a teenager in the 60s he worked with archaeologist William Mulloy. Paul is American but spent much of his adult life on Easter Island married to a native Rapa Nui. We spent 6 nights on Easter Island and could easily have spent another week.
http://tekarera.com/index.html