So, you want to climb Mt Rainier.
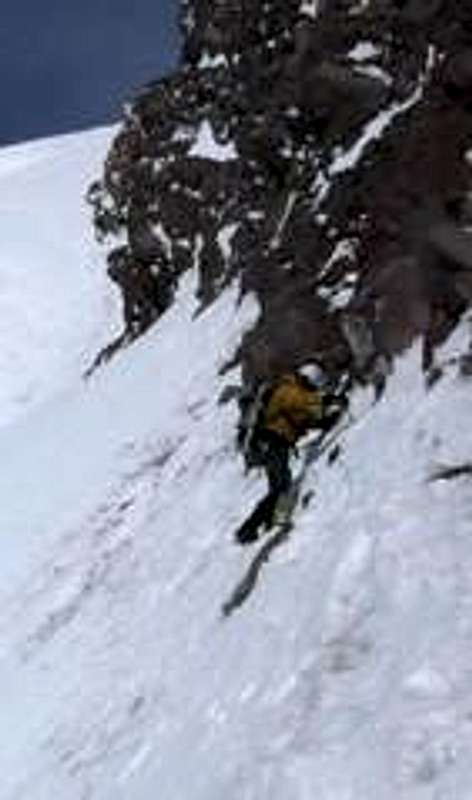
![Gib Ledges - Mt Rainier]() Descending Gibraltar Ledges
Descending Gibraltar LedgesMount Rainier is a unique mountain within the contiguous United States. No other mountain is as extensively
glaciated or has as much prominence. The scale and character of Mt. Rainier is more akin to an Alaskan or Andean peak. The
highest trailhead requires the climber to gain 9,000 feet of elevation to reach the summit, as much as from Everest ABC to its summit. The weather on Mt. Rainier changes remarkably quickly, typically for the worse. Blizzards are not uncommon in August, and the high winds and moisture laden air sap heat and wilt down insulation. If you are planning an attempt on Rainier there are a few things you should know. This article includes tips I have gleaned from over two decades and dozens of climbs on ‘The Mountain’. Bear in mind that this article is
not a substitute for proper instruction or experience. Mt. Rainier kills climbers almost every year.
Objective Hazards
Climbers refer to the dangers inherent to mountaineering that they have little control over as objective hazards. Mt. Rainier aspirants should be aware of these, and make plans to mitigate the risks as much as possible. These include, but are not limited to the following:
- Altitude The high altitude and low atmospheric pressure of Mt. Rainier can induce a number of maladies, including Acute Mountain Sickness, High Altitude Cerebral Edema, and Pulmonary Edema. Know the symptoms and how to avoid these life threatening conditions.
- Crevasse Falls Crevasse falls are a serious hazard on Mt. Rainier. Know and practice safe glacier travel techniques and carry the appropriate gear.
- Falls on Ice/Rock Falling off of steep ice and rock can happen. Use belayed climbing and running protection where appropriate. Practice self arrest so it is second nature, and can be employed without thought.
- Rock/Ice Falls Melting snow and ice foments falling ice and rocks. Wear a helmet, avoid climbing under cliffs as much as possible, and do not dawdle in rock and ice fall areas. Rocks embedded in the glacier are a clue to keep moving.
- Serac Fall Seracs are unstable cliff bands formed by the leading edge of a glacier flowing over a cliff. The worst mountaineering accident in U.S. history occurred when a serac released, sweeping 13 climbers to their deaths. Avoid climbing under serac bands and cross quickly underneath when forced to.
- Weather High wind, frigid temperatures, humid conditions, blizzards, lightning, and intense sun can all create problems on Mt. Rainier. Check the forecast before you go, and recognize that the weather is usually worse on the mountain than in town, and bad weather arrives 12 to 24 hours before it hits the lowlands. Generally, storms come from the south in winter and north in summer. Keep and eye open for tell tale signs of approaching storms including mare's tails and growing, descending lenticular clouds. Do not climb into a growing storm.
- Avalanche Avalanches are deadly, and not just in winter. A team was swept off of Disappointment Cleaver in the summer by a wet slide started by a member of the same party. Check conditions and insist on a favorable forecast before heading out.
The Skill Set
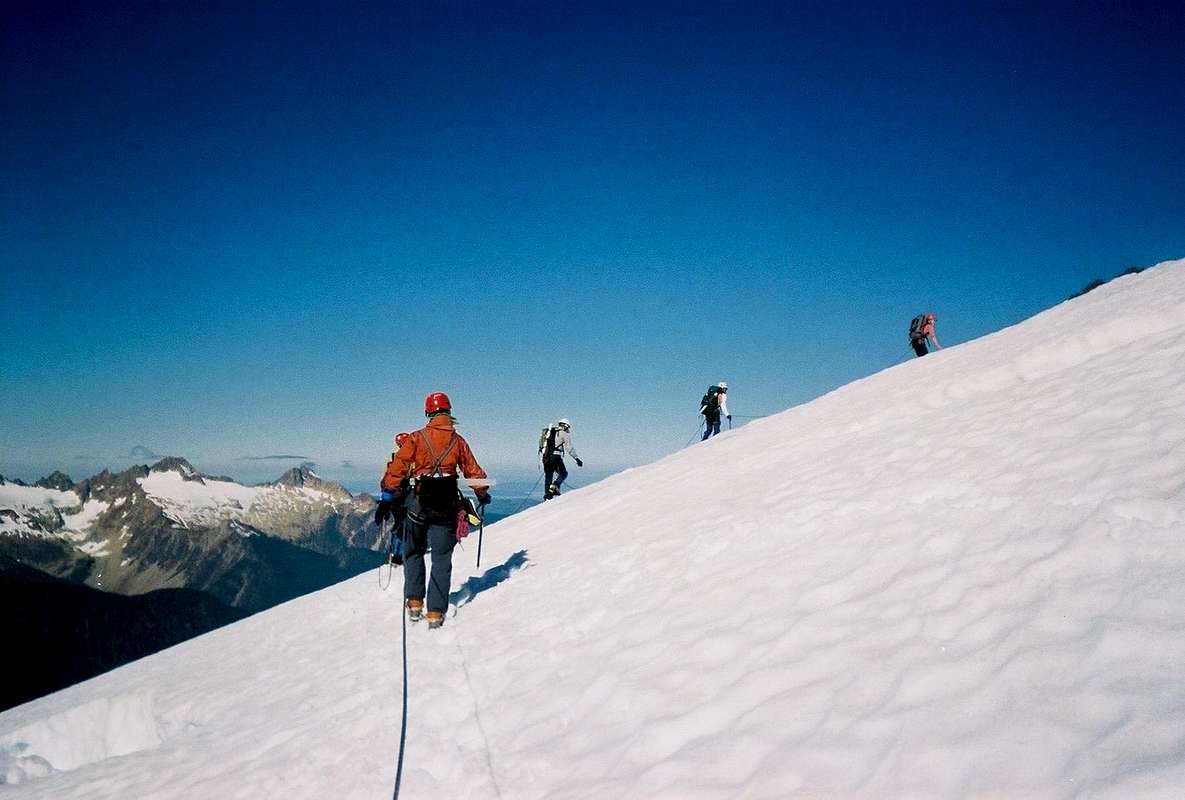
![Rope team on glacier]() Rope team on a glacier
Rope team on a glacierMt. Rainier is a heavily glaciated mountain and anyone attempting to climb it should have solid mountaineering and glacier travel and crevasse skills. In addition to the mountain traveler's knowledge of weather, route finding, winter camping, etc., one should be proficient in the following techniques for safe glacier travel:
- 'Reading' the glacier and route finding
- Ice axe use (arrest, self belay, step chopping, etc.)
- Belaying techniques on snow and ice (boot axe, sitting hip, ice screw, etc.)
- Use of crampons, French technique
- Rope work: knots, roped travel
- Ascending a rope with Prusik cords/mechanical ascenders
- Setting snow and ice anchors (ice screws, pickets, bollards, dead men, flukes)
- Building a Z hauling system (Z x C if in a two person party)
- Hazard recognition (seracs, rock fall, crevasses, weather)
If you are not absolutely proficient in these techniques, you must learn them from a qualified instructor prior to a summit attempt. An excellent primer on these techniques can be found in
Freedom of the Hills, 8th ed., but is no substitute for proper instruction. There are many clubs that offer mountaineering courses, including the Washington Alpine Club, the Boeing Alpine Club, The Mountaineers, and The Mazamas. Many climbers choose to hire a
guide service. Climbing with a qualified guide can increase a new or visiting climber's chance of summiting while decreasing the chance of making poor decisions.
The Climbing Season
![Gib Ledges - Mt Rainier]() Enjoying fine weather on Rainier
Enjoying fine weather on RainierThe typical climbing season starts in April and runs through September. Weather is king on Mt. Rainier, and more trips are spoiled by poor weather than any other factor. Weather improves throughout the season and becomes much more stable after the first week of July. The flip side is crevasses open up, snow bridges become weaker, and routes become more circuitous. Some routes are only appropriate early in the season, April through mid June, as rock fall becomes increasingly problematic once the ice that binds the loose volcanic rock melts.
The trick is to find the sweet spot when conditions are good and weather is stable. Historically, I have found that July is the best month for this. The last several years, however, have seen low winter snowfalls, particularly during the critical early winter period. This has lead to routes becoming icy, broken, and circuitous earlier in the season, and technical routes becoming dangerously out of condition by the end of June. Before you go,
check the weather and insist on a good forecast. The Mount Rainier climbing rangers maintain a
blog with the current climbing conditions.
Selecting a Route
![Mt. Rainier climbing routes]() Mt. Rainier climbing routes
Mt. Rainier climbing routesThere are many good route options for alpinists of varying ability and experience. If you are fairly new to climbing your best choices are
Ingraham Glacier Direct,
Disappointment Cleaver, or the
Emmons Glacier. These, however, are the most popular routes and during the height of the climbing season it may be difficult to secure a camping permit. If you want to be assured of a spot apply for a
permit early. Less crowded, but slightly more technical routes include the
Kautz Glacier and
Fuhurer Finger routes. For a true wilderness experience the
Tahoma Glacier is hard to beat.
Experienced alpinists looking to step up their game are lured by
Liberty Ridge, the largest snow and ice route in the lower 48, made famous by its inclusion in 50 Classic Climbs of North America. True Mt. Rainier aficionados can find steep, challenging climbing on Ptarmigan Ridge, Curtis Ridge, and Mowich Face.
There are several guide books available that cover Mt. Rainier:
Mount Rainier: A Climbing Guide by Mike Gauthier
Cascade Alpine Guide: Climbing and High Routes: Vol 1- Columbia River to Stevens Pass (3rd Ed.) by Fred Beckey
Selected Climbs in the Cascades, Volume I and II by Jim Nelson and Peter Potterfield
Training
The mountaineer's training regimen is perhaps the single most important factor for success that lies in their control. And while any reasonably fit person can climb Mt Rainier, a focused, specific training regimen will make your climb more enjoyable. Tailor your program to mimic the demands of climbing a big mountain. Summit day will likely be an 8 -12 hour affair so it is important to train long. Load up a pack and hike your local hills, or do long trail runs or bike rides. Lift weights to strengthen your core, shoulders, back and legs. Don’t neglect high intensity cardio like interval work. You want the ultra runner’s endurance, the sprinter’s speed, and the weight lifter’s power. Your goal is to become an all around athlete.
Many people train solely on a stair stepper machine or by hiking with a pack filled with water bottles which they dump out for the hike down. Both of these training methods will help you for the climb up, but remember you have over 9,000 feet to descend, usually on the same day as the 4,000-5,000 ascent on summit day. One needs to train the muscles for the hike down as well. I find trail running in the mountains to be very effective. Running down hill does more to strengthen your legs than running or hiking uphill.& Running down hill generates forces several times your weight, far more than can be carried on your back, which must be countered with the eccentric contraction of your leg muscles. If no other options exist, doing various squats and lunges in the gym can help train these muscles.
Extreme Alpinism, Climbing Light, Fast, and High by Mark Twight is a classic on the subject of training in particular and climbing in general.
Training for the New Alpinism, A Manual for the Climber as Athlete by Steve House and Scott Johnston incorporates the newest training philosophies.
Body Results has a wealth of information online that is of interest to the mountain athlete. The owner, Courtenay Shurman, wrote the training chapter in
Freedom of the Hills, and is my personal trainer.
Gear
![Belay Parka]() Belay parkas layered over the top
Belay parkas layered over the topThe old climber's adage “light is right” couldn’t be truer for Mt. Rainier. When buying gear look for the lightest possible piece that will meet your needs. Most first time climbers err on the side of caution and bring too much food and clothing. Don't bring any 'extra' gear but don't forget anything critical. Your total pack weight should be no heavier than 35 pounds. Below is a gear list that works for me from April through September. Bear in mind that some routes and conditions will require additional gear and clothing. This is only a suggested list.
Clothing.
During the main climbing season, early spring through early fall, you can experience temperatures from the mid 70's at the trailhead to well below freezing with high winds on the summit. You will need to pack a clothing system that will handle the range of temperatures you may expect. On summit day dress to stay just warm enough while moving. You should feel chilly standing around waiting for your rope team to get moving. A 'belay jacket' is critical for this approach. Carry a warm synthetic or down insulated hooded parka that is sized to fit over all your layers. The belay parka goes on when you stop for short breaks and in extreme cold and high winds.
Head
- Sun hat - something with a brim to protect your face.
- Warm hat - wool or fleece
- Sun glasses - dark glacier glasses with side shields
- Headlamp - Small LED with extra batteries - lithium last longer, are lighter and less affected by cold weather than alkaline batteries
Feet
- Boots - either plastic or insulated leather mountaineering boots
- Liner socks - thin merino wool or synthetic (2 pair) (optional)
- Heavy socks- merino wool or synthetic (2 pair)
- Gaitors (optional, good for early season wet snow)
Hands
- Liner gloves - cheap poly pro work well
- Warm gloves - Fleece liner with a nylon type shell work well - include spare liners or a spare pair of gloves
Legs
- Pants - mid weight soft shells work great
- Long underwear - mid weight synthetic or merino wool
- Fleece tights - 200 weight PowerStretch is plenty warm and less bulky than fleece (optional early and late season or if you get cold easily)
- Light weight hard shell pants (optional)
- Shorts - (optional, nice for hiking to high camp in warm weather)
Torso
- Short sleeve shirt- light colored synthetic or light weight merino wool
- Light weight fleece jacket or puffy (early and late season or if you get cold easily)
- Wind shirt - lightly insulated nylon jacket is very versatile (e.g. Marmot Driclime)
- Shell - light weight hooded jacket to repel wind and precipitation (e.g. Marmot Precip)
- Insulated parka - hooded synthetic or down 'belay parka'
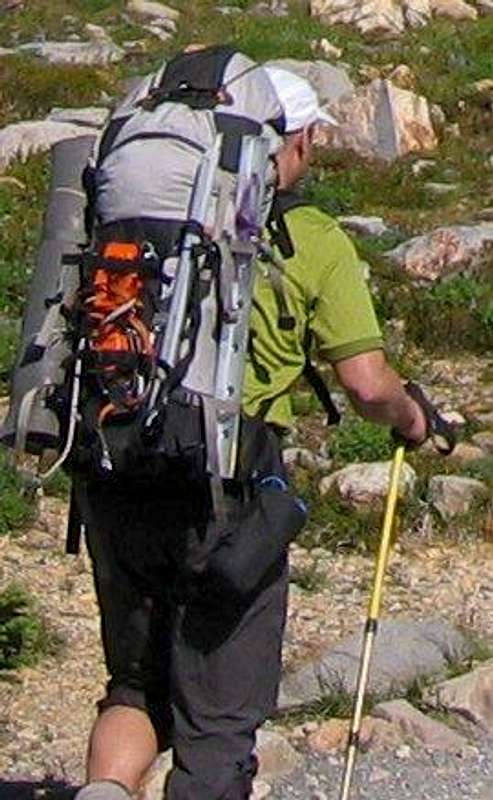
![Pack size of Rainier]() Appropriate pack size
Appropriate pack sizePersonal gear
Technical gear
- Crampons - 12 point steel with anti balling plates
- Ice axe
- Helmet
- Harness - lightweight webbing harness with drop legs. (e.g. Black Diamond Couloir)
- Picket - 24"
- Pulley
- Prusik slings - 5mm perlon or Tiblocs
- Runner/slings - 2 single, 1 double
- Carabiners - 6 wire gate, 3 lockers
Camping gear
- Sleeping bag - 20 degree or warmer if you sleep cold
- Sleeping pad
- Backpack - 40-50 liters is about right. Any larger and you’re not going light
- Trekking poles (optional)
- Small pocket knife
- Lighter - I prefer a mini Bic
- Water bottles (2) - I like to bring one bladder and one Nalgene to use as a mug
- Bowl - I like to use the disposable ‘Tupperware’ type such as Ziplock
- Spoon - I learned the hard way of the value of an unbreakable spoon.
Shared gear
- Rope - 30 to 50 meters, 8 to 9 mm. Climbers may be tempted choose a thin twin rope to save weight, but should be cautioned that hauling and ascending skinny cords is very difficult. I personally use a burly half rope.
- Shelter - Tent or tarp if you are not planning on sleeping in the Muir public shelter
- Stove - butane canister stove systems work very well (e.g. Jet Boil, MSR Reactor)
- Fuel - at high camp all your water will need to be melted from snow. Carry enough fuel for two extra days
- Pot
- Pot lifter (optional)
- Lighter
- Map and compass
- GPS (optional)
- Wands (optional)
Additional gear for technical routes.
Routes like Liberty Ridge, Ptarmigan Ridge, Kautz Glacier, Mowich Glacier Headwall, Sunset Amphitheater Headwall, and Curtis Ridge offer the experienced alpinist challenging climbing on steep ice and rock. You will need additional gear for these routes, which include, but are not limited to the following:
- Second ice tool or a pair of ice tools
- Full length rope - 50 -60 meters
- Ice screws - 6-8
- Rock protection - pitons, Tricams, and cams work better than nuts in the highly broken volcanic rock
- Extra runners and carabiners
Misc.
- Sunblock - I like to use SPF 40
- Lip balm - At least SPF 15
- Toilet paper
- Blue bags
- First aid kit - for injuries, blisters, small wounds, allergies, etc.
- Entertainment - music players or other electronic widgets
What about winter?
Climbing Rainier in winter can be a valuable learning experience for those heading to the greater ranges. Deep snow, bad weather, cold temperatures, and short days all make for a much more challenging experience compared to a spring or summer attempt.
Most of Mt Rainier's routes have had winter ascents, but since the road to Paradise is the only plowed road in winter, a south side route makes the most sense. Gibralter Ledges, Ingraham Direct, and Disappointment Cleaver are all good candidates for a winter attempt. These routes will allow you to stay in the Muir shelter, a much nicer alternative to a tent or snow cave.
When to go?
Winter officially starts December 21st and ends March 21st. Any climb made between these dates is considered an official winter ascent. During the winter the prevailing wind and storms are out of the south west. This effectively strips the snow off of south facing routes high on the mountain. This makes for poorly bridged crevasses and sastrugi snow which effectively conceal hidden crevasses. A good strategy is to aim for late winter which tends to offer better snow conditions, longer days, and a better chance of a good weather window.
Locals watch the weather and avalanche forecasts and drop everything to attempt a winter ascent. Traveling climbers don't have the same luxury. A good strategy is to shoot for the weeks before and after President's day weekend in February. The PNW enjoys a high pressure system every year right around that time which can last a few days or a couple of weeks.
What to know
Avalanches are, or should be, a big concern. Everyone attempting Rainier in winter should have avalanche training and the necessary tools (beacon, shovel, and probe). Watch the avalanche forecasts, don't make an attempt while it is snowing or shortly after it has snowed.
White outs are a big problem, especially in winter. Know how to get back from Camp Muir to Paradise. People have died trying to get back down in a white out. The NPS publishes a
map with compass bearings to prominent features. Get one and know how to use your compass and altimeter. Laying in a GPS track as a back up is a good idea, as are wands.
What to bring
In addition to the usual kit for Rainier, the following items should be considered indispensable.
- Avalanche tools - snow saw, shovel, beacon, probe
- Double plastic boots
- Flotation - snow shoes or skis
- White gas stove and extra fuel
- Extra food
- Hard shell pants or heavy soft shells
- Fleece pants
- Warm mittens
- warm balaclava
- ski goggles - amber tint is the best in whiteout
- Map of Muir snow field with compass bearings
- GPS and/or wands
- Warm hooded parka - synthetic is best (Patagonia DAS, Wild Things Belay Parka or similarly warm parka)
Contingency Plans
Mt Rainier is magnet for winter storms. Rainier can be getting nuked while other mountains, especially those east of the crest, are enjoying relatively descent weather. On the other hand, Mt Rainier is a big mountain and one can some times get above the cloud layer and enjoy warm, sunny conditions while everything else is socked in.
If you are traveling to attempt Rainier in winter allow more time than you think you need. This will give you a better chance of getting a window of good weather. Make alternate plans should Rainier be getting hammered. There are many small ski resorts and good back country skiing (if avalanche conditions allow) if that is your bag. Reliable ice climbing can be found in and around Lillooet, BC about 6 hours north of Seattle. Great mixed alpine climbing can be found in the Stuart Range which due to its position east of the crest can have better weather. Dragontail, Colchuck, Argonaut Peaks and Mt Stuart all offer reasonable winter access and routes ranging in difficulty from easy to hard.
Random Tips
Plan your climb, and climb your plan
Start your days early so you roll into camp with plenty of time to relax, rehydrate, and acclimatize. Start your summit day early. It is far preferable to begin climbing in the dark than to finish in the dark. Aim to be off of the glaciers before the high altitude sun bakes the snow into a sloppy mess, ideally before noon. Aim to leave camp by 3 am at the very latest; many parties leave at midnight. Expect to take at least an hour getting ready and plan your wake up time accordingly. Pace yourself. You will spend the better part of every day working towards your goal. Be the tortoise, the hare will burn out.
Personal maintenance
Drink more than you think you need and before you feel thirsty. Staying hydrated will help with altitude acclimatization. Water bladders with hoses make this easy, but be aware that water can freeze in the tube. Take precautions to prevent this. I find that having something flavorful helps me to drink more. Pack tea, instant soup, hot Jello, electrolyte sports mixes, etc. Apply sun screen to all exposed skin frequently. Don’t forget the lips and the bottom of the nose. Keep your feet dry and don't let hot spots on turn into blisters. Keep your boots laced properly
How's da wedder?
Watch the weather and never climb up into a storm. As a general rule of thumb, storms come from the north in summer and the south in winter. Conversely, if your intended route climbs under or through rock bands, make sure the temperatures will remain cold enough to keep the rock frozen together.
Etiquette
If you are staying in the public shelter at Camp Muir be mindful and courteous of fellow climbers. Don’t smoke in the hut, turn the fans on when cooking, keep your voices low when others are sleeping, and clean up after yourself. Don't leave your left over food for the next climbers, it will attract mice.
External Links
NPS Web page about climbing regulations for Mt. Rainier.
Current avalanche forecasts.
Mt Rainier weather forecast
Printable map of Muir snowfield with compass bearings (.pdf)
Trip report from a winter attempt by MVS.


Comments
Post a Comment