Clear Creek Route, Aug 19, 2014

Clear Creek Route, Aug 19, 2014

Page Type Page Type: Trip Report
Date Date Climbed/Hiked: Aug 21, 2014
Activities Activities: Mountaineering
Seasons Season: Summer

Overview


This is a narrative of my solo climb of Mount Shasta in August, 2014. The “Detailed Route Map” in the “Clear Creek” route “Approach” section shows the route quite well. (Click on it to enlarge it.) At the time of this climb the most difficult section of the route was class 2. You could get to the summit without crossing any snow or ice at all if you chose to skirt the small summit plateau snow/ice field; however, I chose to cross it as it was more direct and the footing was good.

Day 1, Tuesday, August 19, 2014 - Going In


DRIVE TO TRAILHEAD, 6,400 FEET

2.8 miles. From McCloud east on highway 89
5.3 miles. North on Pilgrim Creek Rd (Highway 13), paved.
4.9 miles. West on Forest Rd 41N15, gravel
0.7 miles. Forest Rd 41N61, dirt
2.4 miles. Forest Rd 41N25Y, dirt

Total miles from McCloud: 16.1 miles. Trail Head elevation about 6,400 feet.

The roads get more difficult the farther in you go, but should be passable for almost all ordinary 2-wheel drive passenger vehicles. The route was well-signed at this time. If they change the route in, then follow the new route signs. Call the McCloud ranger station at 530-964-2184 to check current conditions.

Note that the way out is NOT well marked. Apparently, once you drive in the Forest Service expects you to remember the way out. This is not too hard during the day, but at night it could be difficult. If you plan to drive out at night, try to remember what the route looks like and also look for the road numbers. There are a confusing number of side roads in this area so it is quite possible to take a wrong turn.

At the trailhead there is room to park around ten vehicles which was sufficient when I was there. One could also park down the road on the side. You can get a Standard Shasta Pass here good for four days. If you plan to stay longer, you could get a yearly pass at the ranger stations in Mt Shasta City or McCloud. You can also fill out the itinerary form. Obviously, all of this paperwork would be easier in the day time.

There is also an outhouse here and garbage. You can also get a “wag bag” to carry out your human waste (which is required).


HIKE TO CAMPSITE AT CLEAR CREEK SPRING, “THE MEADOWS”, 8,500 FEET


Trail though forest
Trail through forest


Note: All mileages are approximate, estimated from the map. The times given are on the long side since I tend to be a slow hiker.

The hike in is about 3 miles. Time in was 3 hours, 12 minutes. Campsite elevation is about 8,500 feet. Elevation gain about 2,100 feet. The trail to camp is relatively gentle and easy to follow. It starts out in the forest then eventually becomes open with views of Mt Shasta and surrounding ridges and Mud Creek Valley. This might be a good time to start checking out the route up Mt Shasta, especially near the top, while you can see it at a distance.


Camping Area
Camping area and route


About a half mile from the campsites, at some dead trees, the trail levels off and veers to the left across the valley. The trail also goes downhill a little bit. At the campsite area most people cross over the creek and go about 100 yards up the hill to camp. A multitude of campsites are available, some nestled among the stunted trees and some out in the open. Surface is dirt and gravel.

You can enlarge this picture to see better where the trail goes.  Also look at the picture "Clear Creek Route and Meadow Camp Location" in the "Camp Locations Section" of the Clear Creek Route to see the whole route.

The spring is fed from snow and glacier melt above and the water is clear, good and reliable as long as temperatures are above freezing. However, the Forest Service still recommends treating it for bacteria, viruses and parasites. I personally have had two friends stricken with illness from bad water. One was sick for over a year and it took many months to even diagnose the problem.

Note that there are lots of aggressive chipmunks in the area that may get into your food if you leave it unattended. Plastic containers, such as peanut butter jars or Tupperware, may be enough to keep them out. However, small and lightweight containers may get scattered and lost. I’ve seen rodents up to elevations of around 13,000 feet so I assume no area is safe unless, perhaps, it’s the dead of winter.


Day 2, Wednesday, August 20, 2014 - Hike to bivouac site 1


HIKE TO “BIVOUACSITE 1”, 9,500 FEET


Bivouac Site 1
Bivouac site 1 at 9,500 feet


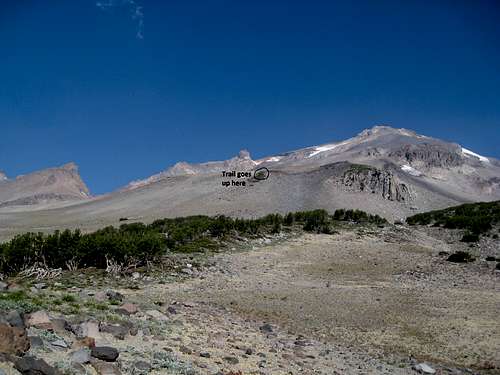
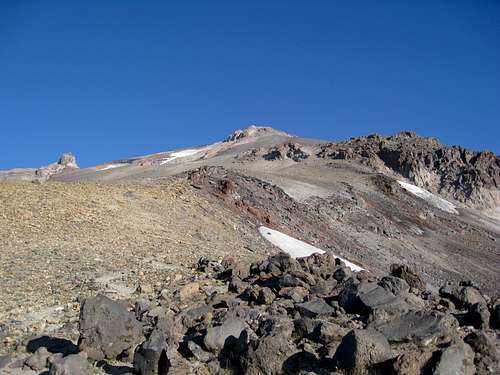
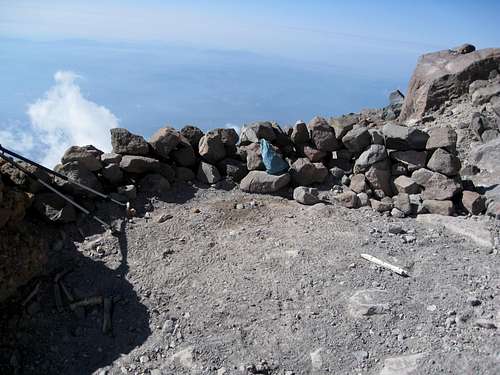
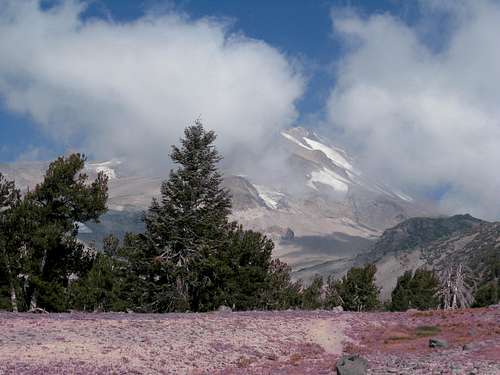
From camp some prominent cliffs can be seen up slope, and to the left of that is a knoll with some stunted trees.  The trail heads up towards the base of the knoll then switch backs up to the left of it. Eventually the trail goes right by a large rock wall which encloses the main bivouac site and would be hard to miss (at least in daylight).  There are other, smaller bivy sites as well.  By the map I judge the distance up here to be only about a half mile as the crow flies, but my gut tells me that a mile or so would be more realistic.  The elevation gain was around a 1,000 feet, and it took me about 2 hours.  There are also bivy sites 2 and 3 shown on the map which I referred to in the Overview.  These would also be good options; of course, the higher up you go the colder and more exposed it gets. 


Most people climb Shasta directly from camp at the spring.  Why did I choose to bivouac higher up?

PROS:

It shortens the actual climbing day, allowing one to go at a slower pace and have more time to arrive back at camp before dark.

It provides time for additional acclimatization.

If you leave for the summit climb before daylight (highly recommended), then the trail from the bivy site is more distinct and easier to follow then the previous section before the bivy.

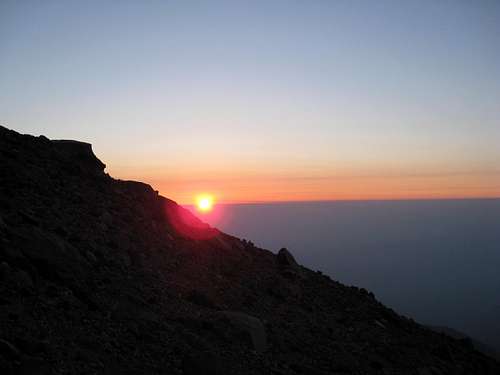
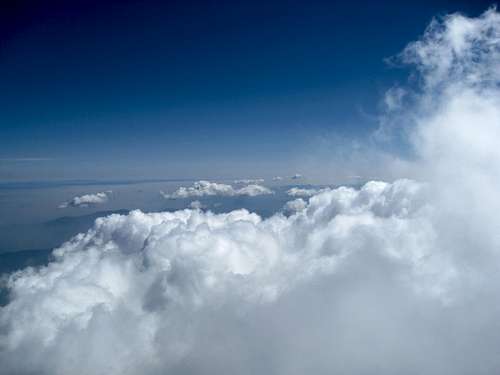
It provides additional views and photographic opportunities.  For example, on the morning after my summit climb there were thick clouds out in the valley below Shasta.  There was an opportunity to get a picture of a red sunrise looking DOWN on the clouds.  (However, I didn’t think to get up that early - darn.)

At higher altitudes insect pests are greatly reduced, although I haven’t found insects to be a problem on the Clear Creek route anyway.

It provides more of a sense of adventure.

CONS:

In August, there’s no water above the spring until you get to the summit plateau.  I carried an additional half gallon of water up there.

Who wants to carry a backpack up any further than they have too?

Obviously, the additional camp takes additional time, so if you’re time is limited, this is a disadvantage.

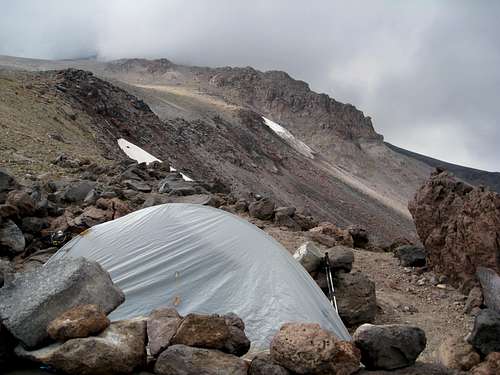
The bivouac site is more exposed to the wind.  It’s colder and may be harder to sleep up there.


Day 3, Thursday, August 21, 2014 - Summit Day


THE ASCENT


Shasta Sunrise
Shasta sunrise


I got off a bit before sunrise in the morning.


Trail beyond bivouac site


From the bivy site the trail skirts along to the left (south) of the ridge.  Eventually it leaves the ridge and heads towards the left of the looming band of cliffs.


Descent Trail
Descent trail


To the left of the trail is a large gulley which is filled with snow earlier in the season.  No reason to cross this gulley.  On the other side of the gulley is a dirt trail which goes straight down the slope.  It is great to go down, but hell to go up.  (See picture.)


Bivy Site 3
Bivouac Site 3 at 11,000 feet


It took me about two hours to get to the cliff band.  There is also a bivy site at this spot, although it is very exposed to the elements.

Once I turn the corner at the cliff band, I bear right and head up towards the next set of cliffs high up near the summit and the large orange rock at the base of the cliffs (at 12,800 feet, according to the route description).  The trail is good, easy to follow, nicely graded and endless - it took me three hours to reach the large orange rock (about 15 feet high and visible from the spring if you have good eyesight).


Mount Lassen from Shasta


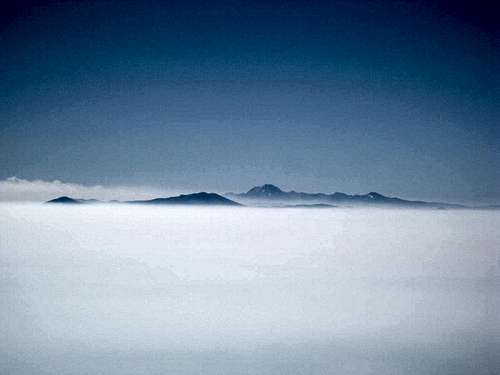
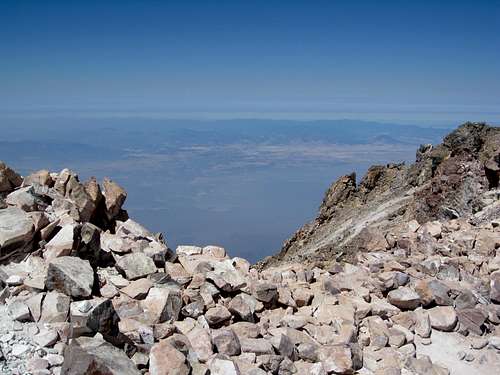
Mount Lassen at 4X magnification.  This picture was taken on another trip in August 2012.  It was cloudy and smokey then, too.


Bivouac Site at Orange Rock
Bivouac site at orange rock at 12,800 feet


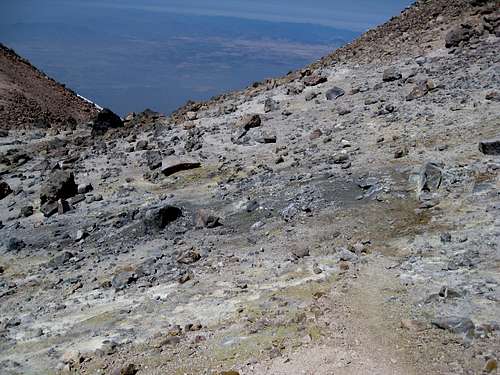
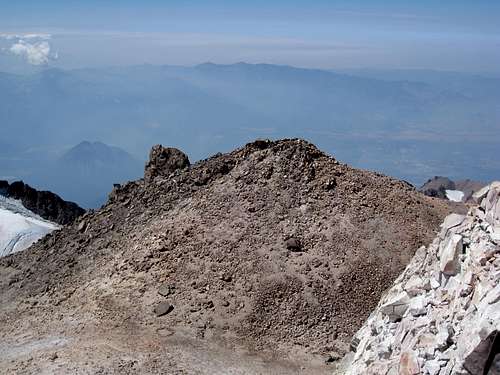
There is yet another bivy site at the orange rock.  Someone has left a pint-sized beer can at this landmark and dampened the ground with the excess beer that he didn’t drink, along with a few fragments of beer-soaked pretzels.  There is a chipmunk there who likely enjoyed some of the excess.  From here I also took a compass bearing back down the route. It read 120 degrees.  Cross country travel on this route is feasible and if you got off the trail it might be an option. 


Class 2 climbing at edge of Wintun Glacier
Beyond the orange rock the journey feels more like a climb and less like a hike.  For one thing, the “trail” becomes less distinct as it passes through a major scree area fed from the cliffs above.  I simply bore right (north) and angled upwards until I came to the edge of the Wintun Glacier.  At that point I headed straight up picking my way through the scree.  This is terrain where you take one step up, then slide one step down.  Rocks dislodged at this point may slide or roll down the hill for twenty feet or so before coming to rest.

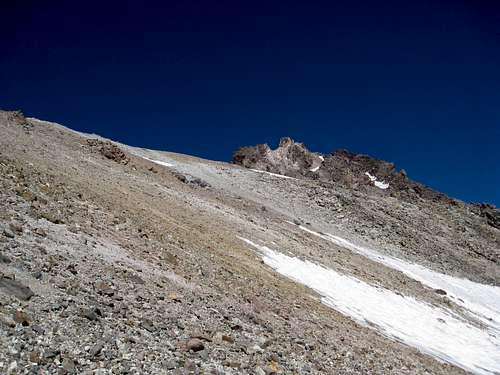
The Clear Creek route description says there are other routes up through gullies in the cliffs above that are also class 2.  I chose this route because people in two other parties that I talked to went this way.  Finding the way was pretty straight forward.  I'm also concerned that the routes through the gullies might be more subject to rockfall, but I can't say for sure since I didn't go that way.  If you have an opinion about this you might add a comment to this trip report.  

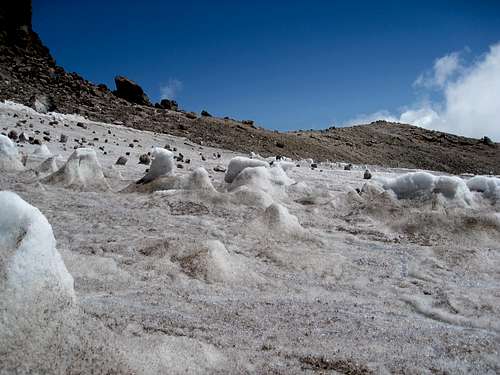
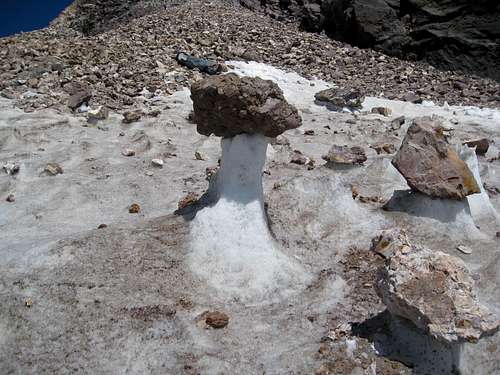
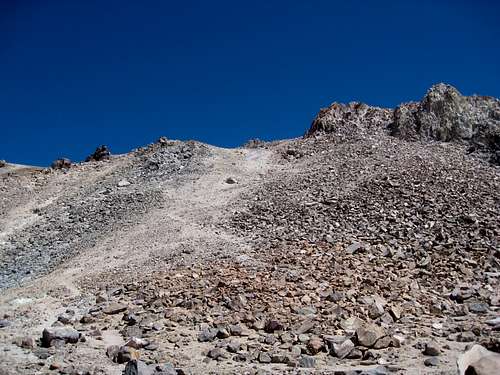
When you top out of this section remember what it looks like for the trip down, as it could be very easy to miss if it’s foggy, or (heaven forbid), getting dark.  At this point a distinct trail again ensues until you reach a large snow/ice bowl.  You have the option of going directly through the bowl, or skirting around it to the right. If the snow is melted to the point where the bowl consists of somewhat dirty ice, the surface provides a good grip and it’s easy to head straight through it. 


Summit Plateau Ice Field
Summit Plateau ice field


Ice Hoodoo
Ice Hoodoo at Summit Plateau ice field


Sulfur spring at roughly 13,900 feet
Sulfur spring at roughly 13,900 feet, just below the summit


Continue beyond the bowl, likely on dry land (in August at least), until you reach the sulfur spring.  When I was there I could hear and smell the spring, but I couldn't see any water.  It must have been flowing somewhere beneath the surface.  On my trip I started up before the spring and reached a false summit, wasting about half an hour or so. 


Trail Switch Backs to Summit
Trail switch backs up final climb to summit


From the sulfur spring you can see a trail switch-backing up the slope to the east and on up to the summit.  From the orange rock the distance traveled was maybe about a mile, although again, I’m doubtful as to how useful map distances are.  The elevation gain should only have been about 380 feet, although it seemed like more.  It took me two and a quarter hours from the orange rock, including some time off route. I arrived at the summit at 1:00PM.


Summit Register
Summit Register


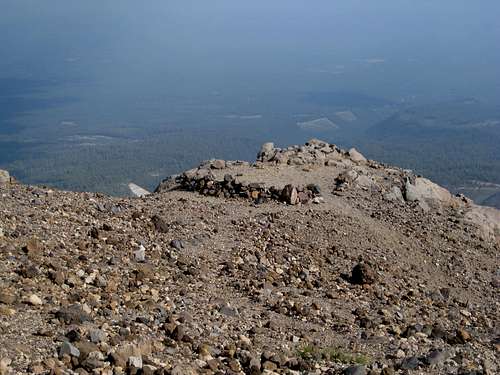
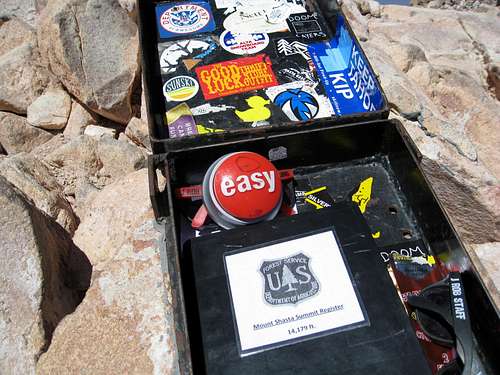
People left quite an assortment of stuff in the summit register box.

When you press the "Easy" button a voice says "That was easy".  It cracked me up.


Summit Selfie
Summit selfie


Picture taken at the summit register with the summit in the background.


Wintun Glacier from near summit


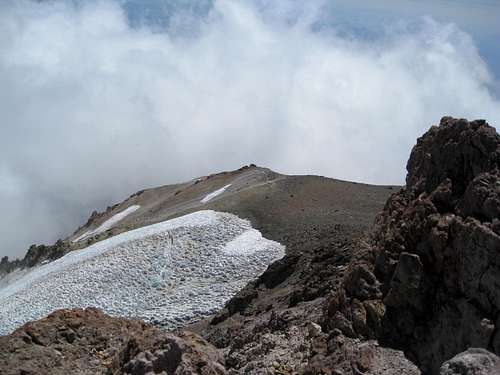
Pictures from summit area


View to West
View to west from summit


View to North
View to north from summit area


THE DESCENT

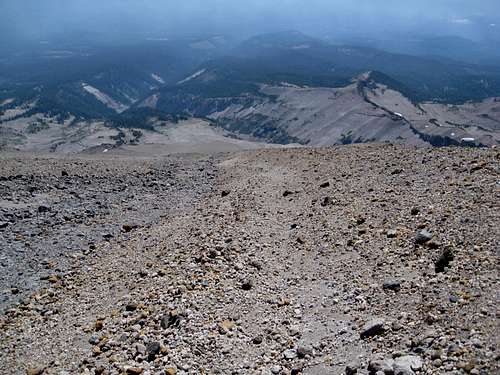
Going down the scree slope by the glacier was fast and easy.  I was able to do a standing glissade.  From the summit back to the orange rock took about two hours, including time spent taking pictures.

From the orange rock I missed an intersection about 30 minutes below the rock and went off on a different trail. I went more slowly on this trail, but it still just took two hours down to the “corner” (where the trail skirts the cliffs) rather than the three hours on the way up. As has been said before, there are many trails on this side of the Mountain.  There are some nicely graded trails with switch backs that are good for going up.  Some trails just go straight up and down the slope and are dirt and scree that some people use to descend really quickly.  Personally, I prefer the better constructed and graded trails for ascending and descending, and using them would reduce erosion as well.

From the corner it took one and a half hours back to the bivy site as opposed to two on the ascent. Note that as I was alone I took the descent more slowly than I might have due to safety concerns.


Day 4, Friday, August 22, 2014 - The trip out


From the bivy it took about an hour and a half back to the spring.  From the spring it took about an hour and a half back to the trail head – half the time of the hike in.

The drive back to McCloud is pretty straight forward if you’re traveling in broad daylight, although the way back is not well-marked unless you look at the BACKSIDE of each major sign as you’re driving out.  Sticking to the main road and avoiding any smaller side roads is all it takes.

After this trip, your vehicle will be thoroughly covered in orange dust.  For a safer and more pleasant trip out to wherever you’re going, I recommend using the coin-operated car wash in McCloud just off of highway 89 on the south side by the gas station.  There’s a machine which provides change for$1’s, $5’s and $10’s and $20’s. 


The Weather


Shasta Clouds from trail
Typical Shasta clouds at 9 in the morning

The weather was pretty stable in August, but that doesn’t mean that it was always “good”! Dawn generally arrived cloudless while I was there.  By 9:00AM clouds started to form and generally came and went around the mountain and elsewhere all day.  The recorded message from the Fifth Estate mountain equipment shop (530-926-5555) advised to be heading down off the Mountain by about 10:00AM.  This would require a VERY early start and fast pace. On my trip there was really only one time when the route was significantly obscured, and that only lasted a few minutes.  Overall, the clouds increased the scenic beauty of the trip rather than detracting from it.

Also note that in August there were significant forest fires in the Shasta area producing considerable haze.  This was the case in August of 2012 when I was there previously as well.  If you desire clear skies and distant views for your climb, better check about conditions with the rangers before coming up.


Clouds From Near Summit Plateau
The weather socks in at 1020 AM near Summit Plateau


Equipment needed


You need the usual stuff that you should have in the mountains, plus trekking poles.  I had three pairs of good REI socks and switched them often.  I had hiking/climbing shoes that were broken in and proven on Mt. Diablo.  I got away without snow boots, crampons, ice axe, rope or gaiters.


Statistics


Hike in to spring, “The Meadows” – 3 hours

Hike up to bivy – 2 hours

Ascend to summit from bivy – 7-1/2 hours

Descend back to bivy – 5-1/2 hours

Hike out to trail head – 3 hours

Total hiking/climbing time -  21 hours.

Total elevation gain from TH:  Close to 7,800 feet.

Summit Post member dsmith814 in trip report “Mount Shasta via Clear Creek Route” reports that he did the climb in about seven hours and 20 minutes round trip not including bivouac time.


Final Thoughts


Currently you don’t have to have a reservation to climb Mt. Shasta and there are no quotas.  Let’s try and keep it that way. Practice Leave No Trace.  Haul out your own trash and be prepared to haul out other people’s trash.  Don’t even think of going to the fragile spring area where it emerges from the hillside; get your water down lower where the trail crosses the stream.

Help to avoid accidents. Inform any unqualified people you may meet on the trail about the dangers of climbing.  Preventing accidents may help to eliminate a possible excuse for introducing more restrictions on the use of the mountain as well as give you a good feeling for doing the Right Thing. 


Comments

No comments posted yet.


Parents 

Parents

Parents refers to a larger category under which an object falls. For example, theAconcagua mountain page has the 'Aconcagua Group' and the 'Seven Summits' asparents and is a parent itself to many routes, photos, and Trip Reports.

Clear CreekTrip Reports