


Comments
No comments posted yet.
My hiking friends and I had ambitious plans for summer 2020: two weeks of camping and Cascade volcanos (though not to the top in every case), beginning with St Helens in Washington and proceeding south to Mt Hood, South Sister, Crater Lake, Mt Shasta and Mt Lassen. Alas, COVID intervened. Two of my buddies live on the East Coast and understandably were not excited about spending six hours cooped up with a group of strangers on an airplane. Indeed, their travel to the West Coast would have posed the biggest COVID threat. The third, a fellow resident of California, decided to stay home … for which he will continue to get flack.
Going solo was not particularly appealing, but I had a permit for the south rim of St Helens and was unsure when it would be possible to get another. So I scaled the plan back to three days at St Helens. My spouse was hugely unenthusiastic about the solo part, but I brought her around, in part by playing my “Shasta 2001” card, when my college roommate and I displayed unusually good common sense – for us – by turning back due to rockfall (we made it to Shasta’s summit a few years later).
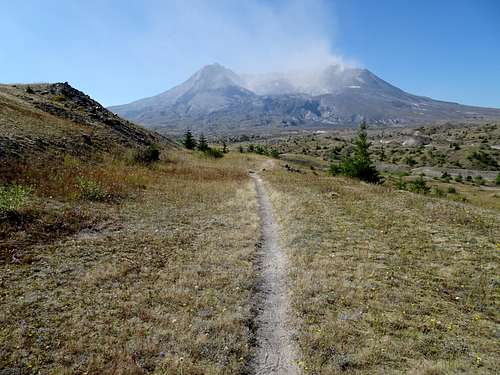
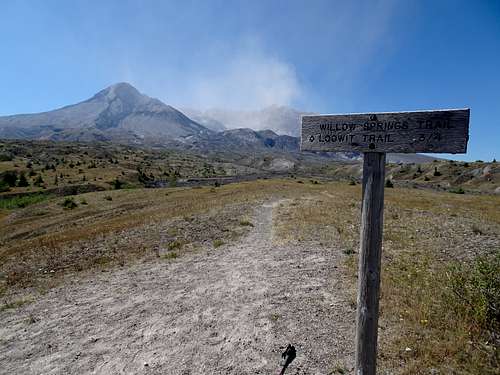
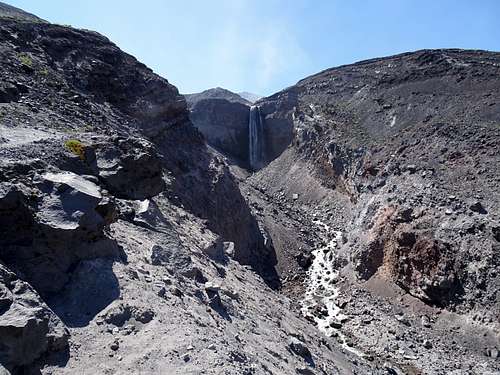
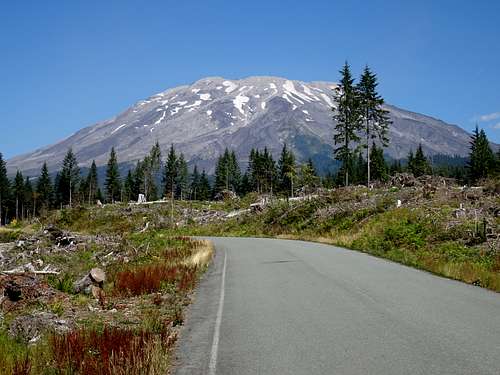
The first day at St Helens (August 17) entailed a hike on the volcano’s north side, from the Johnston Ridge Observatory to Loowit Falls, which empty water out of glaciers that have formed in the St Helens crater. The 15-mile (roundtrip) hike follows Johnston Ridge for a couple of miles before descending to cross the devastated zone near Spirit Lake and then ascending to the falls at the base of St Helens, all on good, sandy trails. Signs clearly marked each junction. The hike offered an excellent opportunity to see how nature is coming back in the devastated area (about 600 feet higher than the forest floor pre-1980 eruption): wildflowers, shrubs and a number of fir trees have returned. This hike makes for a nice counterpart to the hike to the south rim, providing a very different perspective on St Helens.
The first challenge for a summer hike to the south rim is getting a permit, which is required between April 1 and October 31. Permits went on sale on March 18 at 7:00 am PDT, and I went on-line promptly and secured four permits for August 19. The permits are popular. When I turned back the three for my friends at the beginning of August, I checked permit availability out of curiosity; turns out they were the only three available between August 14 and August 24.
I arrived at Climber’s Bivouac, the trailhead for summer climbs to the south rim about 6:30 am. There was plenty of space for parking and a couple of toilets, as well as an area for bivouacing before the hike. The trailhead has a place to pick up a “blue bag” (pack everything out) and a sign-in sheet to log in when you begin and when you return. After final preparations, I set out at 6:50 am.
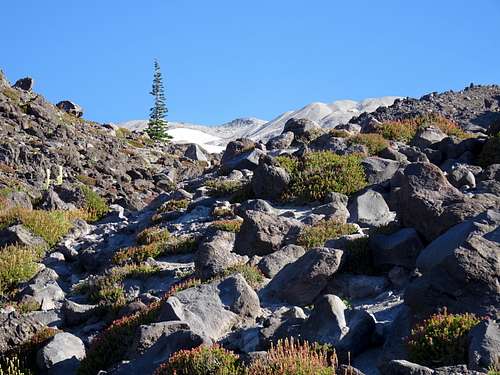
The first two miles are on the Ptarmigan Trail and gain about 1000 feet. It’s a pleasant, sandy trail that proceeds steadily upward, but not at a particularly steep rate. Blue diamond markers on trees accompany the trail. The trail is shaded most of the way, with a few open patches offering nice views of the terrain south of St Helens, including Mt Hood and Mt Jefferson in northern Oregon. Hikers do need to keep an eye on the ground, as numerous tree roots extend out to catch unwary legs.
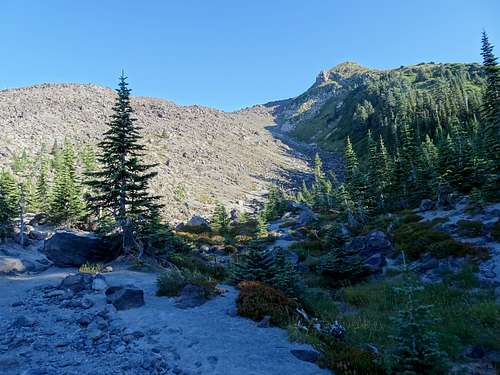
After about 40 minutes, I caught the first sight of the lower end of the boulder field through the trees. The trail also offered a couple of glimpses of the top of St Helens (not visible from the trailhead). At 8:00 am, I crossed the Loowit Trail, which circumnavigates St Helens, staying on the Ptarmigan Trail for another 15 minutes to reach the point where the trail turns up to enter the boulder field and ascend Monitor Ridge.
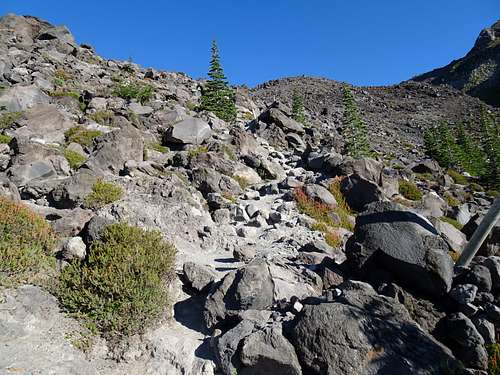
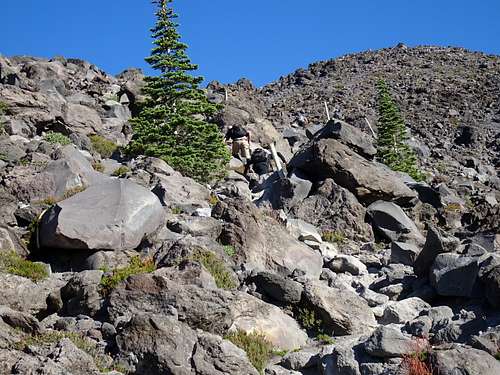
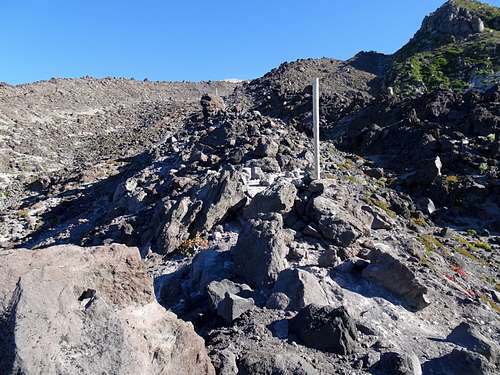
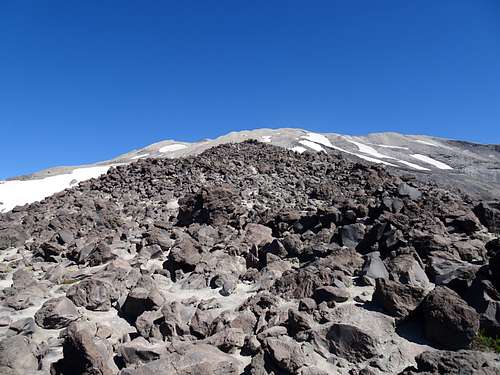
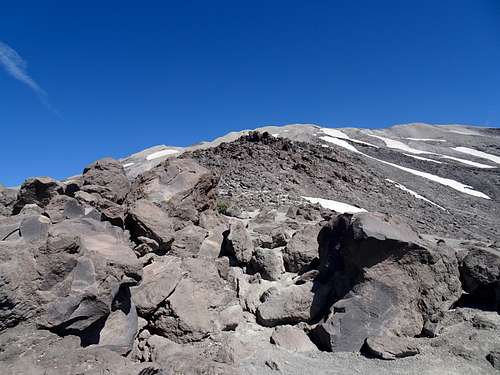
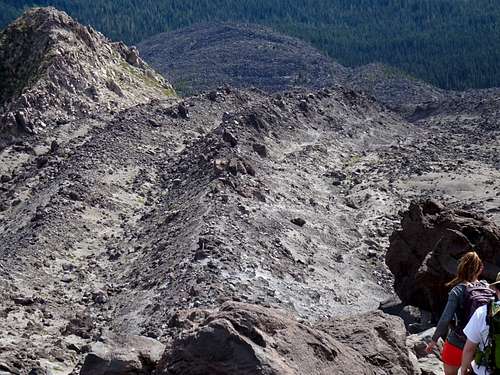
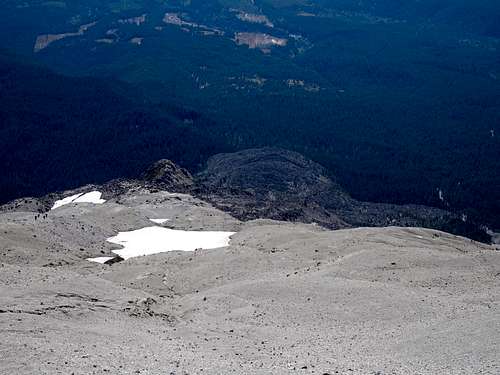
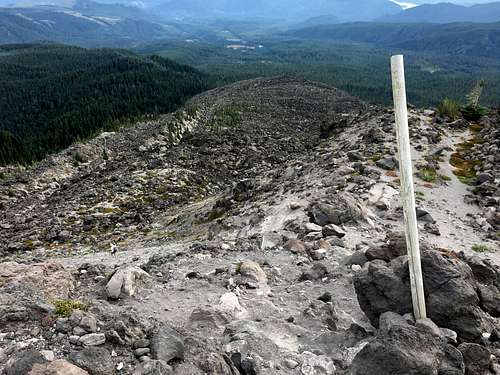
The portion of the route through the Boulder Field (and along Monitor Ridge) runs about two miles with an altitude gain of 2500 feet. The hike became considerably more challenging, involving more uphill and a mix of walking on gravel trail and scrambling over and around boulders of various sizes, often covered by gravel, sand and ash. (However, no technical skills are necessary.) Gloves came in very handy, though my hiking poles stayed in the daypack. A series of very visible poles indicates the path up and through the boulder field; one was rarely out of sight, so it was difficult to get far off course.
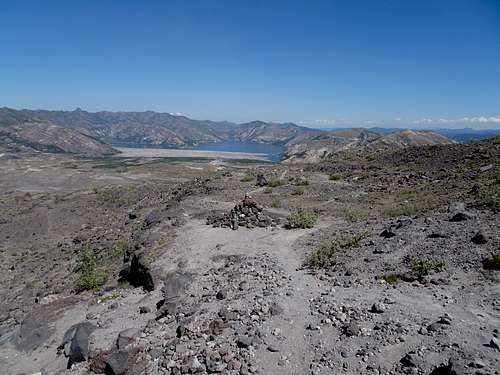
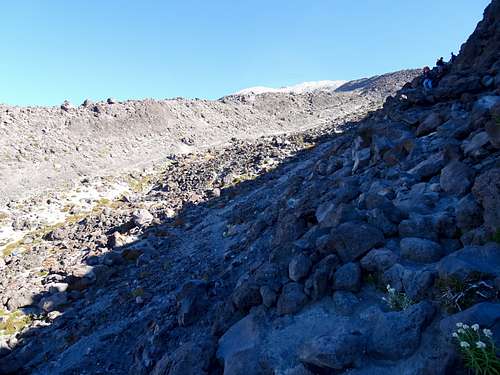
After climbing the ridge, the trail passes over to the other side, and much of the ascent through the boulder field runs along the western side of Monitor Ridge, steadily upwards alternating between gravel/scree trail and scrambling over rocks. At points, it appeared the field might be at an end, but I climbed up only to discover another stretch of boulders. This happened several times. The south rim was visible for much of this stretch, so at least the ultimate goal stayed in sight.
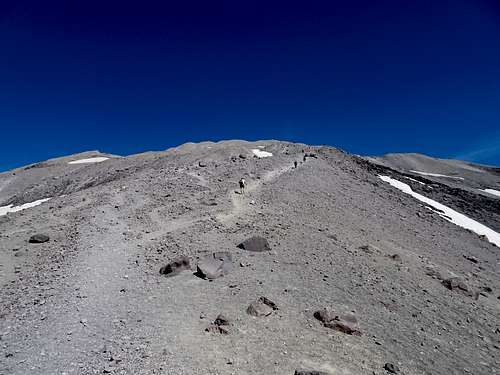
Finally, after three hours and change, I exited the boulder field to the final stretch and last 1000 feet of altitude gain. Here the trail is a mix of scree, sand and ash. One on-line guide and a couple of hikers that day cautioned that this would be the toughest part of the climb – step up one foot and slide back six inches, while boots get swallowed in sand. My gaiters came in handy, and I broke out my hiking poles for this portion of the hike. However, to my happy surprise, it proved much easier than advertised, certainly nothing at all like some scree nightmares in the eastern Sierra (e.g., the chutes leading out of Meysan Lake basin to Lone Pike Peak or Mt Mallory, or the climb from the Tungstar Mine to Mt Tom’s summit). It was slow going because I was tired and feeling the effects of less oxygen, but it was steady up to the rim, which I reached about 1:15 pm.
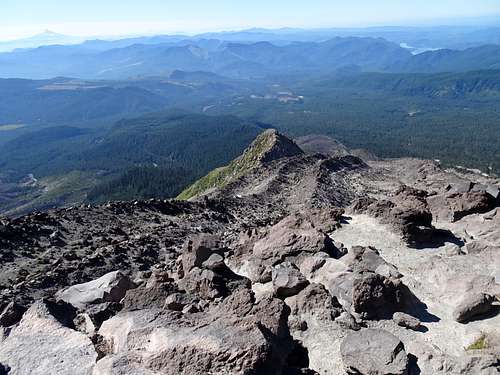
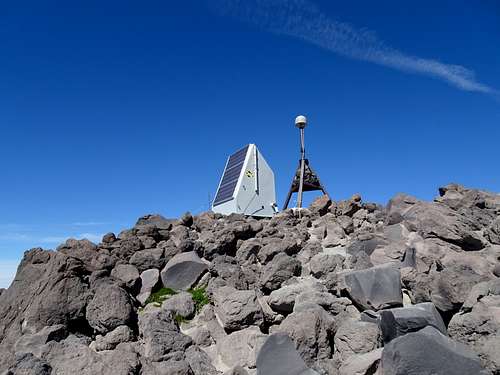
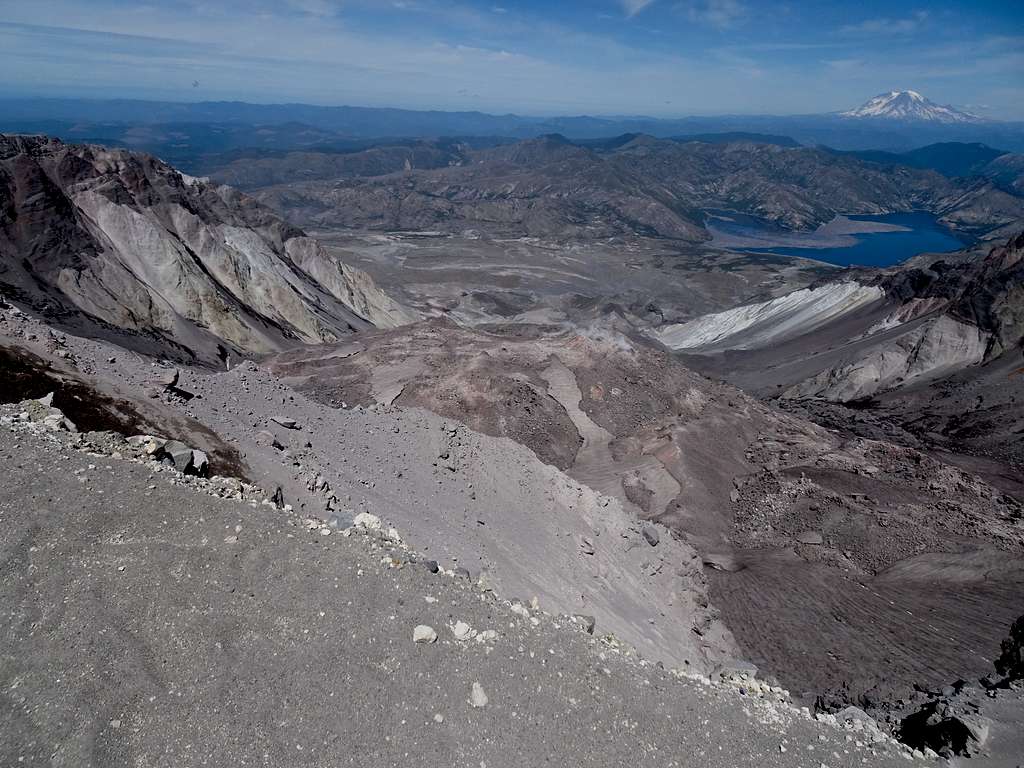
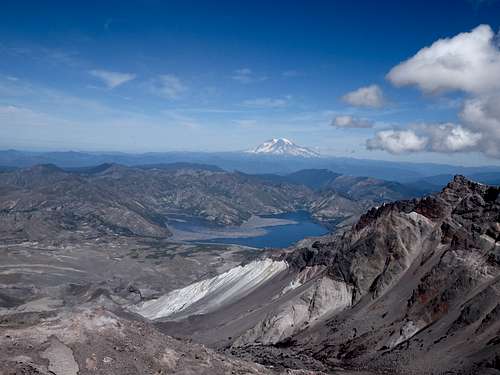
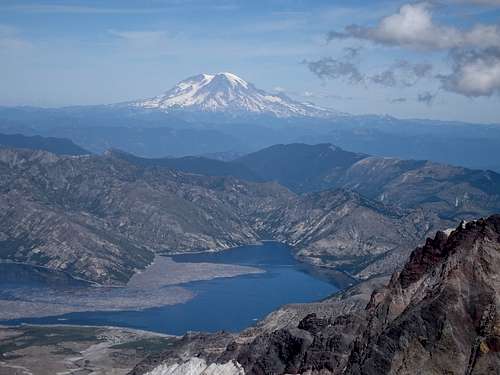
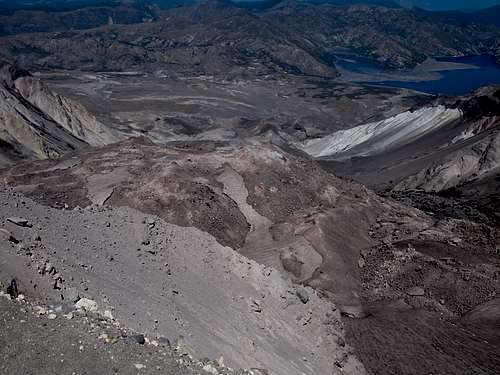
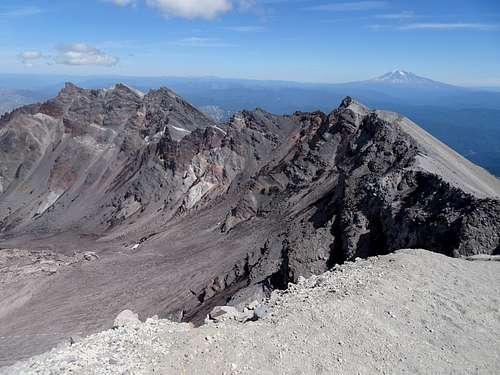
The views were spectacular: the lava dome venting steam, the crater’s interior walls revealing St Helens’s colorful strata, the devastated area northwest of the volcano, Spirit Lake and, in the distance, Mt Rainier, Mt Adams and Mt Hood. Rock falls were continuous within the crater, kicking up trails of dust (the crater walls did not appear particularly stable).
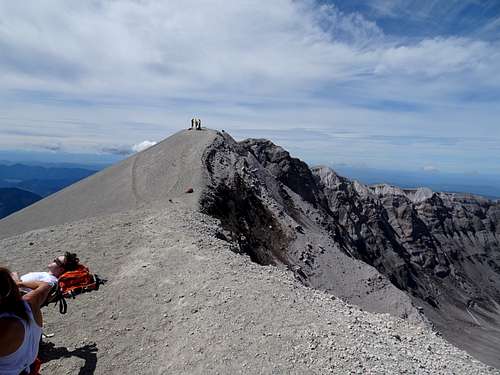
I considered going to the rim’s high point but decided the additional slogging would not be worth the extra 50 feet in elevation gain.
After a trail lunch and lots of pictures, it was time to head down. The first section down the scree/sand/ash trail went quickly, with gaiters and hiking poles proving very useful. The boulder field was the harder part and, after some back and forth, I opted for one hiking pole and one free hand. Trying to go fast and rubbery legs led to a couple of minor falls – the sand on the boulders can be slippery. Nothing serious, but several scrapes and bruises to serve as mementos of the hike.
Descending down to the bottom of the gully to the west of Monitor Ridge yielded a path with far fewer boulders, something I should have moved onto sooner. The marker poles clearly showed where to cross over to the east side of the ridge and descend back to the Ptarmigan Trail.
The Ptarmigan Trail allowed a good pace back to the trailhead, though it took a bit longer than I had anticipated. All-in-all, about 12 hours trailhead-to-trailhead, with an hour-plus on the rim and lots of stops for pictures, water and snacks. I tend to be slow, so most will be able to do the roundtrip in less time. Whether 12 hours, ten or fewer, it certainly is a great way to spend a day.