
-
 9074 Hits
-
 82.48% Score
-
 15 Votes
|
|
Route |
|---|---|
|
|
43.96070°N / 109.3393°W |
|
|
Hiking, Scrambling |
|
|
Summer, Fall |
|
|
Most of a day |
|
|
Class 2 |
|
|
Overview
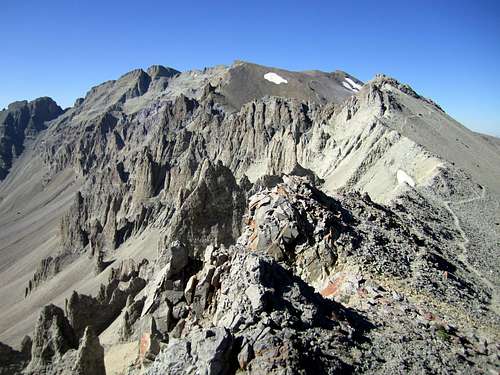
 The northeast ridge of Francs Peak
The shortest and easiest way to climb Francs Peak is to approach the mountain by the Phelps Mountain Road and follow the Northeast Ridge to the summit. This route is only possible if you have a high-clearance 4WD vehicle to navigate the difficult road, but it cuts the hiking distance and elevation gain at least in half when compared to the Meadow Creek or Jack Creek routes.
The total distance for the Northeast Ridge route of Francs Peak is 3.5 miles with about 2,600 feet of elevation gain.
This ridge walk is one of the most beautiful in the Absarokas, as most of the hike is spent above 12,000 feet. The alpine terrain, wildflowers, and the endless supply of breathtaking views make this an absolutely stunning route on a wonderful mountain.
 Francs Peak
Car Approach
 Phelps Mountain Road sign
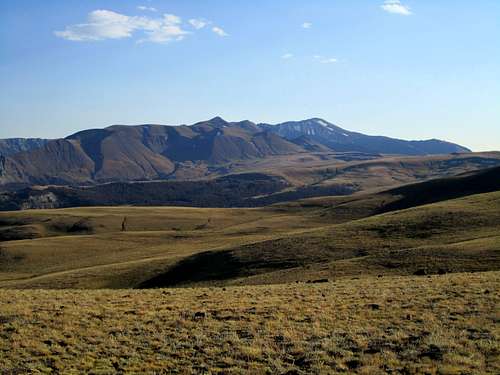 Nearing Francs Peak on the Phelps Mountain Road
This next section of the road gains 1500 feet in the next 1.5 miles, so the grade is steep and there are lots of rocks to avoid. Keep right at the only fork, which is just before a gate about a half mile up the road. Once you reach the top of the ridge, the driving gets much easier all of the way to the end of the road. After 4.5 miles, keep left at the fork and continue for another 5.0 miles to the highest point just before the end of the road. The 4WD section is a total of 9.5 miles and gains over 3000 feet of elevation!
Route Description
 Climbing towards 12,000 feet
From the high point of the road at 11,100 feet, begin the climb by hiking up the steep slopes to the south, aiming for the rock outcrop about two-thirds of the way up the slope to your left. You will find a game trail just before you reach it; follow this to the left as it contours around to the saddle and then continue along the ridge towards the Reef Benchmark. Follow a trail in the loose rock up and around the right side of this 12,490-foot subpeak and traverse its west side below the summit to the next saddle. Bypass the next prominence on the left, climbing slightly to reach a large open plateau, which ends abruptly on the west side with superb views into the Jack Creek drainage. From here, turn left and head south over the next easy crest, which brings the most fun part of the route into view.
 The narrowest part of the ridge
When I had checked out this part of the ridge on 3D Google Earth and from a distance in my car, I had some doubts about it, as it looked pretty rugged. It is rugged, but to my surprise I found a nice trail that spans the entire narrow ridge with only a small section of Class 2 stuff to get through in the middle. You can see this whole section from the top of the crest, and it is definitely a fun hike!
 Breccia tower
Descend down a few hundred feet and follow the narrow ridge until it reaches the very steep climb on the other side, which is probably the most difficult part of the route. Watch your footing, as everything is super loose; once you reach the top of this slope at about 12,700 feet, there is relatively flat section that winds around slightly to the left to the next plateau. Bypass the next 12,900-foot hill by going slightly up and then around to the left (this was a short snowfield even in September), and then follow the top of the ridge to the base of the summit, where a faint trail in the scree leads directly to the top.
 Summit view west
If thunderstorms are threatening, you may want to get off of the ridge and descend by dropping into the Jack Creek drainage just after you navigate the slightly tricky descent of the steepest part of the climb. Follow the drainage down until you are parallel with the lone cabin across the creek to your left (on the map at the intersection of trails 643 and 644) and then ascend about 600 feet up the gentle slopes to your right, which is where the end of the road is located.
Essential Gear and External Links
Bring bear spray! This area around this peak is thick with grizzlies, and after reading the summit register, where entry after entry recounts seeing multiple bears, it would just be foolish not to bring it! Normal day hike gear should suffice for most summer weather conditions.Shoshone National Forest
Washakie Wilderness
Francs Peak on listsofjohn
 Smoky Absaroka Sunset