
|
|
Route |
|---|---|
|
|
47.53117°N / 123.24622°W |
|
|
Hiking, Mountaineering, Scrambling |
|
|
Summer, Fall |
|
|
Most of a day |
|
|
YDS Class 2-3 |
|
|
Overview
The standard south route for Mount Washington, located in the Olympic Mountains of Washington State, is the least technical route leading to the summit of the mountain. Even with that in mind, the route ranges from YDS Class 2 to YDS Class 3. Both this route and mountain are NOT for amateur hikers. The route ascends approximately 3200' elevation in only two miles, and includes multiple levels of technical scrambles and rugged terrain despite its "easiest route" moniker.
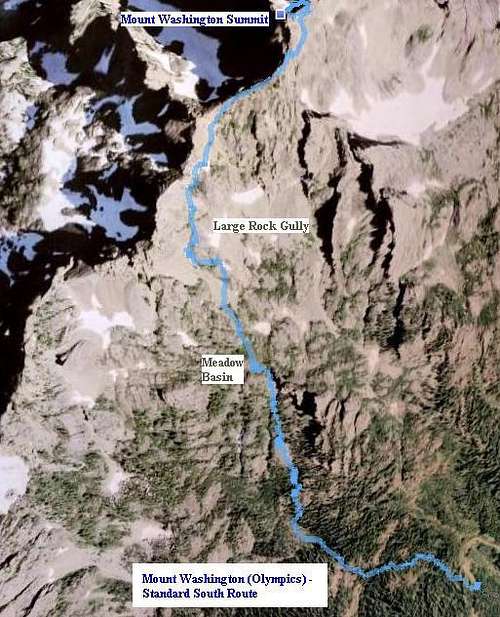 Satellite Image Of Standard South Route
There are many other possible climbing routes for the mountain, all of which have significantly increased levels of difficulty (i.e. YDS Class IV and/or YDS Class IV) and risk factors involved. In addition, if a deviation from this standard south route occurs midway up the mountain slopes, the chances for a successful summit attempt dwindles, in many cases somewhat considerably.
Although this standard south route for Mount Washington can be, in theory, climbed all year, it is primarily recommended during Summer and Fall when little-to-no snow is present. In addition, this route and mountain should NOT be attempted either soon after, or during, wet weather, as slick terrain (especially near the summit) could be disasterous or even fatal.
Allow enough time [between three hours (advanced fit climbers) to six hours (slower climbers)] for the ascent to the summit. Allow the same amount of time for the descent, as caution is definitely needed while traversing down steep, loose terrain on the mountain slopes.
Route Description
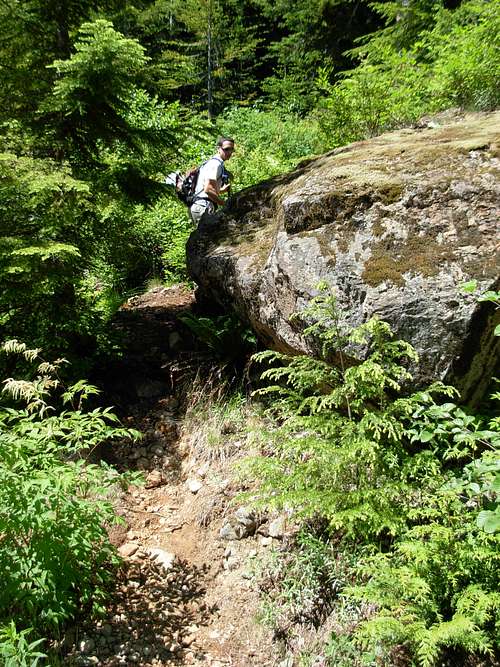 "Trailhead" For Standard South Route
ROUTE SECTION #1:
The route begins along FR-2419, where the trailhead (~3050' elevation) is found next to a large boulder. This section of the route is unmarked but the trail is easy to see during daylight hours. This section of the route ascends a thick forest, becoming increasingly steep along the way.
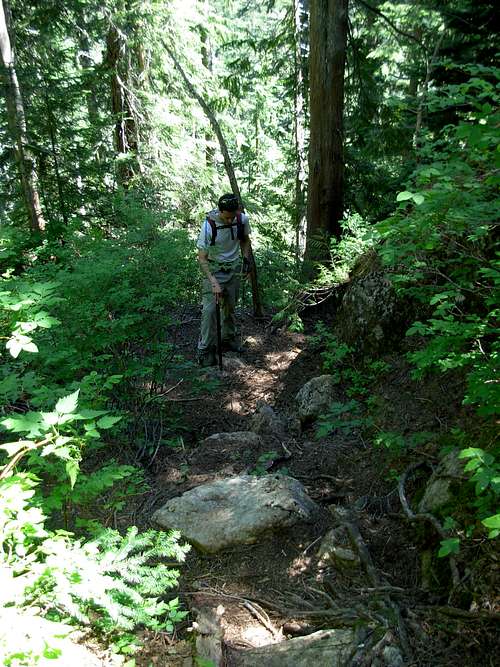 Ascending Lower Forest...
ROUTE SECTION #2:
Upon leaving the lower forest, the route switchbacks up a steep scree slope. The rocky terrain on this slope is very loose and unstable in places; try to stay on the main path (if easily seen).
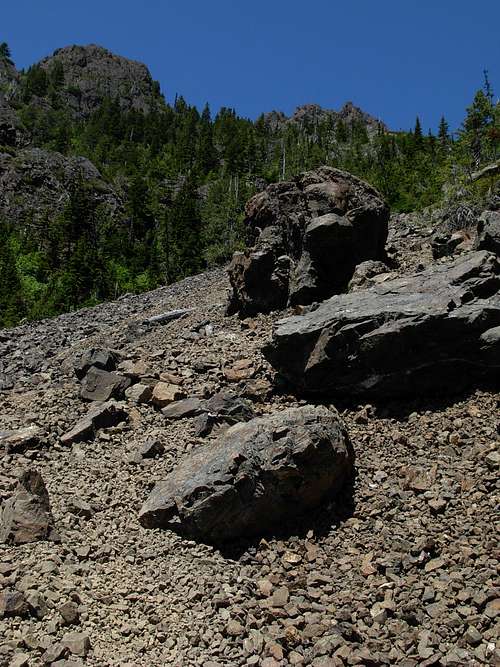 Entering Lower Scree Slope...
ROUTE SECTION #3:
Above the scree slope is a tight ravine containing a seasonal (typically snowmelt) stream. The ravine is very steep and tight, with a long near-vertical rock wall on the climber's left and a large column-like highpoint (which some climbers refer to as "The Horn" or "The Pinnacle") looming overhead to the climber's front-right. There are two options at this ravine: Either continue up a steep path leading up the center of the ravine and then ascend the leftside rock wall at the top of the ravine, or follow a path across the ravine (at the beginning of the leftside rock wall) which then turns and ascends along the top of the rock wall. The latter option is the preferred option, although that path is not as easily detected during the ascent as it is on the descent.
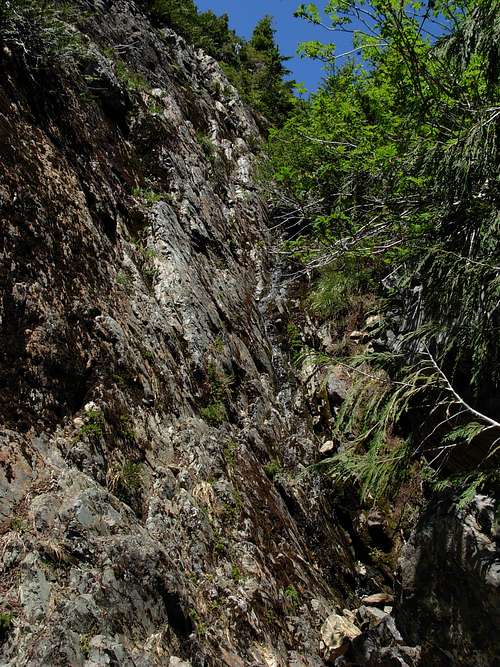 Traversing Up Ravine
ROUTE SECTION #4:
Once beyond the rock wall/ ravine section, the path enters a fairly flat meadow basin (~4900' elevation). The column-like rocky highpoint known by some climbers as "The Horn" or "The Pinnacle" will be behind climbers entering the basin. There are three main noticeable paths diverging at the entrance to the meadow basin: One goes left, one goes straight up the middle, and one goes right. The correct (i.e. preferred) path is the route UP THE MIDDLE. This path ascends up the center of the meadow basin and curves around the rightside of two large noticeable boulder-cliffs at the entrance to a large rocky gully. Climb up the gully's scree slope to where the path heads nearly-vertical up a short steep slope, where using tree-roots and natural handholds/ footholds will be necessary. Once at the top of the short steep slope, the path will appear to end at some short mangled trees on the rocky top to the climber's right. Go through this small tree-branch area and regain the obvious path on the other side of it.
(NOTE: At the entrance to the meadow basin, the left path and right path eventually each end up at the same location as the middle path, but two two paths are more technically challenging.)
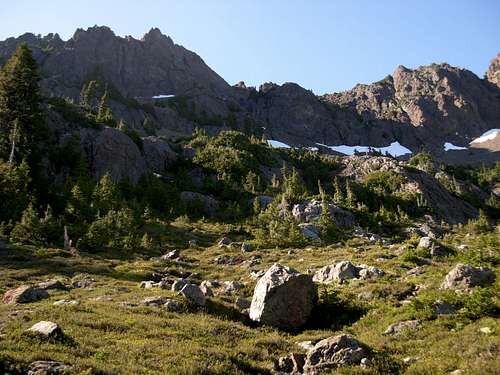 Entering Meadow Basin...
ROUTE SECTION #5:
The path then ascends along the left side of the large rocky gully. The path is tight in places and has many loose rocks. Climbing groups should not have members climbing closely together, in case of an accident and/or loose rocks sliding down the route. The path continues winding around the left side of the gully, and then above the gully, until reaching the southern ridgeline of Mount Washington. The summit of Mount Washington can finally be seen to the climber's front-right (northeast) by the time the ridgetop is attained.
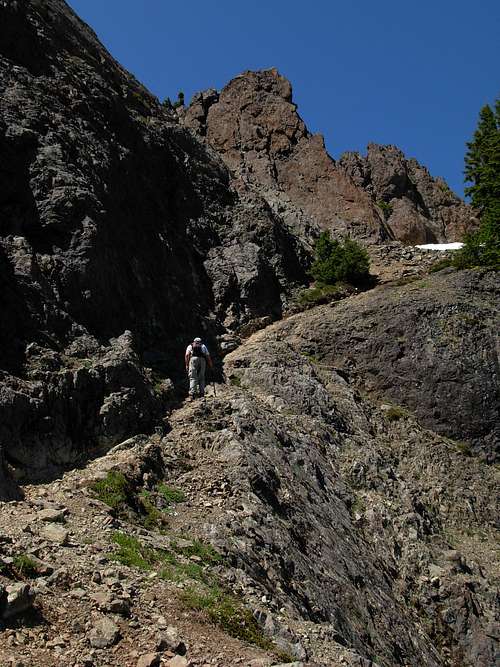 Ascending Along Left Side Of Large Rocky Gully
ROUTE SECTION #6:
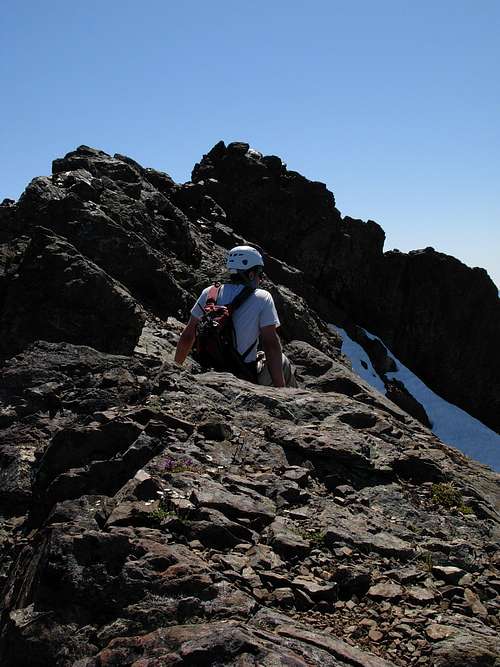
The path then ascends up and around the right side of the mountaintop, heading northeast, becoming almost little more than an animal trail in multiple places. Several areas of this section barely have enough room for one foot to be placed, let alone two, and certainly not for people to walk side-by-side. As with the previous loose terrain sections, climbing groups should space their members apart to help avoid injury (or worse) from loose rocks and/or accidents. Extra caution is required along this section, as a slight misstep could be fatal. This section eventually passes by a steep "path" to the climber's left, heading nearly-vertical directly to the summit. DO NOT take that "path", as it contains very loose soil and is an animal path (i.e. used by mountain goats) only. Continue straight along the side of the cliff, following the main route.
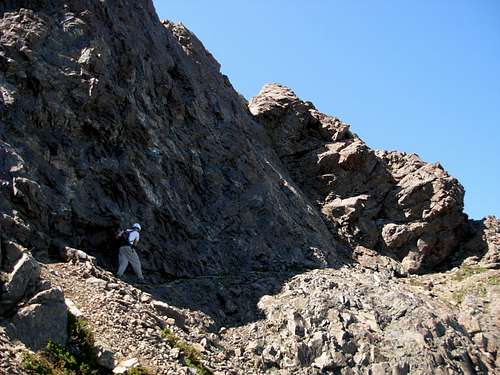 Following Animal Trail-like Path On Upper Slopes
ROUTE SECTION #7:
The cliffside path abruptly ends at its junction with the jagged ridgetop north of the true summit, which is back in view only a short distance southwest. Climb up onto the ridgetop and follow it south towards the summit, making certain to use most-every available handhold and foothold along the way. Use extra caution along this section, as the only options are to traverse along the ridgetop or have a fatal fall from a misstep. The rocky terrain along the ridgetop and summit block will be the most "solid" rock experienced on the entire route. Carefully climb up onto the summit block (6255' elevation), enjoying the views and savoring the accomplishment of a successful summit.
 Traversing South Along North Ridgetop To Summit
Getting There
1) Follow US-101 along the eastern/southeastern side of the Olympic Peninsula to the small town of Hoodsport, WA.
2) Turn west onto Lake Cushman Road.
3) Drive approximately eight miles along Lake Cushman Road, until the road encounters a "T" intersection. Turn right, onto Forest Road #24. Forest Road #24 becomes a gravel road.
4) Drive several miles until reaching a turnoff for Forest Road #2419 on the left (west) side of the road. Forest Road #2419 leads towards Mount Ellinor and Jefferson Pass, and a sign at the intersection might say as much.
5) Drive approximately 6-6.5 miles to the Mount Ellinor turnoff. However, continue straight along Forest Road #2419 for a few more blocks, to a small turnaround spot/ parking area on the right side of the road. Park here, and the "trailhead" is located on the left side of a large boulder across the road.
(NOTE: If you reach the creek crossing after the Mount Ellinor turnoff, you have driven too far.)
Essential Gear
Standard hiking gear, as well as a helmet and at least one trekking pole (as you will need at least one free hand for scrambling during multiple sections of the climb).
An ice axe is highly advised, even if off-season but especially between Winter-early Summer while snow is still present along the route.
Bring plenty of water, as sources are very limited along the route.
For safety reasons, this route and mountain should not be attempted by solo mountaineers or by inexperienced hikers/climbers.
Keep hiking groups limited (i.e. 2-3 people), as the true summit is very small.
External Links
I found a trip report from September 2012 which contains some additional photos and useful information.