
-
 12190 Hits
-
 87.98% Score
-
 26 Votes
|
|
Route |
|---|---|
|
|
47.77241°N / 123.13212°W |
|
|
Mountaineering, Trad Climbing, Mixed, Scrambling |
|
|
Spring, Summer, Fall, Winter |
|
|
A long day |
|
|
5.5 (YDS) |
|
|
III |
|
|
Mount Constance Overview
Those who have climbed Mount Constance can attest to the hideous loose crap and exposed scrambling required to reach the summit, not mentioning it requires 7,000 feet of elevation gain and a bike ride to make it happen. Located in the eastern margin of the Olympic Mountains where the pillow basalt rocks are seen everywhere, this mountain is a tough one to summit no matter which way you go. The standard south chute route is filled with loose scree that makes upward progress difficult for all but the most goaty of climbers. This route also has a fair share of very exposed scrambling which can turn back many people trying to make the ascent who are uncomfortable with exposure. However for those people who are so masochistic they want to rock climb rather than scramble on this almost garbage quality rock, read on.
The West Arete is the prominent ridge rising directly above Crystal Pass at the head of Avalanche Canyon and leading right to the summit ridge crest of Mount Constance. Climbers pursuing this route should have quite a bit of experience climbing loose rock and are comfortable with long run-outs. Placing protection on parts of the route is non-existent apart from the fixed pitons you may find. This route is a Grade III climb and rises about 1,100 feet above Crystal Pass on mostly 4th and low 5th class terrain and tremendous exposure. This route can be a whole lot of fun or a disaster waiting to happen...come prepared with confidence.
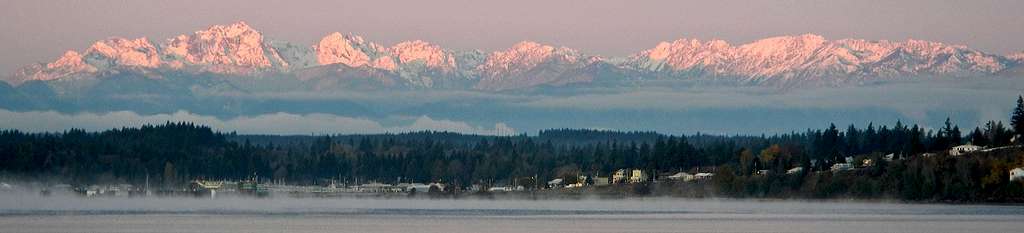
Mount Constance at left towering above Kingston
Approach - Lake Constance Trail
This route follows the same approach as the standard south chute route on the mountain. From Seattle, either take the Edmonds-Kingston ferry across Puget Sound ($17 headed west and $8 headed east) or drive south on I-5 through Tacoma and take Highway 16 north across the Tacoma Narrows Bridge. You want to get to the Hood Canal Bridge to cross onto the Olympic Peninsula and eventually get to the small town on Brinnon located on the west side of Hood Canal along US Highway 101. On the south end of town, turn west off the Highway onto the Dosewallips Road. Follow this paved road for 7 miles to the end of the pavement, then an additional 3 miles on gravel until the washout and road closure at an elevation of 600 feet. Here the Dosewallips River has washed out a large section of the road leaving it closed indefinitely past mile 10. Cars can park along the roadside but be sure to leave room for others to get by.
You need to take the Lake Constance Trail which starts at mile 14 on the road therefore you will have to either walk four miles of road each way or if you are prepared with bikes you can bike up (highly recommended). The road becomes overgrown in places where it's merely a single track but it's mainly still a nice gravel one lane road and isn't ever really steep making biking fairly easy even with a pack on. Just after you cross the second wooden bridge look for a sign indicating the start of the Lake Constance Trail which is at 1,480 feet. You can stash bikes under this bridge or lock them to a tree. Begin hiking up the relentlessly steep trail through the 2009 burn area which transitions into healthier forest around 2,000 feet in elevation. The trail is never really difficult to follow but is very rocky and steep. At 3,100 feet exactly halfway up to the lake, the terrain flattens considerably offering a great place to rest or spend a night with the sound of the creek slowly flowing by. Beyond this flat section the trail becomes very steep following the creek for awhile, then leaving it to the west (left) side and climbing up a series of third class steps some of which are covered in dirt and have considerable exposure below. There are lots of good roots to grab onto though but use caution if carrying a heavy pack. Reach Lake Constance (Elev. 4,678 feet) after two very steep miles from the road where you can now take a nice break along the clear blue water and refill water. There are a few places to camp at the lake as well but camping here requires permits since it's within Olympic National Park.
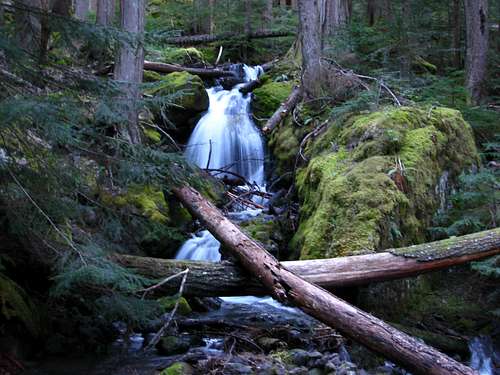 Small waterfall along the Lake Constance trail |  The Dosewallips River | 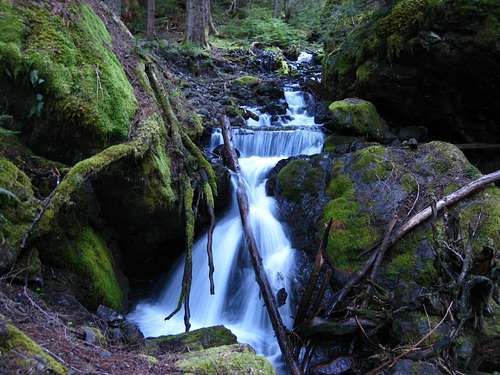 Another nice waterfall along the trail |
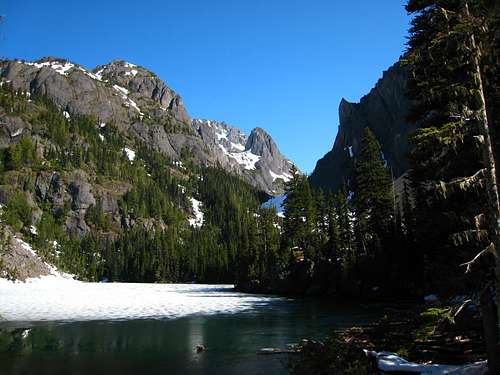 Looking up Avalanche Canyon from Lake Constance | 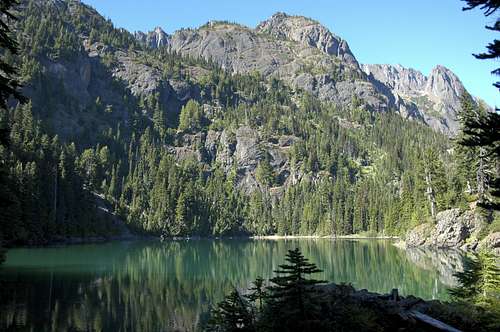 Lake Constance |
Route Description
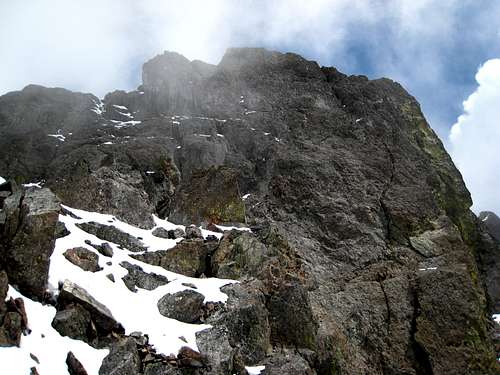
From the lake, hike around its eastern shore along a boot path (which is typically covered in snow through June) and emerge onto a large scree cone above the northeast corner of the lake and traverse north across this cone. You will soon emerge into Avalanche Canyon where you will hike north through the canyon slowly gaining elevation. Aim for the low saddle at the head of the canyon which is 6,500 foot Crystal Pass. It's highly recommended you try and hike through Avalanche Canyon when it's mostly covered in firm snow as the scree filling the canyon is very loose and terrible to hike on. The cliffs on the left side of the canyon are very strange looking pillow basalt rocks that formed at the bottom of the ocean when basalt lava erupted under the depths of the ocean and cooled so rapidly it forms these pillow shaped rocks. These rocks have since been uplifted into the present day Olympic Mountains and exposed high above sea level.
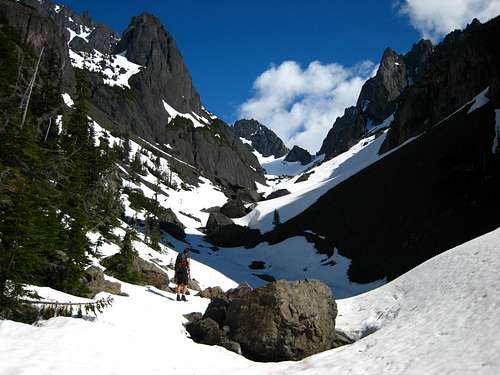 Crystal Pass (center) and The Thumb (left) from Avalanche Canyon. The west arete is the ridge heading up to the right | 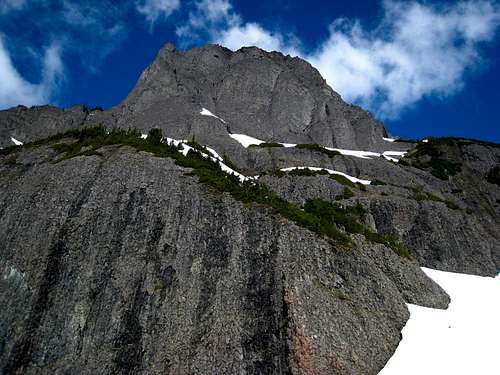 Pillow Basalt cliffs above Avalanche Canyon | 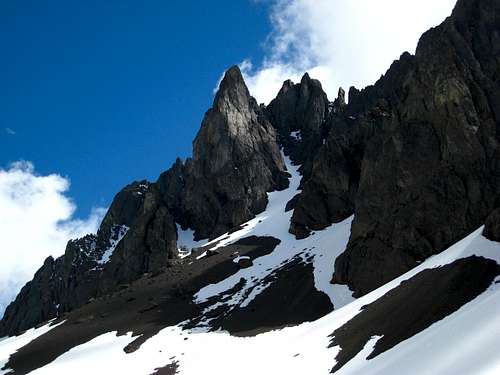 The rugged south and west faces of Constance |
Once at Crystal Pass, scramble east around the north side of a small tower to the base of the cliffs above which mark the start of the route and consider your future. Note that much of this climb can and typically is done simul-climbing. If you were to pitch out every single section you will not only take way too long but good belay anchors can only be made in a few places.
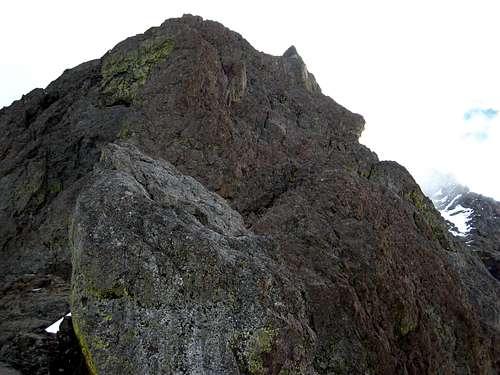
Start of the climb from Crystal Pass. Traverse left around the rock in foreground
Part 1 - The Lower Walls
Rack up and begin the climb by following a prominent ledge leading up and to the right and around the corner continuing up the face to the base of a wide 20 foot tall crack (crux of the lower section...maybe 5.4) with a slung piece of red webbing around a chalkstone. Climb the now vertical face just right of this crack to a ledge where you can belay. From the ledge, follow it to the right and slightly upward until you come to easy third class terrain and head up through a prominent rubble filled gully. Just past the gully, you will spot a bunch of towers to the left. Veer right and climb up a small slab right next to a huge rock with a small cave beneath it. Once above this slab it's more easy Class 3 to a second set of towers where the correct path appears to be right between them however continue to the right towards the large cliff and you will find a beautiful ledge on the right side of the right tower. This ledge is hidden until you are right below it. Scramble across this ledge and up back to the left where you will gain the crest of the arete and follow it over and around a few small spikes until you reach a large ledge at the base of a large imposing wall. Note that from the last belay ledge above the 20 foot wide crack all the way to the big ledge below this crux upper wall is 3rd and 4th class and is typically done unroped to same time. Use you best judgement to determine whether your party is comfortable with this.
 Looking back towards Crystal Pass from the first belay above the 20 foot wide crack | 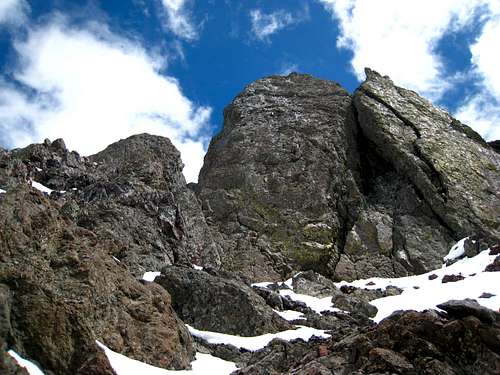 Easy Class 3 section | 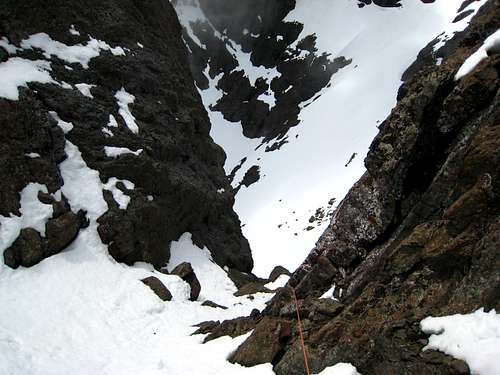 Looking down the Class 3 rubble gully |
Part 2 - The Upper Crux Wall
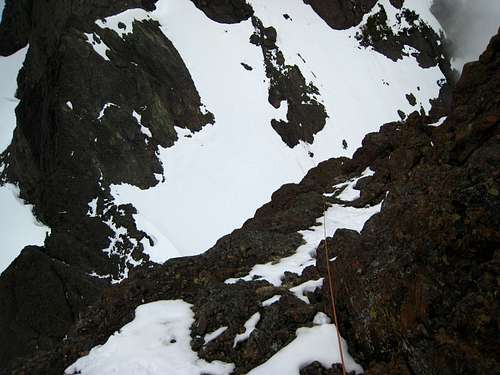
Pitch 1 - 5.4 - 30 meters - Now the real fun begins. It's best to pitch this wall out and belay from the large ledge at the base. Locate a small ledge system leading up to the right, then cutting back left. This is the route and it requires concentration as the exposure is relentless. Most of the rock is good however I found myself testing every hold especially the footholds. Once above the two ledges, continue up and slightly to the left passing two pitons (which I recommend you use as this section is VERY thin) and aim for the base of a 15 foot chimney with another fixed piton which you can use for a belay. Locating this chimney is key to the route...when in doubt veer slightly left. This chimney is exactly 30 meters of climbing above the large ledge below and rope drag was already almost unbearable. Belay here.
Pitch 2 - 5.4 - 45 meters - Climb the chimney which is vertical for 15-20 feet then continue up and left heading around the steep cliffs above to the left! This section of the pitch is lots of lower angle face climbing on generally sound rock. Continue left to the base of a vertical face and climb left around it to the start of a left facing open book. Make an anchor and belay here. Rope rag becomes an issue if you go further and even if you have a 70 meter rope, you will still be 10-15 feet short of easy terrain at the end of the route. Plus, your belayer is out of sight after the 15-20 foot chimney so if it's windy forget about hearing one another.
Pitch 3 - 5.5 - 30 meters - Climb the left facing open book for about 40 feet to its end then make a hand traverse left another 30 feet with your feet on thin slabs and your hands on mostly good jug holds. At the end of this traverse (which I thought was the crux of the entire route at 5.5) you'll reach easy Class 2 terrain marking the end of technical climbing.
From the end of the route, continue up a short ways on scree to the crest of a connecting ridge which becomes flat. Traverse this small ridge and aim for a nice Class 2+ ledge/gully where you can climb up and slightly to the right directly to the summit ridge crest. You will reach the summit ridge around 7,600 feet but you must descend roughly 100 feet down the opposite (southeast) side to meet the standard ascent route (Class 3). See the South Chute Route for beta on the final scramble to the summit.
 A glimpse of the upper crux wall appears  At the big ledge starting the crux wall | 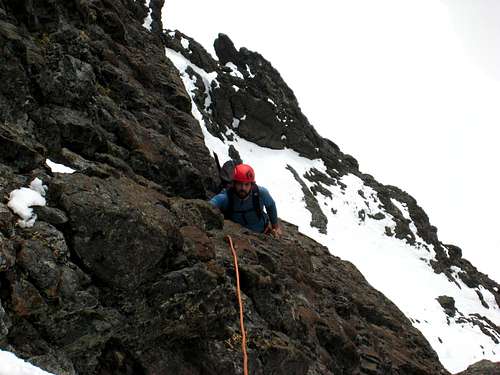 Finishing the first pitch of the upper wall  Down from the chimney belay atop pitch 1 | 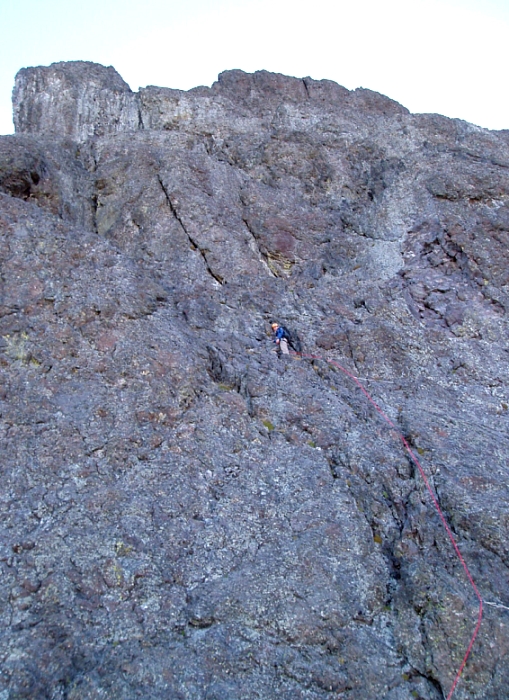 Starting up the upper wall |
Essential Gear/Seasons
A 70 meter rope isn't necessary. Best to have a 50 meter rope. There are no rappels on this route (unless you get into trouble) so double cords also isn't necessary. I brought a single set of BD Camelots from 0.3 - 3, a full set of nuts (which place well in this rock) and numbers 0 and 1 Mastercams. This rack worked very well. Bring lots of slings!!! A few doubles and a few triples work wonders!
Depending on what month you climb the route in you will need to bring additional gear. I climbed the route in June and brought an ice axe, crampons and gaiters in addition to my stiff mountaineering boots...which I used to climb the route in! Rock shoes in June won't do much good because the middle third of the route where it's low angle class 3 and 4 will be wet and snowy. In addition, the standard south chute route will certainly have lots of snow making the scrambling even harder and more tedious. Every other report I read had descriptions for September where standard day hiking clothes and rock shoes is usually sufficient.
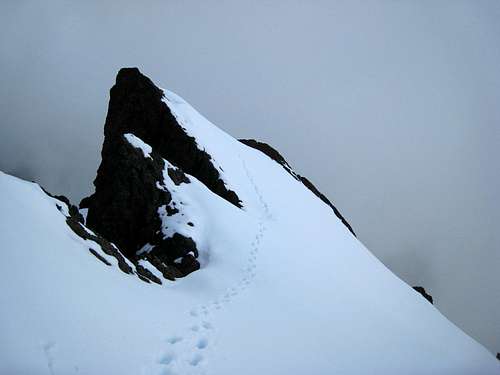 The final flat section just before the summit ridge in June |  The final flat section just before the summit ridge in September |
Map
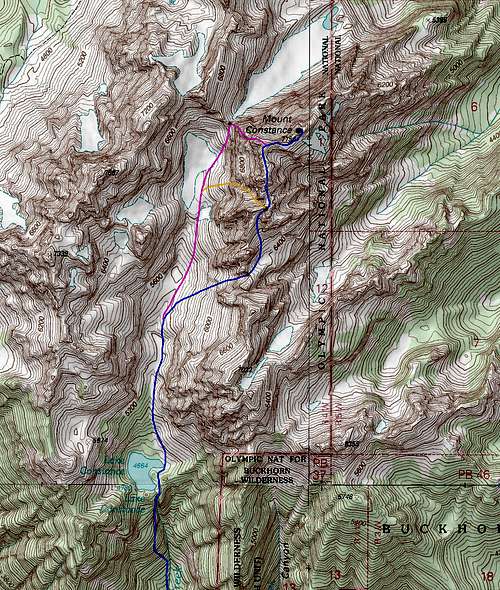
The West Arete route shown in pink
External Links
Also check out the Climbing in the Olympic Mountains guide by Olympic Mountain Rescue for additional information on the route.