Provo Peak was one of those mountains I’d always glanced at in passing, but until recently didn’t have much of a desire to climb. Even when I lived right at the foot of the mountain, it seemed that peaks like Mount Timpanogos, Mount Nebo, Y Mountain, Cascade Mountain, or even Box Elder Peak were the ones in Utah County that interested me more. As an avid scrambler, the gentle western slopes didn’t exactly seem alpine when compared to some of the other nearby Wasatch peaks. However, with my wife wanting to trade in our old 4WD Ford Explorer for a crossover with enough seating for our next child on the way, I figured it made sense to hike Provo Peak while it was still possible for me to drive all the way to the trailhead on the rough Squaw Peak Road.
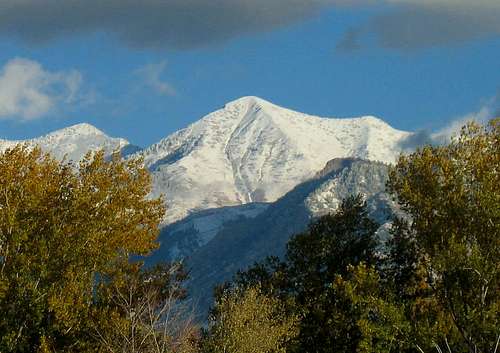
![Provo Peak from I-15]() Provo Peak from I-15
Provo Peak from I-15
David and I picked another summer day with relatively cool temperatures, and decided that since it was nearby we’d also consider going to the top of East Provo Peak after summiting Provo Peak. I’d read the log entries on Summitpost describing the awful, loose rock on the east ridge of Provo Peak along the ridgeline between it and it’s slightly shorter neighbor peak, but figured “how bad could it really be?” Besides, it would give us the chance to get in some scrambling on what would usually just be a straightforward trail hike.
Top of Provo
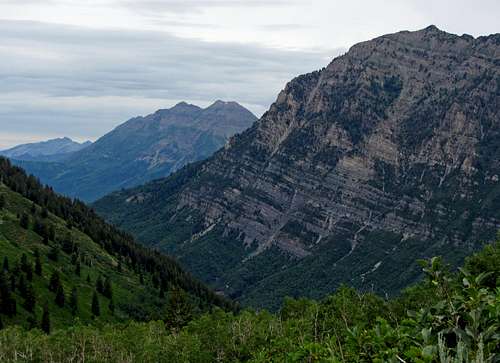
Part of the day’s adventure would be the drive up to the Provo Peak Trailhead. Squaw Peak Road starts as a paved road, but shortly after forking away from the overlook it transitions to dirt. Since it had rained the previous day there were a few muddy patches, but nothing too washed out. Along this section of road we caught some nice views of the southern end of Cascade Mountain, as well as the northern aspect of Y Mountain over Rock Canyon. We could also make out the ridgeline connecting Shingle Mill Peak, Freedom Peak, East Provo Peak, and Provo Peak.
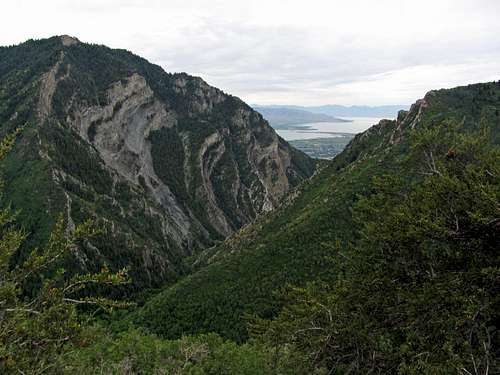
![Provo Peak from Squaw Peak Rd.]() Views of Provo Peak ...
Views of Provo Peak ...![Rock Canyon]() ... and Rock Canyon from Squaw Peak Road
... and Rock Canyon from Squaw Peak Road
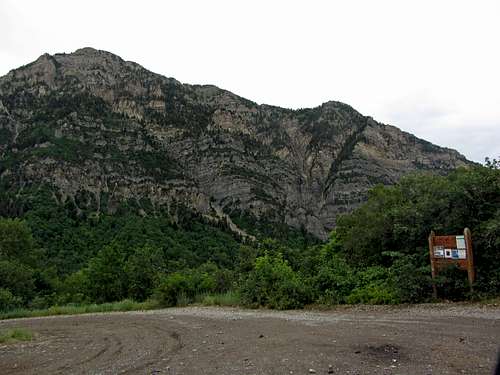
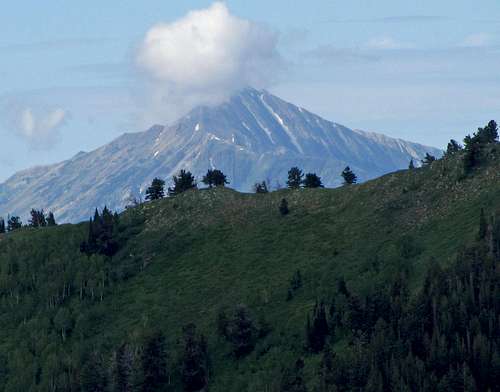
![Cascade Mountain from Squaw Peak Road]() Cascade Mountain south peak
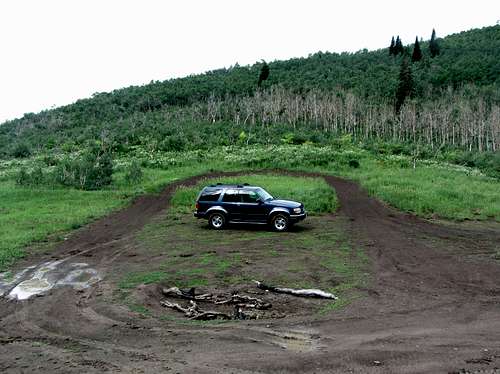
Cascade Mountain south peak![Old Reliable]() Old Reliable
Old ReliableI’d driven a passenger car up to the Dry Creek Trailhead when attempting Cascade Mountain near the start of the more rough section of dirt road, but had never ventured past that until this morning. While there were some places with decent-sized rocks strewn across the road, the main reason we needed a high-clearance vehicle was due to a few spots with deep ruts worn into the road, where a lower-clearance vehicle most likely would have bottomed out. Most of the time I straddled the well-worn tire tracks when possible, although at times this caused me to scratch up the sides of my vehicle when getting a little too close to branches on the sides. Sometimes there was no alternative but to follow the same deep tracks, in which case I was glad we had enough clearance. At one point I had to drive through a wide, deep-looking puddle, so I got out of the Explorer to check it out before going across, just to be certain we could make it through. It required a burst of acceleration with some fun fishtailing to make it through the mud, but since it wasn’t too steep we were able to make it through. We also encountered a few fallen trees in the road (lightning?), which fortunately had been moved just far enough to the side for us to get past. Luckily for us, we didn’t encounter any other vehicles on our way up (not unless you count a group of crazy skateboarders flying down the lower paved part of the road) since there weren’t that many spots along the rough dirt road where it would have been possible for two vehicles to squeeze by each other.
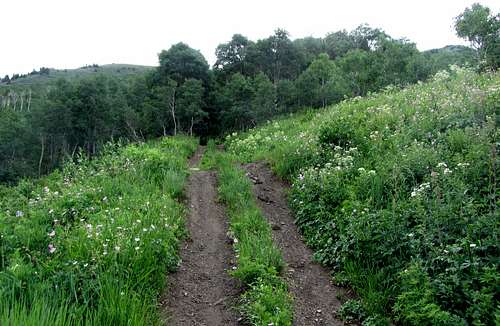
From below, Provo Peak looks pretty tame (for most of the hike up you can’t actually see the true summit, as it’s hiding behind a false summit which tricks you into thinking you’re closer to the top than you really are), but the trail doesn’t mess around, gaining 2,800 feet in just 1.3 miles with only a few small switchbacks. It was definitely one of the steeper ones I’d been on, even more so than the standard Mount Olympus or Jacobs Ladder trails up to the north. David went first so that I could catch my breath as I took photos down below. Due to the previous day’s rain, most of the plants around the trail were still wet, so pretty soon the bottoms of our pant legs were soaked just from brushing up against them. The trail was steep, but never so much that we had any issues with slipping on the dirt.
![Provo Peak false summit]() False summit
False summit![Utah Lake]() Utah Lake
Utah Lake
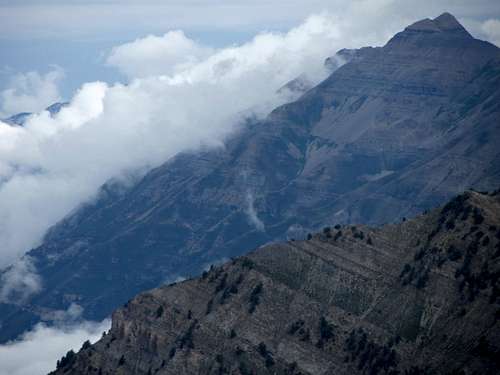
![Clouds near Provo Peak]() Clouds forming
Clouds forming
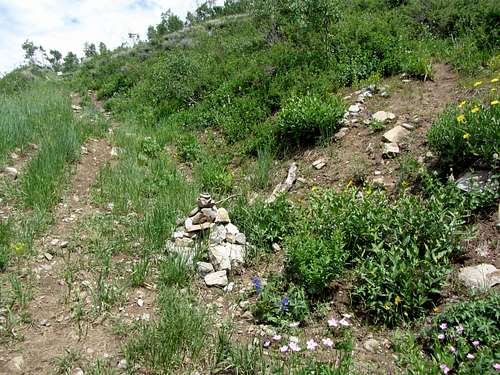
Due to our quick elevation gain, it wasn’t long before our views became more expansive. Off to the north were Cascade Mountain and Mount Timpanogos, and back behind us to the west were Utah Valley and Utah Lake behind the smaller peaks of Buckley Mountain, Maple Mountain, Y Mountain, and Squaw Peak. Crossing over the top of the false summit, I could still make out the Explorer in the trailhead parking area over 2,000 feet straight below us. At this point the trail became a bit more rocky, but still remained well-defined the rest of the way to the summit. Off to the sides we saw all kinds of different colored wildflowers: violet, white, yellow, orange, and even some bright reddish-pink ones. One hour and forty minutes after leaving the SUV, we were at the top of Provo Peak.
![Provo Peak summit view]() Summit view
Summit view![Squaw Peak]() Squaw Peak
Squaw Peak![Timpanogos clouds]() Timpanogos clouds
Timpanogos clouds
During our snack break on the summit, we noticed clouds slowly forming in every direction around the peak. Spring and early summer forecasts don’t really mean much in Utah since the weather is usually unpredictable in those seasons, but the sites I’d looked at had shown a completely sunny forecast. I wasn’t complaining though, since I prefer hiking in cooler, cloudy weather. The clouds didn’t appear stormy, so we figured it was safe to continue on to East Provo Peak.
Redefining Loose Rock
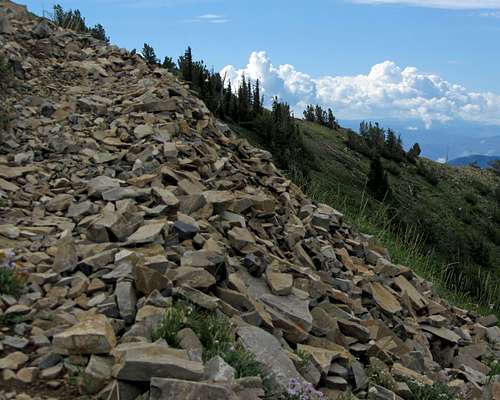
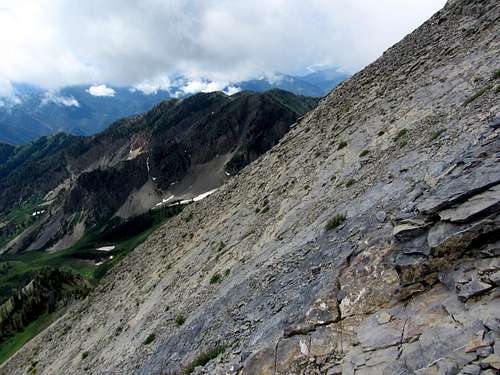
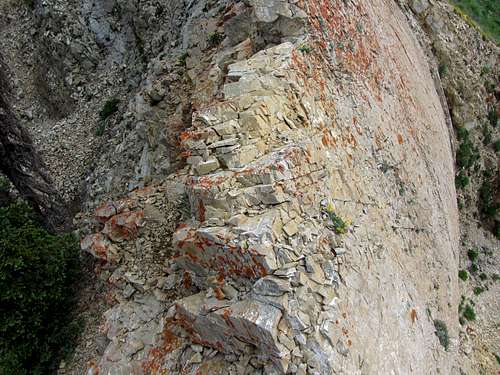
Looking down from the summit, the eastern side of Provo Peak looked quite steep, and since we’d heard that the rock here was pretty loose we decided to go down on the south side a bit before making our way across the southeast slopes to join up with the east ridge lower down. Electing the way of pain was a big mistake, which we didn’t realize until coming back. We pressed on though, certain that we’d run into solid rock eventually. I’ve hiked on loose scree before, but this loose shale was much worse. Most of the rocks were long and sharp, and on the initial part of the slope it seemed like all of the loose little pieces of shale were just sitting on top of progressively bigger pieces of loose shale. What this meant was that what looked scree-skiable was not, since my boots could never sink in at all, and when they did hit a solid rock, that rock was completely smooth and slick. It was actually quite dangerous being on a slope as steep as we were (around 45 degrees) on such bad rock, and each time I thought I had solid footing I kept on slipping. After having to catch myself with my hands several times and scraping up my fingers, I started going down much slower, facing into the mountain.
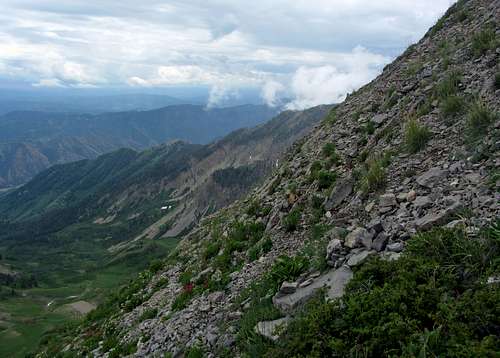
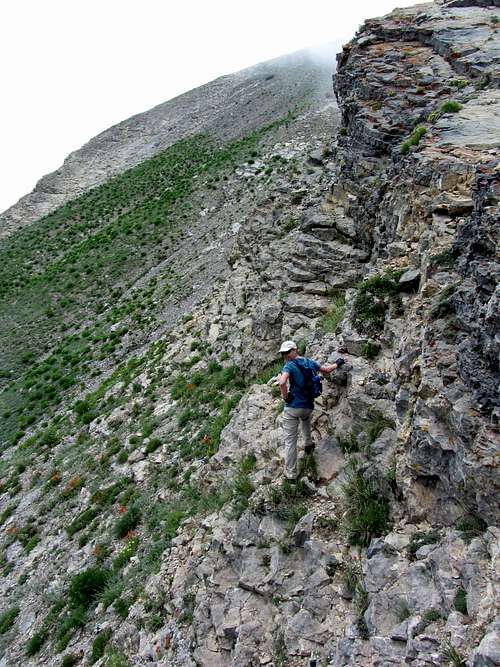
![Steep southeast slope]() The steep, loose terrain on the southeast slope ...
The steep, loose terrain on the southeast slope ...![Worst descent ever]() ... made this one of my worst descents ever
... made this one of my worst descents ever
![Almost back to the ridge]() Almost back to the ridge
Almost back to the ridgeSince I was inadvertently knocking so many rocks loose, I decided to wait a while for David to get further away from me so that I didn’t knock any loose rocks down on him, but even just standing still without slipping on this slope worked a lot of leg muscles I didn’t know I had. The strategy I tried using was creeping underneath and hanging onto the larger, solid slabs from down below and making my way back towards the east ridge. About halfway down to the ridge we encountered more vegetation in between the shale, which I thought would help, but each time I expected my feet to dig into solid soil, my feet instead found slippery mud (must have been from the previous day’s rain). Compounded with the fact that each slip on the shale and mud underneath now resulted in my hands catching on prickly bushes instead of solid rock, this down climb quickly jumped to the top of my “worst mountain terrain ever encountered” list. After a descent of less than 500 vertical feet that took over an hour, we finally made it to the more solid-looking rock of the east ridge (emphasis on “looking”). I was already dreading the return trip back, with images flashing through my head of Frodo clawing his way up Mount Doom, bloodied and dirty.
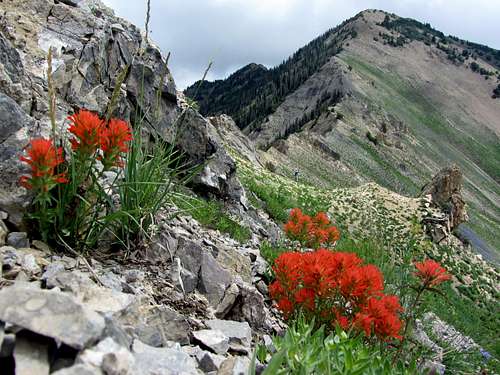
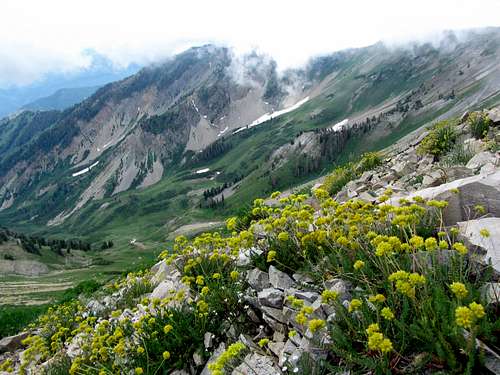
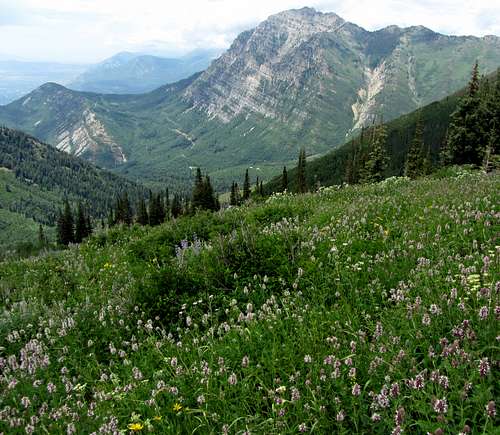
![Provo Ridge wildflowers]() Despite the tedious terrain, there were lots of wildflowers ...
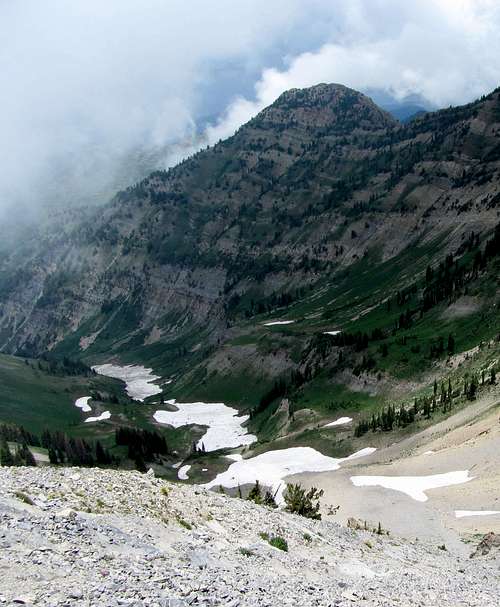
Despite the tedious terrain, there were lots of wildflowers ...![Basin north of Provo Ridge]() ... and nice views along Provo Ridge
... and nice views along Provo Ridge
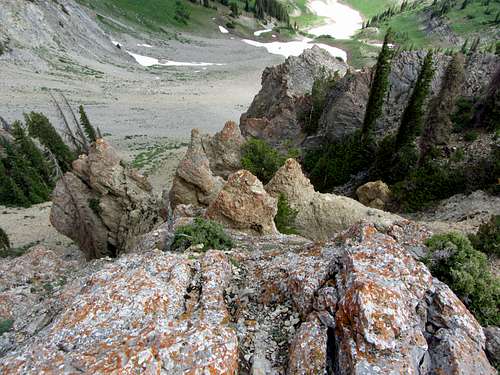
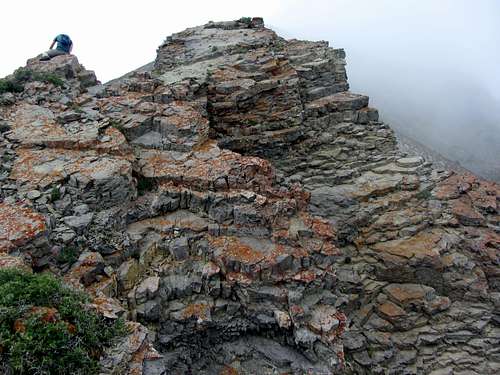
![Provo Ridge outcrop]() One of the many outcroppings we climbed over
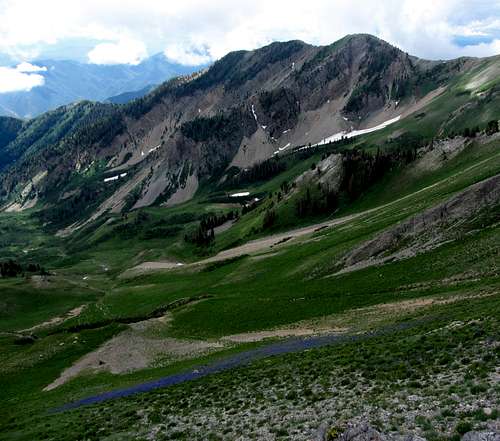
One of the many outcroppings we climbed over![Steep terrain below Provo Ridge]() Looking down at basin to the north
Looking down at basin to the north
At this point we started hearing loud booms off in the distance, which could only have been thunder. The sounds made both of us nervous, but at the same time I didn’t want to turn back either, especially after all the work we had done just to get down to this point. We hadn’t actually seen any lightning, so we agreed that we’d keep a close eye on the clouds as we went along and keep re-assessing the conditions before deciding to turn back.
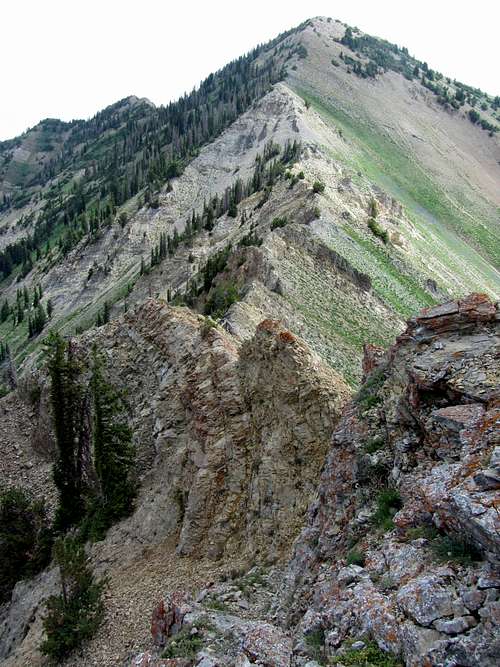
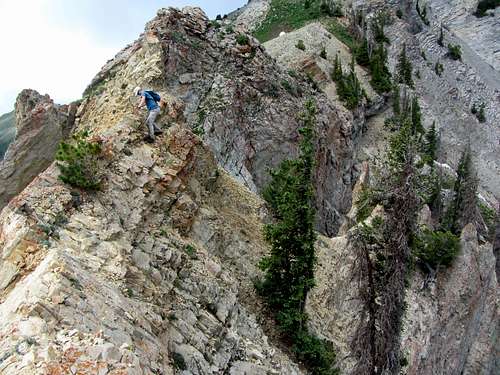
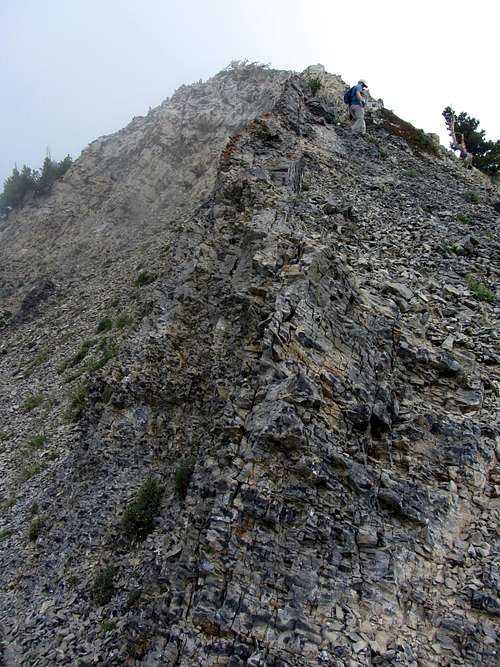
![Provo Ridge & East Provo Peak]() There was plenty of scrambling on the ridge between East Provo Peak ...
There was plenty of scrambling on the ridge between East Provo Peak ...![Scrambly terrain east of Provo Peak]() ... and Provo Peak
... and Provo Peak
We finally got to do some real scrambling on the east ridge, which was a nice change from the horribly loose shale above. Coming across a little knife-edge, I first contemplated traversing a few feet below the ridge on the left (north) side, but after seeing some loose scree on the sloped ledge below the knife edge, I decided to at least keep my hands on and over the other side of the knife edge as I made my way across (it was long enough that I didn’t dare tight-rope it). It’s a good thing I had my hands across the solid rocks on top, because the scree had been covering some fractured rocks underneath.
![Provo Ridge knife edge]() A knife edge we encountered ...
A knife edge we encountered ...![Loose knife edge]() ... where I accidentally knocked off some large pieces of loose rock
... where I accidentally knocked off some large pieces of loose rock
Upon stepping on the ledge below me to the north, several big chunks of rock fell off, crashing in the trees below us to the north. Even the bigger, more-solid looking rock on the knife-edge was loose! Seeing me knock those big rocks loose from above probably didn’t inspire much confidence in David, but we agreed to keep going. I decided it would be best to swallow my pride and use the butt-scoot method across the rest of the knife edge. After making it across I waited for David to do the same.
![Wildflowers in front of Corral Mountain]() Some bright yellow wildflowers along Provo Ridge ...
Some bright yellow wildflowers along Provo Ridge ...![Corral Mountain]() ... with Corral Mountain to the south
... with Corral Mountain to the south
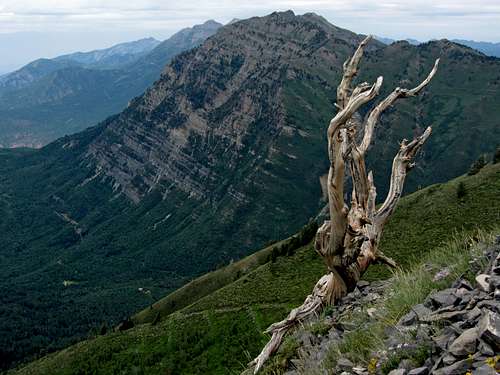
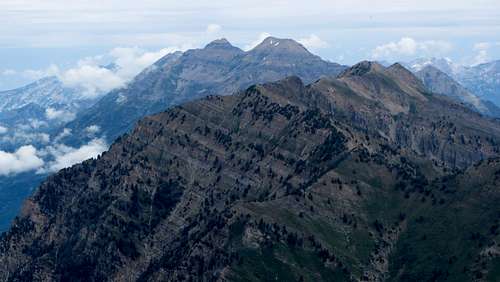
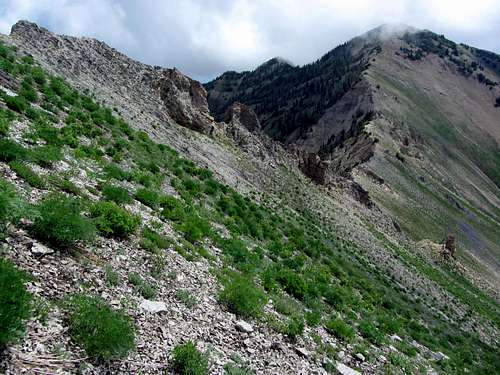
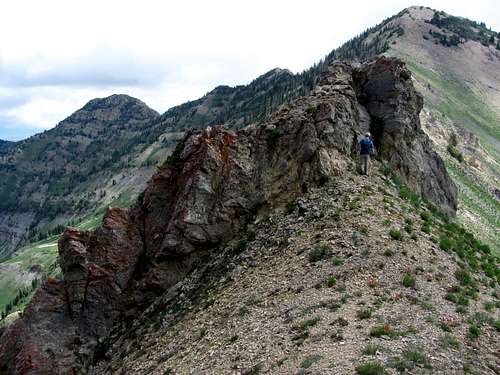
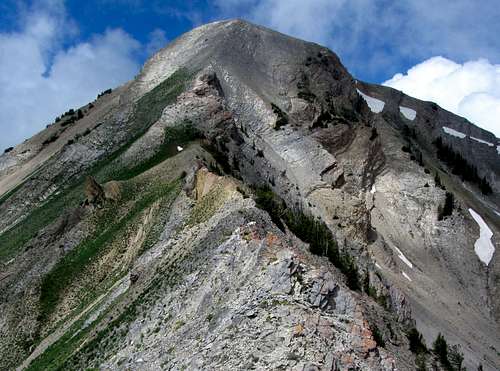
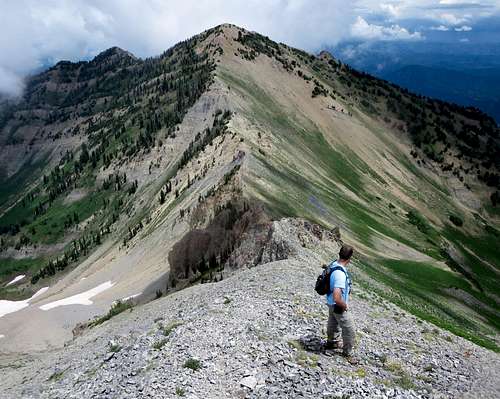
As we continued towards the low point of the saddle on the ridge between Provo Peak and East Provo Peak, which I’ll call Provo Ridge, we encountered more rock outcroppings, requiring us to re-gain and re-lose elevation a few times. After knocking those rocks loose I started looking a lot closer at the rocks I was climbing on, and usually after looking at them from a couple different angles, I’d discover large cracks in them, so when this happened I made sure not to put too much of my weight on them. Luckily, I didn’t knock any more big chunks loose. David decided to try traversing below one of the bigger outcroppings on the loose shale again, but after climbing over the top and seeing how much elevation he’d have to lose, I told him that it would be easier to stay right on top the ridge. Every now and then I’d pause to look back at the east side of Provo Peak, which was very rugged looking compared to the typical view you get of the west aspect along the Wasatch Front. When also comparing how easy it was coming up the west side with how difficult it had been coming down the east side as well, it definitely seemed to give the peak a Jekyll and Hyde character.
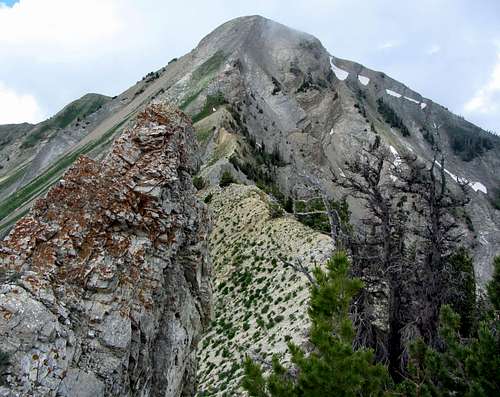
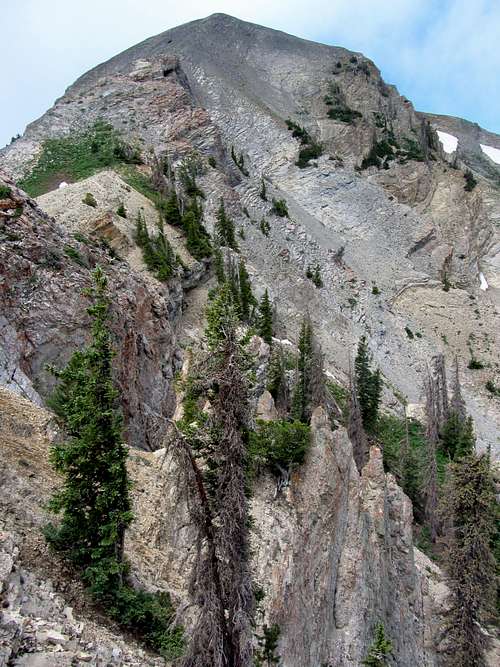
![Provo Peak east ridge]() We kept looking back at the surprisingly rugged east face of Provo Peak ...
We kept looking back at the surprisingly rugged east face of Provo Peak ...![Provo Peak east aspect]() ... as we continued along the ridge
... as we continued along the ridge
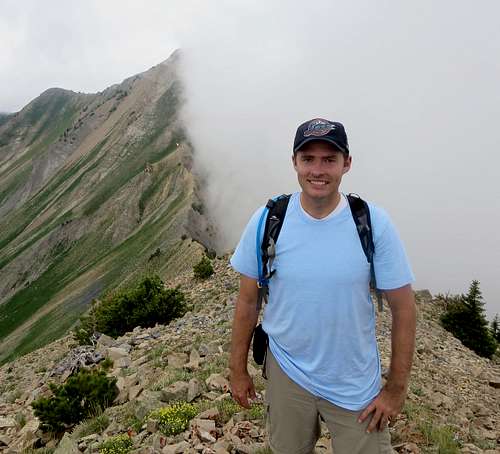
![East Provo Peak summit shot]() Proof that I made the slog over to East Provo Peak
Proof that I made the slog over to East Provo Peak
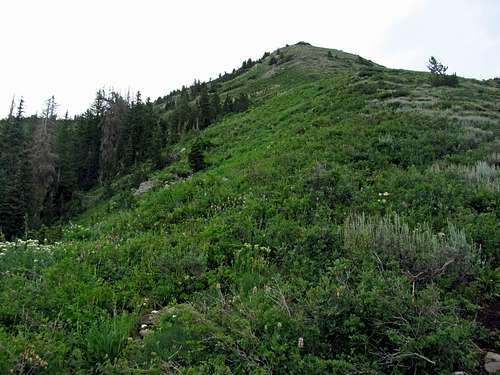
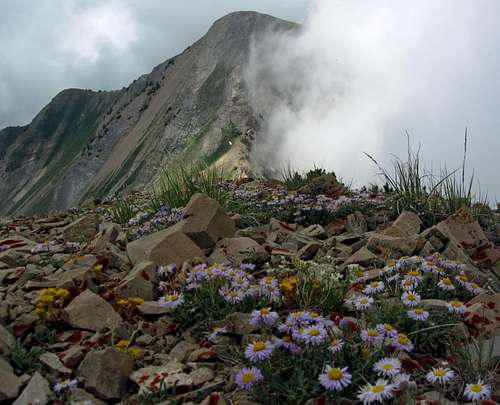
The rest of the scrambling along the ridge was actually enjoyable, and once we started gaining elevation again on our way up to East Provo Peak the route became easy to follow. In spots there was a faint trail, and when there wasn’t it was still easy enough to make our way up. We finally made it to the top of East Provo Peak, where we had another short snack break. We still hadn’t seen any lightning, but the loud booms had returned, and with clouds now blocking our view of everything except the basin to the south of Provo Ridge, we decided it would be best to get back on top of Provo Peak as quickly as possible (we figured getting back across would be hard enough without adding rain to the mix).
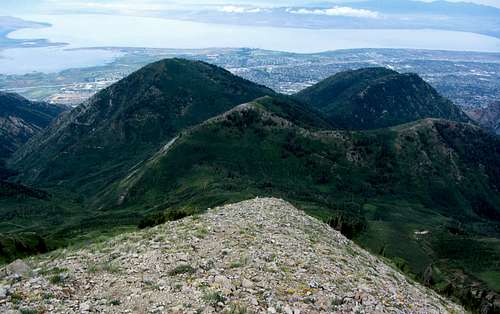
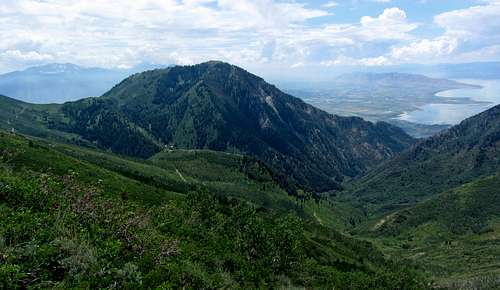
![Provo Peak from East Provo Peak]() Provo Peak from East Provo Peak
Provo Peak from East Provo PeakStaying on the Ridge
Descending back down from East Provo Peak to the low point of the saddle was quick and easy. Staying right on the ridge for the most part helped us navigate the rock outcroppings a lot more quickly as well.
![East Provo Peak descent]() We quickly descended the west ridge of East Provo Peak ...
We quickly descended the west ridge of East Provo Peak ...![Provo Ridge scramble]() ... and started scrambling back up from the saddle towards Provo Peak
... and started scrambling back up from the saddle towards Provo Peak
Eventually we made it back to the knife-edge around the same time that the clouds coming in from the north started spilling over the ridge (which until now had just been hitting the ridge and then going straight back up into the sky). This time we knew to trust no rock, so I went a bit slower on this part, and this time we stayed right on top of the knife edge the whole way, which made for some fun scrambling.
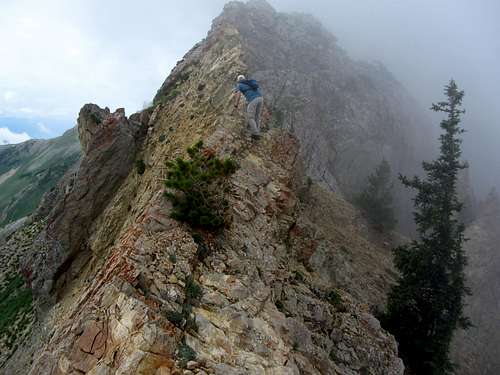
![Fun knife edge]() David ...
David ...![Brandon on Provo Ridge]() ... and Brandon scrambling along the knife edge
... and Brandon scrambling along the knife edge
We soon made it back to the point where we’d originally started out across the ridge after wading through all the loose shale, and with no hesitation we agreed that this time we would stick to the more solid rock on the ridge itself as much as possible. This involved a few class 4 moves, but was much more enjoyable and easy-going.
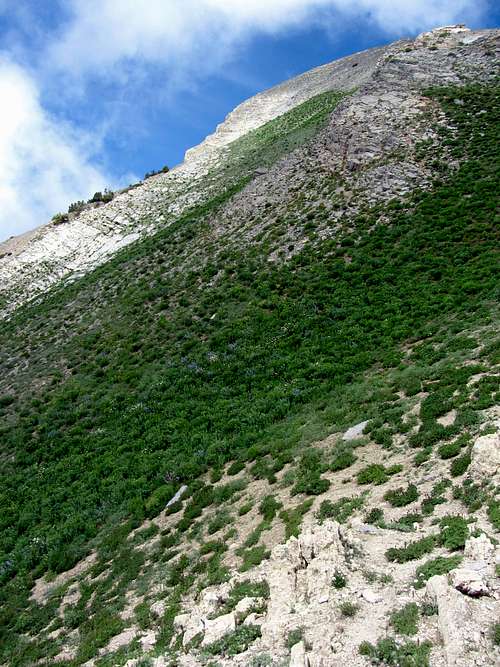
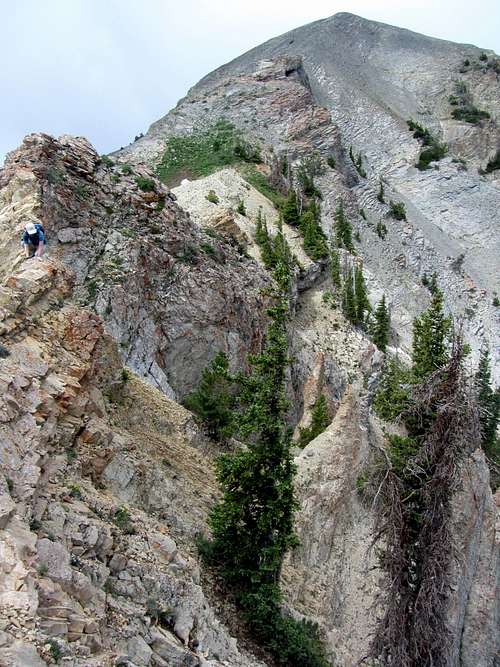
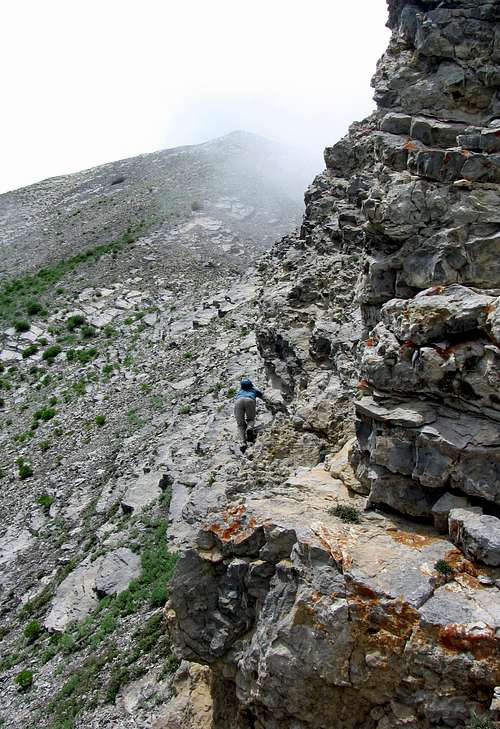
![Steep east face]() Making our way back up the steep east face of Provo Peak ...
Making our way back up the steep east face of Provo Peak ...![Provo Ridge obstacles]() ... this time we tried to stay closer to the top of the ridge
... this time we tried to stay closer to the top of the ridge
At one point we came to some smooth slabs that we decided to bypass on the south (left) side as we made our way back up to Provo Peak, but the rock in this section seemed solid enough.
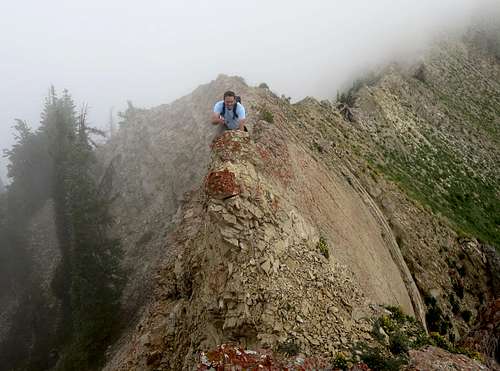
![Scramble below east ridge spine]() We dropped just below the ridge ...
We dropped just below the ridge ...![Last scramble]() ... for one last section of scrambling on solid rock
... for one last section of scrambling on solid rock
After this it was a straight shot along the east ridge back to the top.
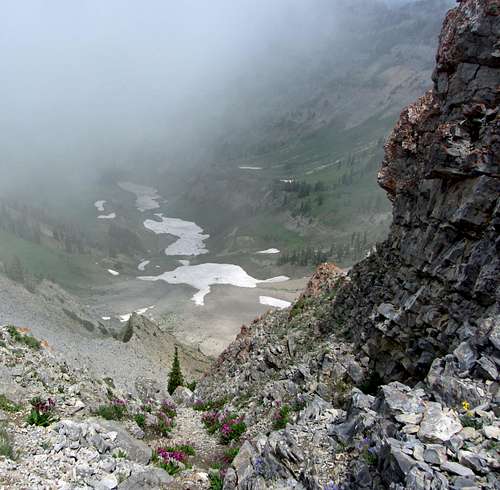
![Snow down below]() Looking back down to the north ...
Looking back down to the north ...![Looking back at Provo Ridge]() ... and the easier route we took directly on the ridge between East Provo Peak
... and the easier route we took directly on the ridge between East Provo Peak![Freedom Peak]() Freedom Peak
Freedom Peak
At one point the slope steepened enough (probably over 50 degrees just below the summit of Provo Peak) that I had to concentrate a bit harder to make it up the shale again without slipping, but we suddenly arrived at the easily-recognizable mirror/flag at the top, which surprised me. I was expecting the worst on the way back but we had done it twice as fast, without slipping or knocking down any loose rocks. After our miserable descent, our route straight back up the ridge was short and sweet. The skies started clearing for us as well, right on cue to coincide with our good mood. Descending down the terrain we had just come up may have been a little harder going down than coming up (wouldn’t know, since we didn’t do it), but I’m convinced that it’s much better to stay right on the ridge instead of veering off to the south if you’re contemplating the traverse over to East Provo Peak.
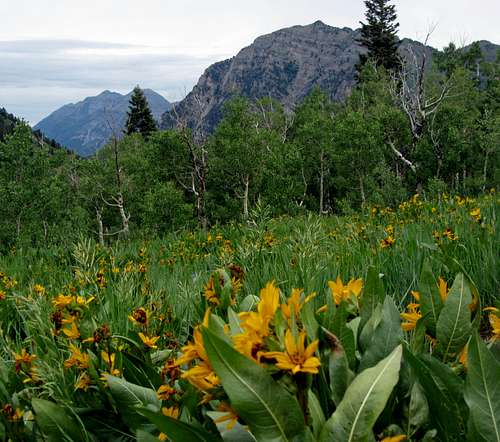
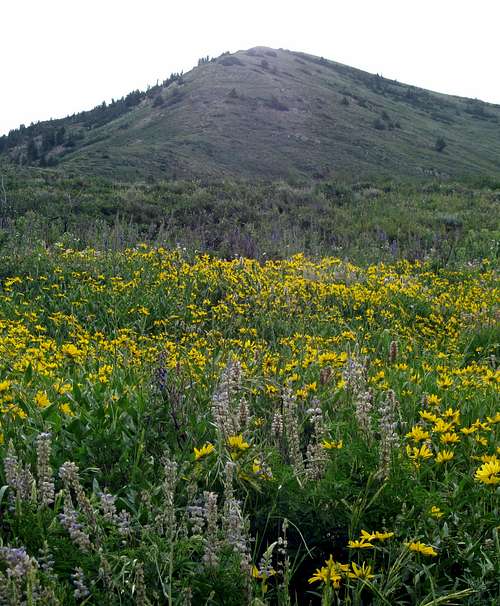
![Buckley Mountain]() The hills are alive ...
The hills are alive ...![Provo Peak meadow]() ... with the sound of bees (buzzing between flowers)
... with the sound of bees (buzzing between flowers)
Getting back to the bottom of Provo Peak was short and easy as well, although the steepness does give your legs a good workout. We made it all the way from East Provo Peak back down to the SUV in less than two hours, even though it had taken us almost four hours to get there (mainly due to the loose shale slope of death). Mileage-wise this was a short hike, but it’s probably the most difficult 4-mile hike I’ll ever do (on average you gain/lose about 2,000 feet per mile), and keeps you working hard the entire time. The scenery was nice throughout and the scrambling on Provo Ridge was fun, but due to the steepness and loose rock I think East Provo Peak is probably just a one-timer for me.
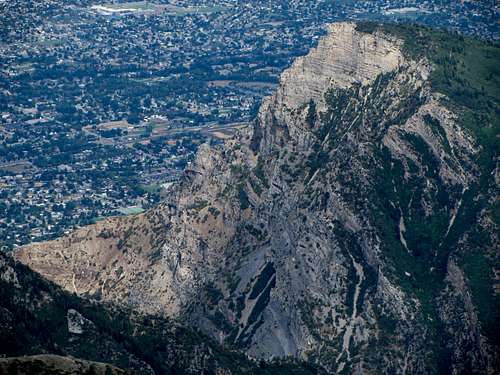
![Provo Peak west aspect]() Provo Peak west aspect
Provo Peak west aspectProvo Peak & East Provo Peak Stats
DISTANCE:
4 miles roundtrip
PROVO PEAK TRAILHEAD:
8,320 feet
PROVO PEAK ELEVATION:
11,068 feet
EAST PROVO PEAK ELEVATION:
11,044 feet
ELEVATION GAIN:
4,000 feet
DIFFICULTY (Provo Ridge):
Class 3+
TIME:
5.8 hours
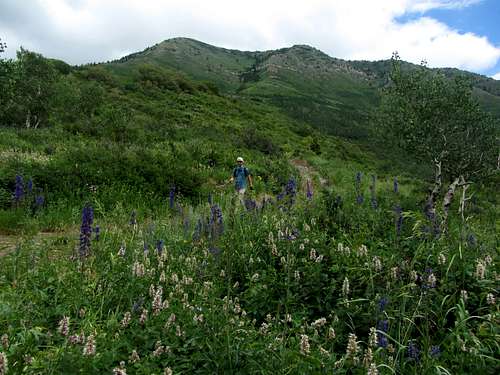
![Wildflowers below Provo Peak]() Provo Peak playing Jekyll (west side) ...
Provo Peak playing Jekyll (west side) ...![Provo Peak Hyde side]() ... and Hyde (east side)
... and Hyde (east side)


Comments
Post a Comment