
|
|
Trip Report |
|---|---|
|
|
37.75600°N / 119.593°W |
|
|
Jun 6, 2004 |
|
|
Aid Climbing |
|
|
Summer |
Notes
This is an old (June 2004) trip report. I was bored, so I've replaced the attached photos with their full resolution versions and added one or two more. This digital remastering of the masterpiece ;) was done in Feb. 2009.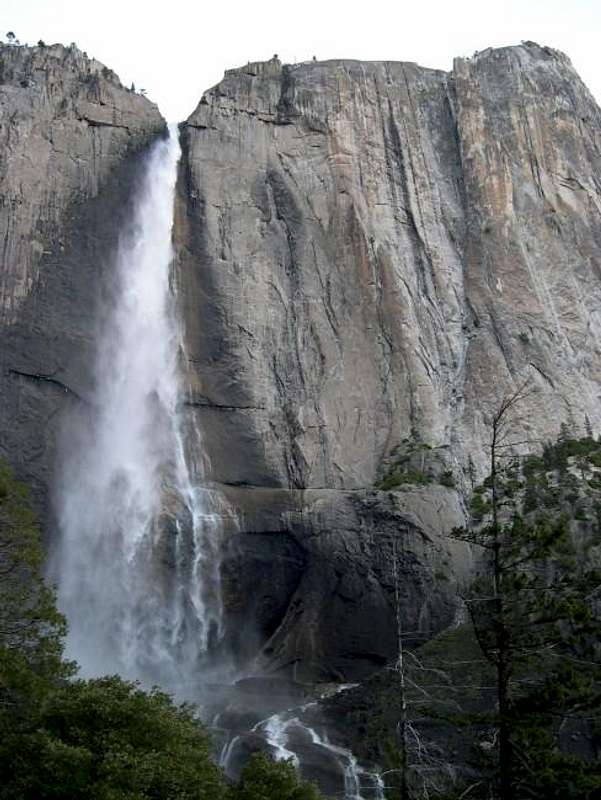 Lost Arrow Spire
Lost Arrow Tip - TR
 Rap To Notch
 Getting Ready
 Starting P1
 Nearing Top Of P1
 Salathe Ledge
 Top of P1
 Starting P2
 P2
P2 P2 View Down
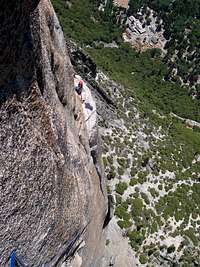 P2
P2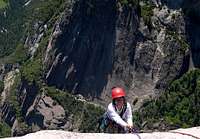 Summit
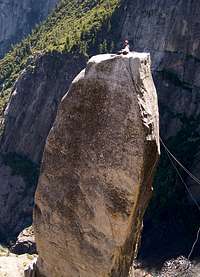 Summit
 View Down
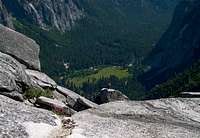 Summit From Rim
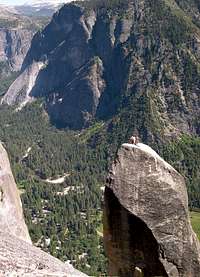 Shirley On Summit
 Rigging Tyrolean
 Tyrolean
 Tyrolean
 Jug To Rim
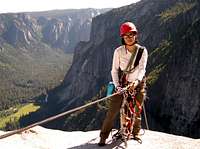 Back On Rim
 Back In Camp
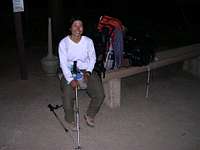 Wait For Bus
Travelocity is an evil invention. The sneaky - and oh so tempting - travel deals arrive through email at the most vulnerable of moments: at work. This time it was an advertisement for cheap flights to Sacramento........hmmmmm, that's pretty close to the Valley... As I finished punching in the credit card info., I knew we would be attempting the Lost Arrow Tip route in a month - a climb I've been eyeing for over a year now.
The week before the trip, Shirley and I went to a local crag after work to remind ourselves on how to efficiently pass a knot on rappel - a skill required to reach the start of the Lost Arrow Tip route. It's no rocket science but certainly can be a time-consuming pain in the ass. On Friday, the departure day, a brilliant idea had occurred to me: let's just save time by getting some long line and foregoing the whole knot-passing business. Rushed out and got 300 feet (at a nice discount) of 3/8 inch static rope. Now we were really committed to the climb.
By the time we made it to the Valley it was 4 pm on Saturday. For better or worse, we decided to park at Curry Village and take the bus to the trailhead. Quite a task to squeeze with our huge packs onto the park bus loaded with tourons. We decided to go light - 300 feet of static line, 2 60m ropes, bear container, bivies, and about a million other things. All in all, we nearly maxed out Alaska's luggage weight limitations and now it was all coming along with us on the 4 mile (2700' gain) hike up Yosemite Falls Trail - light is right. We started the hike up at 5pm and by 7:30 were setting up our camp just before the bridge atop Upper Yosemite Falls. Our camp was less than a mile from Yosemite Point and the start of the Lost Arrow Tip route. There were other parties bivying in the area. We assumed that we'd be racing other climbers to the start of the climb in the morning.
Though we did not talk about it at first, there was an air of anticipation as we cooked up the Ramen noodles on Saturday night. This was to be my second real aid lead (not counting the one or two bolt ladders) and the first to carry a "C1+" or "C2" rating (the C2 came from Supertopo). It was certainly going to be one of the most exposed climbs we've done to date. Our desire to nail it was strong - the sight of the spire in photos never failed to impress me.
Morning arrived and we were soon hiking up to Yosemite Point. From the railings at the overlook, a quick hike down led us to a small stand of trees just above the point where the rim has a notch. Although we could not really see the spire, we were pretty sure we had the right 15 foot juniper tree in front of us (you can see the spire if you hike 75 feet further down along the edge of the rim). I fixed the static line directly to the tree, set up for rappel and had an "Oh-shit" moment as I realized that one of the leg loops on my harness was just about wasted. It rubbed through to the point where I just tore off the excess strap with my hand. Fortunately I was able to "fix it" by pulling in more strap.
The long - but knot-free - rappel brought us to the notch on the backside of the Spire. Not too impressive from this vantage point. Shirley came down and we tied in with the lead rope. We also had a second 60 m rope which was to serve a dual purpose: (1) it would do away with any need for Shirley to lower off or pendulum after cleaning a piece on a traverse move and (2) we might need two ropes for the "limp Tyrolean" traverse (a term coined by Craig Peer when I described the procedure we used) off the summit.
The start of the first pitch is a bit disappointing - feels like many other climbs in that there's a terrace system about 100+ feet below as you step off the belay ledge - nothing ridiculous exposure-wise. One or two simple gear moves starting off a semi-loose flake (nice, deep pin scars in a small dihedral) bring you to a bolt ladder. Few more bolts and you're in some mandatory 5.7 free terrain (move or two involving a big pocket). A large ledge materializes shortly above as you pass from shadow and into direct sunlight - the off-width section begins at the far left end of the ledge. The off-width is rated 5.10 - for me it was C1 very secure if a bit awkward (sort of bulging). Soon, I was topping out on Salathe Ledge and very much trying to avoid touching a large boulder teetering right above the off-width.
Salathe Ledge is spacious and comfortable. The belay consists of three new bolts. Shirley comes up with the static line in tow and soon we are working hard to sort out the cluster of ropes and aiders. My left eye feels as though some sand fell into it. Keep rubbing it. Couple of pictures, few sips of water, and it's time for me to find the beginning of pitch 2.....OK, a few more pictures. Where exactly does P2 start? Finally notice a nice bolt at the far left edge of Salathe Ledge. Clip in, step up expecting to see the route clearly laid out in front of me. Instead, all I find is some old shoe lace slings hanging from an old peg at the beginning of a shallow finger crack. This is the point from which the climb derives its reputation for sudden exposure - the moment you step beyond the left edge of Salathe Ledge, you have 1000+ feet of vertical wall and air below your feet. You also have Upper Yosemite Falls roaring to your left and spawning beautiful rainbows down below. 15 feet above I spot a bolt - "screw it". I reach for the clip stick, slither my way onto and up the aiders hanging on the shoelace, reach high and clip the bolt. I soon find myself hanging form it and scratching my head as to what I should do next? My eyes, not accustomed to looking for aid placements, cannot spot the next move? The only option it seems is to make a large leftward step where a secure 1" cam can be placed under a flake. I do so and spot a hangerless bolt about 8-10 feet above me. I'm done cheating with the clip stick. With a bit of poking around I find a placement for my smallest Alien. It's not pretty as only 2 lobes fit into the shallow crack but seems to work well enough for me to gain 3 more vertical feet towards the hangerless bolt. Few feet higher I feel out a nice, positive hand pocket. Now the only problem is that there doesn't seem to be much for feet. I don't have the desire to try and free it. It occurs to me that now might be the time to scratch up that brand new hook purchased few weeks earlier with this climb in mind. As I poke around with the hook, I realize that I should've gotten a larger one. The hook I have sits on the lip of the pocket instead of sinking in around its positive edge. Gently apply my weight to the hook placement and to my surprise it holds! I now have gained enough ground to clip the hangerless bolt. The "C2" section is over! The remaining 100 feet or so are straight forward - mostly a fixed gear ladder (bolts, pitons, and one fused in nut). My left eye seems to be getting worse but in my focused state of mind I keep putting it aside - keep thinking that some dirt got in there....keep rubbing. I soon find myself clipping in the last piton and doing some easy friction moves to reach the white granite summit of Lost Arrow Spire. I bring up Shirley who enjoys the exposure and views of the pitch (despite earlier reservations that "it's all jummaring!").
Once again, we sort the ropes and start rigging for our return trip to the rim. We set up a double rope rap using the cluster of webbings presumably equalizing 5 or 6 bolts on the spire and reinforce the set-up with our own material including several old lockers. I clip my aiders to the fixed rim rope (now pulled tightly), tie in back up and start the rap. It's an exhilarating feeling as you start moving horizontally across the void, feet dangling. I snap a couple of photos. The wind starts up again and it gently rocks me sideways. Just as I start enjoying the ride back it's over. I'm on the other side and faced with the 80 foot jug to the top of the rim. As soon as I top out, I run over to a point lower on the rim from where I can snap pictures of Shirley on the Spire summit as she's setting up her return ride. Shirley enjoys the traverse portion of the return trip - pausing in the middle to let me snap a photo or two. Soon we're both back at the juniper anchor pulling all the ropes back. I now realize that my left eye is seeing just "fog". Shirley tells me that it's totally red.
Quick hike back to camp, a brief rest and once again we're facing the endless switchbacks of the Upper Yosemite Falls Trail. The hike down is uneventful. We stop once again to admire the Spire from below. The hike down takes an hour and half. As we approach the trailhead at about 8pm, we're worried that the Yosemite City bus system might not be running any longer at this hour. Not looking forward to having to hike back to Curry! To our great relief, the buses run till 10pm. A brief 45 minutes later (the bus system sucks....they'll need a subway soon) we're at Curry Village buying Red Bulls for the drive back. I'm about 80+% blind in my left eye now seeing nothing but light blurs from headlights. Shirley faces having to do the long drive back to Sacramento. We get to the outskirts of the city at about 12:45am on Monday. Normally we'd sleep in the car till our 6:30am flight but we're planning on heading straight back to work. We splurge on the always luxurious Motel 6. Shower, two hours of sleep, and we're back in hell known as work.....Oh well, next weekend is coming! The feeling of accomplishment is great.


Comments
Post a Comment