Apologies to the Wizard of Oz for the title. I just couldn’t resist!
Though Summitpost has a perfectly good (and easy) way to intermingle pictures with text on a page, for some reason I can’t quite explain, there have been times when I wanted to put images on a page in ways that couldn’t be achieved so simply. So, I began to research. With the help of some generous Summitpost members, the SP FAQ page, perusing the Forums, plus a little searching on the web, I now have a little more control over picture placement.
Since I consider Summitpost to be a community of shared resources, I thought it fitting that I share what I've learned about tables and pictures. I hope to keep this article as “dynamic” as possible. As I learn more, and, as I receive suggestions, I'll make additions.
Though I hope this article will go part way toward providing help in the "how to" for tables and pictures, here are a few additional places to get information about HTML, tables, and pictures.
When you use the "Insert Image" button to place images on your pages, pictures display in a fashion similar to this.
My little buddy, the Pica
The HTML code which is inserted... [ img:248632:alignleft:small:Pica ]
The advantages are...
o - It's a fast and easy way to insert a picture into your text,
o - You have control over the size (thumbnail, small, medium),
o - Using the "standard" procedure allows you to include caption text with the picture;
o - The picture is "clickable" - that is, when you click on the picture with your mouse, you see the picture's "page" with its additional options for viewing, voting, etc.
One disadvantage of using this method is, your pictures always have a border placed around them.
Displaying a Small Picture Without a Border
If you don't want a border around your picture, you can use the following html code.
< img class="lozad img-responsive" data-src="https://images-sp.summitpost.org/tr:e-sharpen,e-contrast-1,fit-max,q-60,w-200/206215.jpg" > - where to find the picture for display
However, controlling placement of the picture on the page (left, center, right) requires a bit more code.
< p align="left" > - left justify the paragraph (image)
< img class="lozad img-responsive" data-src="https://images-sp.summitpost.org/tr:e-sharpen,e-contrast-1,fit-max,q-60,w-200/206215.jpg" > - where to find the picture for display
< /p > - end paragraph positioning
< p align="center" > - center the paragraph (image)
< img class="lozad img-responsive" data-src="https://images-sp.summitpost.org/tr:e-sharpen,e-contrast-1,fit-max,q-60,w-200/206215.jpg" > - where to find the picture for display
< /p > - end paragraph positioning
< p align="right" > - right justify the paragraph (image)
< img class="lozad img-responsive" data-src="https://images-sp.summitpost.org/tr:e-sharpen,e-contrast-1,fit-max,q-60,w-200/206215.jpg" > - where to find the picture for display
< /p > - end paragraph positioning
You may have to change the filename extension ".jpg" to all caps ".JPG" to get your picture to display. It all depends upon how the picture was saved when you uploaded it to Summitpost. If you used lowercase for the ".jpg" filename extension and your picture looks like this , just change the filename extension to uppercase. The reverse (changing .JPG to .jpg) may also be required.
Please note that you are going to have to remove spaces to the right of the < symbol and to the left of the > symbol in the above examples and in all that follow. I have included extra spaces and lines in the example HTML code for clarity and to allow room for explanations.
You will not be able to just cut and paste. Some editing will be required on your part before the code (as it appears on this page) will operate correctly.
Displaying a Medium Picture Without a Border
Pictures in medium and large size can also be displayed without a border. You have the option of placing each picture left, center, or right on the page by using the < p align="..." > code sequence.
BUT, don't forget to include < /p >(ends the alignment code sequence) in the HTML code immediately following the code for displaying your picture; otherwise everything which follows will be placed in the same horizontal position you picked for image placement.
< p align="center" > - center the paragraph (image)
< img class="lozad img-responsive" data-src="https://images-sp.summitpost.org/tr:e-sharpen,e-contrast-1,fit-max,q-60,w-500/204161.jpg" > - where to find the picture for display
< /p > - end paragraph positioning
Displaying a Large Picture Without a Border
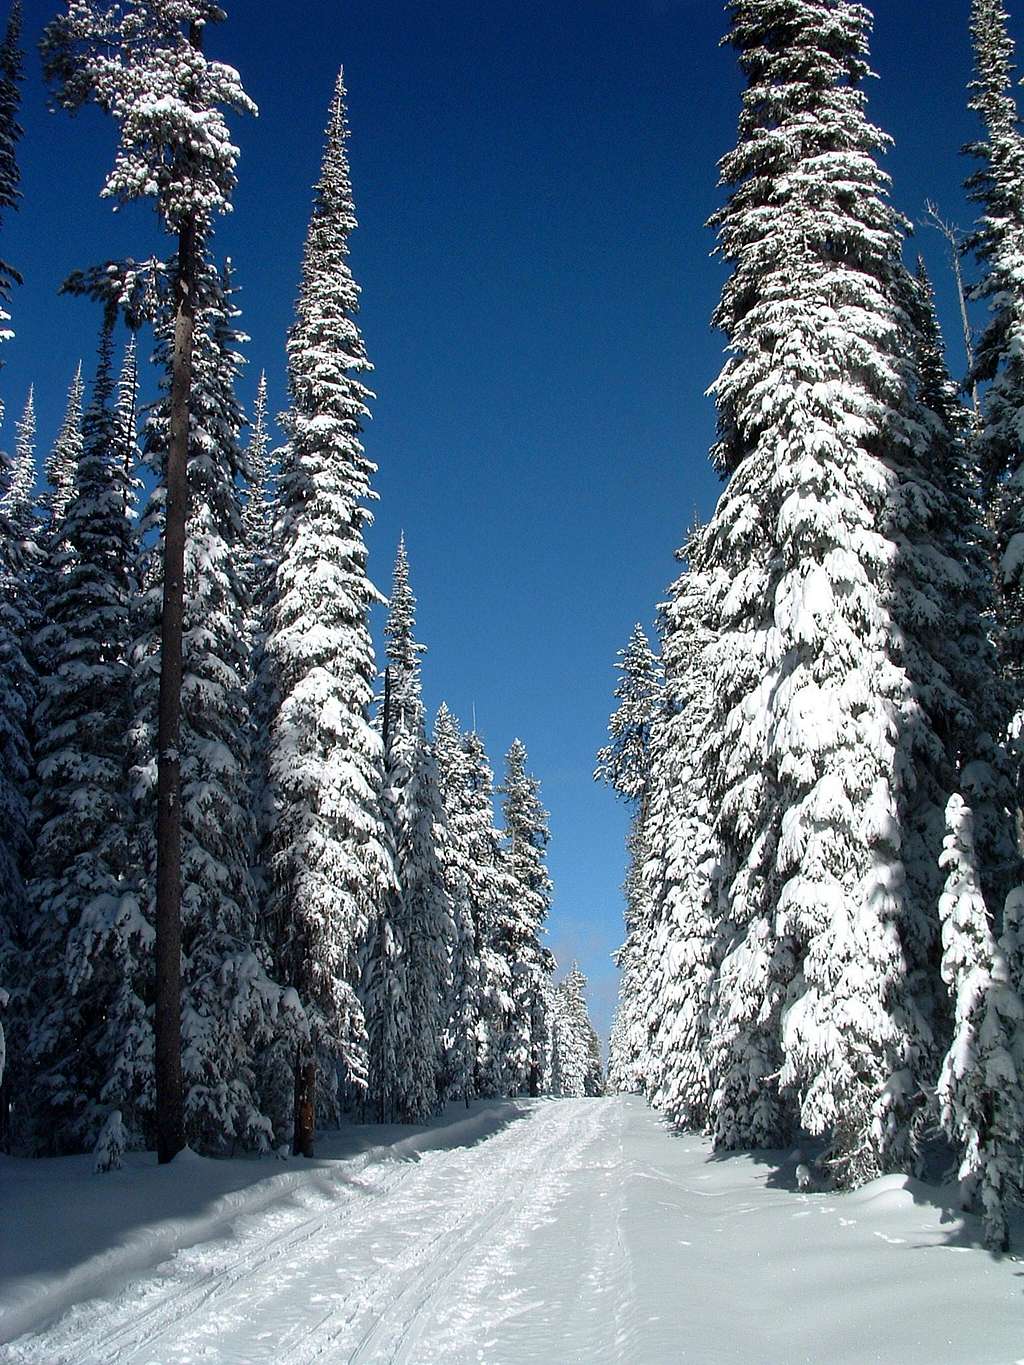
< img class="lozad img-responsive" data-src="https://images-sp.summitpost.org/tr:e-sharpen,e-contrast-1,fit-max,q-60,w-1024/252351.JPG" > - where to find the picture for display
Because the image will be bigger than most peoples' screens, displaying a large picture on Summitpost is something you should do sparingly, if ever.
Pictures in Tables
There are times when you want to show pictures in a format similar to the way they are displayed on a Summitpost Album. The following method will not duplicate an Album display exactly, but in most cases will suffice.
The concept here is to set up a table, then, use the "Insert Image" button to place a picture in each cell.
In most cases, medium- and large-sized pictures are too big to be used in this situation.
Tables "auto-adjust" to the size of picture you choose to display (thumb or small) and for a mixture of picture formats (verticle and horizontal).
This is the HTML code required to display the following table of pictures.
< noformat > - clears all previous formatting
< table border="1" - sets the size of the table's border
bordercolor="993300" - establishes the color of the table's border
cellspacing="2" - sets the distance between the table's cells
cellpadding="2" > - sets the space between the cell's edge and its contents
< tr > - begins the first (top) row of the table
< th > - begins a cell in the table
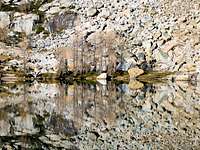
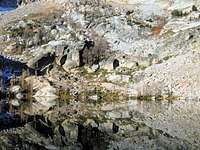
[ img:237979:aligncenter:small:Gem Lake Reflections, #1. ] - insert the image
< /th > - ends a cell in the table
< th > [ img:237978:aligncenter:small:Gem Lake Reflections, #2. ] < /th > - begin cell - insert the image - end cell
< th > [ img:237980:aligncenter:small:Gem Lake Reflections, #3. ] < /th > - begin cell - insert the image - end cell
< /tr > - end the first (top) row
< tr > - begin the next row
< th > [ img:237981:aligncenter:small:Gem Lake Reflections, #4. ] < /th > - begin cell - insert the image - end cell
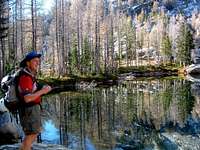
< th > [ img:236764:aligncenter:small:Vernon being reflective. ] < /th > - begin cell - insert the image - end cell
< th > [ img:237983:aligncenter:small:Gem Lake Reflections, #5. ] < /th > - begin cell - insert the image - end cell
< /tr > - end the row
< /table > - end the table < /noformat > - end noformat
Gem Lake Reflections, #1.
Gem Lake Reflections, #2.
Gem Lake Reflections, #3.
Gem Lake Reflections, #4.
Vernon being reflective.
Gem Lake Reflections, #5.
Picture Tables - Small Pictures - Pictures Without Borders
If you don't want the pictures included in your table to have individual borders, it requres different HTML code for the display of each image. Compare the following code with that in the above table to see the differences. The code for the "table" is unchanged.
Be aware that when using this method to diplay your pictures without individual borders, the images are no longer "clickable."
< noformat > - clears all previous formatting
< table border="1" - sets the size of the table's border
bordercolor="993300" - establishes the color of the table's border
cellspacing="2" - sets the distance between the table's cells
cellpadding="2" > - sets the space between the cell's edge and its contents
< tr > - begins the first (top) row of the table
< th > - begins a cell in the table
< img class="lozad img-responsive" data-src="https://images-sp.summitpost.org/tr:e-sharpen,e-contrast-1,fit-max,q-60,w-200/204161.jpg" > - where to find the picture for display
< /th > - ends a cell in the table
< th > < img class="lozad img-responsive" data-src="https://images-sp.summitpost.org/tr:e-sharpen,e-contrast-1,fit-max,q-60,w-200/206216.jpg" > < /th >
< th > < img class="lozad img-responsive" data-src="https://images-sp.summitpost.org/tr:e-sharpen,e-contrast-1,fit-max,q-60,w-200/234691.JPG" > < /th >
< /tr > - end the first (top) row
< tr > - begin the next row
< th > < img class="lozad img-responsive" data-src="https://images-sp.summitpost.org/tr:e-sharpen,e-contrast-1,fit-max,q-60,w-200/236759.JPG" > < /th >
< th > < img class="lozad img-responsive" data-src="https://images-sp.summitpost.org/tr:e-sharpen,e-contrast-1,fit-max,q-60,w-200/206223.jpg" > < /th >
< th > < img class="lozad img-responsive" data-src="https://images-sp.summitpost.org/tr:e-sharpen,e-contrast-1,fit-max,q-60,w-200/242293.JPG" > < /th >
< /tr > - end the row
< /table > - end the table < /noformat > - end noformat
Notice that some of the images require the use of a "JPG" filename extension rather than "jpg." Expect this to be the case fairly often.
Besides the obvious fact that different pictures are being displayed in the table above and that below, there is one other (and more meaningful) difference - the HTML code used to find and display each image.
[ img:234691:aligncenter:small:Trapper Peak ] - clickable but with a border
< img class="lozad img-responsive" data-src="https://images-sp.summitpost.org/tr:e-sharpen,e-contrast-1,fit-max,q-60,w-200/234691.JPG" > - no border but not clickable
Picture Tables - Thumbnail Pictures - Pictures Without Borders
The required change to the html code is minimal if all you want to do is reduce the picture size from small to thumbnail.
If you compare the following code with that just above to see the difference, you'll see the only difference is...
< th > < img class="lozad img-responsive" data-src="/images/small/206223.jpg" > < /th >
< th > < img class="lozad img-responsive" data-src="/images/thumb/206223.jpg" > < /th >
< noformat > - clears all previous formatting
< table border="1" - sets the size of the table's border
bordercolor="993300" - establishes the color of the table's border
cellspacing="2" - sets the distance between the table's cells
cellpadding="2" > - sets the space between the cell's edge and its contents
< tr > - begins the first (top) row of the table
< th > - begins a cell in the table
< img class="lozad img-responsive" data-src="https://images-sp.summitpost.org/tr:e-sharpen,e-contrast-1,fit-max,q-60,w-100/237113.JPG" > - where to find the picture for display
< /th > - ends a cell in the table
< th > < img class="lozad img-responsive" data-src="https://images-sp.summitpost.org/tr:e-sharpen,e-contrast-1,fit-max,q-60,w-100/243091.jpg" > < /th >
< th > < img class="lozad img-responsive" data-src="https://images-sp.summitpost.org/tr:e-sharpen,e-contrast-1,fit-max,q-60,w-100/242287.JPG" > < /th >
< /tr > - end the first (top) row
< tr > - begin the next row
< th > < img class="lozad img-responsive" data-src="https://images-sp.summitpost.org/tr:e-sharpen,e-contrast-1,fit-max,q-60,w-100/252351.JPG" > < /th >
< th > < img class="lozad img-responsive" data-src="https://images-sp.summitpost.org/tr:e-sharpen,e-contrast-1,fit-max,q-60,w-100/206223.JPG" > < /th >
< th > < img class="lozad img-responsive" data-src="https://images-sp.summitpost.org/tr:e-sharpen,e-contrast-1,fit-max,q-60,w-100/230870.JPG" > < /th >
< /tr > - end the row
< /table > - end the table < /noformat > - end noformat
Picture Tables - 50 x 50 Pixel Pictures - Pictures Without Borders
There is one additional picture size available on Summitpost, a small, 50 x 50 pixel image. Summitpost creates and keeps these small copies (of every uploaded picture) in the "avatars" sub-directory. If you wish to use these small representative images in a table format, use the following html code.
< noformat > - clears all previous formatting
< table border="1" - sets the size of the table's border
bordercolor="993300" - establishes the color of the table's border
cellspacing="2" - sets the distance between the table's cells
cellpadding="2" > - sets the space between the cell's edge and its contents
< tr > - begins the first (top) row of the table
< th > - begins a cell in the table
< img class="lozad img-responsive" data-src="https://images-sp.summitpost.org/tr:e-sharpen,e-contrast-1,fit-max,q-60/237113.JPG" > - where to find the picture for display
< /th > - ends a cell in the table
< th > < img class="lozad img-responsive" data-src="https://images-sp.summitpost.org/tr:e-sharpen,e-contrast-1,fit-max,q-60/243091.jpg" > < /th >
< th > < img class="lozad img-responsive" data-src="https://images-sp.summitpost.org/tr:e-sharpen,e-contrast-1,fit-max,q-60/242287.JPG" > < /th >
< /tr > - end the first (top) row
< tr > - begin the next row
< th > < img class="lozad img-responsive" data-src="https://images-sp.summitpost.org/tr:e-sharpen,e-contrast-1,fit-max,q-60/252351.JPG" > < /th >
< th > < img class="lozad img-responsive" data-src="https://images-sp.summitpost.org/tr:e-sharpen,e-contrast-1,fit-max,q-60/206232.JPG" > < /th >
< th > < img class="lozad img-responsive" data-src="https://images-sp.summitpost.org/tr:e-sharpen,e-contrast-1,fit-max,q-60/230870.JPG" > < /th >
< /tr > - end the row
< /table > - end the table < /noformat > - end noformat
Changing a Table's Visual Features
Now let's play with the borders and background of the tables.
Increasing the "border" from a value of 1 to 10 gives the following result.
To change the color of the border, change the "bordercolor" value.
From < table border="10" bordercolor="993300" cellspacing="2" cellpadding="2" >
To < table border="10" bordercolor="ff0033" cellspacing="2" cellpadding="2" >
Values for colors which are "good" to use can be found at... Web Source
To change the spacing between the table's cells, change the value of "cellspacing".
From < table border="10" bordercolor="ff0033" cellspacing="2" cellpadding="2" >
To < table border="10" bordercolor="ff0033" cellspacing="10" cellpadding="2" >
To change the space between each cell's border and the edge of the pictures, change the "cellpadding" value.
From < table border="10" bordercolor="ff0033" cellspacing="10" cellpadding="2" >
To < table border="10" bordercolor="ff0033" cellspacing="10" cellpadding="10" >
You can give color to the table's background by using "bgcolor".
From < table border="10" bordercolor="ff0033" cellspacing="10" cellpadding="10" >
To < table border="10" bordercolor="ff0033" cellspacing="10" cellpadding="10" bgcolor="00ff66" >
Again, values for colors which are "good" to use can be found at... Web Source
Making changes to just these five table-defining values, gives a substantial amount of control over how tables look.
o border - controls the size of the table's border
o bordercolor - controls the color of the table's border
o cellspacing - controls the amount of space between the table's cells
o cellpadding - controls the amount of space between the image and the edge of the cell
o bgcolor - controls the background color of the table
Picture Tables - Pictures Without Borders - Invisible Table Border
There are times when you want to display pictures using a table format but do not want the table to be visible (that is, no borders and no lines between cells). This can be managed by setting the value of "border" to zero.
If you wish, for the sake of simplicity, you may also remove "border" from the table's "definition" and accomplish the same result - no visible border.
Of course, if the border is no longer visible, "bordercolor" is no longer needed and may be removed from the table's "definition."
You may still want to set the values of "cellspacing" and "cellpadding" to control how the pictures are spaced on the screen, but it's not required.
One of the problems with NOT using the "standard" method ("Insert Image" button) for adding pictures, is that the images are not "clickable." That can be remedied quite easily in a table by adding a "clickable" caption beneath each picture.
< noformat > - clears all previous formatting
< table - begins the table definition
border="0" - sets the size of the table's border to zero so it will not be visible
cellspacing="0" - sets the distance between the table's cells (this line of code is not required)
cellpadding="2" > - sets the space between the cell's edge and its contents
< tr > - begins the first (top) row of the table
< th > - begins a cell in the table
< img class="lozad img-responsive" data-src="https://images-sp.summitpost.org/tr:e-sharpen,e-contrast-1,fit-max,q-60,w-100/237113.JPG" > - points to image which should be displayed
< br > - a linebreak so the "clickable" text will appear below the cell's image
< a href="https://www.summitpost.org/view_object.php?object_id=237113" > North Trapper < /a > - location of the cell's (clickable) image and the text which will appear on screen
< /th > - ends the cell
< th > - begins the next cell
< img class="lozad img-responsive" data-src="https://images-sp.summitpost.org/tr:e-sharpen,e-contrast-1,fit-max,q-60,w-100/243091.jpg" > < br >
< a href="https://www.summitpost.org/view_object.php?object_id=243091" > Rattle Snake < /a > < /th >
< th > < img class="lozad img-responsive" data-src="https://images-sp.summitpost.org/tr:e-sharpen,e-contrast-1,fit-max,q-60,w-100/242287.JPG" > < br >
< a href="https://www.summitpost.org/view_object.php?object_id=242287" > Wolf Sign < /a >
< /th >
< /tr > - ends first (top) row of the table
< tr > - begins the next row in the table
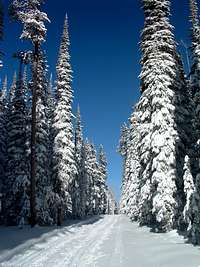
< th > < img class="lozad img-responsive" data-src="https://images-sp.summitpost.org/tr:e-sharpen,e-contrast-1,fit-max,q-60,w-100/252351.JPG" > < br >
< a href="https://www.summitpost.org/view_object.php?object_id=252351" > Ski Trail < /a > < /th >
< th > < img class="lozad img-responsive" data-src="https://images-sp.summitpost.org/tr:e-sharpen,e-contrast-1,fit-max,q-60,w-100/206232.JPG" > < br >
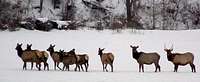
< a href="https://www.summitpost.org/view_object.php?object_id=206232" > Buddies < /a > < /th >
< th > < img class="lozad img-responsive" data-src="https://images-sp.summitpost.org/tr:e-sharpen,e-contrast-1,fit-max,q-60,w-100/230870.JPG" > < br >
< a href="https://www.summitpost.org/view_object.php?object_id=230870" > Larch Fall Color < /a >
< /th >
< /tr > - ends the row
< /table > - ends the table
< /noformat > - ends the "noformat" command
Here is another table with "clickable" captions (and a few different pictures), this time with the table visible and a little background color.
< noformat > - clears all previous formatting
< table - begins the table definition
border="10" - sets the size of the table's border
bordercolor="ff0033" - establishes the color of the table's border
cellspacing="8" - sets the distance between the table's cells
cellpadding="8" - sets the space between the cell's edge and its contents
bgcolor="ff6666" > - establishes the color of the table's background
< tr > - begins the first (top) row of the table
< th > - begins a cell in the table
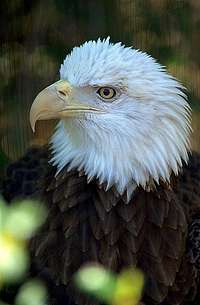
< img class="lozad img-responsive" data-src="https://images-sp.summitpost.org/tr:e-sharpen,e-contrast-1,fit-max,q-60,w-200/206215.jpg" > - points to image which should be displayed
< br > - a linebreak so the "clickable" text will appear below the cell's image
< a href="https://www.summitpost.org/view_object.php?object_id=206215" > Bald Eagle < /a > - location of the cell's (clickable) image
< /th > - ends the cell
< th > - begins the next cell
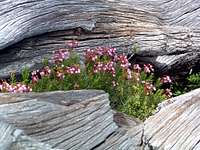
< img class="lozad img-responsive" data-src="https://images-sp.summitpost.org/tr:e-sharpen,e-contrast-1,fit-max,q-60,w-200/205851.JPG" > < br >
< a href="https://www.summitpost.org/view_object.php?object_id=205851" > Mountain Heather < /a > < /th >
< th > < img class="lozad img-responsive" data-src="https://images-sp.summitpost.org/tr:e-sharpen,e-contrast-1,fit-max,q-60,w-200/252343.jpg" > < br >
< a href="https://www.summitpost.org/view_object.php?object_id=252343" > Fall Sunrise < /a > < /th >
< /tr > - ends first (top) row of the table
< tr > - begins the next row in the table
< th > < img class="lozad img-responsive" data-src="https://images-sp.summitpost.org/tr:e-sharpen,e-contrast-1,fit-max,q-60,w-200/252348.jpg" > < br >
< a href="https://www.summitpost.org/view_object.php?object_id=252348" > Melting Snow < /a > < /th >
< th > < img class="lozad img-responsive" data-src="https://images-sp.summitpost.org/tr:e-sharpen,e-contrast-1,fit-max,q-60,w-200/252351.JPG" > < br >
< a href="https://www.summitpost.org/view_object.php?object_id=252351" > Ski Trail < /a > < /th >
< th > < img class="lozad img-responsive" data-src="https://images-sp.summitpost.org/tr:e-sharpen,e-contrast-1,fit-max,q-60,w-200/252333.jpg" > < br >
< a href="https://www.summitpost.org/view_object.php?object_id=252333" > Frosted Trees < /a > < /th >
< /tr > - ends the row
< /table > - ends the table
< /noformat > - ends the "noformat" command
There is another solution for making borderless pictures clickable, one which I think is a bit more elegant.
Using this method not only makes the image clickable, but when the viewer moves the mouse pointer over the picture, the name (title) of the picture appears in a little box, thus eliminating the need for captions, clickable or otherwise.
< a href="https://www.summitpost.org/view_object.php?object_id=252348" > - clickable link to the picture's page
< img class="lozad img-responsive" data-src="https://images-sp.summitpost.org/tr:e-sharpen,e-contrast-1,fit-max,q-60,w-500/252348.jpg" - where to get the picture for display
title="Melting Snow" > - the picture's name
< /a > - end link
Clickable Pictures With Borders
Now that we've gone to all the trouble of eliminating the "default" border from a picture while retaining the picture's "clickability", we can make things more complicated by adding a border of our own to the picture.
Two methods come to mind. One uses a single-celled table to place the border.
< noformat > - clears all previous formatting
< table - begins the table definition
border="10" - sets the size of the table's border
bordercolor="ff0033" - establishes the color of the table's border
cellspacing="8" - sets the distance between the table's cells
cellpadding="8" - sets the space between the cell's edge and its contents
bgcolor="0" > - establishes the color of the table's background
< tr > - begins the only row of the table
< th > - begins the only cell in the table
< a href="https://www.summitpost.org/view_object.php?object_id=243086" > - clickable link to the picture's page
< img class="lozad img-responsive" data-src="https://images-sp.summitpost.org/tr:e-sharpen,e-contrast-1,fit-max,q-60,w-500/243086.jpg" - where to get the picture for display
title="Camas & Stump" > - the picture's name
< /a > - end link
< /th > - ends the only cell
< /tr > - ends the only row
< /table > - ends the table
< /noformat > - ends the "noformat" command
The other method uses "style" to define the border. This is a good method to use when you're displaying only one picture and you don't want the border to look like those which appear around tables.
If you use the current version of Internet Explorer, you will see no difference between a border using the table method and one using the “style” method (assuming you have the same size border and use the same colors). However, if your browser is Mozilla Foxfire, you will see a difference. I use Mozilla Foxfire most of the time and included the two methods for others who also do.
< a href="https://www.summitpost.org/view_object.php?object_id=252343" > - clickable link to the picture's page
< img class="lozad img-responsive" data-src="https://images-sp.summitpost.org/tr:e-sharpen,e-contrast-1,fit-max,q-60,w-500/252343.jpg" - where to get the picture for display
title="Fall Sunrise Over Pond" - the picture's name
style="border-style: solid; - sets the border style
border-width: 15px; - sets the border width
border-color: red;" > - sets the border color
< /a > - end link
Displaying Pictures in Non-Standard Sizes
There are times when you want to put a picture on a page that is differently-sized from the standard large, medium, small, or thumbnail image. Fortunately there are two atributes of "img" which can provide a bit of help - "width" and "height."
Be advised if you include both of these attributes for the display of a single image, you are likely to cause the picture to be distorted (unless you are VERY careful with your math). If you specify just one of the attributes - "width" or "height" - the image will be automatically (and correctly) scaled by the browser. There may be instances when including both is appropriate; you either wish to distort the image, or, a slight distortion won't matter.
< img class="lozad img-responsive" data-src="https://images-sp.summitpost.org/tr:e-sharpen,e-contrast-1,fit-max,q-60,w-500/205862.JPG" - where to find the picture for display
width="350px" - set the width
height="460px" > - set the height
Notice the above example points to the "medium" version of the image. Although you might think that pointing to the "original", "large", or "small" version would work just as well because the HTML code establishes the exact size to be placed on the screen, you'd only be partially correct. Pointing to a too-small picture, then stretching it to a larger size for display, will make the image look blocky and low-resolution. It's better to point to a too-large picture file and "reduce" it to fit into a smaller space. Best however, is to pick the appropriately-sized picture file which only needs to be reduced a small amount to fit your allotted space.
Last Table
Here is one last table with a new set of pictures, all of which are "clickable" and have titles which appear when you hover your mouse over the image.
Notice that I've chosen to set both the "width" and "height" attributes. I wanted to make sure each image was similarly sized for use in the table display and knew, that in this case, a slight distortion of the images wouldn't matter.
< noformat > - clears all previous formatting
< table - begins the table definition
border="20" - sets the size of the table's border
bordercolor="green" - establishes the color of the table's border
bgcolor="red" > - establishes the color of the table's background
< tr > - begins the first (top) row of the table
< th > - begins a cell in the table
< a href="https://www.summitpost.org/view_object.php?object_id=252345" > - clickable link to the picture's page
< img class="lozad img-responsive" data-src="https://images-sp.summitpost.org/tr:e-sharpen,e-contrast-1,fit-max,q-60,w-200/252345.jpg" - where to get the picture for display
width="200px" - set width to 200 pixels
height="135px" - set height to 135 pixels
title="Fall Sunset" > - set picture's name
< /a > - end link
< /th > - end cell
< th > - begin next cell
< a href="https://www.summitpost.org/view_object.php?object_id=252342" >
< img class="lozad img-responsive" data-src="https://images-sp.summitpost.org/tr:e-sharpen,e-contrast-1,fit-max,q-60,w-200/252342.jpg" width="200px" height="135px" title="Spring Oak Leaves" > < /a >
< /th >
< th >
< a href="https://www.summitpost.org/view_object.php?object_id=256161" >
< img class="lozad img-responsive" data-src="https://images-sp.summitpost.org/tr:e-sharpen,e-contrast-1,fit-max,q-60,w-200/256161.JPG" width="200px" height="135px" title="Snow Covered Trees" > < /a >
< /th >
< /tr > - end row
< tr > - begin next row
< th >
< a href="https://www.summitpost.org/view_object.php?object_id=243082" >
< img class="lozad img-responsive" data-src="https://images-sp.summitpost.org/tr:e-sharpen,e-contrast-1,fit-max,q-60,w-200/243082.jpg" width="200px" height="135px" title="Mountain Primrose" > < /a >
< /th >
< th >
< a href="https://www.summitpost.org/view_object.php?object_id=205992" >
< img class="lozad img-responsive" data-src="https://images-sp.summitpost.org/tr:e-sharpen,e-contrast-1,fit-max,q-60,w-200/205992.jpg" width="200px" height="135px" title="Indian Paintbrush" > < /a >
< /th >
< th >
< a href="https://www.summitpost.org/view_object.php?object_id=252326" >
< img class="lozad img-responsive" data-src="https://images-sp.summitpost.org/tr:e-sharpen,e-contrast-1,fit-max,q-60,w-200/252326.jpg" width="200px" height="135px" title="Aspen Trees" > < /a >
< /th >
< /tr > - end row
< tr > - begin next row
< th >
< a href="https://www.summitpost.org/view_object.php?object_id=252334" >
< img class="lozad img-responsive" data-src="https://images-sp.summitpost.org/tr:e-sharpen,e-contrast-1,fit-max,q-60,w-200/252334.jpg" width="200px" height="135px" title="Maple Leaves" > < /a >
< /th >
< th >
< a href="https://www.summitpost.org/view_object.php?object_id=252338" >
< img class="lozad img-responsive" data-src="https://images-sp.summitpost.org/tr:e-sharpen,e-contrast-1,fit-max,q-60,w-200/252338.jpg" width="200px" height="135px" title="Early Morning Light on Ponderosa Pines" > < /a >
< /th >
< th >
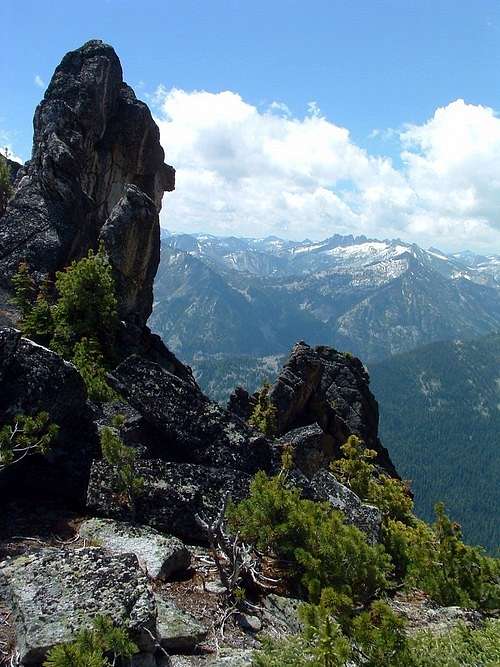
< a href="https://www.summitpost.org/view_object.php?object_id=236753" >
< img class="lozad img-responsive" data-src="https://images-sp.summitpost.org/tr:e-sharpen,e-contrast-1,fit-max,q-60,w-200/236753.JPG" width="200px" height="135px" title="Rocks on Baker Point" > < /a >
< /th >
< /tr > - end row
< /table > - end table
< /noformat > - end noformat
Summary
Tables provide a good method for displaying images and closely-related text in a block-type format. I hope the above information will help in your use of tables, especially for pictures.
Remember, a table in its simplest form requires no more code than...
< table > - start the table
< tr > - start a row
< th > Cell Contents < /th > start cell - insert contents - end cell
... - repeat cells as required
...
< /tr > - end the row
... - repeat rows and cells as required
...
< /table > - end the table
If you're interested in more help with the HTML required for tables, have a look at Setting Tables Using HTML.
Each cell's contents is up to you and may consist of text, pictures, a combination of the two, or, if you really want to make things complicated, another table. Now THAT sounds like fun!
Over the last few weeks I created the Worth Another Look custom object using tables to place images. Now, using your suggestions here, I've added a little bit of spit and polish to it. Thanks!
mark d.
BTW: The link for the color table didn't work for me. I did find one here:
http://www.w3schools.com/html/html_colornames.asp
Michael Hoyt - Dec 21, 2006 4:50 pm - Hasn't voted
Re: Excellent!
Mark,
Thanks for pointing out the problem with the link to the color tables at Web Source - just a typing problem on my part and it's fixed now.
I added you w3schools.com address to the "link list" - it looks like a pretty good site for HTML help. Thanks again,
And I liked your "Worth Another Look" page. Excellent!
There's one thing I miss though.
The info on how you make the photos votable. When I see for example a nice looking medium sized photo (like the one in this section), I would like to give it a vote.
The problem is; I can't, unless I try to find it in the archives of SP. This can be a really time consuming job.
Michael Hoyt - Dec 21, 2006 4:55 pm - Hasn't voted
Re: Good info!
I miss the "votable borderless" picture, too. I'm still working on a good solution. So far I've only got a work-around using clickable captions, but I'll keep trying.
Thanks for posting this, Mike. I have always wondered how one can place photos three in a row on a page since some do it but the SP format doesn't seem to do it on its own. Maybe your different codes will help me do that. Vernon Garner once had the same question; I hope he sees this.
Bob
Michael Hoyt - Dec 21, 2006 5:03 pm - Hasn't voted
Re: Very Helpful
Good to hear from you Bob. A three-in-a-row table is a good solution for puting three (small or thumbnail) pictures side by side - it's just a single row table. If you need help, give me a holler.
And, from the look of his newer pages, I think Vernon has already got it figured out.
Photohiker, this is a great resource and I will no doubt be making use of it. I note you don't make mention of one handy process for sizing any photo to be displayed on a page, and that is the use of the width and height tags (settings). I've used these tags on my pages, most recently on my WA 2kP page to get a manageable size for images in the table (70 pixels wide by 53 pixels high). With these tags you can even abnormally stretch images.
The format is (removing spaces as necessary after and before < and >):
< a href="picture page URL to link to" > < img src="image URL to link to" width="enter integer herepx" height="enter integer herepx" >< /A >
(Note that img src URL has to have quotes around it now. Quotes are also necessary for the A HREF URL.)
As an example, here are four versions of a picture of mine at different W and H settings (70 x 53, 100 x 76, 100 x 110, 200 x 108). I've linked to the main/medium image in this case but could link to any old image, even an image not at all related to the A HREF URL.
Michael Hoyt - Dec 21, 2006 5:45 pm - Hasn't voted
Re: Photo sizing tip
Hey thanks.
I knew someone would come along with even more information. I certainly do appreciate it and will try to incorporate your input into the article in the next few days.
Quotes might not be necessary. I looked online for more info. I did find this tutorial. You will find it useful for some additional information to put onto your page.
There is also some good info here. In particular, it looks like you can insert white space or a border around an image. See sections 13.7.2 and 13.7.3. Although, as seen in the image below, I can't get these tags to work. Help?
Here's a run I've made for a border. I was summarily turned away by the Border Patrol...
I think use of the border tag has become "deprecated" meaning it is no longer supported. Deprecated is one step short of obsolescence.
Also, the ALT command (see section 13.8) can be handy. It puts up a comment box in which you can say anything. See nartreb's comment below for more info. Hover the mouse over the image below:
Be careful about copying code from tutorials, some are quite out of date. The one you link to is mostly quite good, but the BORDER attribute is technically deprecated for IMG tags.
All browsers I know of still allow it, but the SP website happens to be an example of a situation where it no longer works the way you'd expect.
Most browsers are pretty forgiving, for example I don't know any that will always require quotes around an element value (like WIDTH=33px). (But it's a good habit to put in the quotes anyway. They're required, for example, if the value has spaces in it.) Most browsers can in fact change their behavior if a Web page includes a declaration telling them to enforce standards more strictly. It's best to follow standards as best you can, because you never know how future browsers might behave on nonstandard code.
Different browsers behave differently. The ALT tag you mention, for example, was intended to be displayed only by browsers that can't display the image (either because they can't handle a particular image type, or because it's a text-only browser, or because it's being used by a voice synthesizer for a blind user).
A certain installed-by-default (but horribly insecure) browser from the maker of a certain installed-by-default (but horribly insecure) operating system displays the ALT attribute's value as a "tooltip" when you hover the mouse over the image, but most other browsers show the value of the TITLE attribute instead.
For maximum compatibility, include both attributes. But keep in mind the real intended use of ALT (blind readers, primarily) and keep the description short and clear.
A tutorial that won't steer you wrong is the one at the W3C School.
Yep, this works: forget the old-fashioned BORDER attribute and use CSS style instead. (I guess that a site-wide CSS stylesheet for links and/or images is interfering with the BORDER attribute; it works outside of SP)
<A HREF="http://www.summitpost.org/image/84265/Mt-Spickard-and-beautiful-.html" target="_blank"><img src="http://www.summitpost.org/images/medium/84265.jpg" width="70px" style="border-style: solid; border-width: 1px; border-color: black;"></A>
One more thing: unless you love arithmetic or are deliberately trying to distort your image, don't give both HEIGHT and WIDTH. Just specify one and the browser will automatically scale the image to maintain its original proportions.
(This behaviour is not explicit in the standard, but it's the only sensible outcome and all visual browsers act this way.)
Thanks for your input (including the border solution).
I agree with you about not using both HEIGHT and WIDTH in most cases. However, there is a case where putting both in is mandatory: when you're trying to maintain a uniform sizing for multiple images whose originals aren't at the same WxH proportion. Such is the case for my WA 2kP and WA Top 100 pages. I needed all the images to be of the same width and height (70 x 53) so that A) the image column (70 pix wide) is fully engulfed by all of the photos in it else some blank space at the right edge of narrower photos will be introduced and B) so that each row is of the same height (53 pix high). Some thumbnail images were distorted slightly when doing this but it was a small price to pay in order to get the table looking nice.
3 options for that situation:
1) Set the size of the table cell and clip the image to fit within the cell using the CSS property overflow: hidden (set this for the cell, not the image). SP does this for the thumbnails at the bottom of its pages. Fills the cells exactly but sacrifices the edges of some images.
2) set the HEIGHT of some and the WIDTH of others, depending on the aspect ratio of each image. Leaves irregular whitespace, which may not be the look you want.
3) what you did. May cause distortion.
Michael Hoyt - Dec 22, 2006 1:27 am - Hasn't voted
Re: Photo sizing tip
Thanks for the discussion, guys. I'm sure many others will find it as helpful as I have.
Parents refers to a larger category under which an object falls. For example, theAconcagua mountain page has the 'Aconcagua Group' and the 'Seven Summits' asparents and is a parent itself to many routes, photos, and Trip Reports.


 , just change the filename extension to uppercase. The reverse (changing .JPG to .jpg) may also be required.
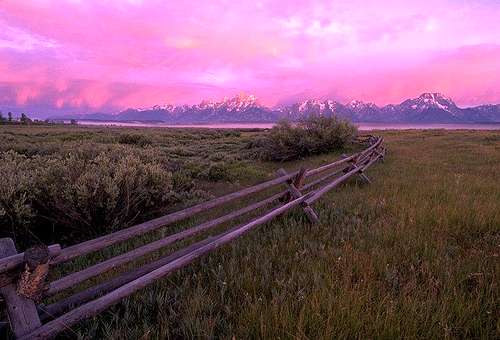


Comments
Post a Comment