
-
 26784 Hits
-
 77.48% Score
-
 8 Votes
|
|
Route |
|---|---|
|
|
39.95196°N / 105.28961°W |
|
|
Trad Climbing |
|
|
Summer, Fall, Winter |
|
|
Less than two hours |
|
|
5.7 (YDS) |
|
|
1 |
|
|
Overview
The Devils Thumb is closed due to nesting raptors from February 1 through July 31 yearly. Devils Thumb from the SE
The Devils Thumb is a highly recognized formation in the Southern Flatirons, easily visible from Boulder, commonly referred to as "The Boulder Boner". The Thumb is located high on the shoulder of Bear Peak, and involves quite an arduous approach from all sides. Because of this, it doesn't see too much climbing activity. Basically, the only reason people climb it is just to be able to look up at it and say "I've climbed it". The rock actually is overhanging on all sides, which is unusual for the Flatirons, thus the easiest route up is not a standard low 5th class scramble. The easiest route is described here. "Left Side" follows only about 15 feet tall, and involves surmounting an awkward overhanging, flaring lie-back crack on the east side. The guide book rates the climb 5.7, yet I thought it could have been 5.8-. It's really a 2 move wonder. Obviously, the east side overhangs only about 15-20 feet, yet the impressive west side of the formation has a HUGE overhand. Not sure if any routes go up the west side, but if they do, they would be very difficult.
 Closeup of Route.
Given the approach-to-climb ratio, many people would claim that the hike to the Thumb is not worth the short amount of climbing. Be that as it may, you will find solitude up here, plus the opportunity to climb a prominent feature, so I think it's worth it.
Getting There
This might be the hardest part. A few approaches are possible, from the west, the east, or the southeast. What we did is we first climbed the Fatiron (the formation to the north of the Maiden), which is was an easy 5.4 climb we soloed. From the top of the Fatiron, a 20 minute scramble northwest along the ridge takes you to the Thumb. The other approach, which was our descent route, follows the Shadow Canyon Train into Shadow Canyon, then up a long talus field which leads you to slabs beneath the west overhang. Either one will take several hours. The talus approach will be quicker, however there is more slogging and less climbing, compared to the Fatiron approach.Both approaches start at the Mesa Trailhead on CO 170, about 2 miles from Hwy 93. From the TH, take the Mesa Trail for a few miles until you come to a junction with a sign that states Shadow Canyon right, Mesa Trail, left. Stay left, on the Mesa Trail, and continue another 3/4 mile or so to the another junction that says "To Shadow Canyon" right, and Mesa Trail, left. Go right. If you are the Fatiron approach, break off this trail and follow a climber's trail through a rock quarry, and it will eventually lead you to the base of the Fatiron. If you are going to do the talus slog, continue on the Shadow Canyon trail, and it will lead you around the ridge and into Shadow Canyon. Hike up the canyon a ways, and soon you will break out of the trees and see a large talus field up to your right. The Devils Thumb is also visible up on the ridge. Whenever you see fit, break off from the trail and hop up the talus, aiming for the Thumb. As you get higher, you will find that cliffs block the lower part of the base of the overhang. Follow the base of the cliffs on a loose, faint trail until you come to a raptor closure sign. An easy 5th class break in the rock above will lead to the base of the Thumb, skirting the north face of it. The Left Side begins on the east side.
 Approach
Route Description
Once on the slabby east side of the Thumb, Left Side is the obvious left crack, while the right hand crack is Toponas (5.8). Scramble over so you are beneath Left Side and belay from a large break that covers the east side. Scramble up 15 feet to the base of the crack. A fixed ring pin is located to your left, yet it is very old, so you can back it up with some small nuts/small cams in the crack. Climb the crack (easier for taller people) and reach a 12 inch tall metal rod. Belay your second up from here. All in all, about 20 feet of climbing. From the rod, you can easily scramble up to the summit. The rod
Descent: There are chain anchors on the SW side of the summit. Rap back down the east face, landing approximately where your second belayed you up. A 60 M rope barely touches down here, so be careful.
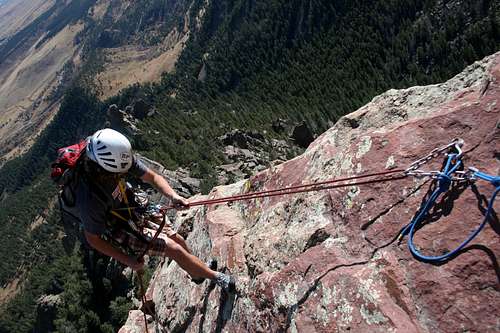 Rappeling