
-
 11219 Hits
-
 83.69% Score
-
 17 Votes
|
|
Route |
|---|---|
|
|
46.40132°N / 10.63187°E |
|
|
Mountaineering, Mixed |
|
|
Summer |
|
|
A few days |
|
|
UIAA grade I - III |
|
|
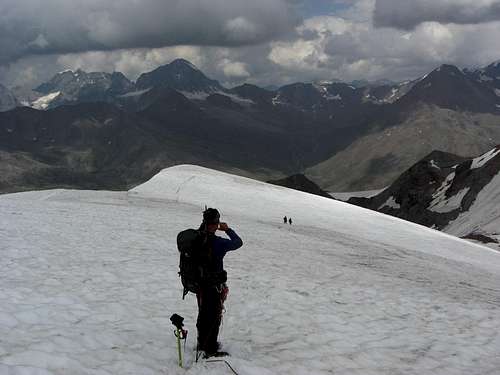
Overview
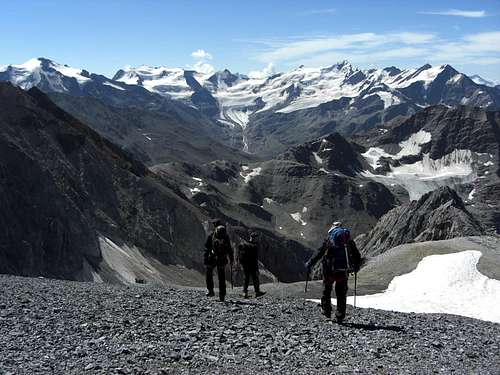
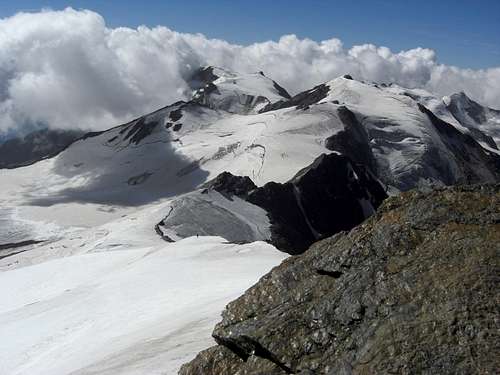
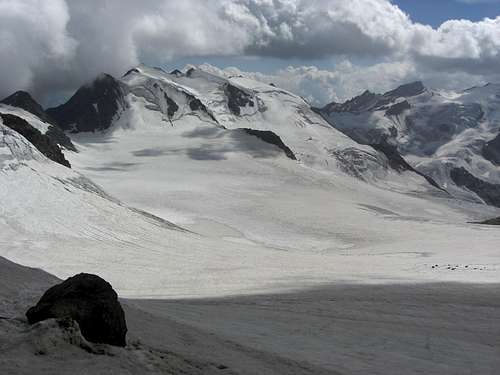
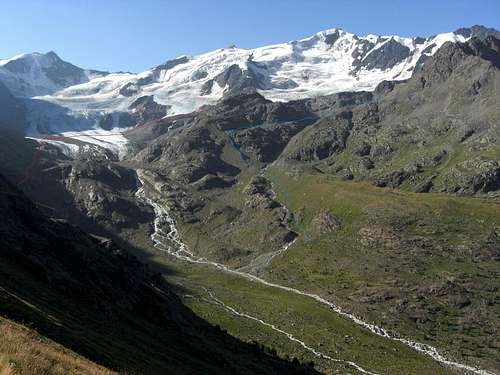
Forni mountains as seen from Cima della Miniera
“La Traversata delle 13 Cime” is called a long and demanding two or three days traverse of 13 peaks with a height of more than 3000 meters in the southern part of the Ortler Alps. This part of Grupo di Ortles / Ortler Alps is originally Italian speaking and well known among Italian mountaineers but less known among the other mountaineering communities.
Besides the climb of Ortler or Königsspitze / Gran Zebrù this traverse is the best thing you can do within Ortler Alps. It offers a huge variety of mixed ice, snow, glacier and rock terrain and must be rated in parts PD / PD+ and especially the middle part of the traverse AD / AD-, always depending on the snow, weather and rock condition.
A very warm summer like this one in 2015, when I did the traverse with some colleagues, add to the difficulties as there is more rock climbing and less snow, more ice slopes, which require good crampon work, and more and wider bergschrunds and crevasses. The vanishing permafrost cause more instabe rocks and thus more rockfall.
In early summer you can avoid some of these difficulties if there was enough snow in winter / spring time and enough cold weather beforehand. You may then meet some ski touring folks on the peaks of your traverse as some of these summits are nowadays frequented by ski touring in springtime and early summer.
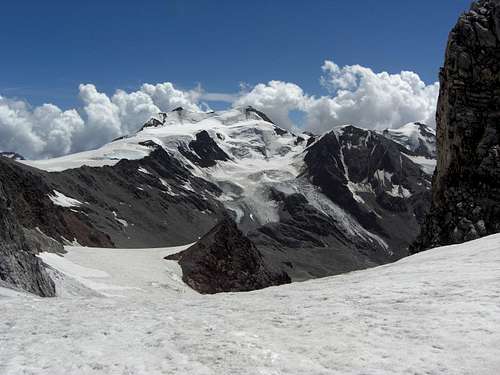
Monte Cevedale, the start summit of the traverse, as seen from Col Pale Rosse
The route itself is well equipped with mountain huts and bivvy shelters. Some short rock parts exeed UIAA grade III, these are secured with iron chains, fixed ropes and even some iron pegs. In two parts the route is marked with yellow signs as these parts can be a bit confusing. The rest of the route is rather obvious and the best thing is: stay on the ridge crest as long as it is possible. Sometimes you meet cairns but the most time there is no marking at all besides the scratches of crampons on the rock.
Most people start the traverse at Rifugio Casati and end it at Rifugio Berni / Gavia pass or at Rifugio Branca after a two or three days work. We did the traverse in three days, starting from Rifugio Pizzini-Frattola, ending at Rifugio Branca and I will describe the traverse likewise.
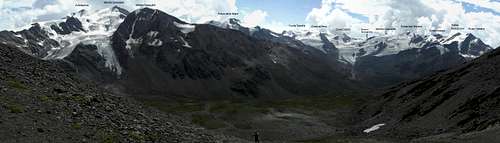 Panorama view from below Passo di Zebrú to the Forni mountains and the peaks of the traverse
First day:
From Rifugio Casati (3269 m) to Rifugio Mantova al Vioz (3535 m)
Summits:
- Monte Rosole (3529 m)
- Palon de la Mare (3685 m)
- Monte Vioz (3645 m)
Bivvy shelter:
Bivacco Colombo (3485 m) at Monte Rosole, 9 sleeping places, blankets; snow for water about 50 m below the bivvy.
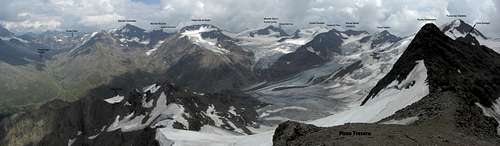 Summit panorama as seen from Pizzo Tresero, the 13th peak of the traverse, on all the other 12 peaks
Second (and third) day:
from Rifugio Mantova al Vioz to Bivacco Seveso (3420 m) (if done in one day), alternatively to Rifugio Berni (2541 m) or Rifugio Branca (2487 m) (if done in two days) with an overnight stay at Bivacco Meneghello (3453 m)
Summits:
- Punta Linke (3637 m)
- Punta Taviela (3612 m)
- Cima di Peio (3549 m)
- Rocca Santa Catarina (3529 m)
- Cima Cadini (3524 m)
- Punta San Matteo (3678 m)(additionally: Monte Giumella (3594 m))
- Cima Dosegù (3560 m)
- Punta Pedranzini (3599 m)
- Pizzo Tresero (3594 m)
Bivvy shelters:
Bivacco Meneghello (3453 m) between Cima Cadini and Punta San Matteo above the Colle degli Orsi, 6 sleeping places, blankets, water only on the southern glacier about 150 m below the bivvy. This is the second overnight stay when the traverse is done in three days!
Bivacco Seveso (3420 m) on the south ridge of Pizzo Tresero, 9 sleeping places, blankets, water about 100 to 200 m below the bivvy on the glacier; best overnight stay for the second day if you do the summits 5 to 13 in one day (10 – 12 hours at minimum).
Getting There

Rifugio Pizzini-Frattola
Starting points for the route in the north are:
Starting points for the route in the west are:
I would recommend to start in the north. The first day from Casati or Pizzini hut (about 1,5 to 2 hours longer) is the easier part of the traverse. The two huts in the west are located a bit too low for a good start and it will take you several hours and – when starting at Rifugio Branca – a difficult glacier ascent to get to the beginning of the ridge (Pizzo Tresero). If you start from the west take an overnight stay at Bivacco Seveso; it will be easier to start near the ridge in the next morning.
Rifugio Casati
You reach Rifugio Pizzini-Frattola best within a 2 hours walk from the Forni parking area at a height of 2178 m, coming up the valley road which branches off at Santa Catarina di Valfurva near Bormio.
Another two hours from Rifugio Pizzini bring you up to Casati hut, if you don´t like to stay at Pizzini hut and wish to have a higher start and a shorter first day.
Rifugio Casati can be reached, too, from Sulden/Solda cablecar parking area. Go up the forest road to Schaubachhütte and follow the trail to Eisseepass / Passo di Lago Gelato. A short upward traverse on Langerferner glacier brings you up to the huge Rifugio Casati.
A third ascent possibility is starting at the end of Martelltal; parking area after Zufritt dammed lake. Ascend to Eisseepass and follow the track on Langerferner to Casati hut.
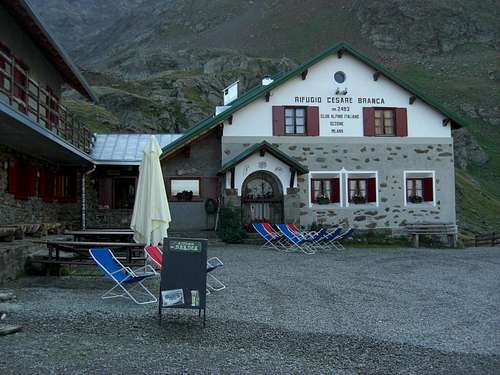
Rifugio Branca
Rifugio Berni is located alongside the Gavia pass road; there is a parking area. You can ascend directly to Bivacco Seveso from Berni hut on a good and marked trail (3 to 4 hours).
A 1 hours ride will bring you to Rifugio Branca which is an excellent stay with really good Italian food (five course dinners!!!) starting at the Forni parking area above Santa Catarina di Valfurva.
I would recommend to descend to Branca hut from Pizzo Tresero / Bivacco Seveso, as the retreating Forno glacier, still a huge glacier, is becoming more and more difficult and navigating the crevasses during a descent is easier than ascending.
Route Description
The description will start at Rifugio Casati and end at Rifugio Branca. This is how most mountaineers will do this traverse.
Ascent Rifugio Casati – Monte Cevedale summit
You hit the Langferner / Zufall glacier right below the hut. Rope yourself up and follow the broad glacier trek in southern direction navigating around a steeper section with crevasses on its left side (in the ascent sense). You will pass by some ski lift pillars, half submerged in the glacier, testimony of a long gone dream about a ski resort with Casati hut as a hotel.
 Monte Cevedale Monte Cevedale |
>
 start at Casati hut, Königspitze in the back start at Casati hut, Königspitze in the back |
 the glacier track to Monte Cevedale the glacier track to Monte Cevedale |
You reach a near level part of the glacier. Ascend from there more steeply in the direction of the connecting ridge Zufallspitze – Monte Cevedale and look for a possibility to overcome the bergschrund. A last steep slope, mostly iced, leads you up to the summit ridge where there is now an impressive ice gap of about 15 m height where the summit part of the glacier opened wide due to the common glacier melting. The snow track passes by this gap and enters the narrow snow ridge which leads to the summit of Monte Cevendale.
 Ascending Monte Cevedale Ascending Monte Cevedale |
 Cevedale bergschrund Cevedale bergschrund |
 Cevedale summit crevasse Cevedale summit crevasse |
Zufallspitze can be summited back and forth on the connecting ridge from Cevedale summit (1 hour; snow and rock, UIAA grade I) or via the north ridge of Zufallspitze and the connecting ridge to Cevedale (extended traverse, 1,5 hours longer, steep snow/ice and rocks, UIAA grade I+).
 Monte Cevedale summit ridge Monte Cevedale summit ridge |
 Monte Rosole, Palon de la Mare and Monte Vioz as seen from Cevedale Monte Rosole, Palon de la Mare and Monte Vioz as seen from Cevedale |
Traverse Cevedale – Monte Rosole / Bivacco Colombo
Descend the south glacier slopes of Monte Cevedale to Passo Rosole. Traverse on the glacier to the beginning of the Monte Rosole rock ridge. Some easy scrambling leads you up to a first culmination point of the Monte Rosole ridge.
 Passo Rosole Passo Rosole |
 Monte Rosole ridge Monte Rosole ridge |
 Monte Rosole ridge Monte Rosole ridge |
Climb down into a notch (UIAA grade I, good rock), follow the rock and talus ridge (nice scrambling) until you ascend to a huge, steeply inclined slab. The slab is the rock crux of the first part of the traverse (UIAA grade II -). There are some cracks and tiny fractures for the climb; above there is a fixed bolt for some extra security if the need arises (ice, snow). You then follow the summit ridge to Monte Rosole.
Immediately after the summit a steep track let you down through unstable terrain full of scree and talus to Bivacco Colombo for a first good rest.
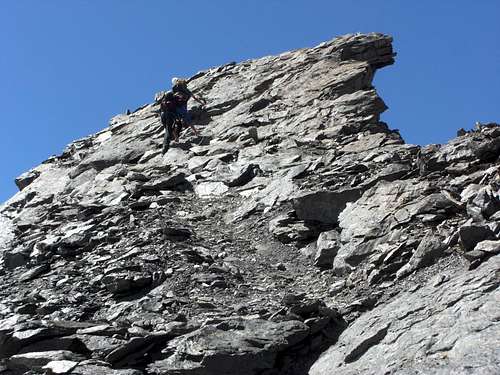 The crux of Monte Rosole The crux of Monte Rosole |
 Monte Rosole summit Monte Rosole summit |
In former times there was a possibility to bypass Monte Rosole rocks on its east side. Due to glacier retreat this option does not look very good any longer (mixed ice and steep rock terrain; condition of begin of August 2015).
Traverse Palon de la Mare – Monte Vioz to Rifugio Mantova
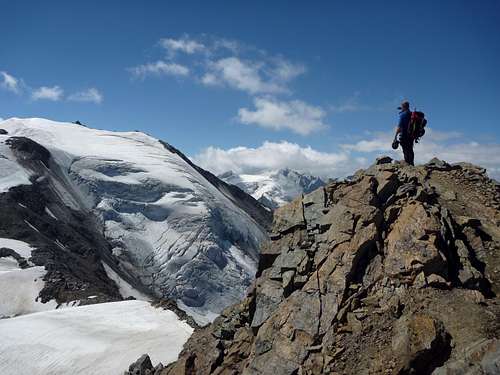
From the bivvy shelter go down to the glacier and traverse to Col de la Mare. Ascend to Palon de la Mare first on the very right side of the glacier slope (in sense of the ascent) then traversing to the left to some rock outcrops half way up to the Palon summit. Pass by the outcrops and traverse a level part of the glacier to reach the broad north ridge of Palon de la Mare. Follow the snow and ice ridge up to the summit (look out for crevasses!).
 Col de la Mare with Monte Rosole and Monte Cevedale Col de la Mare with Monte Rosole and Monte Cevedale |
 Ascending Palon de la Mare Ascending Palon de la Mare |
Step down some meters to the beginning of the south rock ridge.
There is a trail junction with a sign post: to the right there is the descent to Rifugio Branca, a bailout option for e.g. bad weather.
If you stick to the traverse follow the south ridge down to Colle della Vedretta Rossa. This ridge is no fun as the permafrost melted away and the whole ridge consists of loose and instable rock. Be careful and avoid as long as possible the flank slopes left and right of the ridge crest. Sometimes you must enter them; we then send a hailstorm of loose rocks down to Forni glacier.
You reach at last the glacier in front of a huge rock tower; traverse on steep snow and ice into the slightly lower col.
 Passo della Vedretta Rossa with Punta Taviela and Forni glacier Passo della Vedretta Rossa with Punta Taviela and Forni glacier |
 Ascending Monte Vioz Ascending Monte Vioz |
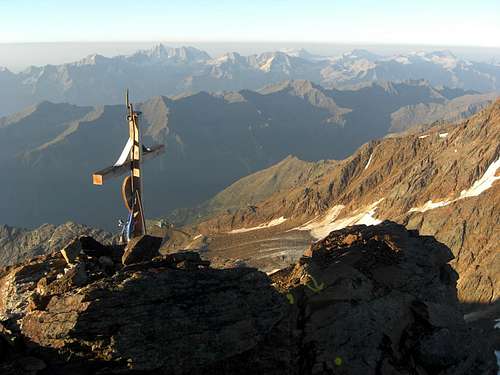
At the col you can once more bail out and descend the Forni glacier to Rifugio Branca. From the col ascend on the uppermost Forni glacier to Monte Vioz. It is an easy ascent but can be full of unexpected crevasses up to the summit rocks. The highest point of Monte Vioz is marked with a short pillar. Some 20 meters lower on the south ridge there is an additional summit cross. Descend to the cross and follow the trail on the south ridge down to the nearby Rifugio Mantova al Vioz.
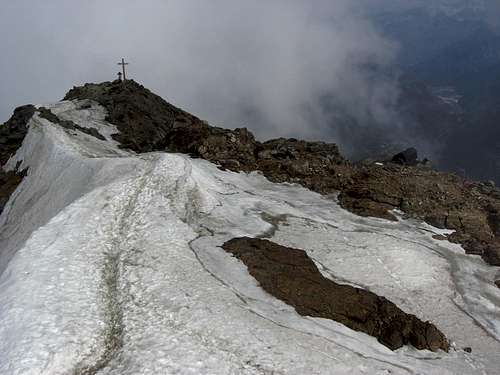 Monte Vioz Monte Vioz |
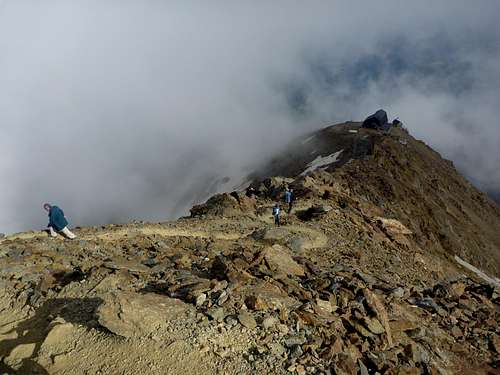 South ridge to Rifugio Mantova South ridge to Rifugio Mantova |
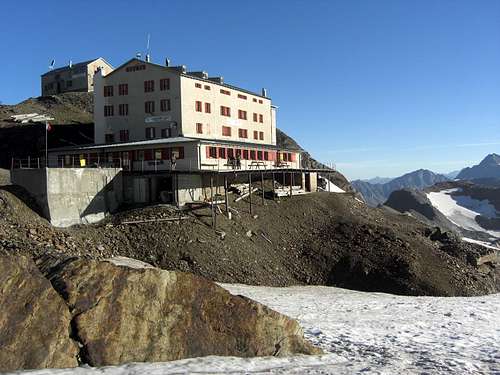
This hut is one of the highest huts of the whole eastern Alps (3535 m). Normally you will have there your first overnight stay of the traverse. I can recommend this hut, it is nicely kept with friendly, helpful staff and good food.
In case of bad weather there is a good trail from the hut down to the Peio cablecars and the village of Peio on the south side of Ortler mountains.
Rifugio Mantova – Punta Linke
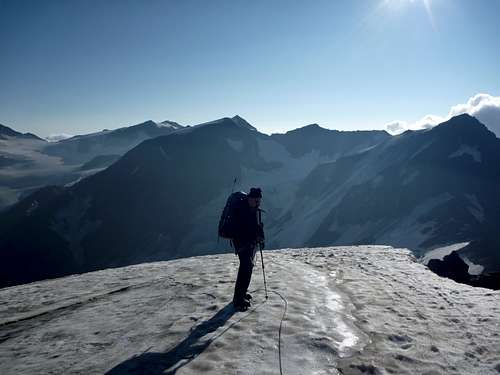
Best start at 04:30 / 05:00 a.m. at Rifugio Mantova. Reclimb Monte Vioz and enter the uppermost glacier. Follow it in western direction alongside old wood stakes, a former military telephone line of the First World War.
 Monte Vioz morning scenery Monte Vioz morning scenery |
 Punta Linke with start marks for the traverse Punta Linke with start marks for the traverse |
You now enter the realm of the Italian First World War front line. Along the traverse route you will hit several fortified holds with barracks attached to steep rocks, dugouts cut in rock for the soldiers, food and ammunition supply trails, barbwire secured cols and – most dangerous – munition rests. Stay away from them. Nearly every year exploding munition injures or even kills mountaineers!
Punta Linke is the western rock outcrop of the Monte Vioz summit plateau. It was one of the major holds between Monte Vioz and Pizzo Tresero. You can – if you like – visit the remains of this sub – headquarters while ascending to the tiny summit cross.
Punta Linke – Punta Taviela
Tha landlord of the Mantova hut has marked the first part of the traverse between Punta Linke and Punta Taviela (but only that part!), as the route would be somehow hard to find. There is a yellow arrow and huge yellow bubble-like dots which show you down a first steep chute starting right behind the summit cross. The chute is full of loose scree and has some parts of UIAA grade I – II scramble. When wet or icy, belaying is a must.
You leave the chute some 50 to 80 m below the summit to the left to gain the main ridge (easy scramble, no marks). Some talus hopping bring you down to a snow or ice col between Punta Linke and a secondary rock outcrop, which has to be overcome on easy talus and rocks. Climb easily down to Colle Vioz, the lowest point of the whole traverse.
 Chute after Punta Linke summit Chute after Punta Linke summit |
 Marked downclimb from Punta Linke Marked downclimb from Punta Linke |
 Punta Linke and the rock outcrop with Colle Vioz in front Punta Linke and the rock outcrop with Colle Vioz in front |
At Colle Vioz you easily (august 2015) can enter the Forni glacier to bail out in northern direction if the need arises. You can traverse the upper Forni glacier to the snow track leading down to Rifugio Branca.
At Colle Vioz the route is marked again to get the easiest way up to the top of the secondary rock summit of Punta Taviela which has to be climbed next. The marks are yellow arrows, huge dots and sun-wheel like pictograms as well as very old and withered red marks.
 Ascent to Punta Taviela Ascent to Punta Taviela |
 Climbing Punta Taviela Climbing Punta Taviela |
 Punta Taviela glacier with Cima di Peio and Punta San Matteo Punta Taviela glacier with Cima di Peio and Punta San Matteo |
The ascent (about 200 m of altitude difference) is very steep, exposed and has in its upper parts some interesting rocks (UIAA grade II) to overcome. The first rock section is secured with an iron chain due to some scree and unstable rocks. The second part near the top of the rock section to Punta Taviela is unsecured but in good and firm rock. In between there are long parts of steep walking terrain with scree and loose talus. The route navigates around obstacles and difficult climbing parts and reaches at last the top of the rock section of Punta Taviela. There the marked section of the traverse ends! Besides of some cairns there will be no other marks than the many crampon scratches on the rocks.
 Punta Taviela as seen from the end of the rock section Punta Taviela as seen from the end of the rock section |
 Ice and glacier part below Punta Taviela summit Ice and glacier part below Punta Taviela summit |
After a short level section on easy slabs you enter the summit glacier of Punta Taviela. Follow it as high as possible to avoid the bergschrund, ascending in direction of the already visible summit. Climb the summit on some easy rocks.
When arriving there you might be surprised how many people climb Punta Taviela. They all use the snow and ice free south route (also a bail out option for the traverse), starting at the cablecar mountain station of the Peio cablecars. Thus Punta Taviela is an easy and frequented 3000 m peak in the southern Ortler Alps.
Punta Taviela to Bivacco Meneghello
The section between Punta Taviela and Bivacco Meneghello / Colle degli Orsi (the bears col) is the most difficult part of the whole traverse as to rock difficulty. It is this part why I rate the route as AD / AD-.
 Traverse Punta Taviela – Cima di Peio Traverse Punta Taviela – Cima di Peio |
 Traverse Punta Taviela – Cima di Peio Traverse Punta Taviela – Cima di Peio |
 Traverse Punta Taviela – Cima di Peio Traverse Punta Taviela – Cima di Peio |
Climb down Punta Taviela´s west ridge on easy talus until you reach a notch. From there on the ridge gets sharp and very exposed. Stay on the ridge crest and climb down some steep slabs and “knife edge rocks” (UIAA grade II) until you reach another notch.
 Traverse Punta Taviela – Cima di Peio Traverse Punta Taviela – Cima di Peio |
 Climbing the “cockscomb” Climbing the “cockscomb” |
 Rocca Santa Catarina and Cima Cadini Rocca Santa Catarina and Cima Cadini |
You are in front of some wild looking rock features on the ridge, we called it the cockscomb, the first part of the ascent to Cima di Peio. Follow the foot tracks and climb then some astonishingly easy rocks up to a sharp notch near a bold pinnacle which seems to tumble down every second. Pass through the notch and climb some easy rocks and snow fields to the first of the two Cima di Peio summits. A short descent on snow and scree and a traverse of the summit ice field brings you to the second (and official) Cima di Peio summit.
At Cima di Peio the ridge bends to the south for the section to Rocca Santa Catarina. This is the crux section.
 Cima di Peio Cima di Peio |
 Traverse to Rocca Santa Catarina Traverse to Rocca Santa Catarina |
 the crux section of the traverse the crux section of the traverse |
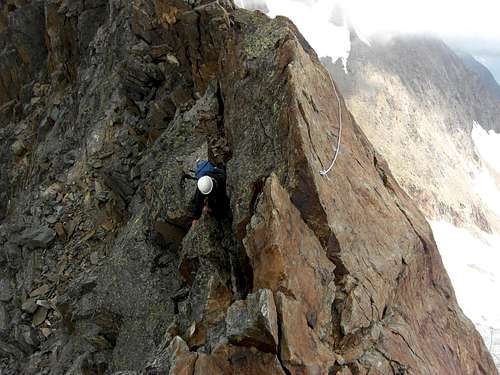
First climb down from Cima di Peio on easy talus and rocks into the col between the Cima and the Rocca. South of the col a perpendicular rock face blocks the route. I first thought you have to navigate round that rock face (about 20 m) to the left, but wrong: you have to tackle it directly. It looks to me like UIAA grade III. The many crampon scratches on the rocks show you the way. It is directly up, there are few holds for hands and feet and – in august 2015 – there was a rather used and worn out sling dangling down the most difficult steps, not the thing to trust your life with. This section is exposed and – if you have passed it – the whole following ridge will be exposed until you reach Rocca Santa Catarina summit.
 crux section crux section |
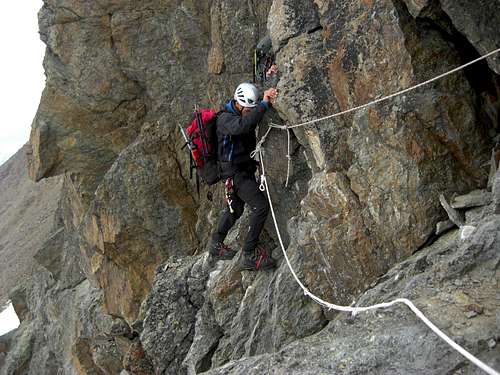 crux section crux section |
Easier rocks follow now but the ridge stays narrow and exposed. After some ups and downs you arrive at a significant drop of the ridge and you will see an iron chain and U-shaped bolts. There is a 10 m perpendicular rock face – UIAA grade V unsecured – with some of these bolts to help you down to a dihedral crack which has to be climbed down (UIAA grade II). At the end an exposed traverse leads you back to the ridge crest (august 2015: damaged fixed rope, not secure!). The route follows the ridge crest in some ups and downs and you arrive at a huge and steep slab with an extension of about 30 m. There again are fixed ropes but in august 2015 parts of them were severely damaged!
 traversing to Rocca Santa Catarina traversing to Rocca Santa Catarina |
 traversing to Rocca Santa Catarina traversing to Rocca Santa Catarina |
 traversing to Rocca Santa Catarina traversing to Rocca Santa Catarina |
You can pass this obstacle on the (left) side with the fixed ropes – I do not recommend to use them – using the upper knifes edge end of the slab as a hold or on the other (right) side. There is a crack with a gap in the rock which gives room for a not very elegant but effective bypass of the steep slab.
Brachiating along the slab naturally is much more elegant!
 the slab (and its bypass) the slab (and its bypass) |
 Cima Cadini as seen from Rocca Santa Catarina Cima Cadini as seen from Rocca Santa Catarina |
After that easier rocks and later some walking ground leads you down and up again to the summit of Rocca Santa Catarina.
At the Rocca summit the ridge bends again to the west. Climb down some rock outcrops to easier talus ground and to the col between Rocca Santa Catarina and the next summit: Cima Cadini.
 World War traces at Cima Cadini World War traces at Cima Cadini |
 Summit view from Cima Cadini Summit view from Cima Cadini |
 Cima Cadini west face/northwest slope Cima Cadini west face/northwest slope |
An easy snow ridge leads up to the dark summit rocks of Cima Cadini. During World War I Cima Cadini was an important hold. You see rests of wooden shacks and barracks on the south side of the summit rocks and wooden staircases leading up to the summit. You can use the uppermost part of these war trails to reach the summit. There are more rests of wooden and stone barracks and barbwire obstacles on or below the summit plateau.
For the descent use the uppermost north ridge for some meters. You reach some foot tracks to your left, steeply leading down a loose scree and talus slope (for sure snow in late spring/early summer), the northwest slope of the mountain. You may use the west ridge, too, starting right from the summit but this part did not look very inviting, so we used the foot tracks and the slope.
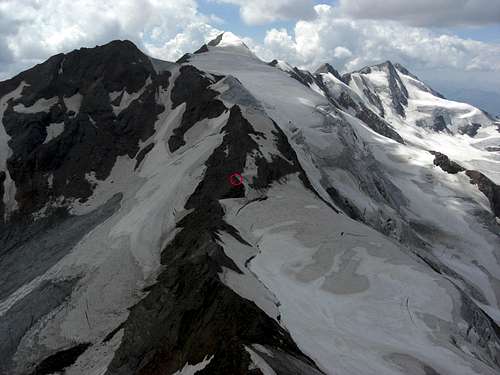 Punta San Matteo and the Bivacco Meneghello location (red circle) Punta San Matteo and the Bivacco Meneghello location (red circle) |
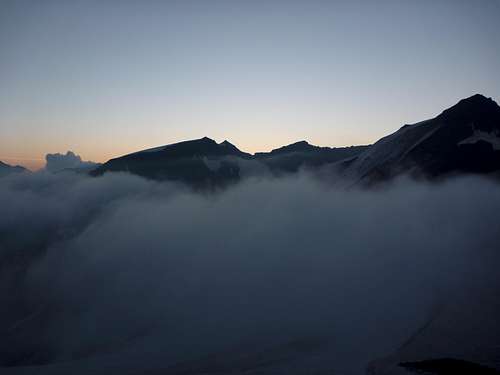 Morning scenery at the Bivacco Meneghello Morning scenery at the Bivacco Meneghello |
Stay left in the lower parts of the slope to regain the ridge. After about 100 m of altitude difference you reach a short flat part of the ridge, the beginning of the broad Colle degli Orsi, an important pass of the whole ridge. There you can leave the ridge to your right to gain the uppermost part of the glacier. Navigate around the rock outcrops of Colle degli Orsi on the glacier – it can be steep ice you have to deal with – to gain the lowest part of Colle degli Orsi where the glacier levels out. Regain the rock ground there if you want to stay (or visit) the Bivacco Meneghello – the traverse route goes straight up the snow slope of Monte Giumella and navigates around the Bivacco – and follow a foot track and some easy rocks up to the small bivvy shelter which is located some 50 m above the Colle degli Orsi.
 Bivacco Meneghello Bivacco Meneghello |
 Bivacco Meneghello Bivacco Meneghello |
 Bivacco Meneghello Bivacco Meneghello |
If you want to stay the night inside: there are 6 bunk beds and the shelter is so tiny that more than 6 people inside would be a miracle …
The best chance to get water is about 150 m below the Bivacco on top of the glacier south (!) of Colle degli Orsi.
From Colle degli Orsi you can bail out to the south or the north, the south route via Vedretta degli Orsi glacier being the easier option!
Bivacco Meneghello to Pizzo Tresero (Bivacco Seveso)
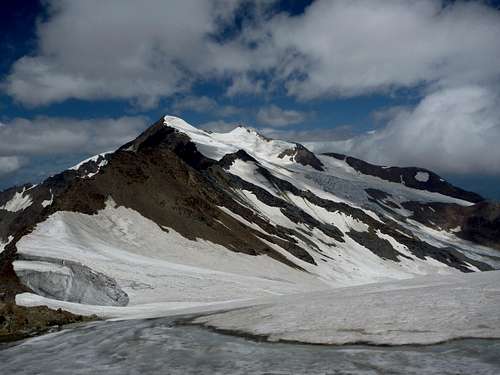
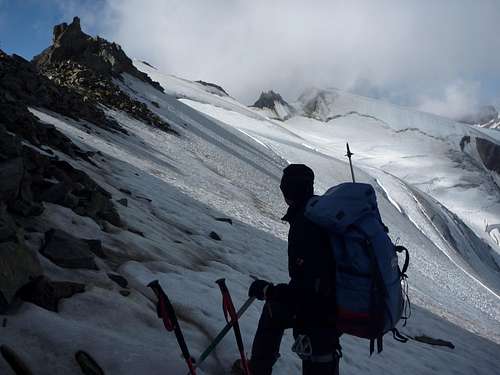
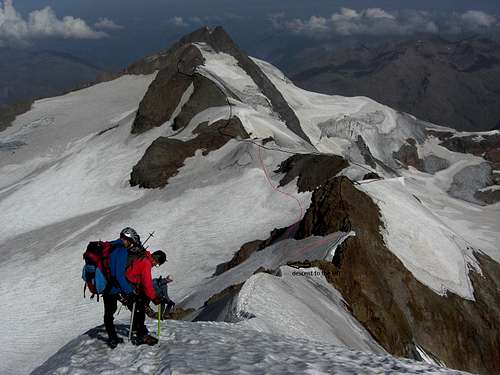
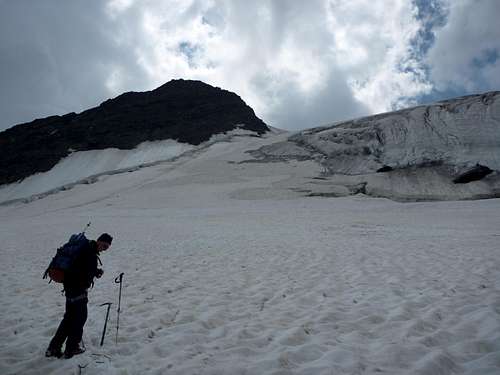
To regain the traverse route climb some rocks above and left of the Bivacco and then traverse to your right. Follow the snow track onto the ice fields and glacier plateau east and north of Monte Giumella and Punta San Matteo. After so much rock scrambling and climbing it is a nice change to simply and easily walk up an elegant snow ridge and arrive at the level part of the glacier between Monte Giumella and the summit slope of Punta San Matteo.
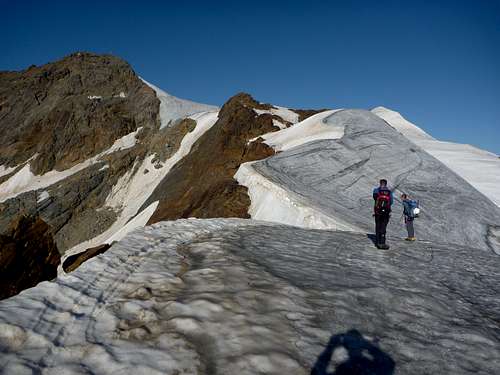 Glacier ascent to Punta San Matteo Glacier ascent to Punta San Matteo |
 Glacier ascent to Punta San Matteo Glacier ascent to Punta San Matteo |
Monte Giumella can be climbed via the steep snow slope and a short UIAA grade I rock climb in about 0,5 hours.
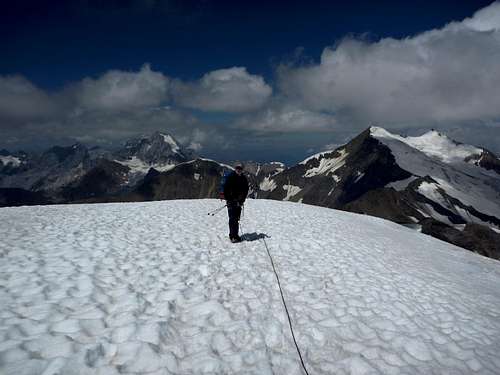
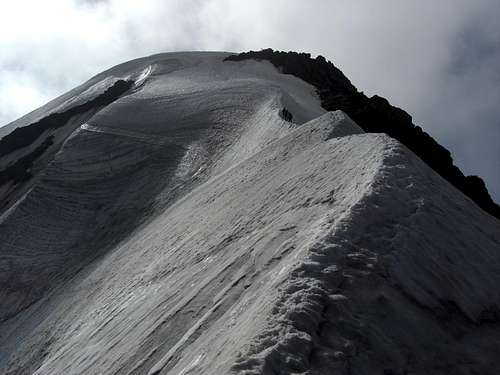
Traverse the glacier flat to the west (crevasses!) and climb the steepening summit slope up to the east ridge of Punta San Matteo (corniches to the north!!). Follow the snow ridge to the summit with spectacular views.
 Punta San Matteo Punta San Matteo |
 Monte Giumella Monte Giumella |
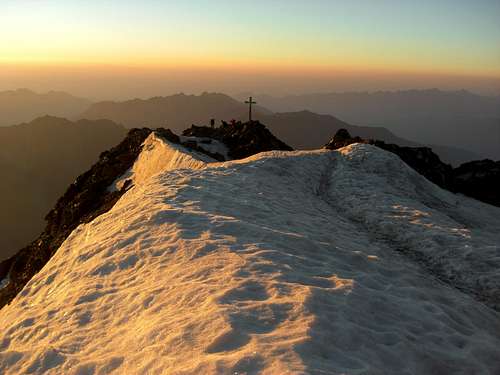
 Punta San Matteo summit Punta San Matteo summit |
Punta San Matteo is a one day glacier hike from Passo Gavia / Rifugio Berni so expect people on that summit. The south ridge, too, is a popular route. These south routes are bail out options if the need arises (Ghiacciaio di Dosegù route).
 Descending Punta San Matteo Descending Punta San Matteo |
 Punta San Matteo west ridge Punta San Matteo west ridge |
Our traverse route leaves the summit on the ice and snow slope northwest of the summit cross. The upper part can be nasty when iced. You soon regain the ridge crest; follow it to a first rock outcrop and then turn left. You can climb down instable rocks or a parallel ice and snow chute to the bottom of the outcrop. Go back to the snow ridge until you hit a second and third rock outcrop. Climb them (UIAA grade I) or navigate around them again on the south side by descending onto the glacier (bergschrund, crevasses!!) and then ascending again to a col (crevasses) between the last rocky outcrop and our next summit, the Cima Dosegù.
 Iced section at first rock outcrop Iced section at first rock outcrop |
 to Cima Dosegù to Cima Dosegù |
 A look back to Punta San Matteo A look back to Punta San Matteo |
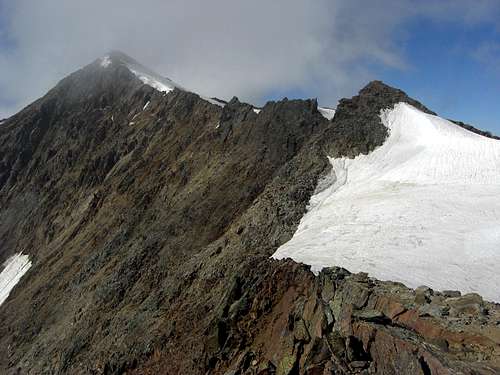
The short ascent to the Dosegù peak starts with a talus and scree slope up to a secondary summit. There is an exposed but easy downclimb into a small notch. Inclined slabs and some talus hopping lead you up to the summit of Cima Dosegù with a huge summit cross and a statue of the virgin Mary.
 Cima Dosegù Cima Dosegù |
 View to Punta Pedranzini View to Punta Pedranzini |
 Cima Dosegù downclimb Cima Dosegù downclimb |
The descent to the west does not look very inviting but soon turns out to be an interesting climb. From the summit some exposed rocks lead to the steep west ridge. The downclimb has good holds for hands and feet and is UIAA grade I / I- in mostly good rock and with exposure. It ends at the broad col between Cima Dosegù and Punta Pedranzini. Mixed snow, ice and rock ground are guiding to the ascent to Punta Pedranzini which is mostly a foot track, interrupted with some short climbs.
 Cima Dosegù downclimb Cima Dosegù downclimb |
 Cima Dosegù west ridge Cima Dosegù west ridge |
 Punta Pedranzini Punta Pedranzini |
The summit of Punta Pedranzini was another important war hold of our ridge between Monte Vioz and Pizzo Tresero. Barracks, wooden shacks, stone buildings, caverns, two rows of barbwire; you can imagine how hard and uncomfortable the life at the front line was.
 Pizzo Tresero Pizzo Tresero |
 Summit view from Punta Pedranzini to the east Summit view from Punta Pedranzini to the east |
 Forni glacier as seen from Punta Pedranzini Forni glacier as seen from Punta Pedranzini |
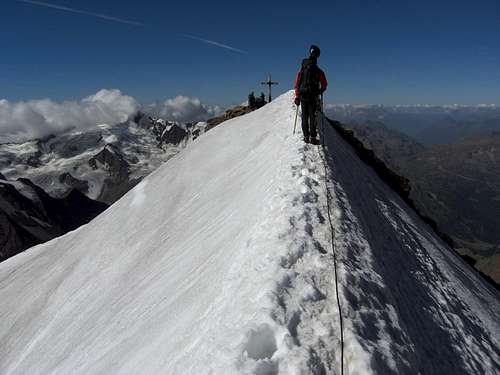
The downclimb to the col between Punta Pedranzini and Pizzo Tresero is the last exposed and steep bit of the traverse, very much like that down from Cima Dosegú. Cross the broad col (snow/ice or talus) and ascent shortly on a foot track to the roomy summit of Pizzo Tresero with its strange summit cross.
This is the last of the 13 (14 or 15) summits of this grand traverse.
Descending from Pizzo Tresero (Bivacco Seveso)
There are two descent options from Pizzo Tresero.
The south route via Bivacco Seveso to Rifugio Berni at the Gavia pass road I do not know. Bivacco Seveso sits on the south ridge of Pizzo Tresero, about 150 m of altitude difference lower than the summit. To get water you have to climb down another 100 to 150 m to the glacier below the Bivacco. It seems to be talus ground and easy rocks for the descent from the summit to the bivvy shelter.
The trail from the Bivacco to Rifugio Berni seems to be partly marked and – following some internet articles – cannot be missed. With enough snow on the south side of the mountain you can descend the dirct south slope, too. This is also the ski route from the south to Pizzo Tresero.
The south route is for sure the easier and less complicated descent from Pizzo Tresero.
Nevertheless if your car is at Sulden or Forni parking area a descent via the north route is better. Due to glacier retreat the Forni glacier starts to decay into several isolated parts and the glacier tongues are more or less separated now. Thus the descent is complicated in summer, for sure easier in early summer like end of june through mid-july.
 Descending Forni glacier, upper part Descending Forni glacier, upper part |
 Descending Forni glacier, upper part Descending Forni glacier, upper part |
Start your descent near / west of the lowest part of the col between Punta Pedranzini and Pizzo Tresero. Descend first in the direction of the northwest face of Punta Pedranzini; there are three (!!) bergschrund crevasses which have their “weak” parts on the Pedranzini side of the upper glacier slope.
After the third bergschrund stay left and descend to a noticeable glacier shoulder on the left bank of the upper glacier thus navigating round a nasty ice fall which cannot be seen from the top of the glacier.
From the shoulder follow the left bank of the glacier eventually navigating round a rock outcrop on its right side. You are now above a col. Stay right and descend a glacier slope to reach the huge glacier plain below Cima Dosegú and Punta Pedranzini. Cross this plain until you are right below the summit of Punta San Matteo. This is important because of huge crevasse zones on the left, west side of the glacier.
 Pizzo Tresero ice falls Pizzo Tresero ice falls |
 Glacier action Glacier action |
In summer you will now see a sort of middle moraine. Follow this moraine down the glacier. When you reach crevasse zones go more to the right than to the left to better navigate around them. You are now right of the middle moraine. At about 2800 m height there is a rock outcrop to your right. Follow the steepening glacier near the right glacier rim. There are some huge longitudinal crevasses with broad but steep ice ridges between them. Climb down one of these ice ridges to the end of the glacier. Cross the muddy plain at the end of the glacier and descend the scree slope down to the glacier tongue coming down from Monte Vioz.
Cross this glacier tongue and the huge middle moraine to its northern rim where it is easy to climb the northern side moraine. This is possible left/west of a noticeable rock face. On the northern shore of the glacier you soon will find some cairns. Follow the cairns in northwestern and western direction until you reach the marked trail coming up from Forni parking area. Follow that trail to a lake and then ascending to Rifugio Branca.
 Descending Forni glacier Descending Forni glacier |
 Lower Forni glacier route Lower Forni glacier route |
Advices for summer conditions:
It is important to stay right on the glacier as the left side has huge crevasse zones and a steep rock face at its end.
It is also important to cross the Forni glacier tongue coming down from Monte Vioz if you want to go to Rifugio Branca. You avoid the problem how to cross the glacier creek without getting wet or drowning.
If you want to go straight away to Forni parking area you can leave the glacier higher up and avoid the zigzag route of the lower glacier part. Stay to the left at the huge glacier plain and aim for the part of the glacier which flows between the outcrops of Cima San Giacomo to the west (left) and L´Isla Persa to the east (right). This glacier tongue ends soon (2015). Best stay on the orographic right side of the glacier creek and descend the valley until you reach a huge green meadow ledge below L´Isla Persa. Follow that broad ledge until you reach the trail from Forni parking area to L´Isla Persa. Descend the trail to the parking area.
Red Tape & Accommodation
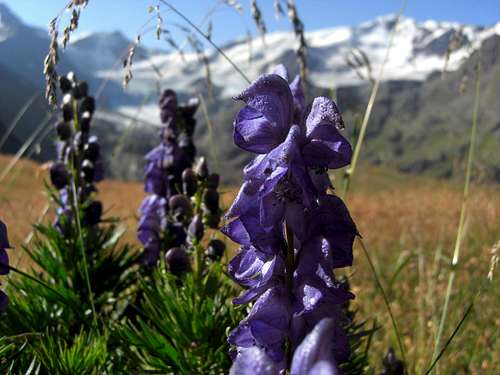
Aconite against Punta San Matteo
Red Tape
The traverse is part of the Italian National Park “Parco Nazionale dello Stelvio”.
There is no entrance fee but the park as a whole with its fauna, flora, rocks and waters is strictly protected. Overnight stays are only allowed in huts, bivvy shelters or in tents in the immediate vicinity of the huts / shelters.
Please respect any rules indicated on information panels at the boundaries or inside the park. There are many rare plants and animals within its boundaries.
Accommodation / Mountain huts and Bivaccos
Gear & Mountain Condition
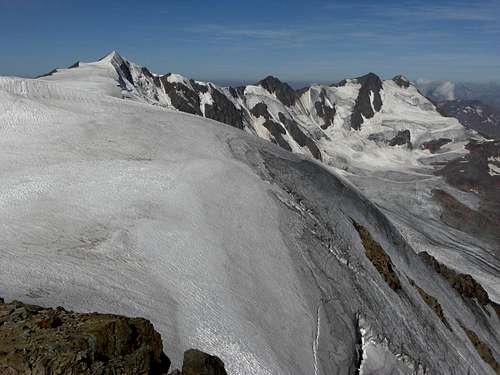
Punta San Matteo, Cima Dosegù, Punta Pedranzini and Pizzo Tresero as seen from the ascent to Punta Taviela
The traverse is a long and demanding outing on mixed rock, glacier and snow ground.
I would rate the traverse between PD+ to AD / AD-.
Rock climbing is up to short parts UIAA grade III and longer parts of grade II and I, often exposed and airy. There are some bolts and slings for belay but not many of them! More difficult parts than grade III are secured with iron chains, U-shaped bolts or fixed ropes. The latter are easily damaged so don´t rely on them.
Parts of the traverse are in instable rocks, talus and scree slopes, thanks to the retreating permafrost.
If the rock parts are iced you may have to climb even the difficult rocks with crampons!
The glacier parts require the ability to move on steep snow and ice slopes and to handle crevasses and sometimes tricky bergschrunds.
Only two short parts of the traverse are marked with yellow signs. The rest is unmarked besides of some cairns. Route finding is not difficult though as you stay most of the time on the ridge crest or you see foot tracks in scree and snow sections or crampon scratches on the rocks.
The whole thing gets more complicated if there is less snow. Due to global warming many former snow ridges are now rock ridges! This means more climbing and more time required for the traverse. This means, too, that the route will continue to change!
You need as a minimum a rope (glacier and rock; we had a 30 m half-rope for two people), harness, some carabiner and draws, slings, an ice-screw per person, ice-axe, crampons and a helmet (as an option).
For a bivvy night you need at least a stove. All three bivvy shelters have blankets, pots and some dishes and mugs, the Bivacco Colombo even had an Italian coffee maker. But all this may change so don´t rely on that.
Current Weather for Punta San Matteo:
Map
The best map of the region and for the traverse is:
Tabacco map, number 08 Ortlergebiet
Bormio - Stilfser Joch - Trafoi - Gomagoi -Sulden - Martelltal - Peio - Gaviapass - S.Caterina Valfurva – Martelltal, with UTM-grid, trails, ski routes and MTB-routes; scale 1 : 25.000, edition 2014
Other maps (Freytag & Berndt, Kompass) are more for hikers, they are - in my opinion - not applicable for mountaineering.
The german guide book of the Ortler Alps, Bergverlag Rudolf Rother, is out of stock and due to the snow and glacier retreat in some parts incorrect for the route.