Delorme Earthmate PN-40
Background
Around September of 2008 I began looking for a GPS unit. I had put off getting a GPS for awhile, having always relied on my map and compass skills. The big catalyst for me in getting a GPS was the fact my local REI stopped carrying their map producing computer. (They had some software on a computer, and you could choose your area and print out USGS 7.5 minute equivalent maps). After they converted that computer into their online catalogue, I was having a tough time getting maps for some of the areas I wanted to explore, especially in the detail I wanted (7.5 minute maps). Once I started looking at mapping software, I quickly realized that for only about $100 more, I could accompany the software with a GPS unit.What I Was Looking For...
After hearing about GPS units for about the last 10 years, I was expecting a MIMIMUM of the following:1. Color screen
2. USGS Maps (7.5 minute maps) displayed on the screen
3. Software to accompany the GPS
4. 3D capability on the desktop software
5. Routability on-trail (In other words, if I was at spot “X,” I could have my GPS route me to spot “Y” ON A TRAIL).
6. Not only usable for hiking, but also for car navigation (for getting to isolated trailheads)
7. Waterproof for kayaking use
8. Maps available for near-shore kayaking and waterways
9. Satellite reception in all weather conditions
10. Battery life to be a minimum of 20 hours
11. Rechargeable battery option
12. Real-time tide chart information
13. Sunrise/Sunset information
14. Points of interest loaded on the unit (for in-car navigation)
15. Small enough to fit in my pant’s pocket
16. Able to consistently work in cold weather (sub-freezing temps)
17. Capable for using during mountain biking and cycling
18. Electronic compass and altimeter
After doing some searching, I quickly found that some of my prerequisites were either impossible to find or only found on very expensive units. I also quickly discovered one KEY feature that I was seeking, 7.5 minute maps, were not widely used in the GPS industry. Not only that, but I found out many GPS units did not even come with maps, and for some units, the only maps available were at a 1:100,000 scale!
I guess for some people, or MOST people that are buying GPS units, a 1:100,000 scale is okay. However, my main focus for having a GPS unit would be to verify my position on a map, especially when traveling off-trail, as I usually end up doing. For this reason, the 7.5 minute maps provided by USGS, or equivalent, were of the utmost importance.
Comparisons with other Leading Units
After some research, I basically came down to a handful of units that I was going to choose from:1. Garmin eTrex Vista Hcx
2. Garmin GPS Map 60CsX
3. Delorme PN-40
There were a couple of other units out there that peaked my interest, notably the Brunton GPS which claimed it had live weather images for your current position in the backcountry, but the two Garmin’s and the Delorme were the only units who had MOST of what I wanted.
It should also be mentioned that Garmin had the (at the time) new Oregon units and the Colorado, having come out a little over the year prior. These two units, however, were between $350 to $500 each, and, especially with the reviews of the Colorado, having some issues.
Unfortunately, while I was doing all this research, there were some delays in the Delorme unit actually being manufactured, which basically left me with the two Garmin units. The pros for the eTrex unit were size and battery life. The eTrex had people claiming 20+ hours of battery life, and it would clearly fit inside of one of my pockets. However, it DID NOT have a very big screen, an awkward kind of joystick which would be difficult to operate with gloves, and did not have tide information. The GPS Map 60 Csx basically did everything the eTrex could do, had slightly better reception/tracking, but was definitely a lot bigger in size and ate up more batteries. However, it DID have tide chart data.
The big reason I ended up waiting for Delorme to produce the PN-40 were the maps, which came INCLUDED with the unit. That was a HUGE selling point. Consider this:
eTrex Vista Hcx (at the time of purchasing) $200
Base 1:100,000 topographical data (US) $100
7.5 minute maps ONLY FOR WESTERN NATIONAL PARKS: $100
Navigatable road maps $100
Near-shore maps for the coast $100
CA and UTAH 7.5 minute maps (just coming out at that time) $100
Total purchase price WITH MAPS: $700 ($200 for the unit and $500 in maps)
(and this would require FURTHER PURCHASING when traveling throughout the United States to get 7.5 minute detail for other states) – The GPS Map 60 Csx would be exactly the same, except the purchase price would be about $100 more for the GPS unit. If I were to consider the Garmin Oregon, the total would be a whopping $1000!
Maps...
This would be a good time to talk about maps, since the majority of aforementioned costs were related to them.I’m not a professional at this, but suffice it to say there are 2 types of maps available for people with GPS units: 1. Raster maps and 2. Vector Maps.
The easiest way to describe a raster map is a scanned image of a map. Think of taking a map, putting it in a scanner, scanning it, and then telling your GPS where the map belongs. It will show you WHERE YOU ARE on the map, but you won’t be able to search for any words, peaks, rivers, etc. on the map because all those things are just scanned with the image, like part of the picture.
A vector map is an actual digital map, where each item on the map has meaning. (Contour lines, map labels such as peak names, rivers, man-made objects AND TRAILS can all be searched for and “seen” by the GPS unit). For an outdoor enthusiastic, whether hiking, mountaineering, kayaking, or whatever, the BIG difference between a vector map and a raster map is searchability of what you see on the map and ROUTABILITY of trails that you can see on your map).
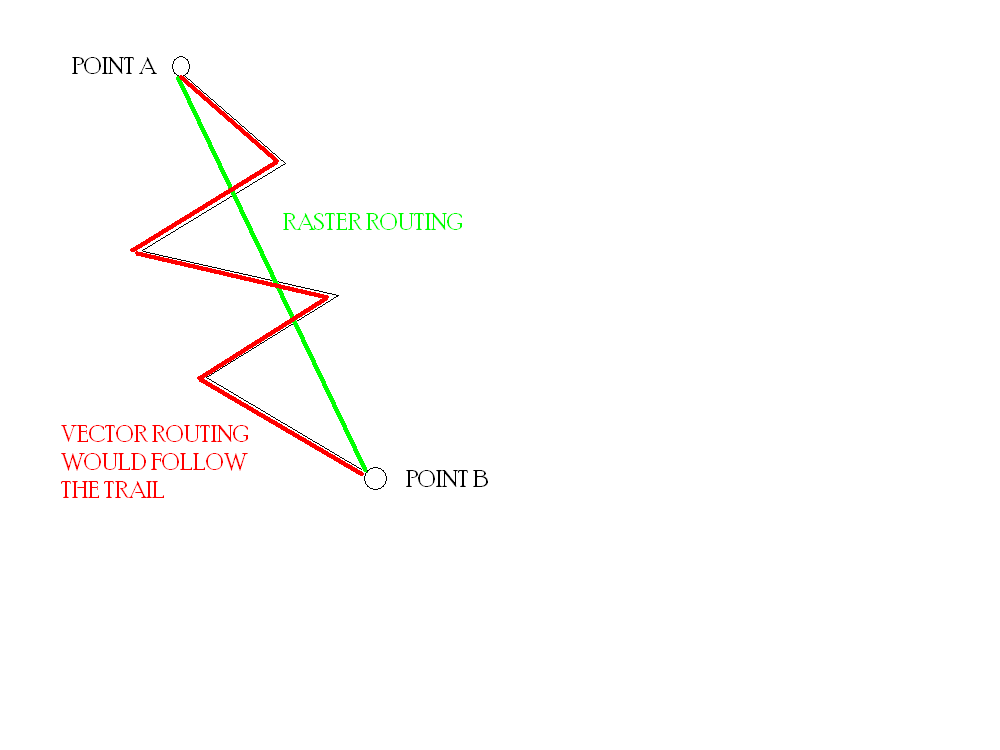
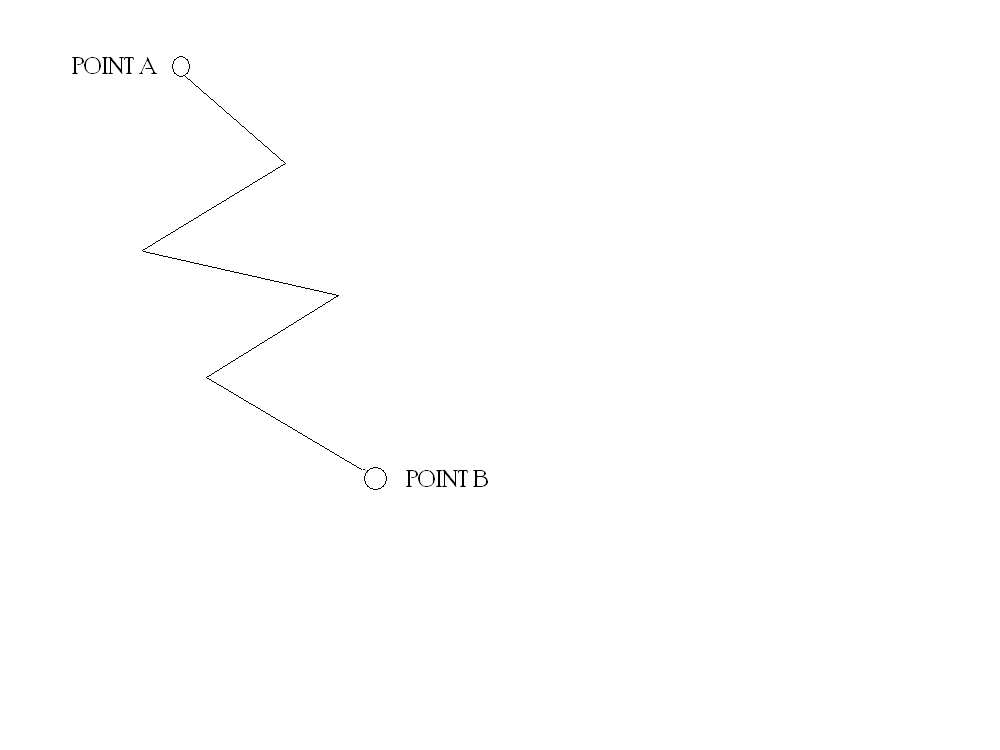
An example will explain this better. Let’s say I’m at “Point X” on a map and I want to get to “Point Y.” In between those two points I can see a zigzagging line that is obviously a trail.
 Point A to B with zigzagging trail between
On a RASTER map if I tried to have the GPS route from X to Y, it would send me “as the crow flies,” or in a straight line. The GPS unit would not “see” the trail because it’s only a scanned image. On a VECTOR map, the GPS unit would be able “see” the zigzagging trail and form a “route” following said trail.
 Vector vs. Raster
The obvious advantage of having vector verses raster maps is being able to have the GPS guide you where you want to go ON A TRAIL and, by doing this, be able to give you accurate data as to how far off your next point really is.
One last point I feel I must make regarding Garmin’s maps. As of October 2008, Garmin had just begun putting out the equivalent of 7.5 minute maps for their GPS units ON SD CARDS. It should be noted that while the maps will show up with 7.5 minute detail on the GPS, THE MAPS ARE NOT VIEWABLE IN THE GARMIN SOFTWARE. This was a huge disappointment to me, and one of the big reasons I decided to go with the Delorme PN-40.
For example, let’s say you are planning a backpacking trip into the Sierra. You’re going to do some cross-country travel and want to scout the route you have chosen prior to leaving in your GPS software. You’ve already paid your $100 for the 7.5 minute maps to put on your Garmin GPS. Well, in your Garmin software, you’d have to plan your route using the 1:100,000 scale maps because you can’t view the information on the SD Card, which contains the maps.
Now those of you who are computer savvy are probably thinking… “Why couldn’t I just copy the information from the SD Card to my computer and make it accessible to the GPS software?” Well, Garmin covered its bases and put some kind of “lock” on the information to prevent against this…
So basically, after spending your $100 for the maps, you’d have to go out and spend another $100 on, say, National Geographic’s software which has 7.5 minute detail of California in order to plan your route on your desktop, then figure out a way to send that info to your GPS….
Is that not ridiculous or what?
To Garmin’s defense, their 7.5 minute maps have vector data, which means the trails they have listed would be routable on the GPS, verses the scanned raster images available on the Delorme.
Functionality and uses of the PN-40
I primarily use the PN-40 to confirm where I am on a printed map. (I just print my maps off of the Topo 8 software – you have the option of printing single pieces of paper, 2x2, or 3x3 maps). The ability to print maps from anywhere in the United States is an incredible deal when you think about it, especially when coupled with the Netlink for $30 a year (in which you can download aerial imagery and USGS 7.5 minute maps). As long as Delorme keeps Netlink going, I’ll never have to purchase another map. I can just go into Topo 8, find the area I’m interested in, select it, and download the imagery or 7.5 minute map I need.
Key Features for Hiking and Mountaineering
The tracking feature of PN-40 essentially works like any other tracking feature of a GPS. Basically this is a “bread crumb” trail of where you have been. Where could this come in handy?
1. White-outs
2. Trailless areas
3. Identifying new trails that do not show up on maps (This happens many times, even with newer maps)
4. Marking springs (water) that are off-trail
5. Marking points where you stash food/gear off-trail
6. Following your track back to your starting point
Field Tests with the PN-40
Out of any feature on the PN-40, I find the tracking feature the most useful. Less than two weeks after I had the unit I headed up to Mt. Baldy. Conditions at the trailhead were fine, but I could see cloud cover further up the mountain. By the time I arrived at the ski hut, visibility had deteriorated to maybe 100 feet with light snow coming down. I decided to head up past the ski hut. At pretty much the base of the bowl I heard a couple climbers calling out, trying to find the trail. They weren’t sure exactly where they were. While I was talking with them I was contemplating heading up further, but then another climber was descending in the same situation. I told them we could follow the track back to the ski hut, and sure enough it wasn’t a problem, despite visibility rapidly deteriorating and there being very little evidence of a “trail.”Another time I was descending Mt. Langley from the summit and looking for the place to exit the ridge and head back to New Army Pass. While most of the terrain directly off the summit ridge is Class 3, I was traveling with someone with less experience and wanted to be sure he would feel comfortable descending, not to mention he had just run out of water and we didn’t want to waste any extra time. Rather than try and “find” the exit spot, we simply followed the track back down and off the ridge. No problem.
Yet another example is when my wife and I were up in Big Bear taking a walk around the Champion Lodgepole Pine area. This area has a lot of old dirt roads, some marked and some not. We were hiking cross country and headed over towards a campground I had been to before. Rather than go back the same way, we used our track to make a “loop” back to the car, even though some of the “trails” we were using didn’t show up on the GPS or the map.
It’s little things like these that can save a lot of time and frustration when you are out in the field. Another great thing you can do is pre-route where you want to go with a “draw” line in Topo 8, then transfer that to your GPS. Let’s say you’re reading a route description that isn’t making much sense, so you open up Topo 8 and try to find make sense of it by using your downloaded USGS maps. You get the part the part that is trailed, but then things get a little uncertain because you plan on going cross-country. Maybe you need to look for an “obvious chute that leads to the summit,” or something like that, but on the map it only looks somewhat obvious. Well, one option is to look at the aerial imagery to see if you can decipher what the description is saying. This is especially useful when dealing with “use paths” and “climber trails” because most of the time you can identify these with aerial shots, and they don’t show up on maps.
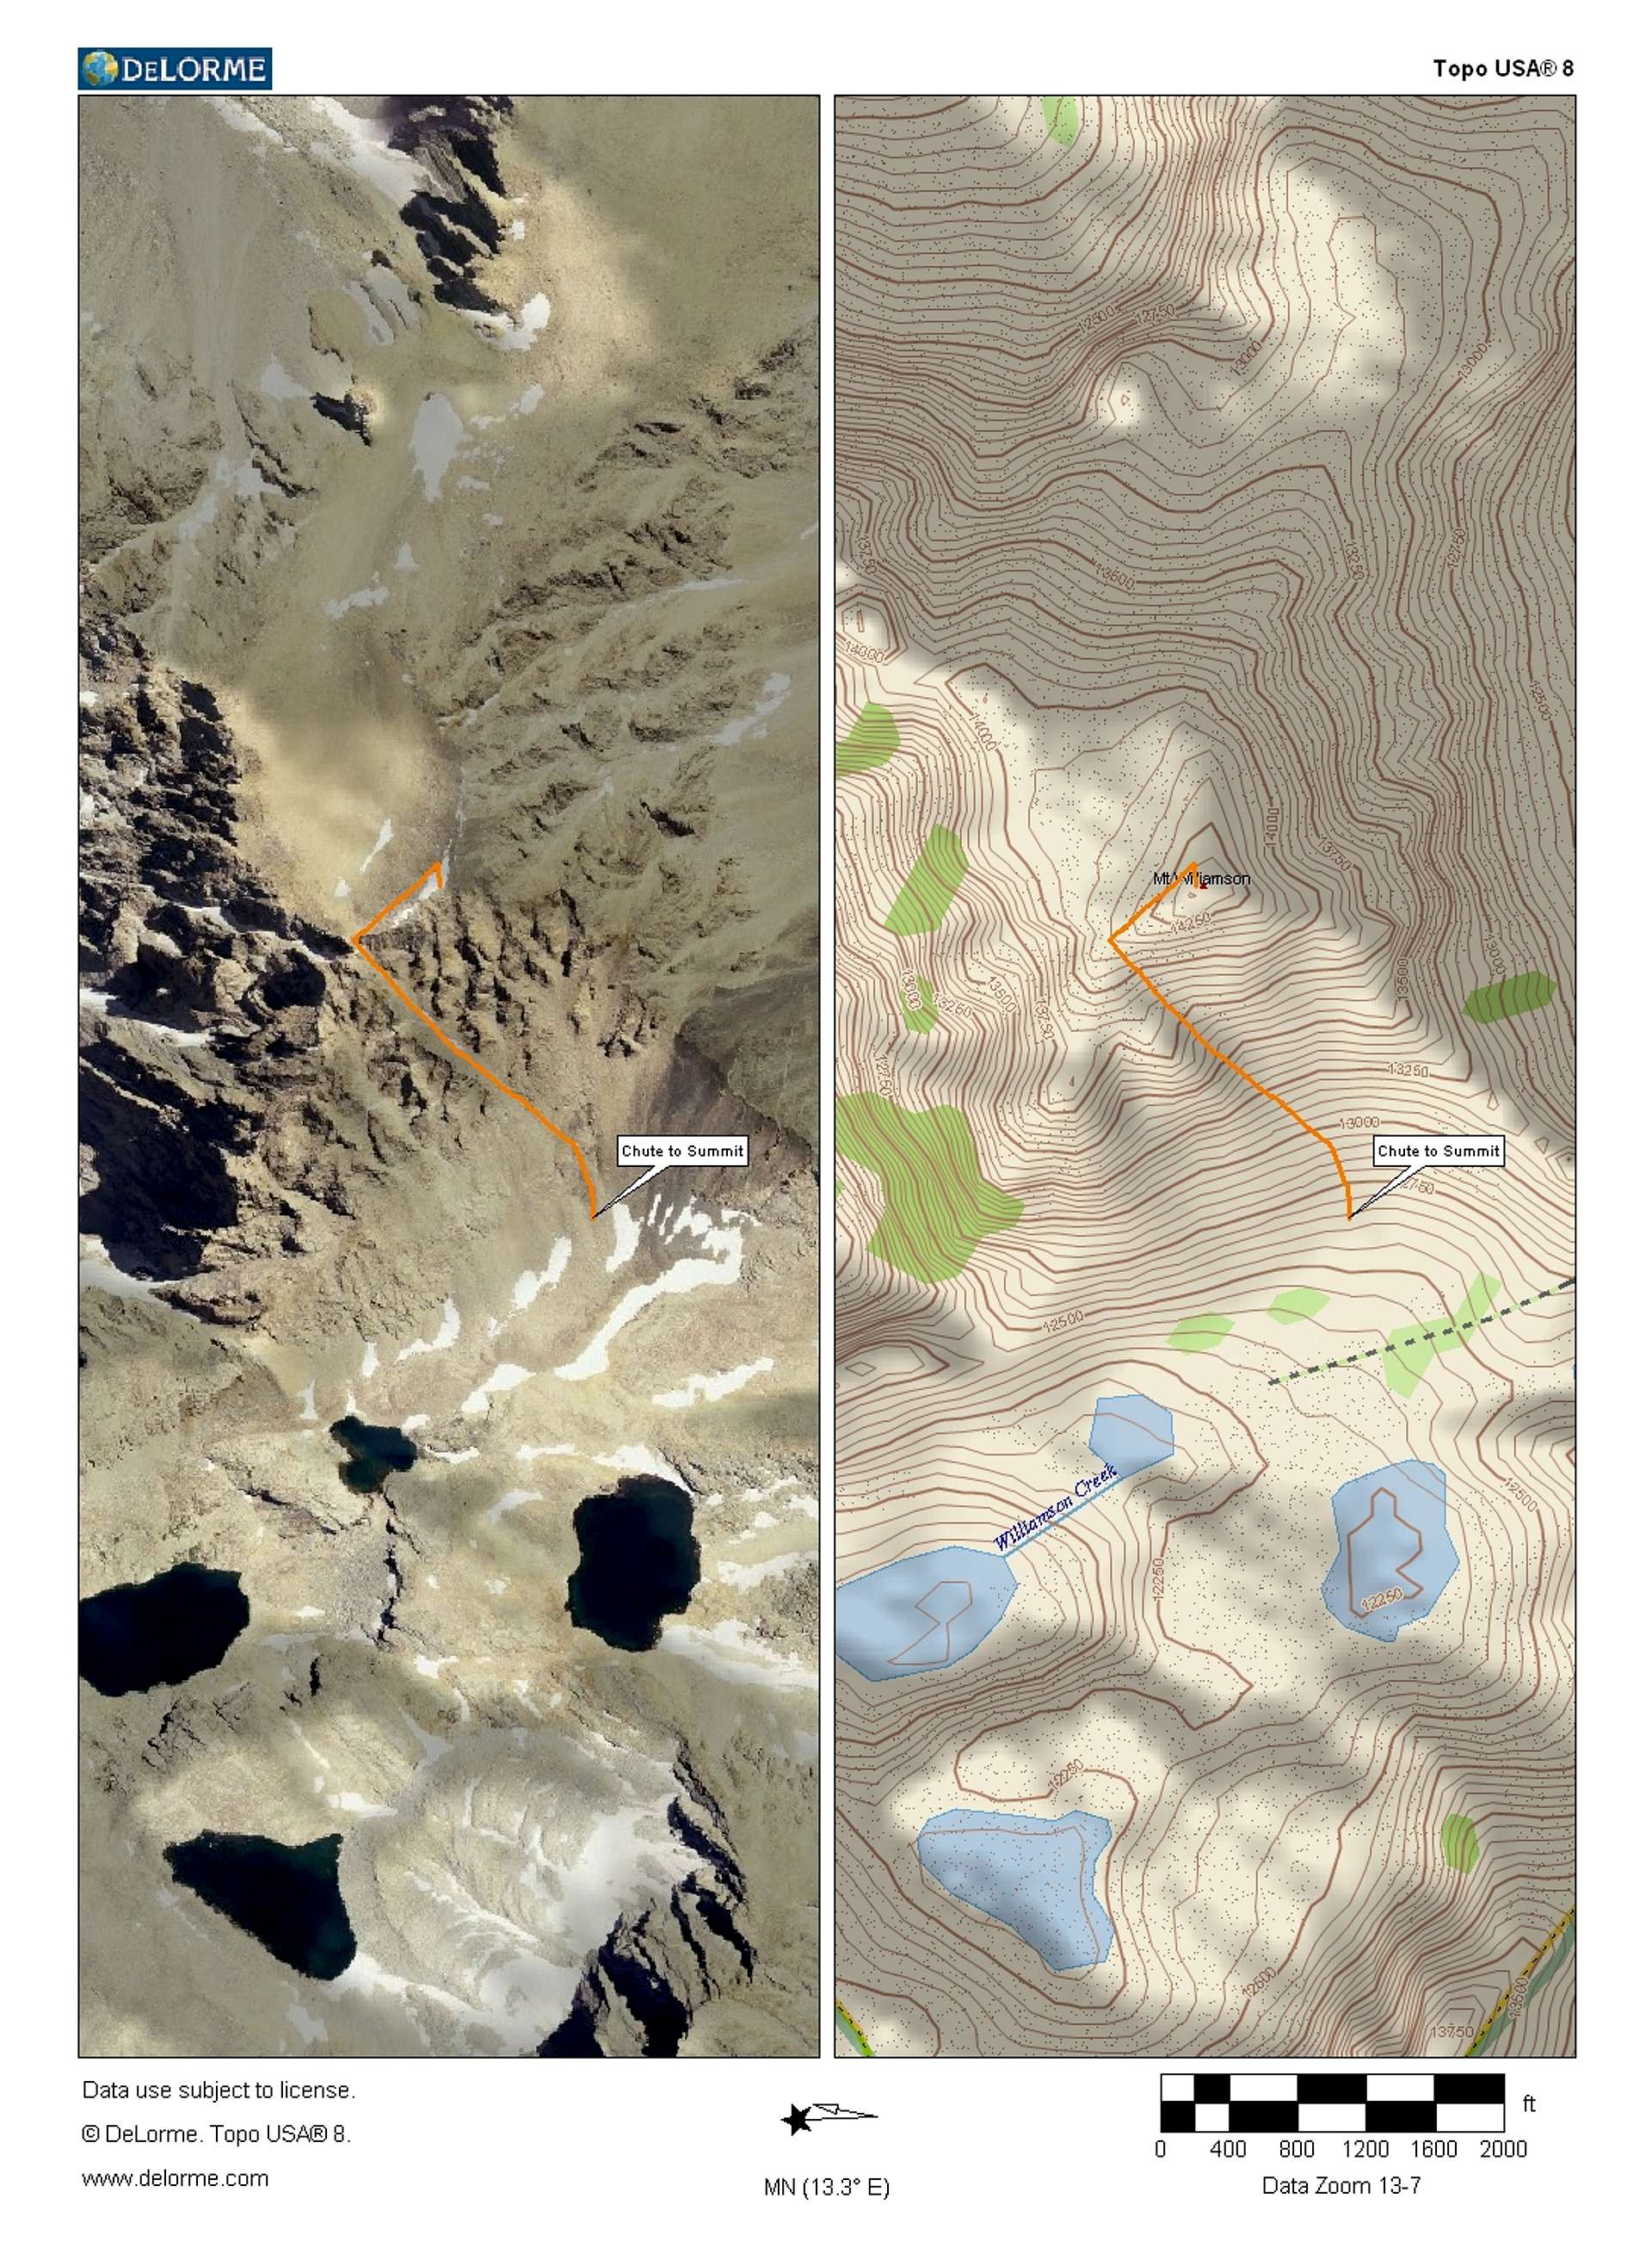
One great example of this is on Mt. Williamson. The one time I did it I had read many people take the wrong chute to the summit, get blocked, and end up doing some shady 5th class traversing into the right chute to get to the summit plateau. By looking at the aerial imagery in combination with the 3d aspect, the chute is very obvious. So I could just “draw” a line up the correct chute, transfer it to my GPS, then when I get in that area, I could use that line to identify the right chute!
Here is a picture of just the map data. From just the maps, it is somewhat unclear which chute leads to the summit plateau.
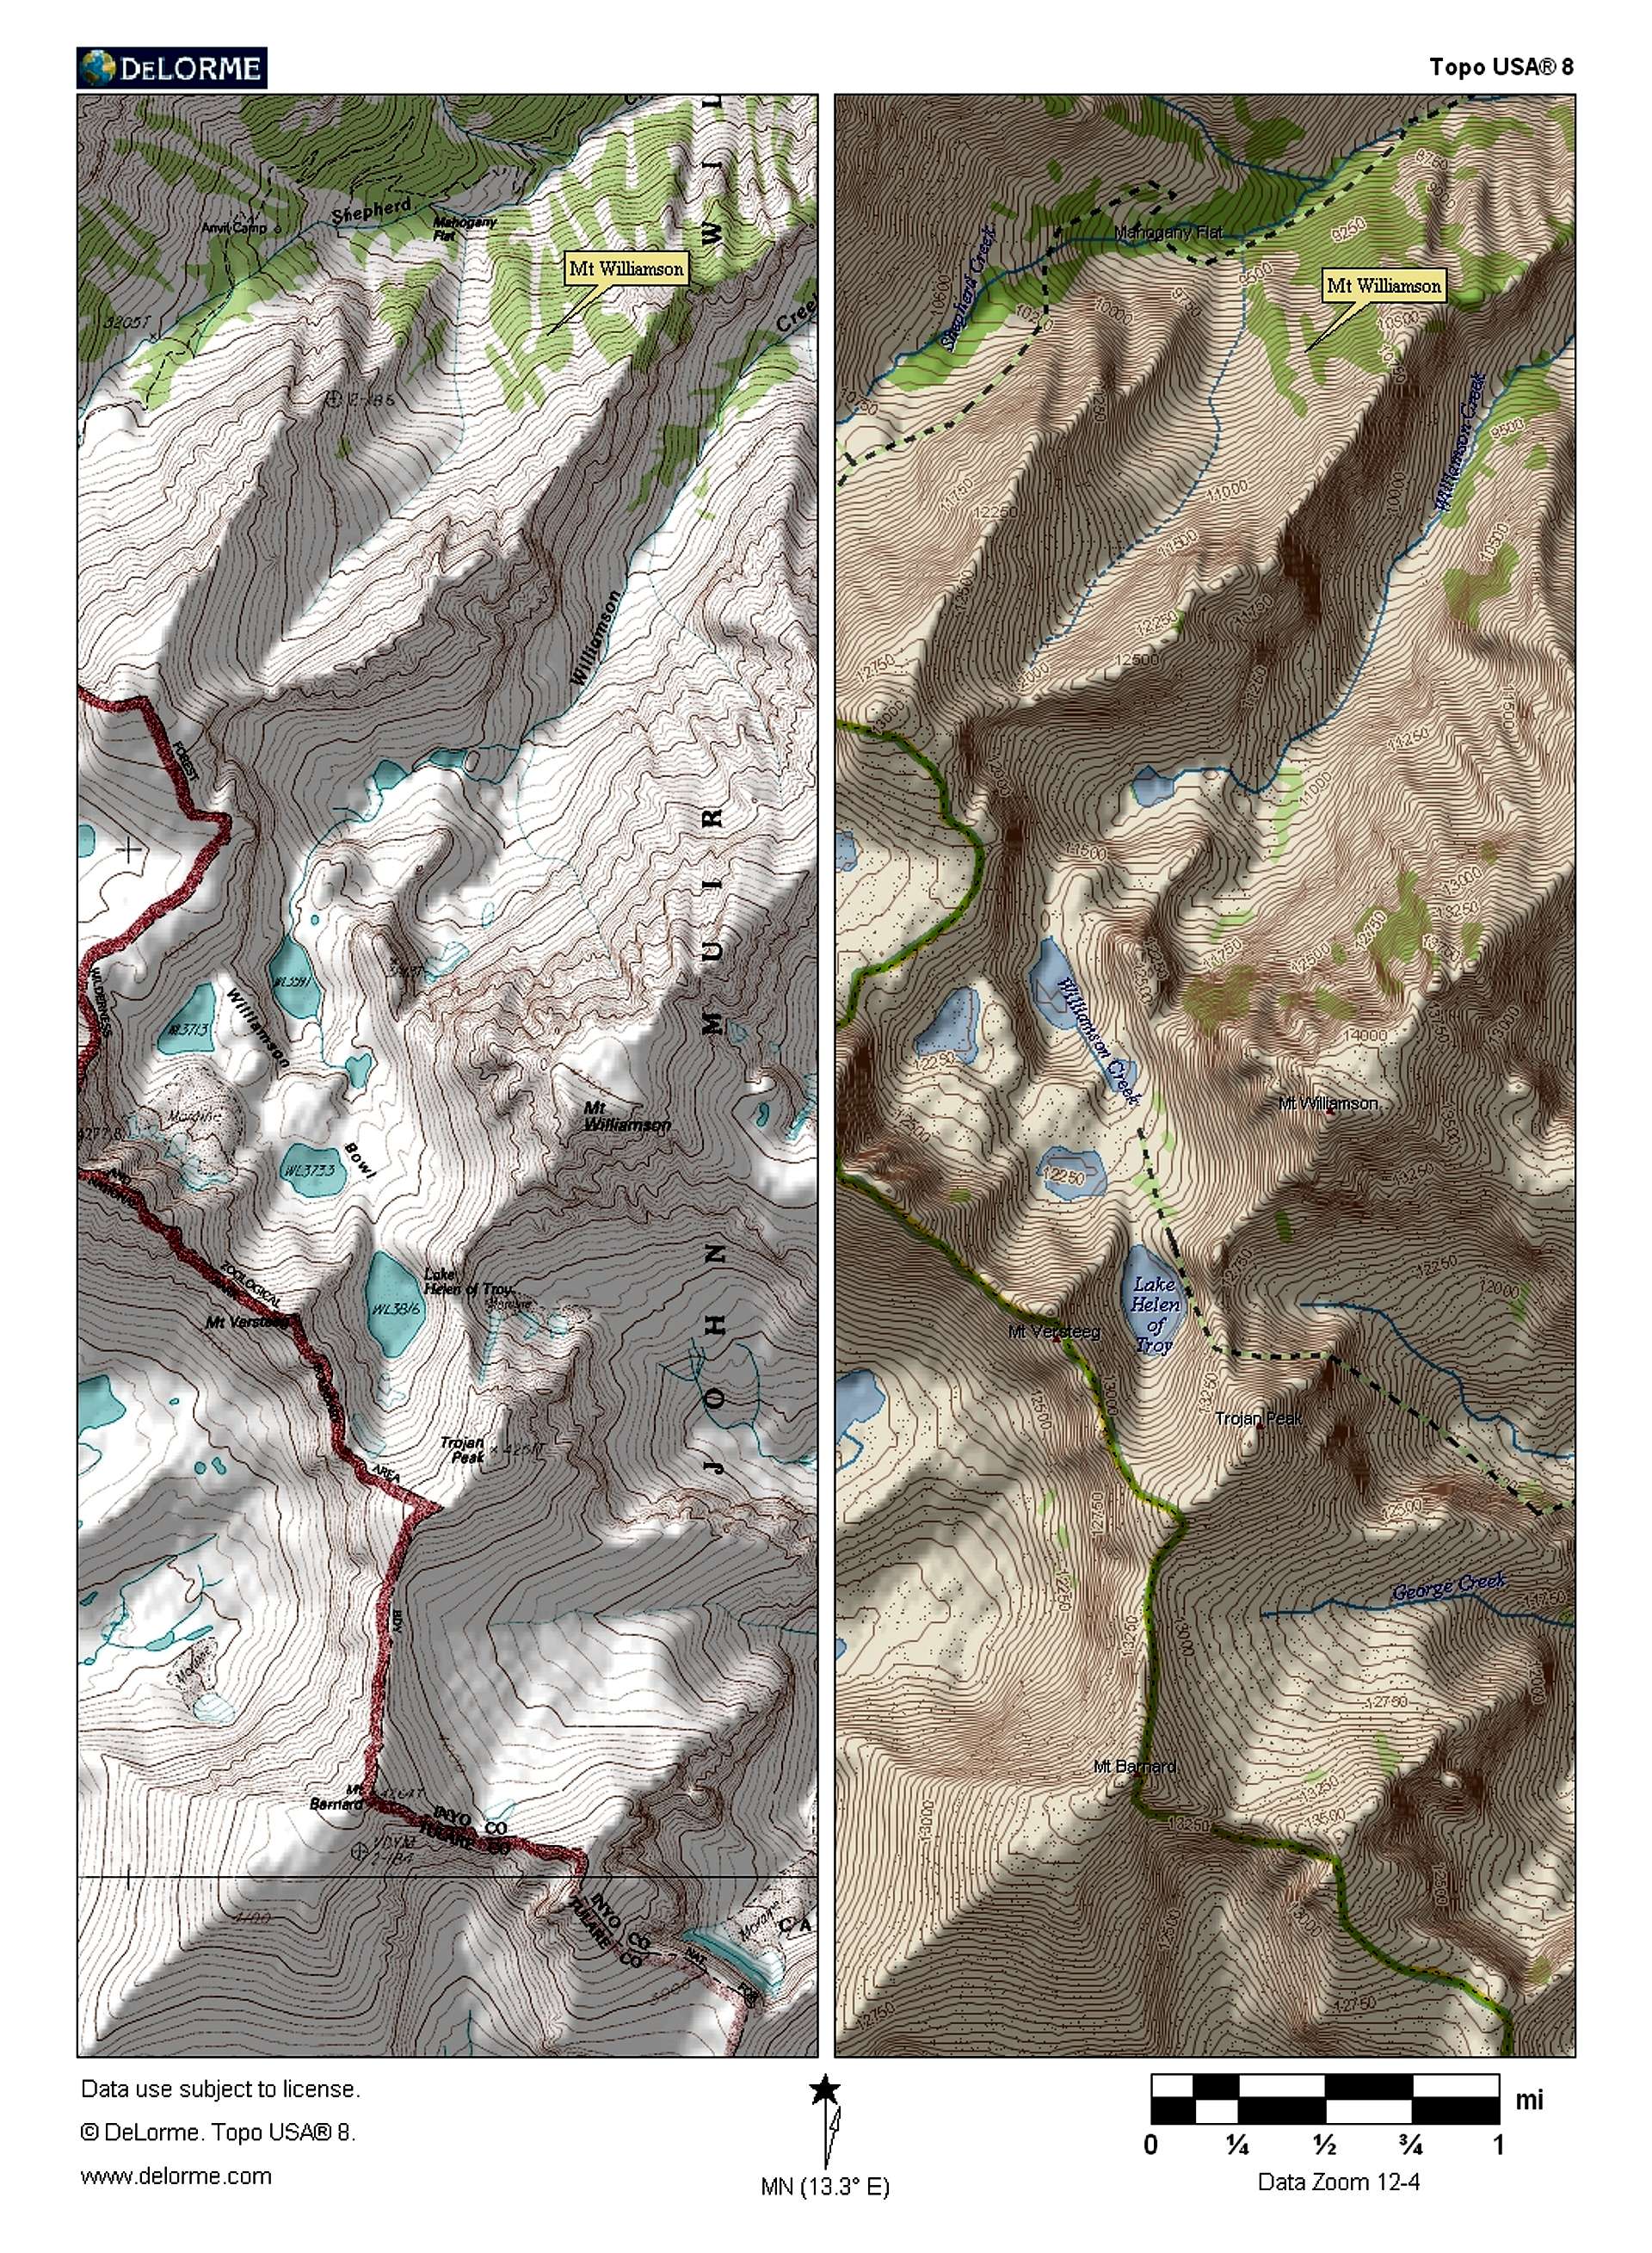  |
Here is a shot using aerial data. By using this, it's much more clear which chute enters the summit plateau.
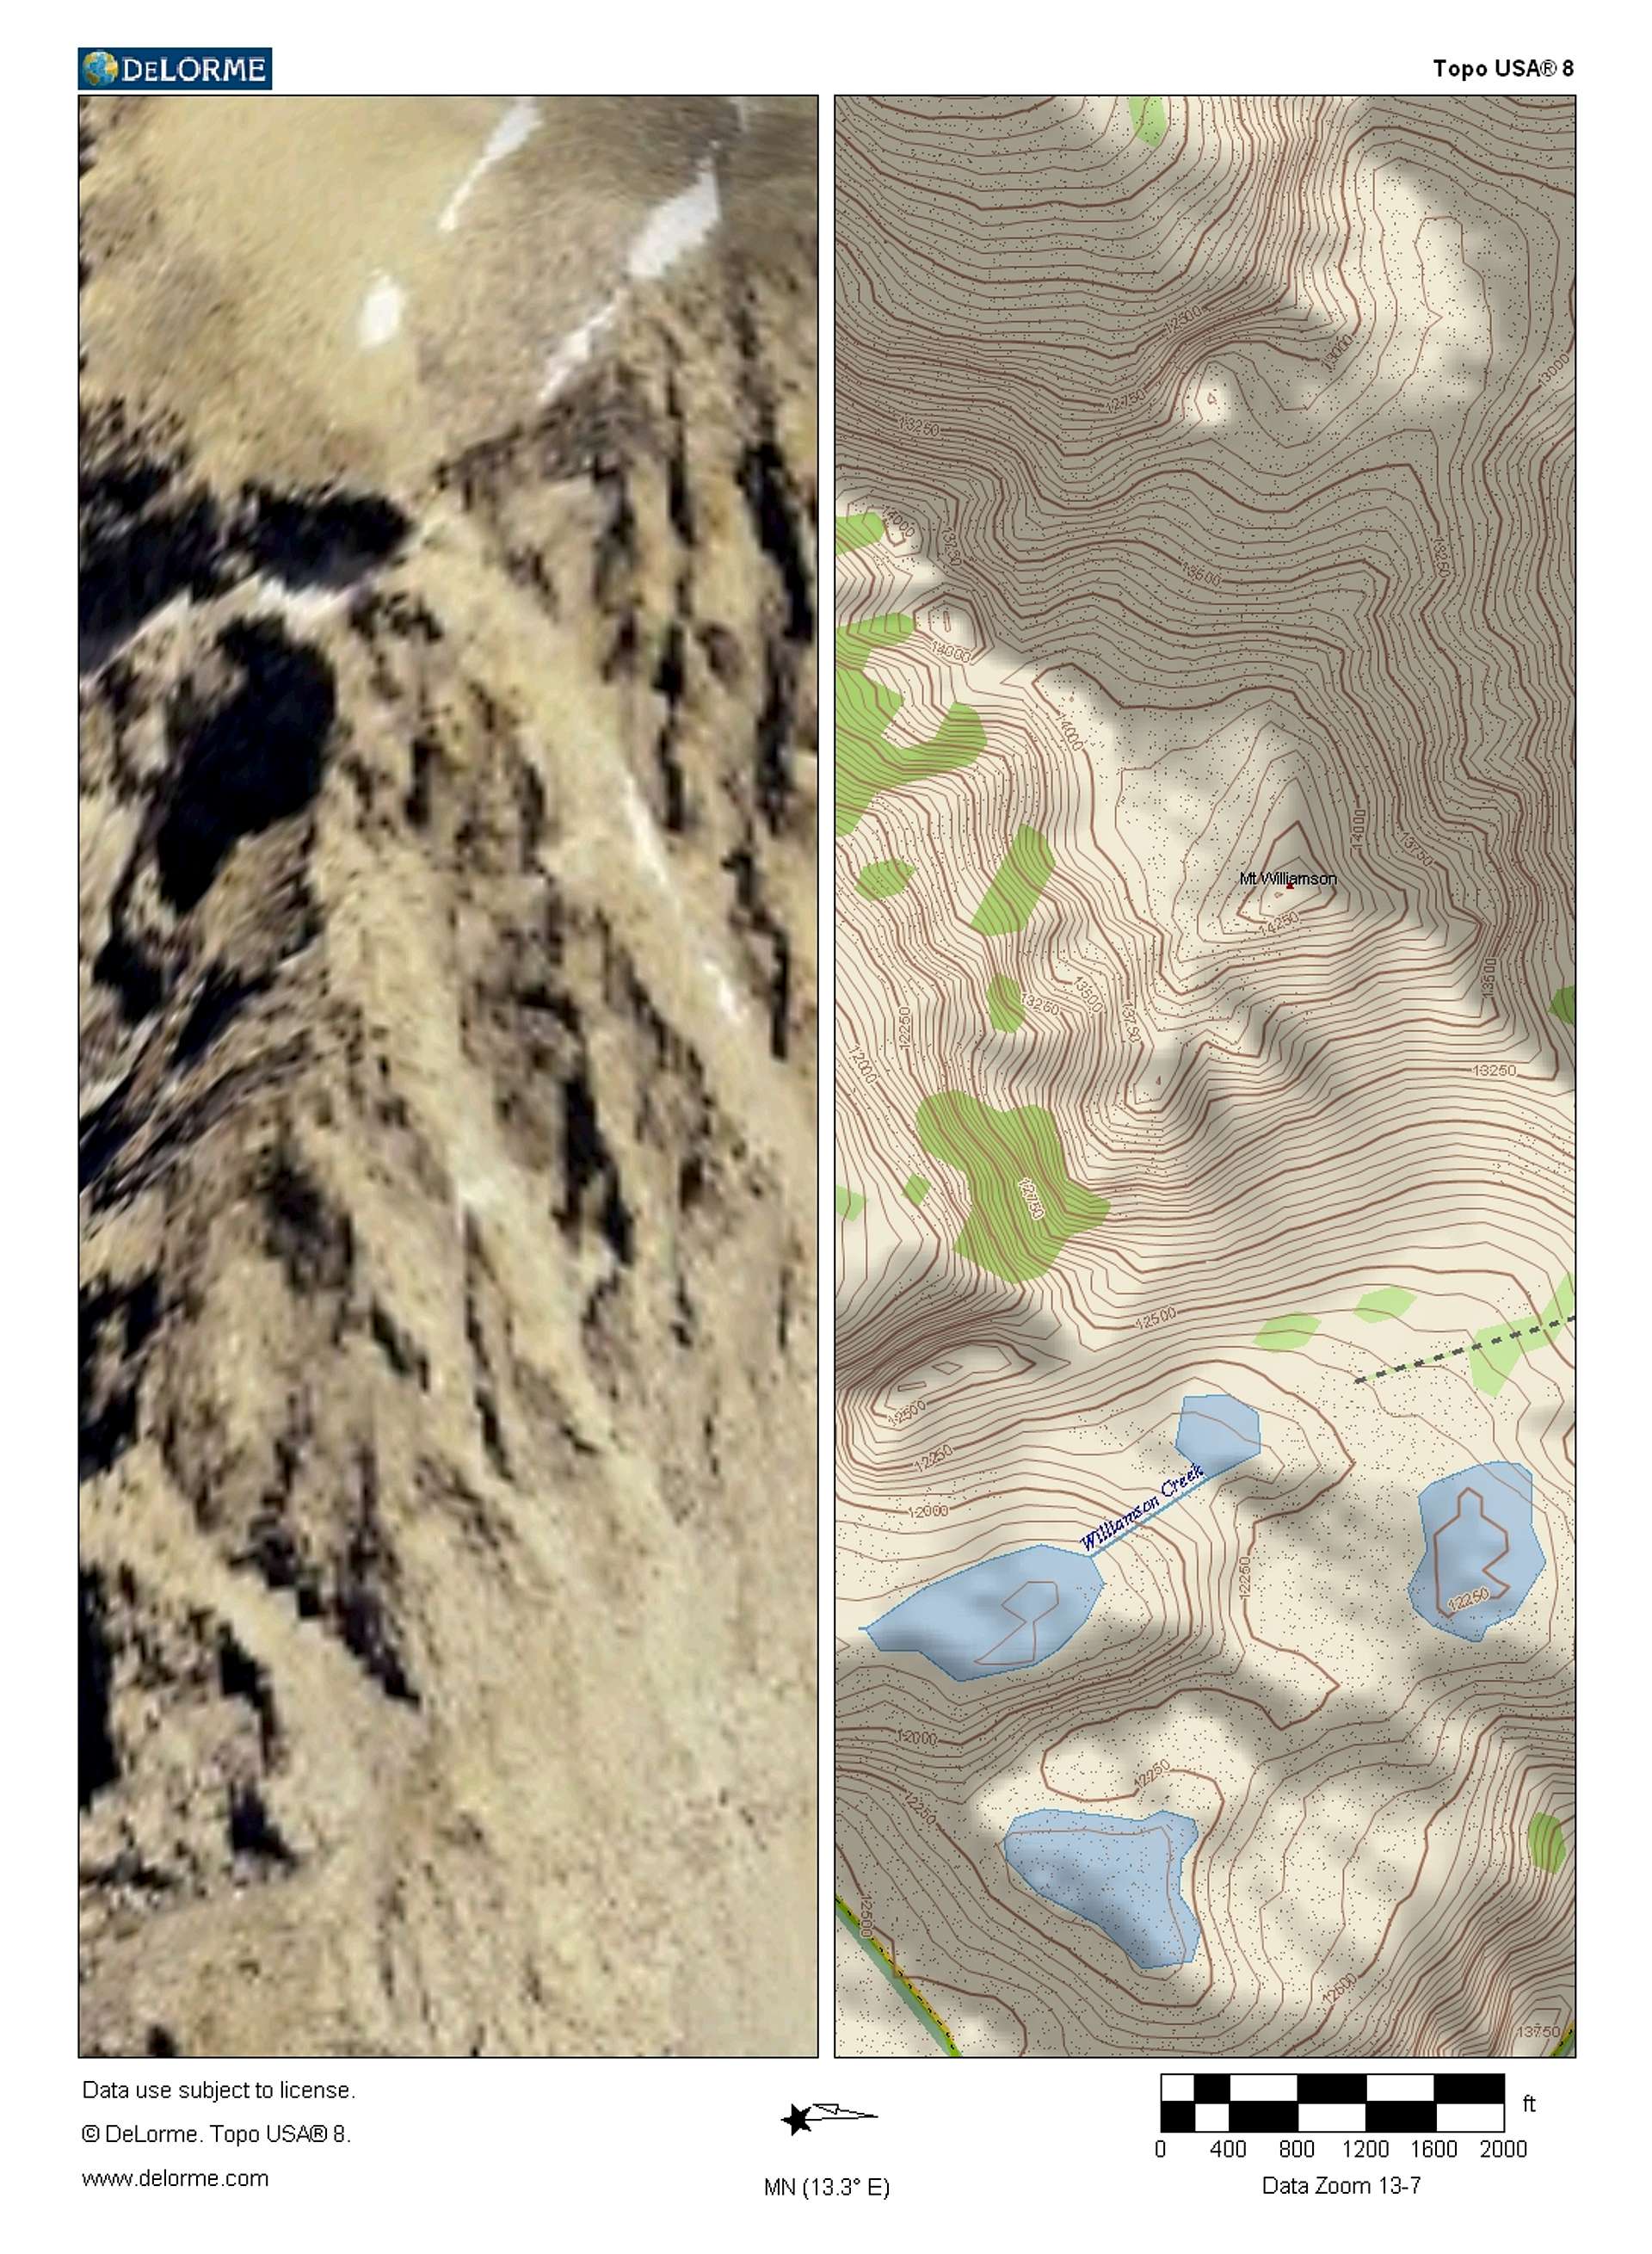 |
Here is another shot of aerial data with contour lines overlayed. (You can do this on the PN-40 also).
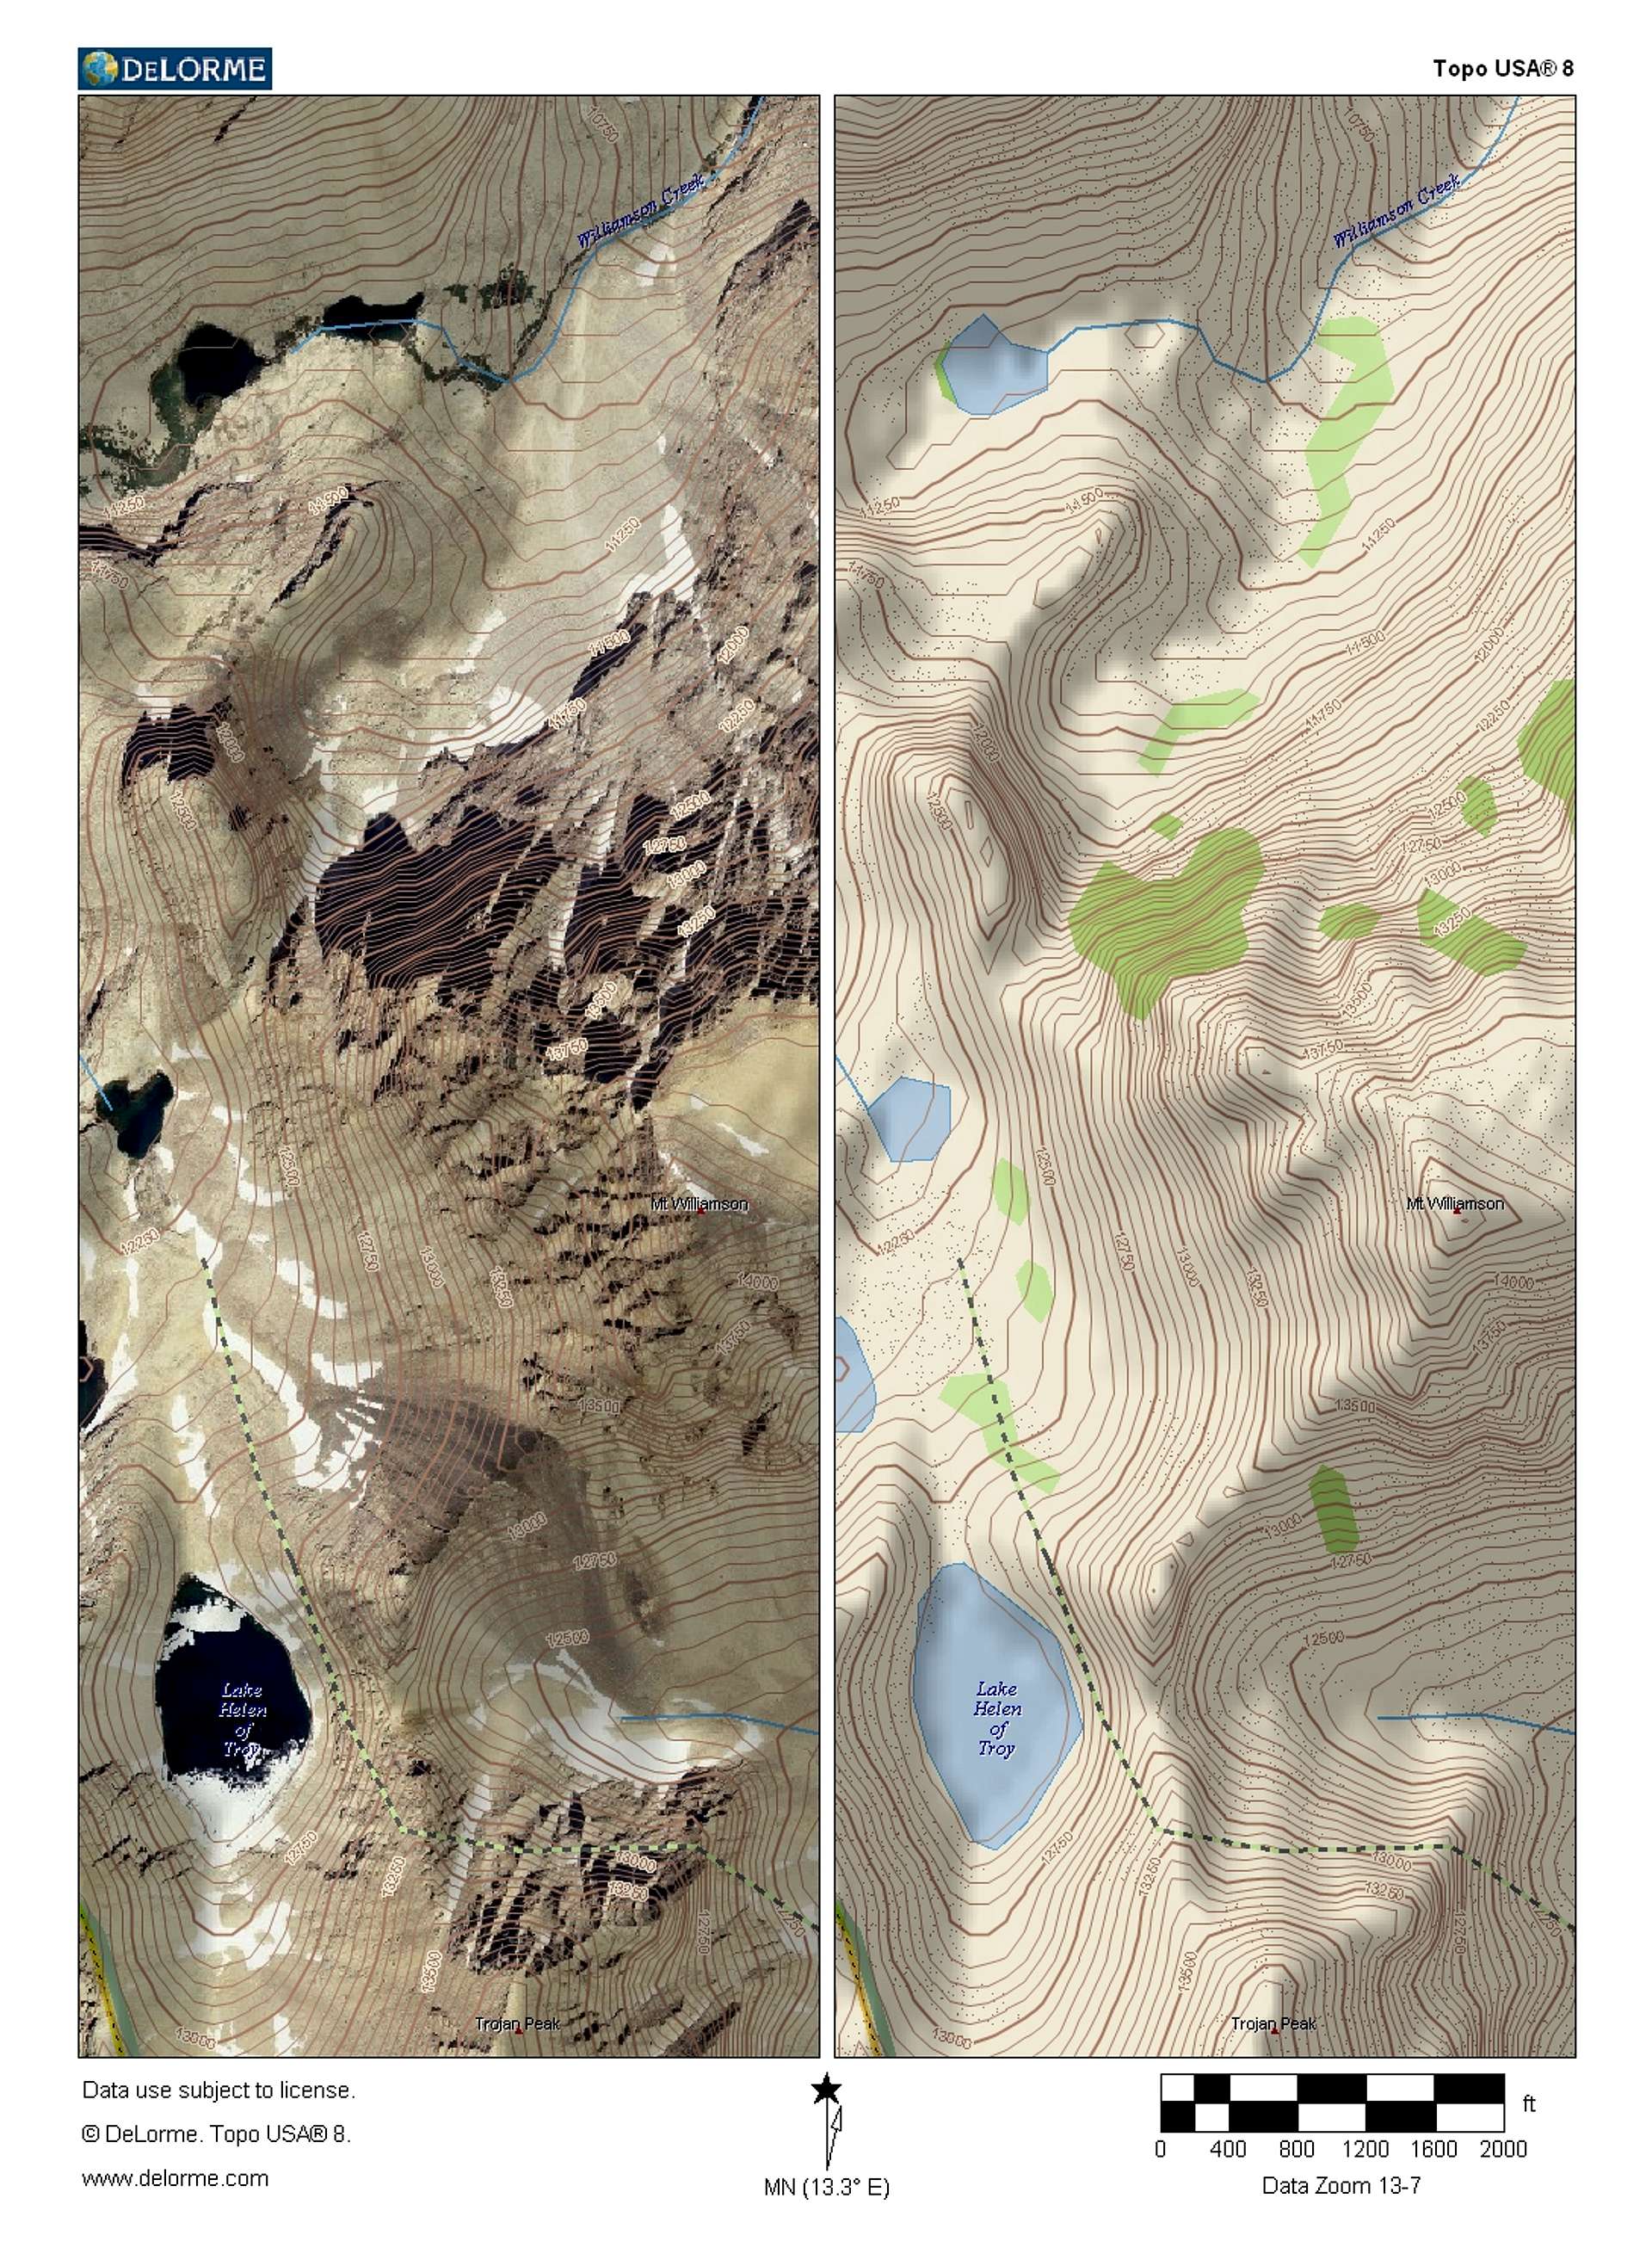 |
After identifying the correct chute, you can then "draw" a line to identify it, so you can follow that line when you are out in the field, thereby making sure you are entering the chute to the summit.
 |
This is more of an overview of what it would like.
 |
It seems a lot of times here on SP you always here about, “I couldn’t find “X,” so…(insert annoying/scary/dangerous/not intended hiking plans here” and I think to myself… This person really could have used a GPS to their advantage in this situation.
This is especially true of descent routes when you only have one access point, or when you have to identify the correct ridge or gully. Most of the times you can figure out in daylight, but suppose you get caught descending at night? Suppose fog moves in or a storm? This is where a planning beforehand on a GPS can make a big difference.
Other Key Uses for the PN-40
Using waypoints to your advantageAnother great feature of the PN-40, and other GPS units, is the ability to mark waypoints. A waypoint is basically a marker you put on your map to identify where something is. This could be your car, camp, water stash, spring, beginning of a climb, trail split… the list goes on.
Why would you want to do this? The most beneficial reason for having a waypoint is being able to find it again if you don’t know where you are. Let’s say you exited a chute onto a summit ridge and that’s the only safe way down sans rappelling, and you didn’t bring a rope. Wouldn’t it be nice to have some kind of marker when you’re coming back from the summit? This way, when you’re on your way back down, you have a visual cue on your GPS to make it easier to find, which will save you time and frustration.
Another great way to use waypoints is when you are walking or hiking and find something you don’t have time to explore that day. Maybe it’s a crack system that looks interesting, a small lake, or possibly a trail that leads off into nowhere. Just mark the waypoint, and then you’ll know where you saw it the next time you head out.
The thing I like about the PN-40 as far as waypoints go, is the button is easily accessible. Some other units you have to toggle through multiple screens just to mark a waypoint. This can really be a pain if you’re in a rush. With the PN-40 you just hit the waypoint button, name it, and you’re good to go.
One great way of using waypoints is to pre-establish them in TOPO 8, then transfer them to the PN-40 prior to your trip. Topo 8 even has a bunch of different icons you can use, so each waypoint doesn’t just have to be a red pin on the map.
Usability in the Field
I predominantly use my PN-40 for backcountry hiking, but I also use it for mountain biking, road biking, kayaking, and 4x4ing on fire roads. For hiking, especially off-trail hiking, mountain biking, and 4x4ing, the GPS MUST be accompanied with a map to offer you any type of help. The screen is simply too small to give you an overall picture of where you are in the grand scope of things. I would never think about using the GPS as my sole source of identifying where I am.
One thing many 4x4’rs are doing now is purchasing a Netbook or similar 11 or so inch mini-laptop and mounting it in their SUV’s, or having the passenger keep it on their lap. Topo 8 (and the previous Topo 7) offer a feature where you can have your PN-40 connected to your laptop and get a read-out of your position under the “GPS” tab. (This is basically like having an 11 inch GPS screen in your car with topographic/aerial image maps). I personally haven’t done this, but I’ve read about a lot of people who have done it with success.
Special notes:
MAC Users – Another one of the reasons I first wrote off the PN-40 and was heading towards Garmin was the fact that Topo 8 is not MAC compatible. Therefore, if you plan on running Topo 8 on your MAC, you’re going to have to use Bootcamp, Parallels, or VM Fusionware, not to mention getting a copy of Windows. So for MAC users, that adds about $200 to the purchase price of the PN-40.
I was lucky in the fact I was in the middle of buying a new iMac and it came free with VM Fusionware. I was also fortunate to have an old copy of Windows XP lying around that still worked. After loading up Service Pack 3, Topo 7/8 was up and running well….
BUT, one word of caution: With VM Fusionware, after the version 10.5.7 MAC OS update, the 3d emulator no longer works in Windows, which basically means the 3d option in Topo 8 and 7 will not function. (You disable the feature in the preferences menu, so that Topo 8/7 won’t crash when it opens, which leaves you with two 2d panels to work with).
For this reason I tried a trial version of Parallels, but I had connectivity issues dealing with the PN-40 being recognized in Topo 8, which is huge problem considering that is how you are transferring data back and forth.
To date, June of 2010, I have not been able to use the 3d feature of Topo 8 on my MAC in VM Fusionware. And while I enjoy using the 3d view in Topo 8 on my PC, it’s not a total loss. (If I really want to see something in 3d, I can always use Google Earth).
My recommendation for MAC users would be to check the Delorme Forums here:
Forums.delorme.com
And ask some of the MAC users what they have been using. The last I heard, Bootcamp with Window XP (service pack 3) was the best option, but that may have changed.
Images
 |  |  |  |  |  |
 |  |
peninsula - Jun 9, 2012 9:19 am - Voted 5/5
Helpful