
-
 1065 Hits
-
 71.06% Score
-
 1 Votes
|
|
Route |
|---|---|
|
|
36.08251°N / 115.48055°W |
|
|
Trad Climbing |
|
|
Spring, Fall, Winter |
|
|
Most of a day |
|
|
5.10d (YDS) |
|
|
4 |
|
|
Overview/Approach

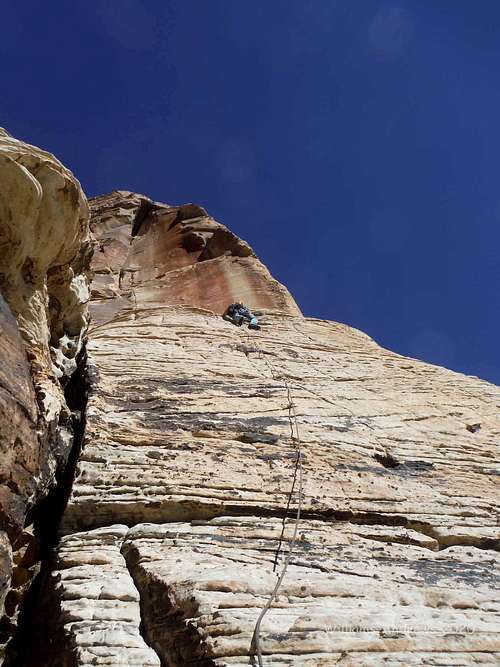
The Maw is one of several hidden off-width gems in Red Rock, that due to their approach, see little traffic or fanfare. If its 3rd pitch were located off the road in Joshua Tree for example, it would be an uber classic in that park. Its first pitch is just an approach pitch up juggy white sandstone face. The first pitch is on a two-tiered face with bolts on the lower tier and gear up a crack on the upper tier. You land below the right facing corner that makes up the remaining three pitches of the Maw. The 2nd pitch consists of relatively easy crack climbing for the grade and lands at a full hanging belay. The 3rd pitch, while short, is the business of the route: a full-on section of off-width that is best conquered with a left chicken-wing and slow heal-toe action. The 4th pitch is also short, but just as intimidating as the 3rd as you do a full body span traverse, left to right, to surmount the roof. A Valley Giant is the only real protection for this traverse. There is no real roof pull, more of just stepping back on an edge on the main wall and clipping the final fixed rap/belay.
Hike First Creek as you would for Romper Room, etc. When even with Slot Club Wall, located way up on the northern slope of the canyon, cross the creek and start the slog of an ascent up loose ground to the base of Slot Club. Scramble up the short tree infested gully to the left of Slot Club. At the top of this gully, the obvious roof of the Maw comes into view. Bushwhack to the base of a crack/right facing corner going through the lower yellow/white sandstone. Start climbing the face to the right of the crack through several pro bolts.
Route Description
1st Pitch- 115’-5.8/ Climb the white sandstone face to the right of the right facing corner. Follow the bolts for the lower part and step right to climb a low angled crack back up and left to a broad fixed belay/rap ledge below the Maw’s intimidating off-width and roof.
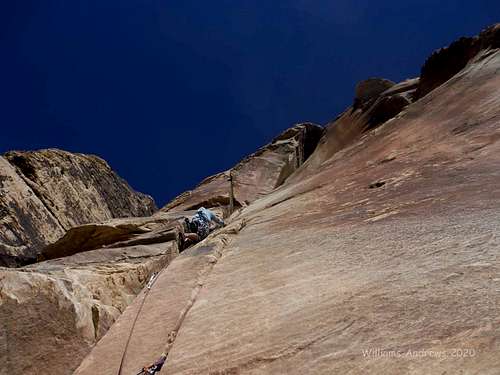
2nd Pitch- 90’- 5.10-/ Felt more 5.9 than 5.10a. Climb the crack/corner above the fixed rap. A single rack is more than enough gear for this pitch. The crux is near the end, pulling out of a wider section and hooking into a hanging belay/rap out right below the OW. Nothing smaller than a #4 is needed for the next two pitches.
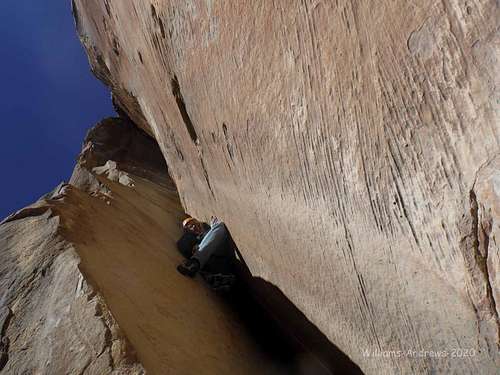
3rd Pitch- 70’-5.10+/ Climb the clean #5 crack, left side in utilizing a chicken wing with one heal-toe (left) and one foot right) chimneying behind your body. Inchworm up the featureless OW until relief shows up via a few scoops on the right wall. Two #5’s and a single #6 protect this short pitch perfectly to a leaning fixed belay ledge.
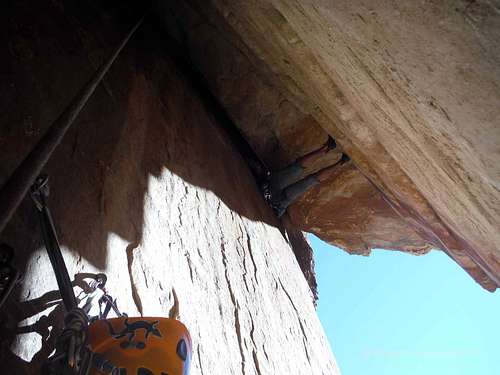
4th Pitch- 40’-5.10/ Continue up and into the depths of the corner turned to roof. A 9” inch (Yosemite Giant) protects this roof crack perfectly. Get your head above the crack at the beginning to allow you to find constriction for the large piece. Walk it out right and eventually drop back down to a push up type of position above the void. Best to leave the helmets back atop pitch two where you can retrieve them on rappel as they will obstruct you in this roof. When you drop back down as you traverse, do a full body span for several meters to where you can transition to the left wall on an edge. The fixed rap is just outside the roof.
Climbing Sequence
|
|
|
|
Descent
Take three single 70m rope raps straight down back to your packs. You have to slightly swing left to reach the top of Pitch 2.
Essential Gear
MP.com has recommendations for some large racks. But if you are comfortable at this grade, the large gear will be protecting any of the cruxes and a single rack from #.5 to Yosemite Giant will cover most anything you need. If you want to sew up the crux of the route on Pitch 3, bring a 2nd #5. 70m rope. Route gets intense sun in mid-November until noon. Decent shade after.