
-
 9620 Hits
-
 76.66% Score
-
 7 Votes
|
|
Route |
|---|---|
|
|
36.08704°N / 115.48071°W |
|
|
Scrambling |
|
|
Spring, Fall, Winter |
|
|
Most of a day |
|
|
Class 4 |
|
|
Overview
Less known than the standard route to the summit of Mount Wilson via the head of First Creek Canyon yet growing in popularity, the Hidden Bowl route (also known as the South Bowl) is a shorter but more challenging and more exposed variation from First Creek.
Although most trip reports seem to suggest that the route is Class 3 when followed correctly, it is very easy to find yourself, as I did, on Class 4 or harder terrain if you stray a bit and/or seek your own way. Following the route correctly lands you close to the main summit of Mount Wilson, but it is no trouble to alter course a bit to wind up closer to Wilson's south summit, which is smaller, more exposed, and more challenging to climb than the main summit block is. Anyone interested in visiting both summits on a single outing while making a loop should bear this in mind.
Even though this route is shorter than the standard one, it is still about 5 one-way miles. Also, it is by no means short; due to extensive scrambling and boulder hopping in the canyon and plenty of steep slabs and scrambling above, most parties seem to take 4-5 hours to reach the summit. Working just with a map diagram and a general sense of the route, it took me just over three hours to reach the south summit (and would have taken about the same time or slightly longer had I angled for the main summit instead), so someone in good shape and with knowledge of the route might be able to cut it down to 2.5 hours, but most people probably really will take that 4-5 hours, so plan for an early start, especially in winter.
Getting There
Take Charleston Boulevard (SR 159) west through Summerlin. After the development abruptly ends and the desert begins, drive a few miles and pass the well-marked entrance to the Scenic Drive.
The exit from the Scenic Drive is about three miles farther along 159, and not far after that is a roadside trailhead for Oak Creek Canyon. Continue on just about a mile along 159 and find the roadside trailhead for First Creek Canyon.
Route Description
This route is 4-5 miles, with about 3600' of elevation gain. There is a lot of Class 3 scrambling, and there are some spots of Class 4.
From the trailhead, hike the trail toward the opening of First Creek Canyon. Stay on the trail as long as possible, for the going gets a lot slower once you get into the canyon bottom and the scrambling begins. Avoid spurs that lead down to the wash for as long as you can; the trail stays above and south (left) of the wash. It is nearly 2 miles to the mouth of the canyon.
In the canyon, follow use trails when you can in order to avoid obstacles. Sometimes things get a little brushy, and often you have to clamber, scramble, or actually climb over or around boulders. It's very possible to find yourself doing Class 4 or 5 moves, but you should always be able to find Class 3 conditions if you need to.
Because of the way the canyon's obstacles slow you down, it is really hard to estimate distance based on time, but take note of a sandstone peak splitting the canyon near its head. This is First Creek Peak, and it is an important landmark. To its right, on the other side of the canyon, is a sandstone wall and ridge heading somewhat northeast (i.e. toward you but slanting to the right). To reach the Hidden Bowl, you're going to head up and out of the canyon to the right before that wall.
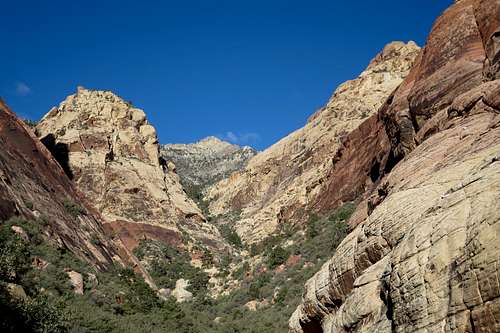
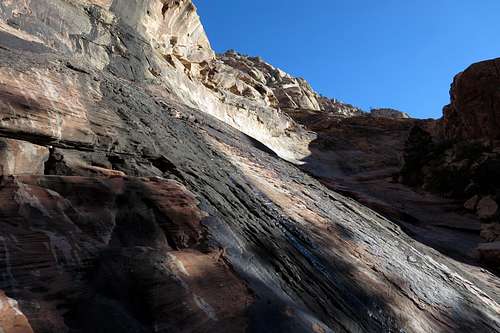
First Creek Canyon
Now things are going to get a little vague. I've read some online trip reports, complete with pictures, diagrams, and GPS tracks, on this route, and I'm fairly certain I did not reach Hidden Bowl the same way those people did but rather reached it by leaving the canyon a little earlier and going up a smaller "Hidden Bowl," what I like to think of as the "Hidden Hidden Bowl." It also seems that my way was slightly harder because the crux of it was definitely Class 4 and verged on Class 5 in one small spot.
Below is a link to the aforementioned pictures, diagrams, and tracks. Following it is a continuation of the route description according to what I did.
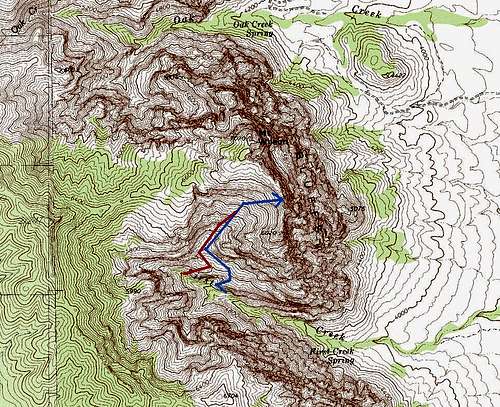
Hidden Bowl Route
First, see the picture below. It shows a cairn in First Creek Canyon that seemed to signal where to leave the canyon. In the picture, you can also see a use trail.
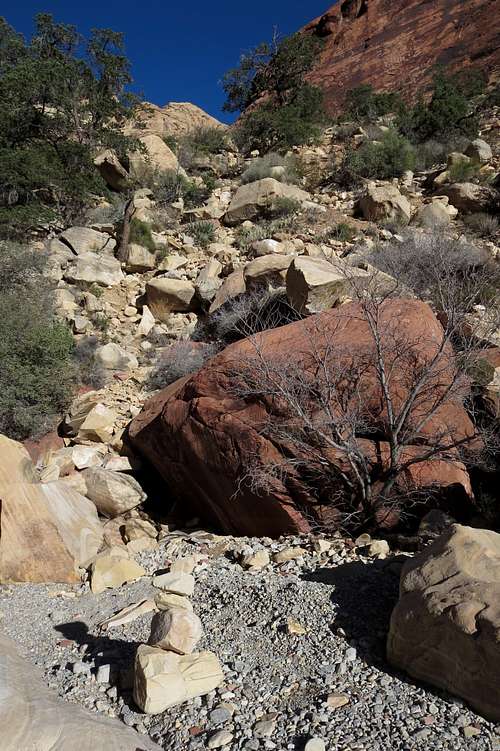
Cairn in First Creek Canyon
After getting above the canyon and then continuing west for a bit, paralleling the canyon, the path of least resistance led me up and back to the right into a small sandstone bowl guarded by steep slabs and cliffs. See the pictures below. A little trial and error got me through, and the occasional cairn told me that at least one other person had been that way. Since many Red Rock routes are heavily (excessively) cairned and this section wasn't, it confirms my suspicion that I wasn't exactly following the Hidden Bowl route as described, and cairned, by others.
The "Hidden" Hidden Bowl
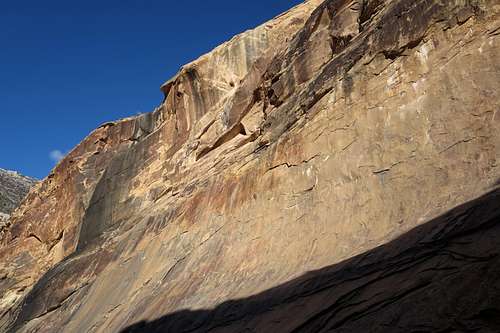
To exit the bowl, ascend toward its head but look for a gully- or chimney-like feature on the right (see below). Climb this Class 4 pitch (the toughest single spot I encountered on the route-- it is harder at the start and then gets easier) and hike past the rim of the bowl.
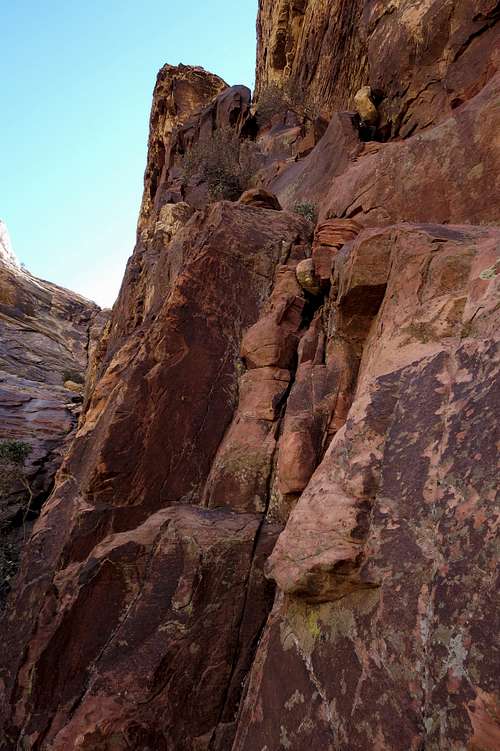
Crux
Then start heading up and left, aiming for a prominent drainage. You'll probably spot some cairns helping steer you, but they really aren't necessary. Enter this drainage and follow cairns or whatever other path works for you. You are now in the Hidden Bowl.
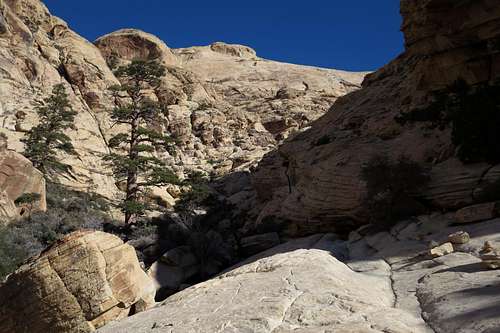
Entering Hidden Bowl
The diagrams linked to a bit up on this page suggest that people take a line more on the left side of the bowl initially and work their way generally up the center or slightly to the right of it. However, I went up more along the center and slightly right of center from the very beginning. Regardless, I seemed to have wound up on the summit ridge at about the same place others do and seemed to have more or less followed the same track on the upper part of the bowl. My exact way wasn't cairned, but it was no harder than Class 3.
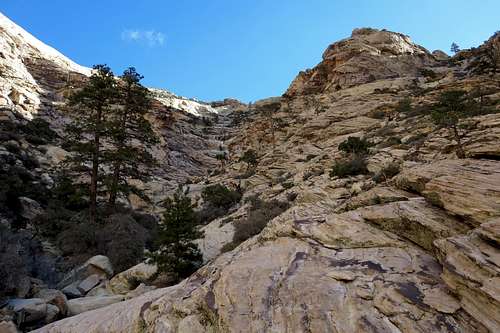
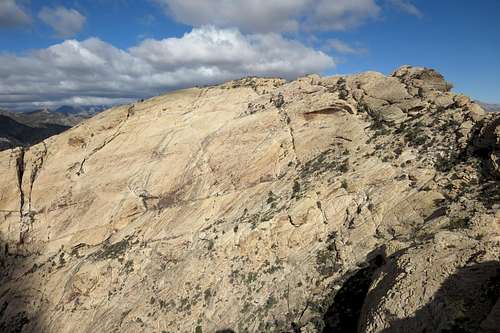
Hidden Bowl
The twin summit blocks of South Wilson are worth it of you have the time and interest. They are smaller, more exposed, and more challenging to climb than the summit block of Mount Wilson is. The ridge traverse between Wilson and South Wilson is not difficult-- Class 4 is possible but not necessary.
To Wilson from South Wilson