
-
 4120 Hits
-
 80.49% Score
-
 12 Votes
|
|
Route |
|---|---|
|
|
Trad Climbing |
|
|
Summer, Fall |
|
|
A long day |
|
|
5.9 (YDS) |
|
|
11 |
|
|
IV |
|
|
Overview
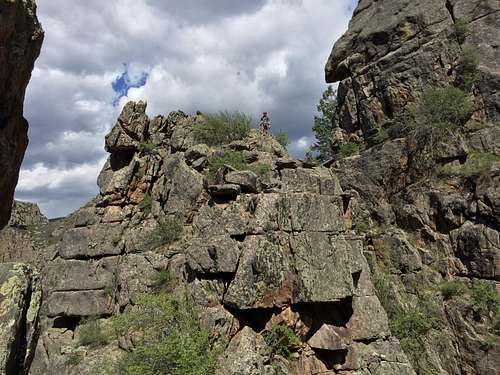
Topping out Grand Control to Major Tom
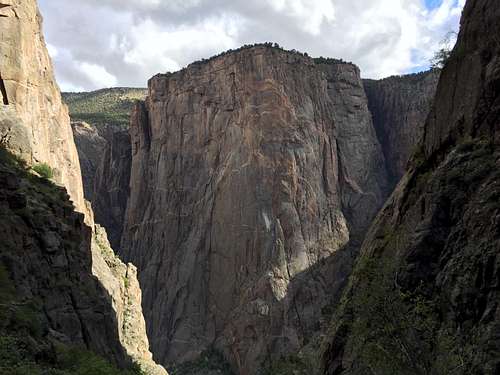
North Chasm Wall as seen from Chillumstone Gully
The old guide book: Black Canyon Rock Climbs by Robbie Williams rates this climb as 5.8, but the new book "The Black: A comprehensive climbing guide to Black Canyon of the Gunnison National Park" by Vic Zeilman gives it a well deserved 5.9 rating, and a great description + topos. I would highly recommend to use the new guide book. (The old guide book has only a vague description of the route).
Some consider this route to be a variation of Cimarron Slabs. Both routes eventually meet higher up. Ground Control to Major Tom has per many different reports better climbing.
Expect a long day, although the climb is only 7 full pitches (60 meters), all are pretty sustained and the climbing is much more involved than other easier 5.9 climbs in the Black (Maiden Voyage or Casually Off Route). After 7 pitches of Ground to Major Tom, you will climb 4 more pitches to get off the wall. (There are 3 additional long pitches on the upper Mirror Wall involving 5.9 moves, tons of 4th class scrambling to get onto rock island one and down to the notch between rock islands one and two, and then 5.5 pitch to get onto 2nd island). You do have an option to rappel down into Chillumstone Gully from the top of the route Ground Control to Major Tom, but more climbing sounded to us like more fun. The Chillumstone Gully is steep and we found it also wet and slippery, not a pleasant way to finish your day.
You need to obtain a free permit at the visitor center prior climbing - there is a post outside the visitor center if starting early.
Chillumstone Gully is not often traveled one and if you have hiked other gullies in the Black, expect this one to be the gnarlier one. Bush whacking, sliding on mud, 4th class down climbs will eventually bring you to a rappel. There could be a fixed rope set up (we found an old rope there in 2017), but do not count on it. You need a 70 meter rope for the rappel. (60 meter rope is sufficient for the climb, but not for the rappel.).
FA:Stewart Green, Dennis Jackson, Major Tom Lumen- 1980.
Getting There
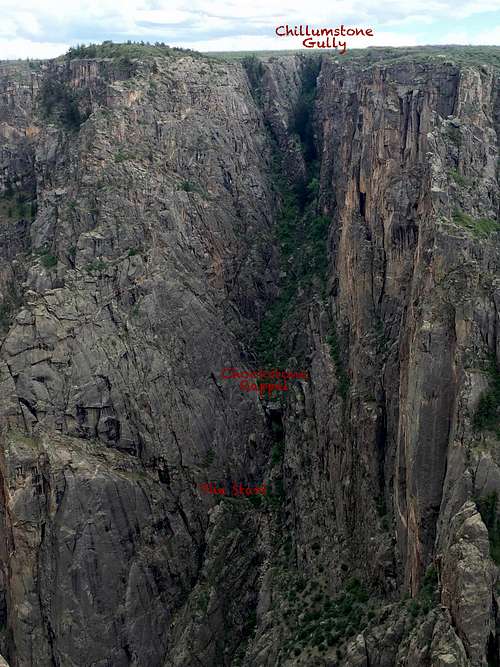
Chillumstone Gully
Chillumstone Gully
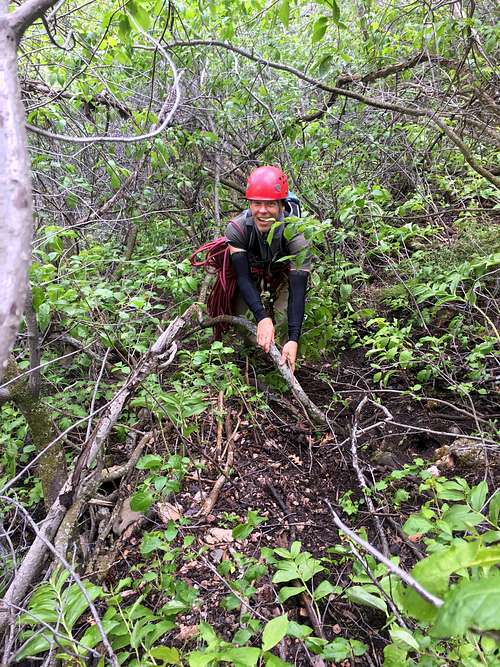
Chillumstone Gully: From the visitor Center drive past the Pulpit Rock, Cross Fissures and Rock Point Overlooks. Either park at Devil’s Overlook and walk up the road a short distance, or locate a single car pull out (the best option) right next to the 20 MPH curving road sign. From the 20 MPH sign, scramble down the hill to a faint climber’s trail that leads to a stand of pine trees. Thick oak brush and steep, loose dirt will eventually turn to gnarly bushwhacking before opening up into a more rocky drainage. 30-45 min of scrambling (with the occasional section of 4th class down climbing) leads to the Chockstone Rappel. We descended after a slight overnight rain and the gully was wet and very slippery. It took us 45 min to get the the rappel, which is really far down. I called the day before our climb the ranger station to inquire whether the rappel has a static line (sort of like Cruise Gully), the park ranger referred me to the last guide book "The Black: A comprehensive climbing guide to Black Canyon of the Gunnison National Park". The book did not mention the rappel set up, mountain project comment from 2013 mentioned there is a fixed rope. We found an old rope which appeared safe and rappeled down. I expected the rappel higher up the gully, but once there, you are almost at the level of your climb. From the top of the rappel it took us less than 15 min to get to the base of the climb, which was easy to find based on description and the start was marked with a small cairn. I doubled the cairn in size.
The climb starts in the middle of the upsloping terrace, located 150-200 feet below the Chockstone rappel on the right. Look for a short, right-leaning crack (bushes above). There is a cairn at its start.
About Chillumstone Gully: The Chillumstone Gully is home to many of the longer moderate climbs on the South Rim, as well as impressive vistas of North Chasm View Wall on the opposite side of the river. Although it is one of the nastier drainages in the Canyon, for those with the right mindset, a trip to this area of the Black is highly recommended - Vic Zeilman. It is unclear who first explored this gully, but it quite possible that it was Layton Kor.
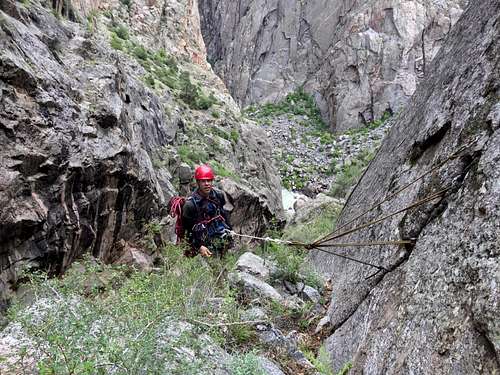 Fixed Rappel in Chillumstone Gully | 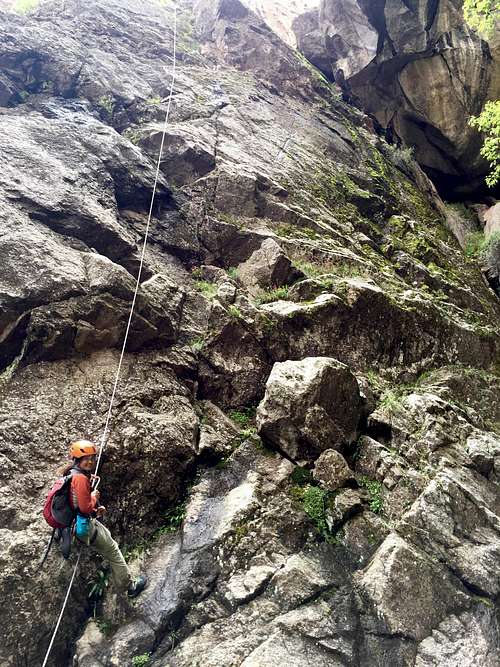 Fixed Rappel below the chockstone | 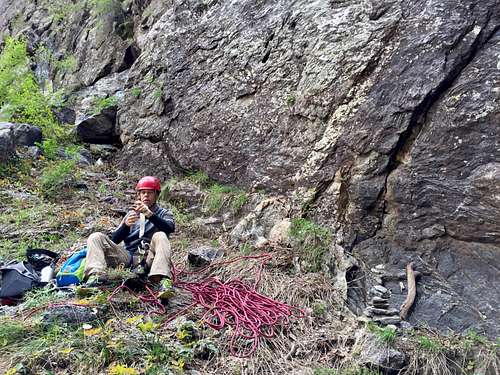 Start of the climb |
Pitch 1: Climb the right leaning crack (relatively easy to identify) 5.7-5.8 to a stance at a bush (optional belay, but better to continue to save the time) and continue up the long, right-angling 5.8/5.9 layback corner to a small ledge with tricky belay pro. (60 meters). You will be traveling through some bushes, but nothing too bad. We had slightly wet condition, and the rock was slippery adding more excitement to the climb.
Pitch 2: Move right and climb the upper of two seams/ramps 5.8 to a small ledge. Continue straight up a blocky corner, eventually moving left into the more prominent crack system (5.8R where a large flake used to be, higher up. The flake is mentioned in the old guide book and on Mountain Project). Follow this to a belay ledge with blocks. There was a cam stuck there - we used it + back it up for setting up an anchor. (50 meters).
Pitch 3: Traverse hard - left on a sparcely protected 5.8 slab to a stance at the base of another crack system. It is pretty obvious where you need to go. We were able to place a small cam at the start of the climb and another one before the end. (25 meters)
Pitch 4: Climb the awkward 5.8/5.9 layback/undercling crack and continue up easier terrain, intersecting Cimarron Slabs below a pegmatite groove/chimney (optional belay). Climb the groove 30 feet of unprotected 5.6/5/7 and belay on the ledge above (60 m). We found the start of this climb wet, the layback starts really wide, good to have #4 camalot here. The grove/chimney towards the end was moist, wet also and filled with a beautiful moss. Watch your footholds here.
Pitch 5: Climb a well featured, but incredibly run out, 5.7 slab with one bolt. Some gear toward the end of the pitch protects a few 5.8 moves, but do not expect any gear at the start of your climb unless you choose a more difficult variation of the slab on your left side (there is a thin crack initially). We climbed the easiest and cleanest weakness on the slab to a bolt 50 feet above the belay. The exposure here is tremendous. The climbing for the 2nd climber is truly enjoyable, but the leader has to be confident. Take a deep breath when you reach the bolt roughly half way up, and continue to a belay stance marked with single bolt. (50 meters).
Pitch 6: Move left and climb 5.7 hand crack to bush, dirty terrain above. Once on the terrace, move right and belay near a junky chimney at the end of the ledge. This pitch was shorter, and went through some bushes. Expect some rope drag.
Pitch 7: Continue up the dirty 5.6 chimney passing the old rappel station (we did not see it, but we climbed the left chimney which seem more fun). Belay at the notch near the top of the buttress.
The first 7 pitches are part of the Ground Control to Major Tom, but this is only part of the adventure. There are 3 more pitches on the Upper Mirror Wall with 5.9 moves, 4th class scramble over from 1st rock island to the notch between the 1st and 2nd island and 5.5 pitch leading to the top of 2nd island and again some 4th class scramble from this island. This would be extremely hard in the dark, plan accordingly. If running out of time, daylight, or bad weather approaching consider finding old rap station and descend into Chillumstone Gully and walk up the steep gully instead.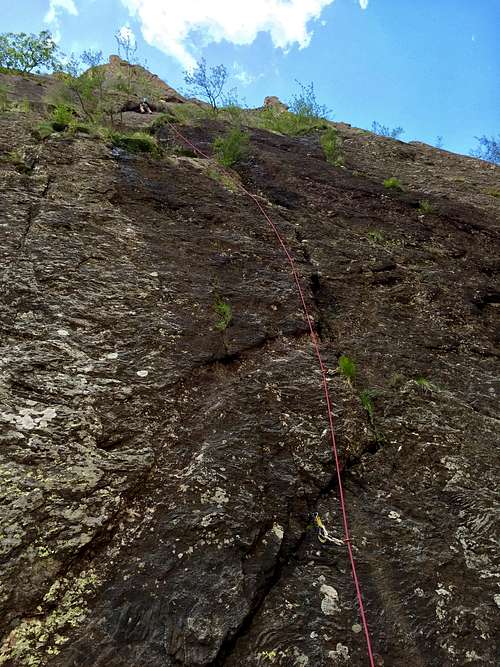 1st pitch | 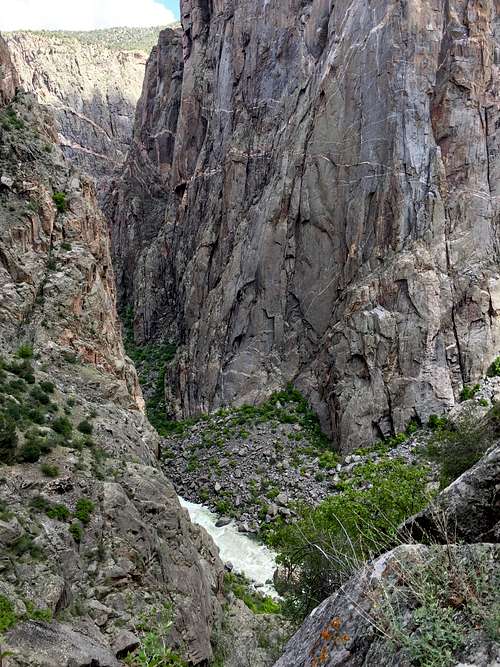 View from the top of 1st pitch | 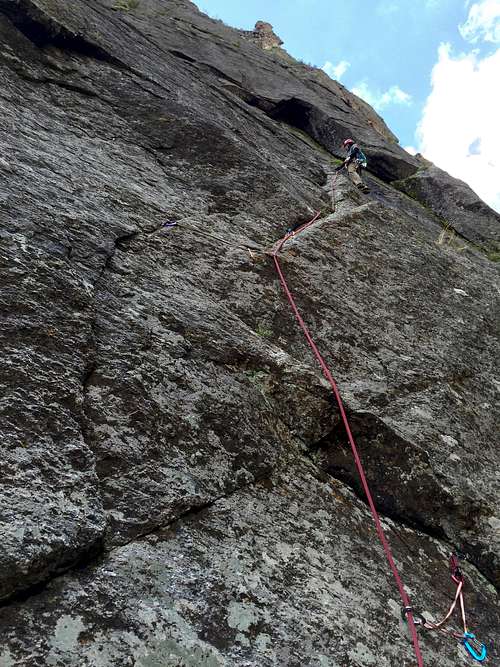 2nd pitch | 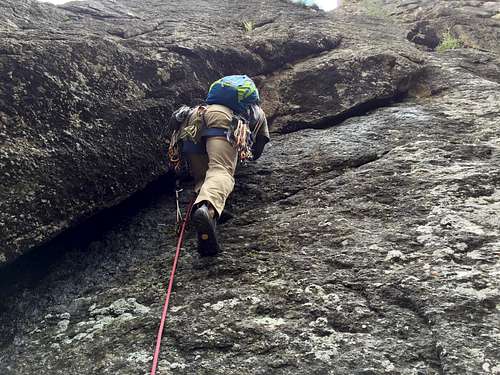 Pitch 4 |
 Top of 5th pitch | 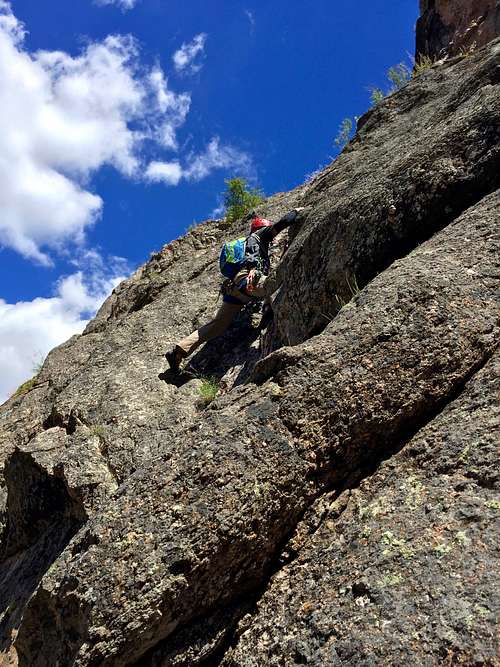 Pitch 6 | 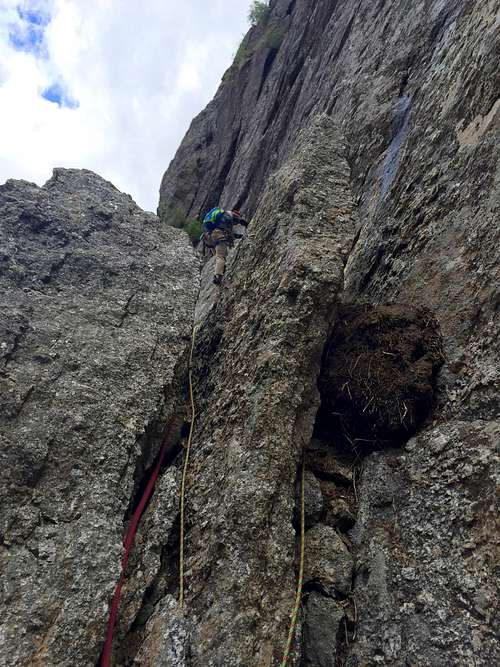 3rd pitch | 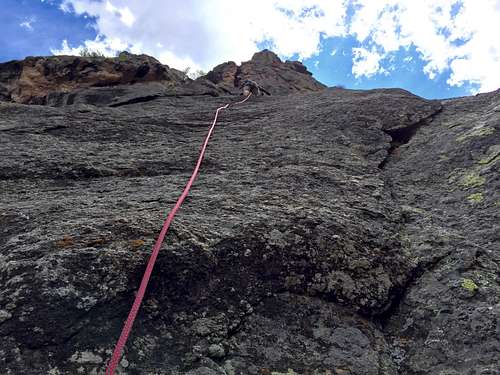 5th pitch |
Finishing to the Rim - Upper Mirror Wall
Pitch 8: Down climb into the notch below the next headwall. The down climb looks very steep and is super exposed, but it is not that bad. It is better to stay roped up here. Climb a short 5.8 hand crack on the left edge of the wall. From the large ledge above, continue up a 5.9 crack that leads to a triangular roof. Exit right and belay (60 meter). We found some hand cracks, but for the first one we also saw an easier option to get up. Pitch 9: Move up and left to a short, awkward 5.9 crack followed by easier wandering on the ridge. Belay at a large terrace above. We got a little confused here I have to admit. We found some more difficult terrain.
Pitch 10: Move the belay 100-150 feet along the terrace to the right. Climb a short 5.9 fist crack to a stance followed by finger crack. This brings to to the top of Mirror Wall - the 1st rock island.
The 1st rock island is big! But there is no walk off from here. It ends up abruptly with steep walls on all sides. Coil the rope here and walk 10 min along the right edge (initially in the middle, then towards the right), looking for a weakness leading to the 2nd rock island. You can see your car parked nearby, yet, you are still far away with technicalities ahead of you. There was not much of a trail. The steep descent gully was marked with 2 small cairns. The down climbing was steep, but felt secure. Later, I have noticed even a fixed line to the skier's left on the gully (we have not used it).
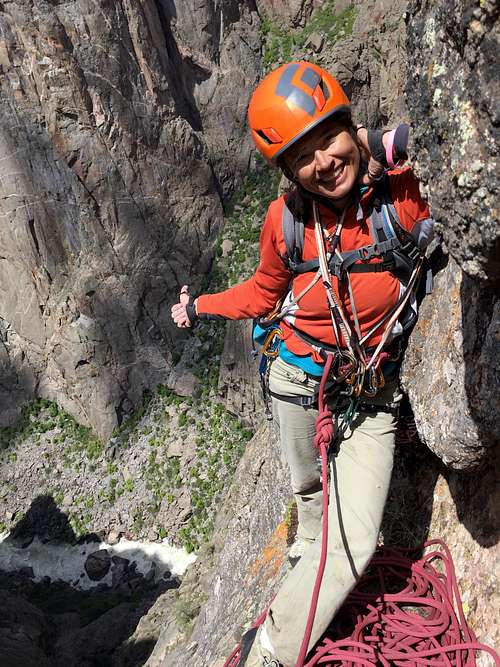
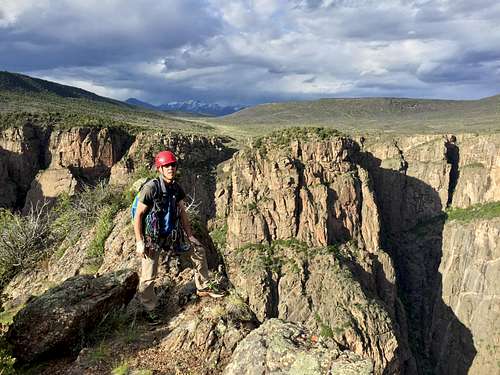
Scramble just below the notch between 1st and 2nd rock islands, pay attention to your footing, it is all loose here. We chose just to climb straight up from the opposite descent gully of the 1st island. The rock was loose at places and there were plenty of 5.5/5.6 moves here = pitch 11. Finally, we reached the summit of the 2nd rock island, which is much smaller. The views from here are spectacular! The short 4th class descent gets you into the upper part of Chillumstone Gully and 5-10 min walk to your car.
 Rock Island 1 | 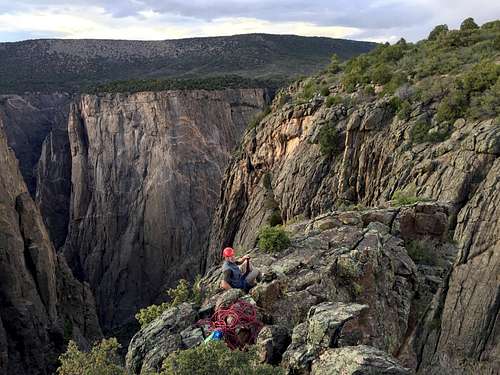 Rock Island 2 |
Essential Gear
- Standard trad gear: a lot of small cams and all the way up to #4 camelot. (we carried doubles for sizes 0.5 to 4 and used it all), plenty of long slings
- One 60 meter rope is sufficient for the climb (as long as the rappel rope is in place).
- Personal climbing gear.
- Plenty of water.
I listened to David Bowie's song prior the climb and kept singing it while climbing: Ground Control to Major Tom, Ground Control to Major Tom, Take your protein pill and put your helmet on....
External Links
- Ground Control to Major Tom on Mountain Project
- Rock climbing in the Black - NP website, remember you have to fill a free permit (available at the visitor center).
- Ground Control to Major Tom - listen to David's Bowie song (I kept it singing while climbing).