Overview
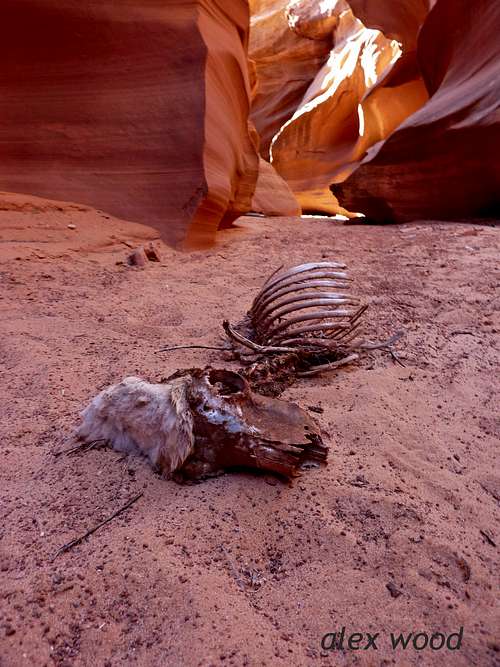
![Beautiful, but Deadly]() Desolation in the depths of Waterholes Canyon
Desolation in the depths of Waterholes Canyon
Waterholes Canyon is an amazing technical slot canyon located just south of Page, Arizona. The upper part of Waterholes Canyon lays on the Navajo Reservation above the rim of Glen Canyon. The lower sections empties out into the canyon to the Colorado River, which is part of the Glen Canyon National Recreation Area. In 4 miles, this canyon drops 1500 feet through the Page Sandstone (a lateral variation of the Navajo Sandstone )in Glen Canyon.
Waterholes is an amazing canyon for numerous reasons. One is that it looks almost like Antelope Canyon, which is only 8 miles away, but the lack of crowds make Waterholes alot nicer. It is also a very technical canyon. While you don't have to build your own anchors, there are 15+ rappels (depending upon how you count them). Lots of stemming is required with some impossibly narrow sections. Swimming is required in a few sections as well. Then the coolest thing, the crux- a 300 ft rappel over featureless sandstone. If you do this rappel, then you are committed and have to float the Colorado River to Lees Ferry for 4 miles or catch a ride on a boat somehow.
If you are an avid canyoneer, just getting started, or looking for photo opportunities minus the crowds, there are options for you. Waterholes Canyon is divided into three sections: Upper, Middle and Lower. Upper Waterholes is very photogenic and offers easy hiking with a little bit of climbing. Middle Waterholes offers around 5 rappels and is often the location of many canyoneering classes. Lower Waterholes has the "Big Drop", the 300ft rappel it also has swimming sections along with the narrowest section of the canyon.
What to Bring: No technical gear is needed for Upper Waterholes. A small rope might be useful for one section (see route beta). For Middle Waterholes, bring a 60m rope, rappelling gear, helmets, and extra webbing. For Lower Waterholes, bring two 60m ropes, helmet, lots of webbing, dry bags, wetsuits (would be helpful earlier in the year), headlamps (there are some dark sections, but you can get by without), ascending gear, personal anchors and lots of food and water. We brought inflatable kayaks and paddles into the canyon- I really don't recommend a repeat of that. Be sure to bring a knife too. In many parts, especially on the big rappel, there is lots of old webbing and rope. If you bring a knife you can cut away these "rats nests".
![Google Earth Overview]() Google Earth breakdown up Waterholes Canyon Google Earth breakdown up Waterholes Canyon |
![Elevation Profile]() Elevation Profile of Waterholes Canyon (not entirely accurate) Elevation Profile of Waterholes Canyon (not entirely accurate) |
Route Beta
Upper Waterholes- 2A II
Upper Waterholes is the least technical section of this canyon. Upper Waterholes is considered anything above Waterholes Bridge. Although these are the least technical sections of the canyons, there are some of the most photogenic. To get into the canyon, you have to walk about about a quarter mile along the rim. Cairns dot the trail here and there. Once in the canyon, you can either hike upwards or go downwards towards Middle and Lower Waterholes. If you're just here to hike Upper Waterholes, then I would recommend checking out something called the "Great Wall". The Great Wall has some amazing cross-bedded sandstone outcrops above the canyon that almost look like the Wave. These are located about .50 miles from the Waterholes Parking area. If you are looking to do Lower and Middle Waterholes, just head down canyon. However, if you are here for the upper section, there are some things you need to know.
![Waterhole s Wave]() The Great Wall The Great Wall |
![Waterholes Bridge]() Waterholes Bridge Waterholes Bridge |
From top to bottom- A large wash sits above the slot canyon part of Upper Waterholes and it gets narrow pretty fast. These are some tall, photogenic slots in here. There is some downclimbing/climbing to be done here. There are a few tight sections that have slopping dry falls. One of them is fairly hard, but with another person there to assist you, it can be climbed or downclimbed fairly easy. This section then ends and opens up into a wider part. Then, the canyon becomes quite narrow- the narrowest parts of Upper Waterholes. The winding slot continues for sometime and then you reach a 15ft slopping dry fall. One could just slide down, but its a little high to do that. We used a meat anchor (just wrapped the rope around someone and put them around the corner of the canyon). Once we were down, the other person slide down while we spotted. The canyon from here on is still pretty tight for a few and then opens up again to the part where you would enter if you were doing Lower/Middle Waterholes. Parts of this section could have water, but if there is, its only enough to get your feet wet.
![Technical Section]() The only technical part of Upper Waterholes. Its pretty easy The only technical part of Upper Waterholes. Its pretty easy |
![Cross Bedded Heaven]() Fluted Walls Fluted Walls |
![Fluted Walls]() More photogenic sections in Upper Waterholes More photogenic sections in Upper Waterholes |
<
![Beautiful, but Deadly]() Beautiful, but deadly Beautiful, but deadly |
Middle Waterholes- 3A II- Updated 11/14/13 to reflect current conditions!
Middle Waterholes, as said before, begins after the Waterholes Bridge. The first difficulty is just after the bridge and its downclimbing from the wedged car under the bridge-its just awkward. The going is a little easier after that as you walk the narrow slots that open and close repeatedly. Rappel 1 is around 20 feet. It is kind of awkward because two sets of bolts have been cut. Now, there is a single bolt standing up directly over the rappel and you just have to rap the bolt with your rope. As you go down, make sure tension stays on the rope otherwise it will come off. The two times that I have been, there was a dinky yellow rope in place. After this rappel, the slot opens and closes up again. The going is still pretty easy
![Top of Rappel 1]() Looking down rappel 1. Don't use this rope. Just wrap your rope around the bolt. Looking down rappel 1. Don't use this rope. Just wrap your rope around the bolt. |
![Rappel 1]() Looking Up Rappel 1 Looking Up Rappel 1 |
Rappel 2 is the biggest rappel in Middle Waterholes. Its a good idea to bring a personal anchor for this because the bolts (on your left) are perched right on a sloping ledge over the drop off. This rappel is around 60ft (18m) and is overhung. Water could be at the base of this rappel because its a small keeper pot hole. The first two times I did Middle Waterholes there was moisture/mud, but no water. The third time (November 2011) it was filled to the brim and was a swimmer. If this is the case, you can avoid it if you want!!! Instead of doing the 60ft rappel in the canyon proper, you can hike out to the right to an alternate set of anchors. There is one set higher up that if you use them, you have to veer to the canyoneers right to another set of anchors on a nice platform (30ft). From here, its around 85 feet to the bottom. Once again, I would only use this rappel if you are trying to avoid the keeper pot hole when its full of water. Update: The keeper pot hole at the bottom is now about 13ft deep! (2.5 m)! It is very hard to escape! A pack toss or pot shot is needed to get a rope up there. There is lots of mud in the bottom too making the task of getting out even harder. I would almost just plan on doing the alternate rappel on canyoneers right to avoid this (no update on the anchors for that rappel).
![Big Rappel]() Rappel 2 Rappel 2 |
![Looking up Rap 2]() Looking up Rappel 2 Looking up Rappel 2 |
Rappel 3 is a short rappel soon after rappel 2. The anchors are higher up on the wall on the right. An personal anchor might be good here. This rappel is only 25ft.
![Rappel 3]() Looking at rappel 3 Looking at rappel 3 |
![Towards Rappel 3]() Back towards rappel 3 Back towards rappel 3 |
Rappel 4 is a fun rappel and the last rappel in Middle Waterholes. The canyon opens up dramatically at this rappel. You walk out on to a small ledge hugging the canyon wall. Large bolts and hangers are on the wall on the right. This rappel is around 25ft on a sloping wall- you can go really fast here. The rappel used to be around 40ft, but floods in the summer of 2103 made this drop shorter.
![Rappel 4]() Setting up Rappel 4-this flake directly in front is now gone. It was washed away in floods during the summer of 2013. Setting up Rappel 4-this flake directly in front is now gone. It was washed away in floods during the summer of 2013. |
![Down Rappel 4]() Down Rappel 4 Down Rappel 4 |
Update: There are three more rappels after rappel 4 as of 11/14/13. The first one is above where the "cruxy" down-climb used to be. It is a massive chokestone with webbing around the pinch point between the boulder and the wall. This one is around 20 ft (6 m) high. The next is a two stage, 25 ft (7.5 m) drop that is fairly difficult to rappel. Webbing is found on a small choke-stone (unnerving) on the left. Something needs to be down to improve this anchor (deadman?). After this, the canyon takes a 90 degree turn to the left and a 10 ft (3 m) climb is required to get to the top of the next drop. This drop is about the same height, 10 ft (3m) and can either be down-climbed or rappel (using bolts on canyon left). The canyon opens dramatically right after this and takes a sharp right. Shortly after this is the escape route out on the right. You can't miss the route-its the only way to get out of this lower part and its pretty obvious. Cairns mark the route up. If you reach another set of narrows and potholes you have gone to far, stop! (unless you are doing Lower Waterholes). Some parts are pretty loose so be careful of rock fall. The crux of the climb out comes towards the top. There is a decent amount of exposure and there is a piece of webbing to aid your climb in this spot. The climbing doesn't exceed low 4th class. After this, you pop out on the top of the canyon. Just follow the canyon rim east and you will eventually reach Waterholes Bridge.
![The Hard Downclimb Again]() The harder downclimb-now gone! This is the first part of a rappel. Where the guy with the blue backpack is standing is now 8ft down and then there is another 10 feet below that. Updated 11/14/13 The harder downclimb-now gone! This is the first part of a rappel. Where the guy with the blue backpack is standing is now 8ft down and then there is another 10 feet below that. Updated 11/14/13 |
![Photogenic Section]() The photogenic section towards the end. This is now replaced with a large pile of debris and requires a ten foot climb to get to the top of the third new rappel. Updated 11/14/13 The photogenic section towards the end. This is now replaced with a large pile of debris and requires a ten foot climb to get to the top of the third new rappel. Updated 11/14/13 |
![End of Middle Waterholes]() Where Middle Waterholes opens up. The escape route is right around here Where Middle Waterholes opens up. The escape route is right around here |
![Lower Waterholes]() Looking back down from atop the escape route at Lower Waterholes Looking back down from atop the escape route at Lower Waterholes |
Lower Waterholes- 4B IV (if doing Middle Waterholes)
This is now the point of no return. Committing to this section is an arduous undergoing. From here, you have hard down climbing, a 300ft multi-pitch rappel (or single rappel if you have a 300ft rope), and you have to float the Colorado River for 4 miles to get to Lees Ferry. You can leave your ropes and jumar up on the return. Make sure you are properly equipped to do this section!! From the escape route out, head up on to the cliff bands above the slot. You could follow the slot in this place, but its a little faster to bypass this section due to a keeper pot hole and some awkward climbing. Cairns indicate when you enter into the canyon again. This section requires lots of stemming. There are bolts in one spot to prevent one from failing in a huge keeper pot hole that is some 20 or so feet deep. Shortly after this, the canyon gets very very tight and drops around 25feet. This is the narrowest canyon I have ever been in. There is hardly enough room to squeeze through. This part looks daunting at first, especially with the drop, however, stemming here is pretty easy. There is no way you can keep your pack on and there is hardly room to even pull it through.
![Keeper Pot Hole]() Keeper pot hole at the start of Lower Waterholes. Its pretty easy to get out of, but in the sake of time, its best to avoid it Keeper pot hole at the start of Lower Waterholes. Its pretty easy to get out of, but in the sake of time, its best to avoid it |
![Fixed Webbing]() Fixed webbing to help avoid a very deep keeper pot hole Fixed webbing to help avoid a very deep keeper pot hole |
![The Very Tight Section]() Entering the bowels of Waterholes-the narrowest section of Waterholes Canyon Entering the bowels of Waterholes-the narrowest section of Waterholes Canyon |
![Very Narrow]() Squeezing through the tightest part of Lower Waterholes Squeezing through the tightest part of Lower Waterholes |
Rappel 5 is an easy rappel of about 15 feet. Bolts are found just above the rappel on the right (?). Some people downclimb it, but I think it iis better to rappel it. It was really dirty when we were there with mud from floods, which would make downclimbng somewhat hazardous. Shortly after this, there is a small, natural arch with a slopping downclimb into it.
![Rappel 5]() Dirty Rappel 5 Dirty Rappel 5 |
![Kyle]() The downclimb into the Natural Arch The downclimb into the Natural Arch |
This is the part of the canyon where you get to get wet! The canyon stays narrow after this and one has to deal with a waist deep pool. We had one friend that was able to stem over it, but most of us just gave up and went through it. Another water section ensues. On this one, everyone might get wet. This was about chest deep and pretty cold. Once again, one of friends was able to get through without getting wet, but it was a work of art to say the least. Another water section comes right after this one. On this one, at least one person has to get wet. There are bolts on either side of this deep pool (you have to swim if you go in the water and it is cold!). We rigged up a little zip line to cross, which worked out wonderfully. After this one, the canyon begins to open up.
![Typical Scene]() Stemming over the first pool Stemming over the first pool |
![Another Pool]() Coming to the second pool Coming to the second pool |
![Getting Wet]() Getting Wet in the second pool Getting Wet in the second pool |
![Third Pool]() Coming to the third pool Coming to the third pool |
![On the Zip Line]() Me on the zip line Me on the zip line |
![Looking Back at the 3rd Pool]() Looking back at the zip line and the third pool Looking back at the zip line and the third pool |
Rappel 6 comes right after this last pool. The bolts are up on the right side of the wall close to the ledge. In order to get there, you can either hug the little ledge with your toes or slide into a little curved dryfall. At least one person needs to go on the ledge to get to the anchors. Once the anchors are set up, that person can then lower themselves down with a little handline and start the rappel. This rappel slopes along a dry (sometimes moist) 50ft wall.
![Rappel 5]() The top of rappel 6 The top of rappel 6 |
![Back at the 6th Rappel]() Looking back up at rappel 6 Looking back up at rappel 6 |
Rappel 7 comes right after Rappel 5. This is the top part of the big rappel. If you plan on ascending your ropes back to the escape route, don't do this rappel!!! The bolts for this rappel can be found on a block on the right overlooking a narrow slot. This rappel is tricky because it is in a whirling, tight slot. This rappel is around 60 feet. Important: stay on rappel at the end of rappel 7. The bottom of rappel 7 is very, very tight and there is hardly any room to move. The big rappel starts here!! In this very tight section, there is an array of bolts, pitons and other anchor gear. Don't even use them!! Stay on rappel and go over the ledge to a set two bolts with alot of webbing. If you do this, rope maintenance will be alot easier and you will be able to re-direct your ropes to avoid the rope eating crack! The only downside is that these hangers are just over the lip of the big rappel so you have 300ft of exposure below as you hang.
![The Anchors]() The top of rappel 7 The top of rappel 7 |
![Narrow Rappel]() The narrow part of rappel 7 The narrow part of rappel 7 |
Rappel 8 (first rappel of the multi-pitch) is a difficult rappel because one has to contend with the rope eating crack. Your probably thinking "oh I can avoid it"...good luck. While hanging on the previously mention anchors, make sure your ropes are in order (this is where you need to tie the two 60m ropes together!). We had poor rope maintenance and almost lost our ropes. What works better is to have the first person go down and feed the ropes out (you can do this by coiling the rope on a webbing, in a rope bag or in your pack). If you drop the ropes from the top, they will end up in the rope eating crack one way or another and then you are screwed. This rappel is 150ft. There is a little bulge maybe 130ft down and if you look right (canyoneers right), you will see some plants growing in the middle of the wall and a bunch of bolts and anchors. You now need to do a pendulum over to those anchors-its easy. Or you could just veer right as soon as the rope eating crack ends. This is another hanging belay. "Hang out here" until you partners join you. Be very careful pulling your ropes!
![Top of the Big Rappel]() On the top anchors on the big rappel On the top anchors on the big rappel |
![Looking Down]() Looking down from the top of the big rappel Looking down from the top of the big rappel |
Rappel 9 (second rappel of the multi-pitch) obviously comes directly after rappel 8. Once again, using good rope maintenance, redirect your ropes and set up this rappel. This rappel is around 180ft and is fairly easy. The bottom is a little overhung and you just have to lower yourself.
![Mid-Wall Anchors]() Mid-Wall Anchors Mid-Wall Anchors |
![Mid-Wall View]() Mid-Wall view Mid-Wall view |
A few pointers about the big rappel... Leave yourself a big chunk of time to do this rappel, it takes awhile. A good idea is to hang your packs with webbing off of your harness. If you don't, then you will be exhausted by the end of this rappel because it takes alot of effort to support your weight and your packs weight while hanging or rappeling on a big wall. Have no more then 4 people for this part! Having more then 4 people on these anchors is a big hassle and makes life alot harder. Everyone in the group needs to have third hands. Some people have done the big rappel with one rope (see the link for "Latest Rave Canyoneering"). Also, there is said to be another route to the climbers left of the big rappel that enables one to only use one 60m rope. You can see some of these anchors up on the wall still, but I don't have good beta for that.
![Hanging off the Wall]() At the top rappel station At the top rappel station |
![Most of Our Party]() Our party at the top rappel station and at the mid-wall rappel station Our party at the top rappel station and at the mid-wall rappel station |
![Looking Up]() Big Rappel from the bottom Big Rappel from the bottom |
<
![Lowering]() Brian lowering himself down on the last part of the Big rappel Brian lowering himself down on the last part of the Big rappel |
Rappel 10 is about 100 yards past the big rappel. There is webbing around a boulder on the left above the canyon. It is possibly to downclimb this one via a little hand line at a dryfall. This rappel is around 25ft
![Looking Back Up]() Big Rappel from Rappel 10 Big Rappel from Rappel 10 |
![Downclimb Option]() Downclimb option for rappel 10 Downclimb option for rappel 10 |
Rappel 11 another small rappel with a fixed line comes after this one next to a seep. The bolts are on the left. The rope was in good condition when we were there-just a little hard to get through our belay devices.
![Bolts for Rappel 11]() Rappel 12 anchors and fixed line Rappel 12 anchors and fixed line |
![Bottom]() Bottom of rappel 11 Bottom of rappel 11 |
Rappel 12 is the last rappel! Two pitons (yikes!!) are located on the right of a huge sandstone ledge. The pitons are solid and were the only anchors when we were there. This rappel is almost around 80ft and slopes unevenly down to the canyon floor. From here, just follow the canyon until you reach the Colorado River. Its about a mile and a half to the river from here.
![Pitons for Rap 12]() Pitons for anchors for rappel 12 Pitons for anchors for rappel 12 |
![Looking Up Rappel 12]() Looking back up Rappel 12 Looking back up Rappel 12 |
![Boulders]() Boulder field below Rappel 12. There aren't too many boulders like this on the hike to the river Boulder field below Rappel 12. There aren't too many boulders like this on the hike to the river |
![All Smiles]() All smiles atop Rappel 12 All smiles atop Rappel 12 |
![Sandstone Towers]() Towering Sandstone Towering Sandstone |
![Hiking the Wash]() Easy hiking along the wash Easy hiking along the wash |
![Almost to the River]() Almost to the river. Almost to the river. |
![Rigging Our Boats]() Rigging our boats that we carried the whole way through the canyon. The sun had already set in this picture. Rigging our boats that we carried the whole way through the canyon. The sun had already set in this picture. |
Red Tape
To hike/canyoneer Waterholes Canyon, a permit is required due to the fact that the upper portion is on Navajo Land. The permit is $5 per person and can be obtained at tribal offices either in Page or Cameron. Click HERE for more information about that. Some people decided not to use permits, which is a possibility due to the fact that permits are not frequently checked. Obtaining a permit before is recommended though.
![Canyoneers Shadow]() Canyoneer's Shadow Canyoneer's Shadow |
![Land Ho]() Land Ho after a long journey on the Colorado River from Waterholes Canyon. This is the only issue about doing Lower Waterholes. You need to get back to Lees Ferry somehow Land Ho after a long journey on the Colorado River from Waterholes Canyon. This is the only issue about doing Lower Waterholes. You need to get back to Lees Ferry somehow |
Also, if doing the whole canyon, you will need to find a way to reach Lees Ferry along the Colorado River from the base of Waterholes Canyon. You could hike along the side, but it is rugged and cliffs out in spots. If you get to the river early enough, you could flag down a boat and ask for a ride. Do NOT try and float the river without a raft of some sort due to the fact that the water is frigid year round due to the fact it comes out from the bottom of Lake Powell. Many people bring rafts or arrange for someone to pick them up at the river. Rafts are the most popular. As far as driving, you could have someone drop you off at the top and then leave a car at Lees Ferry. What we did is we drove two cars up from Flagstaff, parked one at Lees Ferry, drove the other to the top of the canyon. It was alot of driving, but thats one of the easiest ways to do it.
Camping
Camping can be done anywhere in the Glen Canyon National Recreation Area Lee's Ferry is one of the closest camping areas. Established campgrounds can be found around Lake Powell as well. Also, primitive camping around the lake is possible as well. For information about camping in the Glen Canyon National Recreation Area, click HERE. Camping can also be done on Navajo Land with a small fee. Click HERE for more information about that. The Grand Staircase of the Escalante National Monument isn't too far away either, click HERE for more information about that.
Getting There
![Shuttling]() Ready to Canyoneer!
Ready to Canyoneer!To Waterholes Bridge: -From Page: Take Hwy 89 South for just over 6 miles. Park on the left side just before the bride. From Flagstaf: Head north on 89 for around 128 miles. Don't take turn on 89A, which crosses Marble Canyon. Go through the gap. If you get to the Horseshoe Bend Trailhead you have gone to far. The canyon is easy to miss from this direction. Just look for a bridge crossing a slot canyon and then park just after the bridge. To Lees Ferry: You will need to know how to get here if your going all the way with this canyon. From Page- Head south on 89 and just before Bitter Springs you will reach the junction with 89A. Take a right and follow 89A across Marble Canyon (Navajo Bridge) and follow sings to Lees Ferry (Glen Canyon NRA). Follow this till you reach the marina. From Flagstaff- Take 89 north, turn left on to 89A just after Bitter Springs. Follow the same as above
External Links
![Stemming]() Stemming over some water
Stemming over some waterCurrent Weather Conditions The current weather for Waterholes Canyon as provided by NOAA. DO NOT attempt this canyon with chance of rain due to the fact that the flash flood potential is so high, as with any slot canyon. Latest Rave Canyoneering One of the best resources for Waterholes Canyon on the internet Grand Canyoneering Todd Martian's comprehensive guide to canyoneering in the Grand Canyon region. This is the best information available for Waterholes Canyon in a guidebook. America Southwest Good information on Waterholes, but it lacks most of the technical beta needed. Glen Canyon National Recreation Area Lots of information about the area. Navajo Parks and Recreation Information about permits and other canyons on the Navajo Reservation. Technical Slot Canyon Guide to the Colorado Plateau Michael Kelsey's Canyoneering book. His book is amazing for most slot canyons, but not for waterholes. He hasn't done the big rappel yet so any information after that isn't entirely accurate. Even with him not doing the whole canyon, its the best information about Lower Waterholes available in stores. Canyoneering Arizona Tyler Williams guide to many of Arizona's Canyon. He have good information about Upper and Middle Waterholes, but his information about Lower Waterholes is very vague.
Misc and Disclaimer
If you have any more additional information or photos, please contact me or add them to this page. This canyon is a very arduous undertaking. While I can provide lots of information about the canyon, flash floods always rearrange slot canyons and I cannot guarantee the information will be up to date. Always check for current conditions and go prepared for the worst. New beta will be posted as necessary. Thank you!

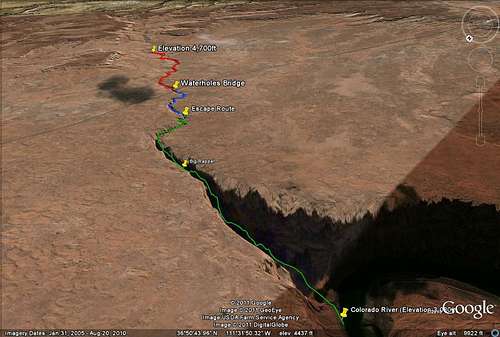 Google Earth breakdown up Waterholes Canyon
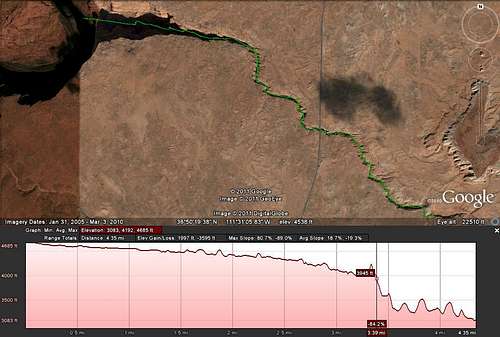 Elevation Profile of Waterholes Canyon (not entirely accurate)
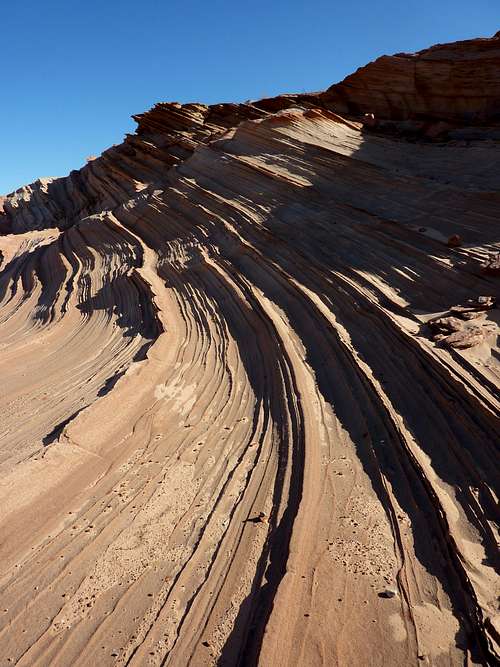 The Great Wall
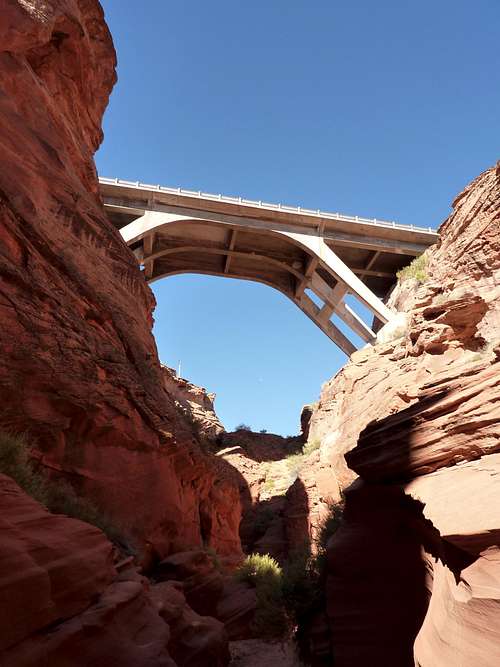 Waterholes Bridge
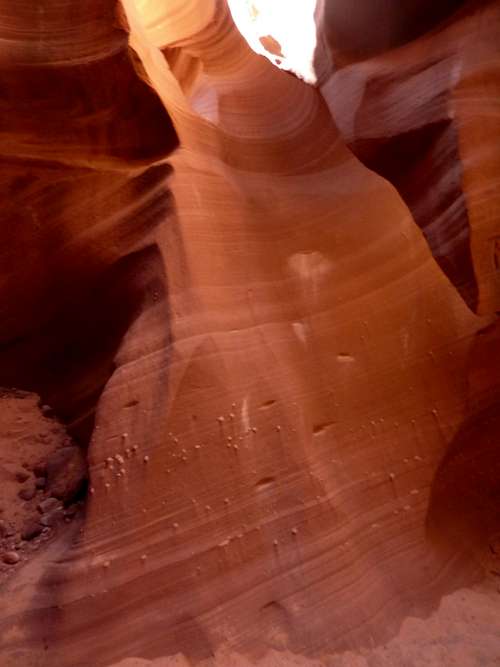 The only technical part of Upper Waterholes. Its pretty easy
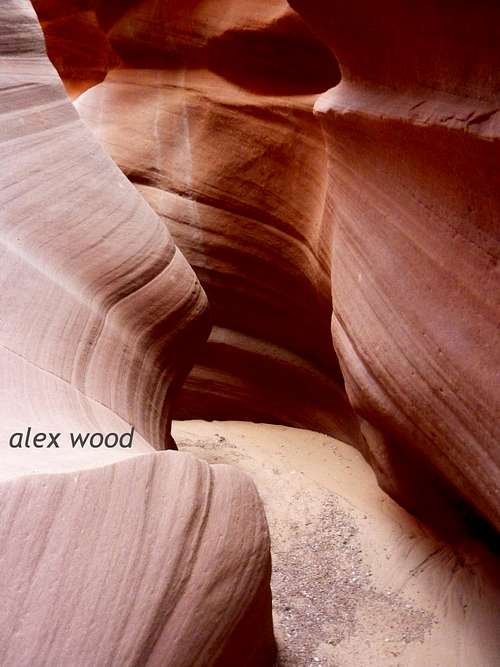 Fluted Walls
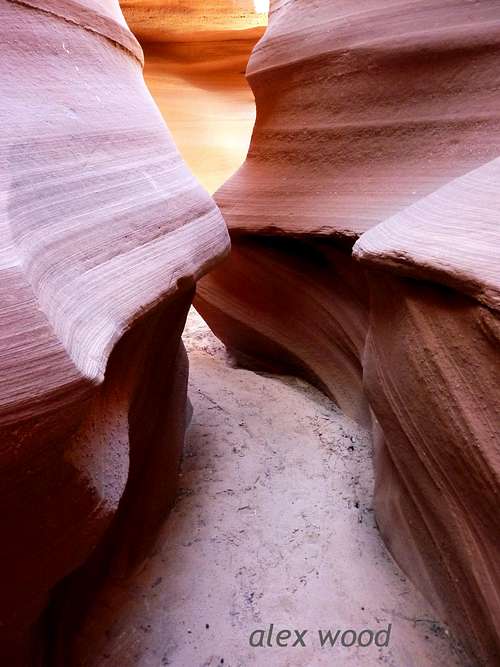 More photogenic sections in Upper Waterholes
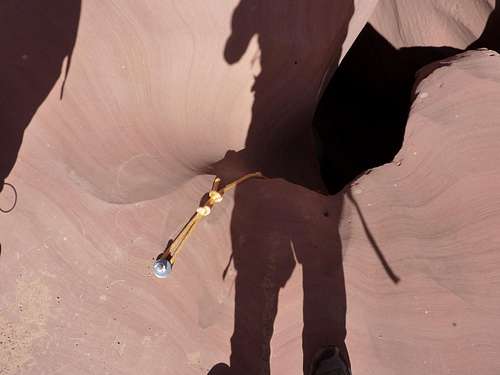 Looking down rappel 1. Don't use this rope. Just wrap your rope around the bolt.
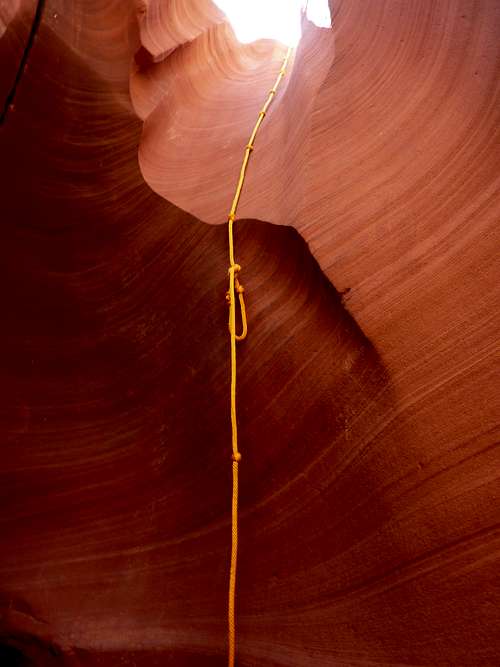 Looking Up Rappel 1
 Rappel 2
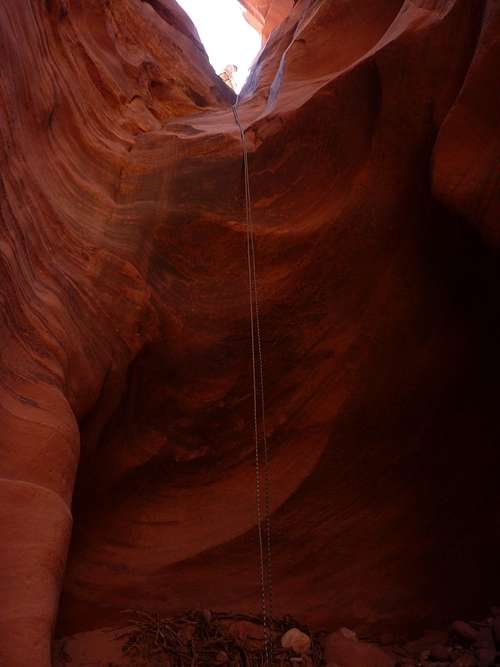 Looking up Rappel 2
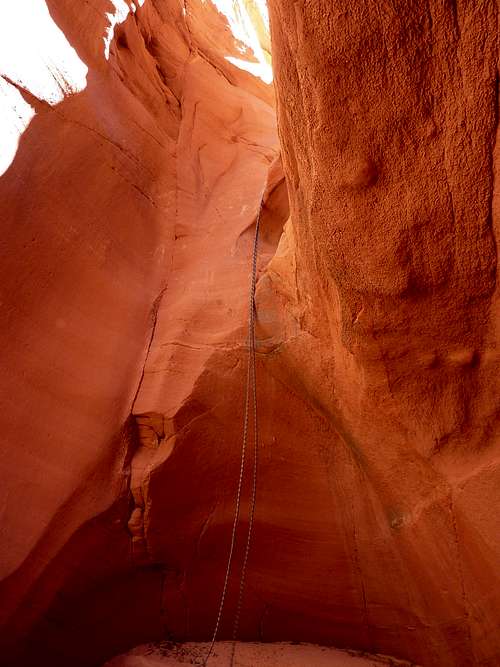 Looking at rappel 3
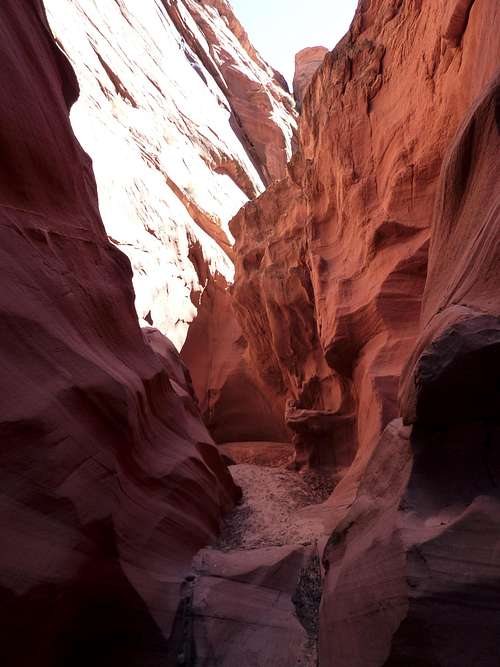 Back towards rappel 3
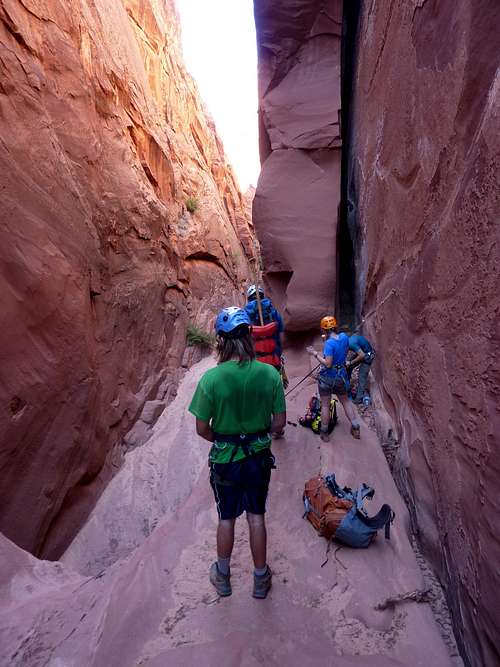 Setting up Rappel 4-this flake directly in front is now gone. It was washed away in floods during the summer of 2013.
 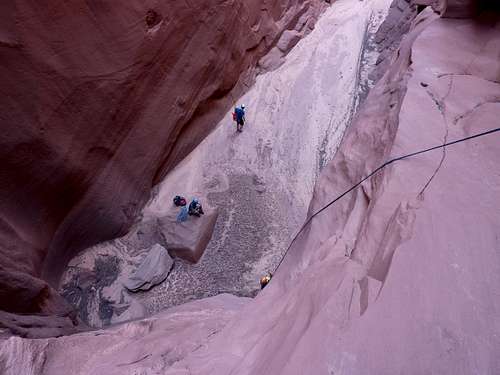 Down Rappel 4
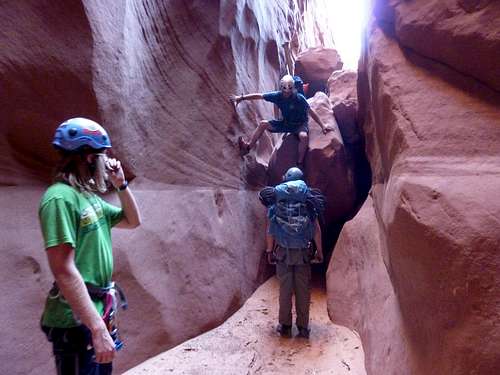 The harder downclimb-now gone! This is the first part of a rappel. Where the guy with the blue backpack is standing is now 8ft down and then there is another 10 feet below that. Updated 11/14/13
 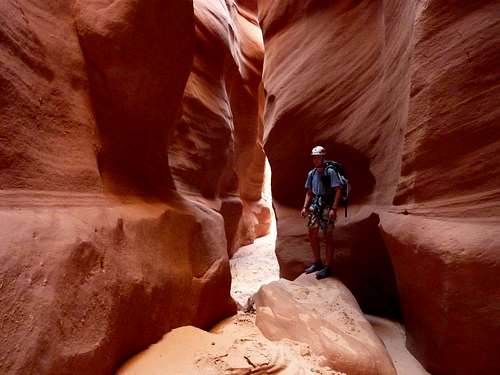 The photogenic section towards the end. This is now replaced with a large pile of debris and requires a ten foot climb to get to the top of the third new rappel. Updated 11/14/13
 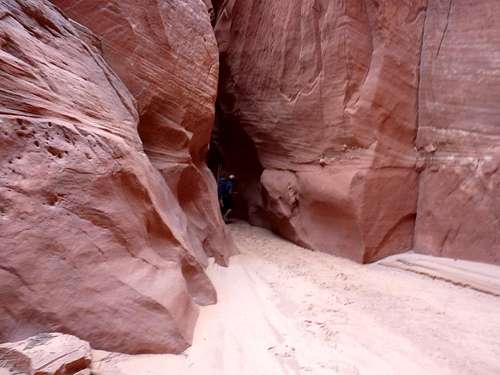 Where Middle Waterholes opens up. The escape route is right around here
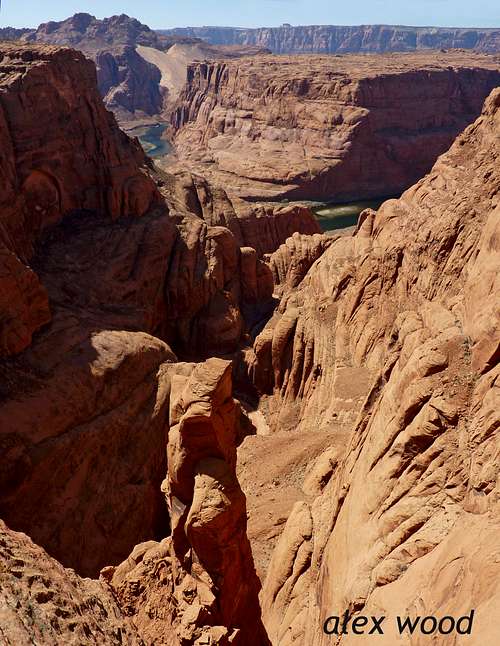 Looking back down from atop the escape route at Lower Waterholes
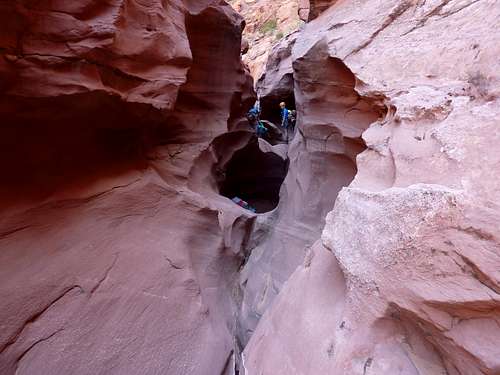 Keeper pot hole at the start of Lower Waterholes. Its pretty easy to get out of, but in the sake of time, its best to avoid it
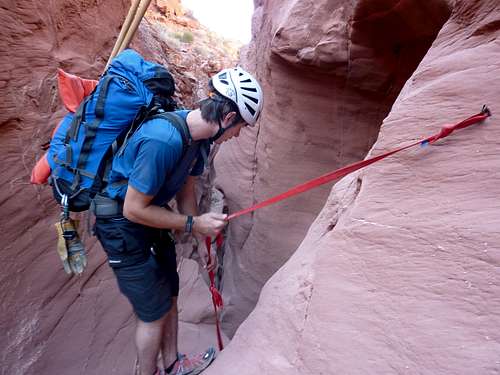 Fixed webbing to help avoid a very deep keeper pot hole
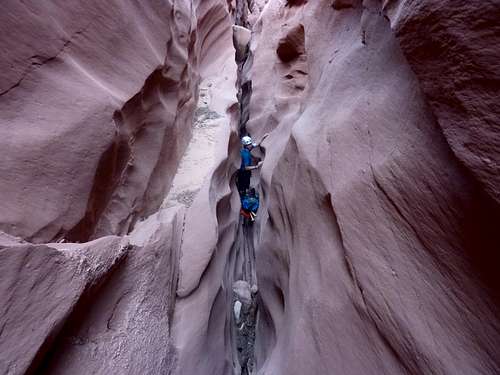 Entering the bowels of Waterholes-the narrowest section of Waterholes Canyon
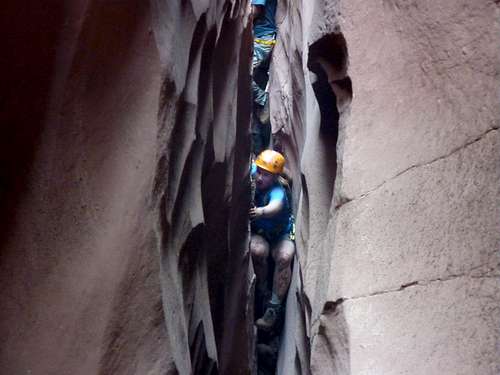 Squeezing through the tightest part of Lower Waterholes
 Dirty Rappel 5
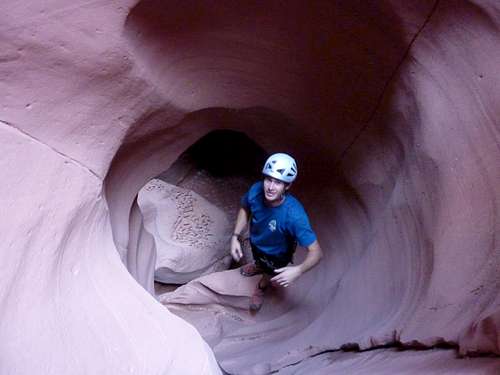 The downclimb into the Natural Arch
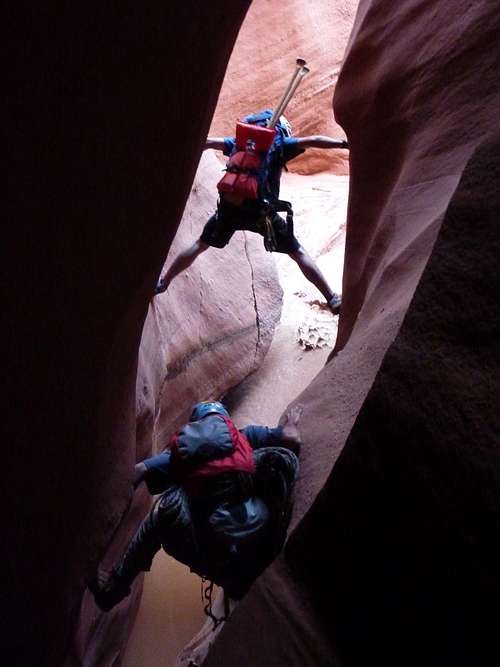 Stemming over the first pool
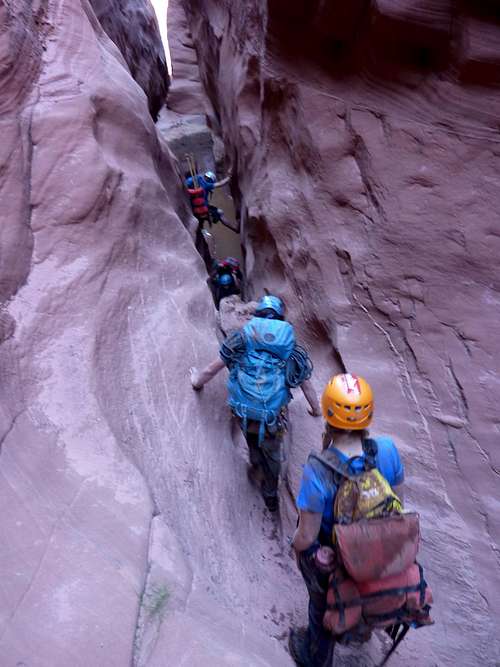 Coming to the second pool
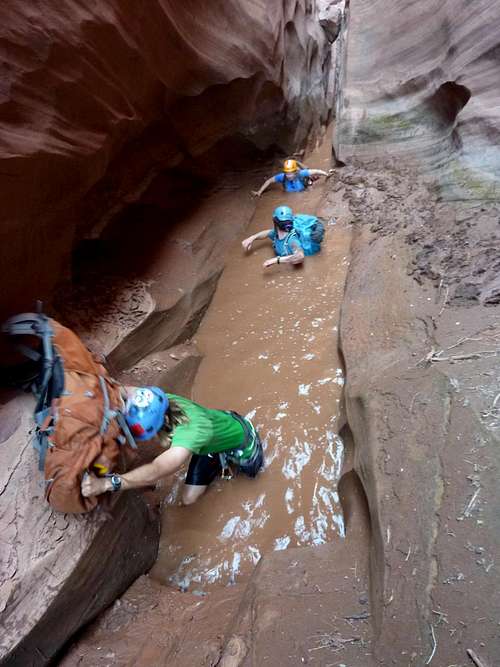 Getting Wet in the second pool
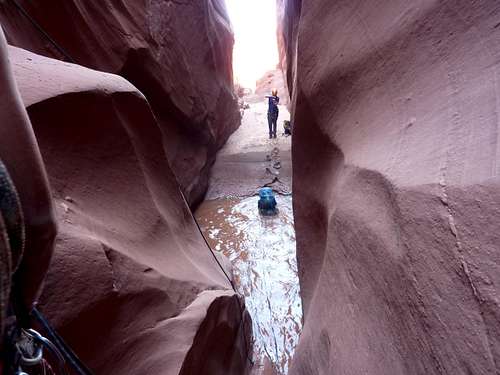 Coming to the third pool
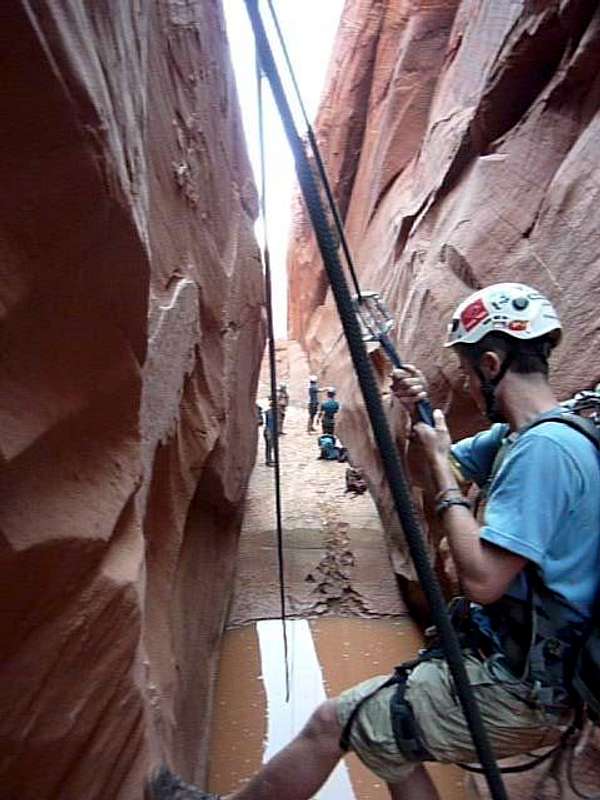 Me on the zip line
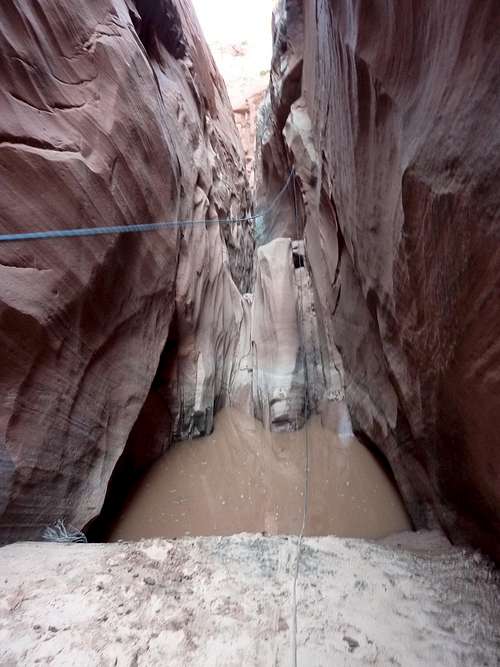 Looking back at the zip line and the third pool
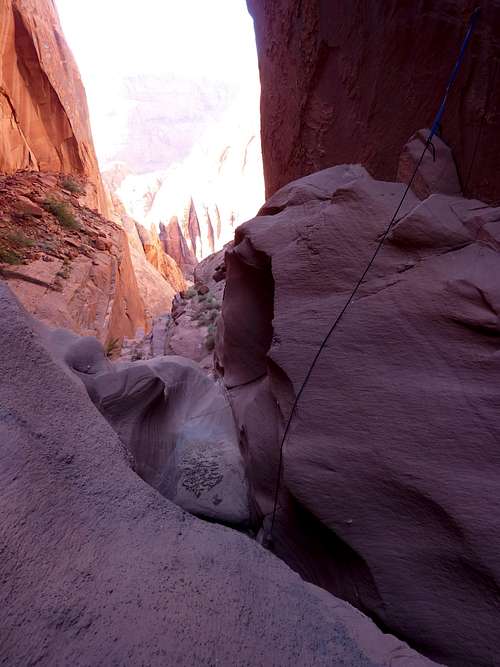 The top of rappel 6
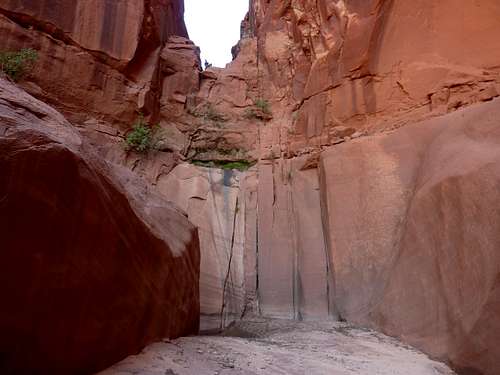 Looking back up at rappel 6
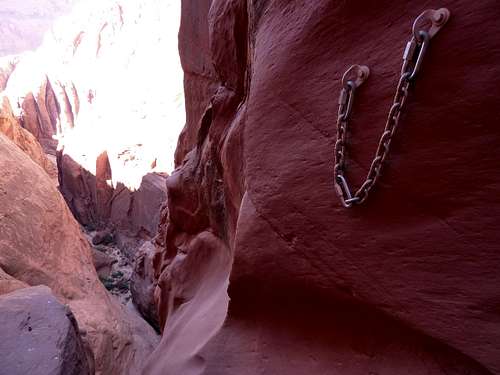 The top of rappel 7
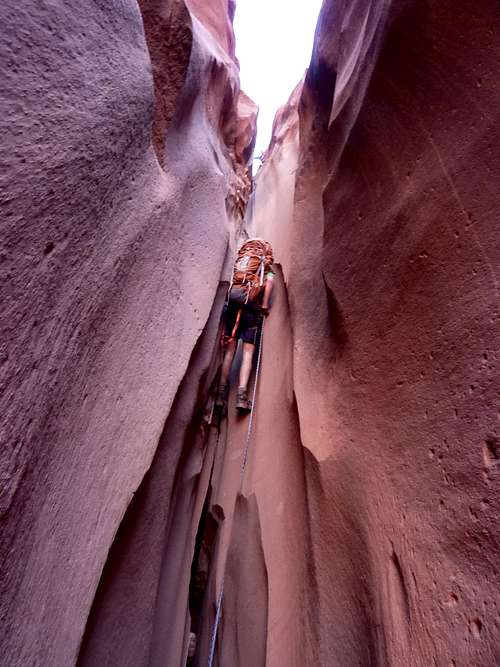 The narrow part of rappel 7
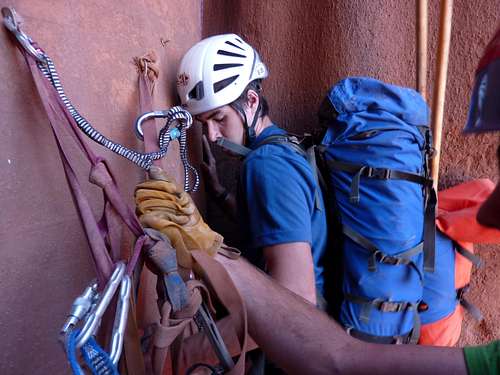 On the top anchors on the big rappel
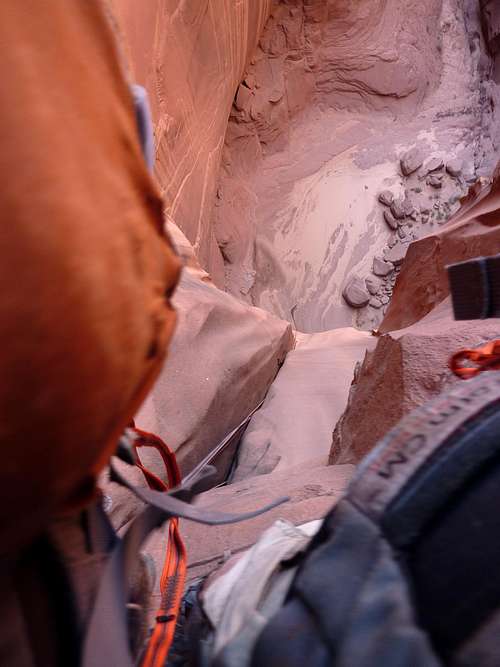 Looking down from the top of the big rappel
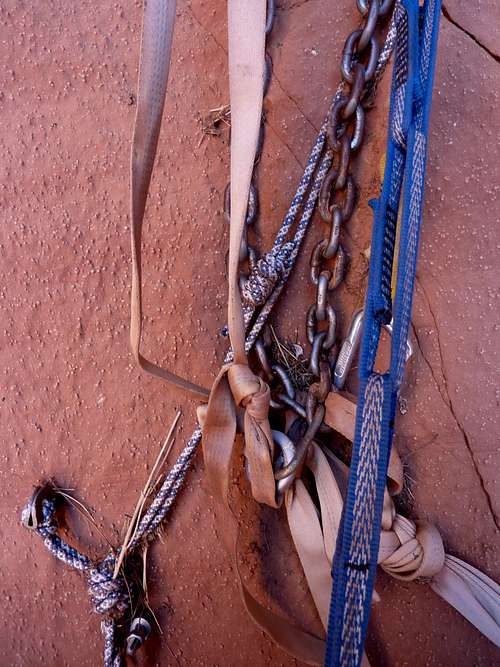 Mid-Wall Anchors
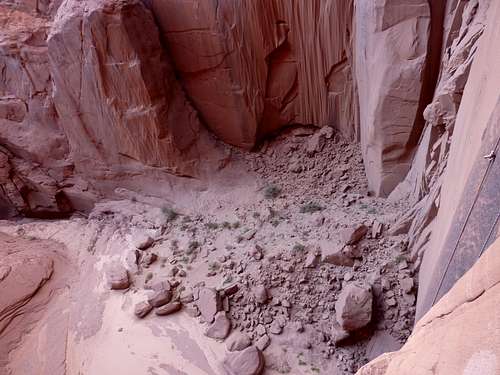 Mid-Wall view
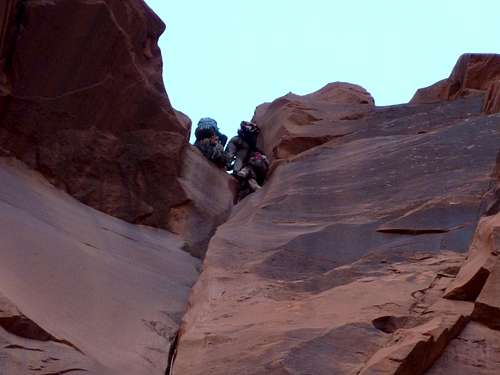 At the top rappel station
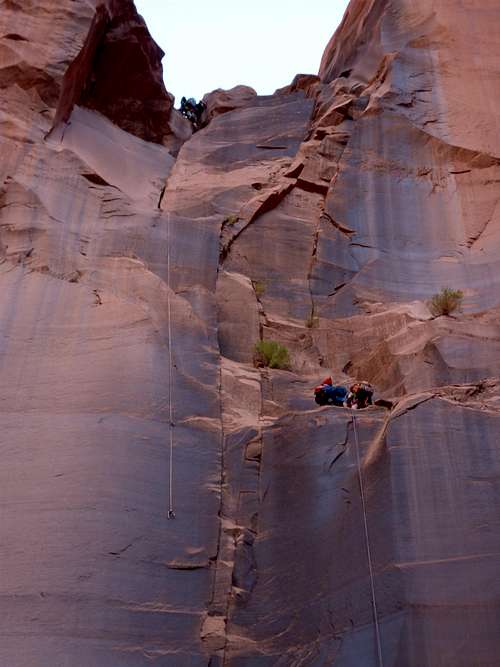 Our party at the top rappel station and at the mid-wall rappel station
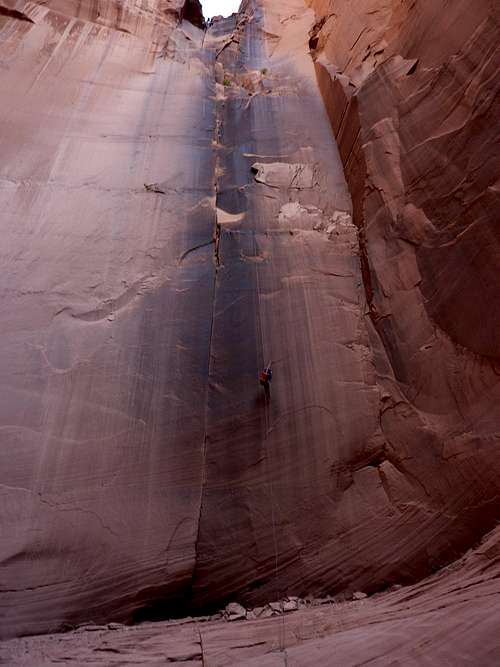 Big Rappel from the bottom
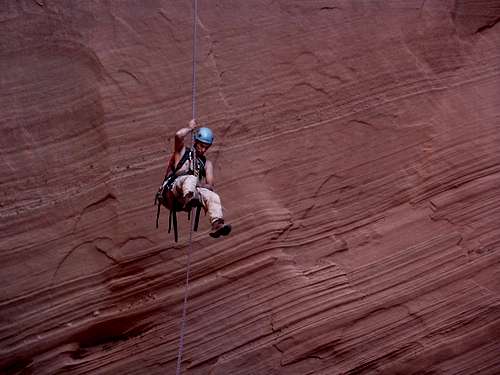 Brian lowering himself down on the last part of the Big rappel
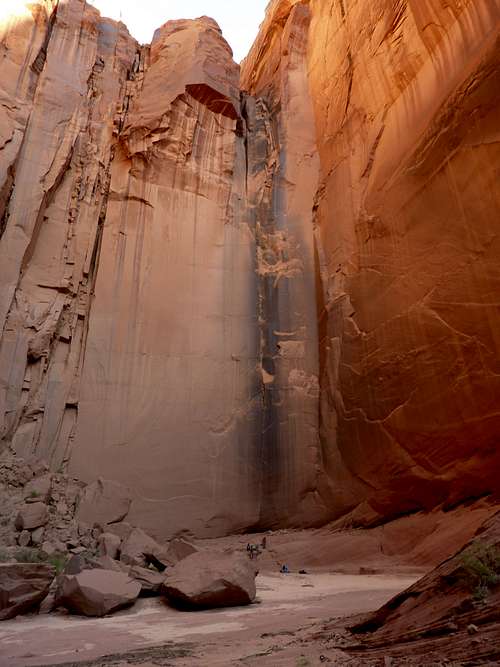 Big Rappel from Rappel 10
 Downclimb option for rappel 10
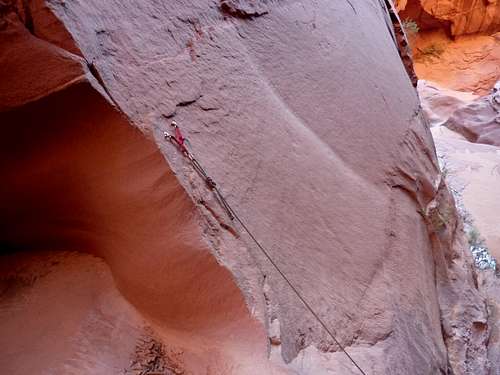 Rappel 12 anchors and fixed line
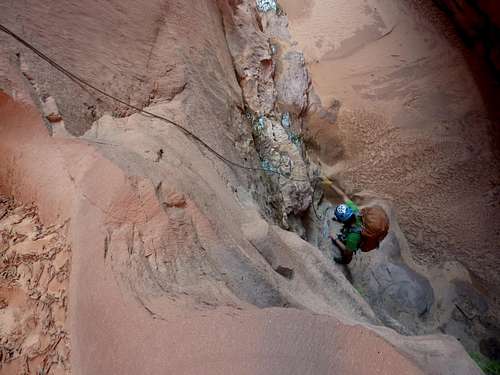 Bottom of rappel 11
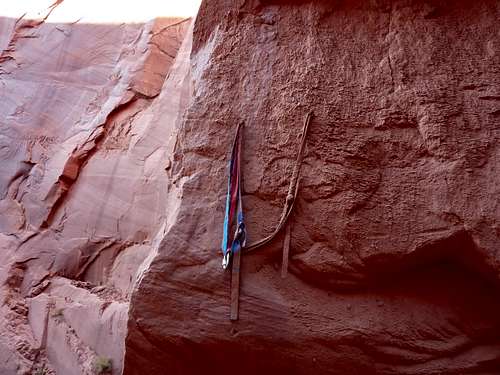 Pitons for anchors for rappel 12
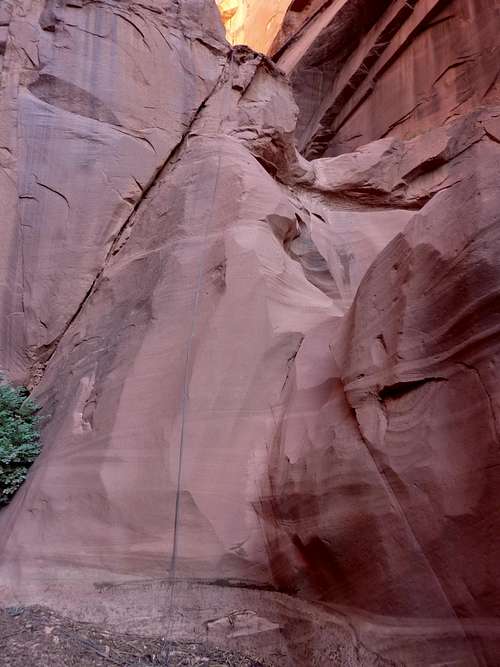 Looking back up Rappel 12
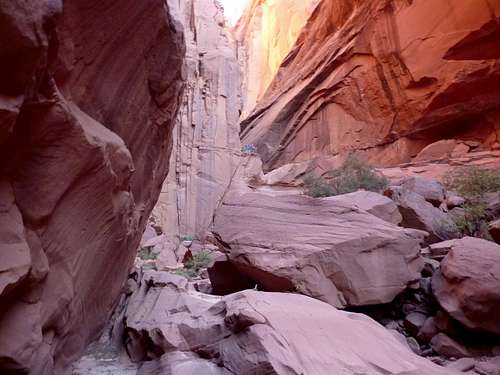 Boulder field below Rappel 12. There aren't too many boulders like this on the hike to the river
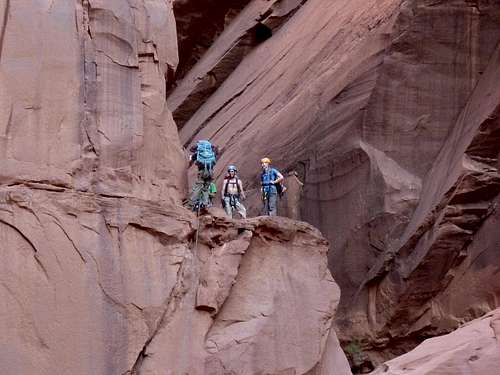 All smiles atop Rappel 12
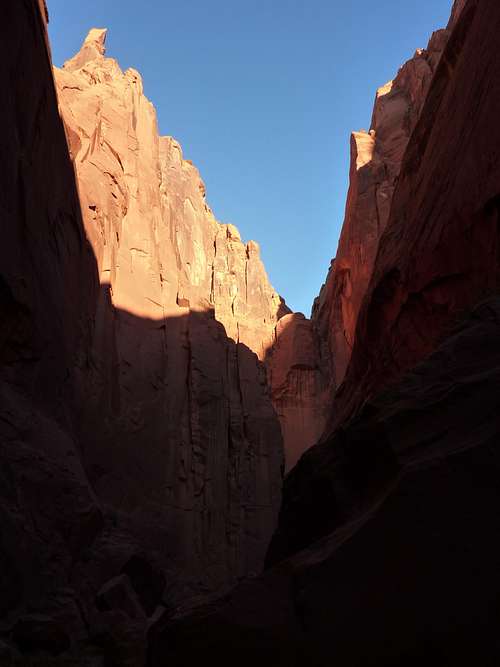 Towering Sandstone
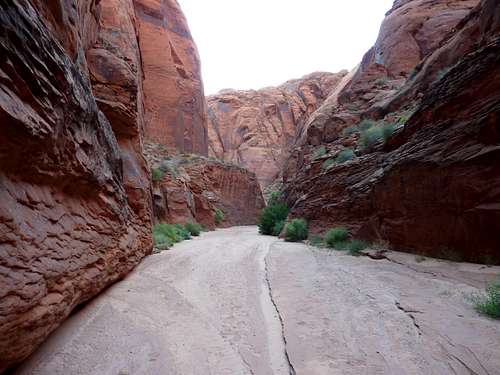 Easy hiking along the wash
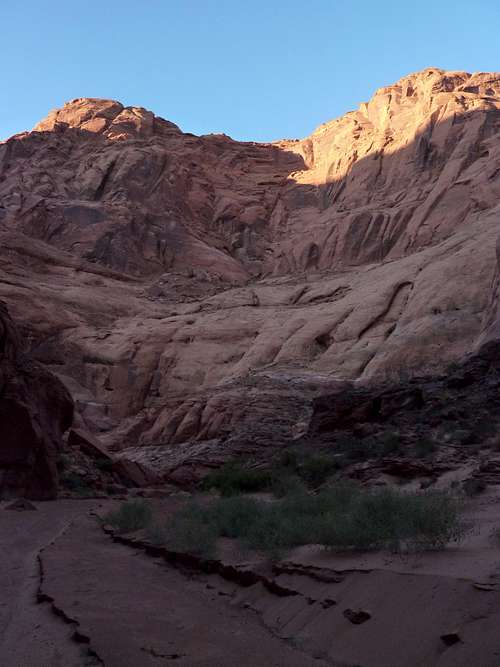 Almost to the river.
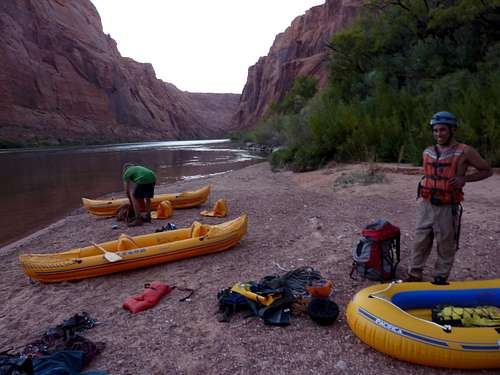 Rigging our boats that we carried the whole way through the canyon. The sun had already set in this picture.
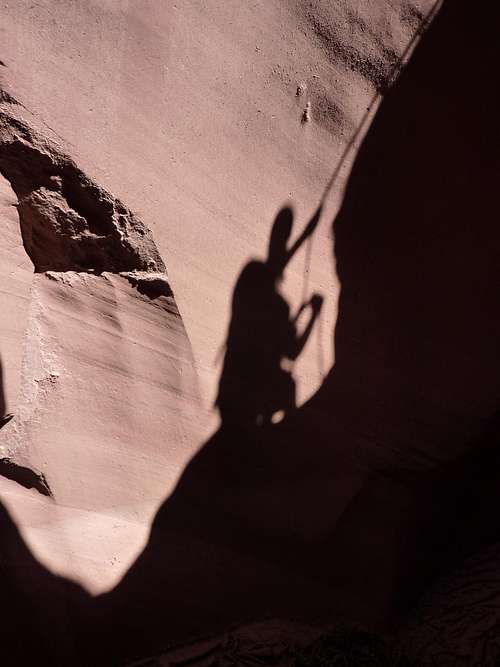 Canyoneer's Shadow
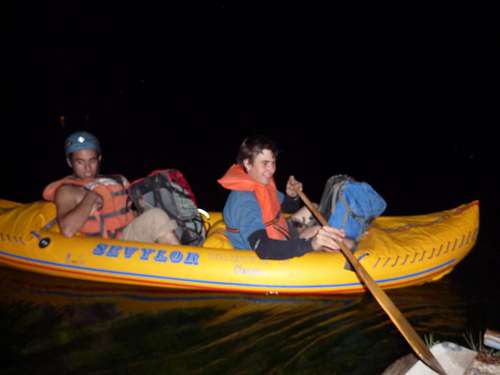 Land Ho after a long journey on the Colorado River from Waterholes Canyon. This is the only issue about doing Lower Waterholes. You need to get back to Lees Ferry somehow
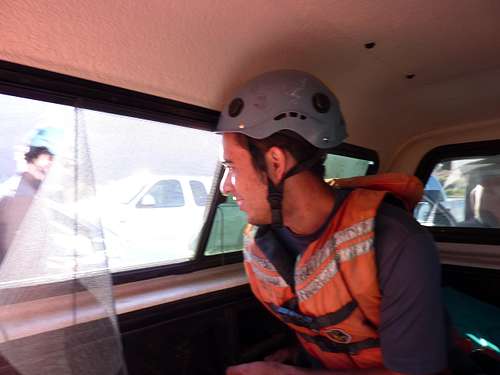 Ready to Canyoneer!
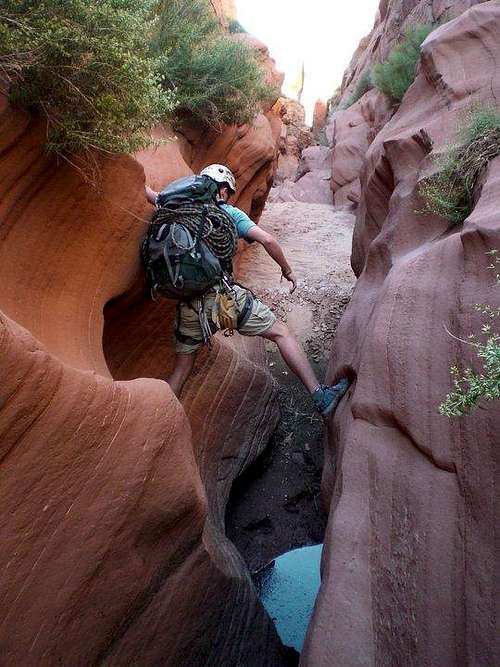 Stemming over some water