
-
 201784 Hits
-
 98.58% Score
-
 85 Votes
|
|
Mountain/Rock |
|---|---|
|
|
48.53763°N / 121.13428°W |
|
|
Download GPX » View Route on Map |
|
|
Skagit |
|
|
Hiking, Mountaineering, Scrambling, Skiing |
|
|
Spring, Summer, Fall, Winter |
|
|
8876 ft / 2705 m |
|
|
Overview
Thumbs Up to A Great Climb
| Elevation Gain | 7,000 ft / 2,133 m |
| Total Distance | 8 miles / 12.9 km |
| Time | 1-2 days |

 Eldorado's West Face | 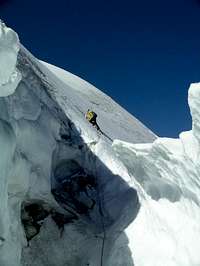 Climbing the NW Face |  Approaching Eldorado | 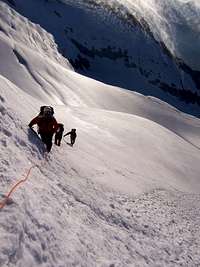 Climbing the Ridge |  Sunset over Eldorado |
Routes

Hiking up the East Ridge

Climber on the West Arete
Climbing the NW Ice Couloir

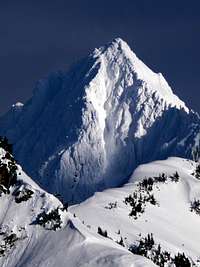
Northeast Face of Eldorado
West Arete: The West Arete is perhaps Eldorado Peak's most spectacular looking face. This climb takes a few days and has a rock climbing difficulty of up to 5.8. The route starts out at mile marker 20 and goes up much of the standard route. At the Eldorado Glacier instead of going up, it traverses around the Eldorado Glacier. It then traverses around Eldorado and the Triad and goes all the way to the bottom of the West Face of Eldorado. Then you start a series of scrambles and climbs up the West Arete. Descend down the East Ridge.
Northwest Ice Couloir: "The Northwest Ice Couloir is an excellent mixed climb leading to the summit of this iconic Cascades peak. Guarded by a long, somewhat complicated approach and situated in the wild Marble Creek Cirque, this aspect boasts stunning views of Dorado Needle and Early Morning Spire. The route has been climbed in late fall, early winter and early spring. When you choose to climb will dictate the character and difficulty of the route." -ExcitableBoy
Northeast Face: "This somewhat contrived route climbs the steep ice face climbers right of the standard East Ridge route and offers a nice alternative for climbers with a bit of ice climbing experience. The route is in best condition in early fall (late September - mid October) before the first snow storms arrive. The climber should expect several pitches of snow and ice to 60 degrees." -ExcitableBoy
Getting There
Eldorado from the Road
Getting there from Seattle: Drive North on I-5 until you get to Arlington which you take a right at exit 208 onto highway 530. The highway briefly takes a left in down town Arlington onto highway 9 which a few seconds later be sure to turn right back onto highway 530 east to Darrington. At Darrington where the road pretty much ends you take a left onto highway 530 which goes north. In about 19 miles the highway ends, take a right onto highway 20 towards Marblemount. In about 7.5 you arrive at the city of Marblemount. After passing the last gas station the highway curves, be sure to go strait which goes onto the Cascade River Road. After crossing the bridge the road takes you all the way to the trailhead of Eldorado which is at Mile Marker 20. Keep in mind that the last 10 miles of road is gravel and washes out almost every year at some point. The trailhead itself is on the right hand side and has a decent parking lot with a bathroom.
Standard Route Overview Map by Steph Abegg
Standard Climbing Route
From the trailhead start out hiking 280 or so feet to the left (West) until you get to a big clearing where you will find a nice big tree fallen over. Use this log to cross the river unless you happen to find another way across that is more to your liking. Be careful, the log is often slippery and may have some ice on it. Thank goodness it's kinda wide, so if you feel uncomfortable you could straddle it (personally I was fine walking it). Go all the way to the end of the log and get off on the right side to avoid bushes and devils club. Keep in mind that this could change some day if the log gets washed away.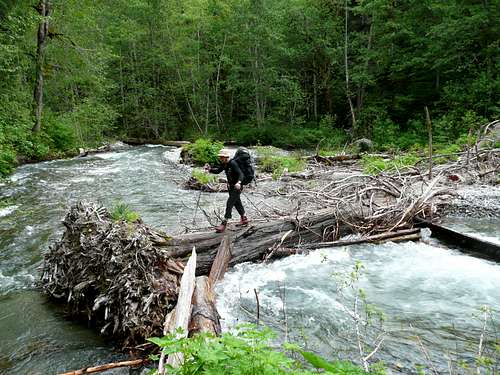
Log Crossing in 2008
Locating the trail might be a little difficult depending on your luck. If you encounter the trailhead sign, you are officially on the trail. Now keep in mind for a little while the trail is broken up in some spots at the beginning. Once the trail becomes more solid, it remains decent all the way until you get to the boulder field. This is considered by many to be a steep trail which usually takes people a few hours to head up depending on your pace.
 Johannesburg in the Morning |  Looking towards Mount Pugh |  Morning Light on the Mountains |  Mount Torment's Twin Summits |
At around 4,000 feet you meet with the boulder field. This could range from simple boulder hopping to a nightmare of postholing. Conditions and time of year dictate the fate of this. You should now see many cairns that lead you up and slightly right as you go up the mountain. The boulder field ends and switches to a boot path for a little ways. Soon it brings you into another boulder field which goes up and then traverses over more to your right. As before, follow the cairns to show the way. It's easy to loose the cairns but hard to get lost here which above there is a large cliff that as long as you keep this in view as you traverse, you will be fine.
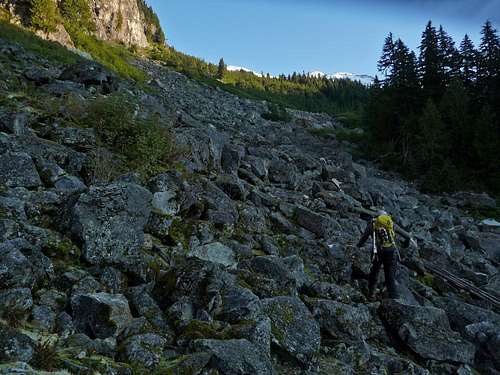
Scrambling up the Boulder Field
 Sunrise over Sahale |  Hiking up the Trail | 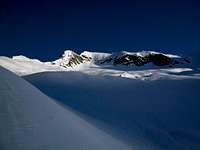 First Light on the Basin |  Water Falls near the Basin |
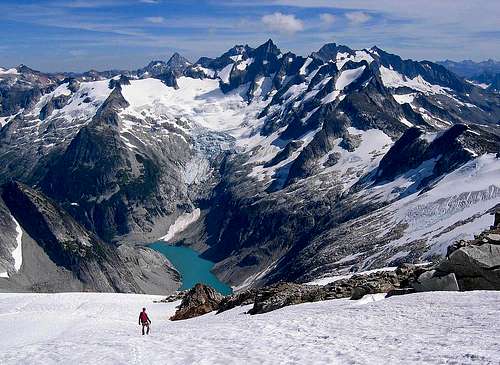
At the end of the boulder field you will arrive at some small waterfalls around 5,000 feet. From here you should see a trail that goes around the water falls and continues up Eldorado Basin. Views of all sorts of North Cascade peaks start showing up in full view like Mixup Peak, Mount Pugh, Snowking, and many more from the Ptarmigan Traverse area.
Eldorado Basin with Fresh Snow
Eventually you get onto the Eldorado Creek Ridge and look for a appropriate spot to head down into the Roush Basin. There are two ways of doing this. The way I'm familiar with is to go right over where there are rock slabs below where if you look hard enough you can scramble down. The other route is to go up where the ridge steepens and descend left into a class 3 gully. It contains dirt and rock and is approximately 150 feet down into the basin. The gully is marked by a large boulder just below the ridge crest. Make sure your in the right one, or go back and look for the scramble path I mentioned.
 Hiking Down to the Basin |  Carefully Descending Down |  Heading up the Basin |  Eldorado Fin with the Moon |
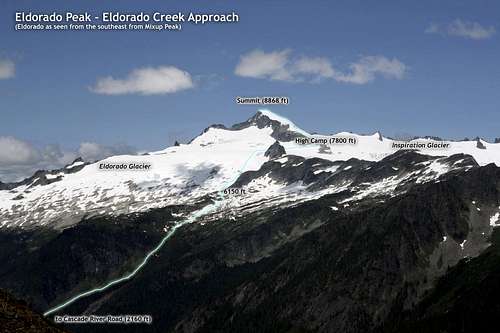
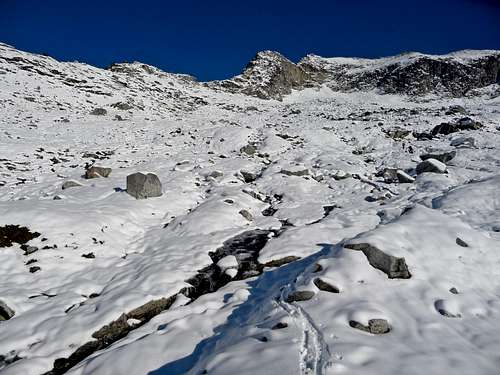
Approaching the Eldorado Glacier
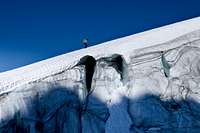
Once your in the basin, start heading up north towards the Eldorado Glacier. In summer finding the edge of the glacier should be obvious, but in winter time it is not so obvious. Look for signs of crevasse to your left and when in doubt, rope up if your unsure if your on the glacier or not. Though most of the year the glacier remains not very crevassed as long as you stay on route. If there is not already a made boot path up, follow some what near the cliff but not too close. Rock and ice do fall from the cliffs daily so be on the watch out while climbing up through this section. Higher up on the glacier there is what I call "The Ice Cliff" which you go left in order to go around it. Soon you go from the Eldorado Glacier to the Inspiration Glacier which it flattens out.
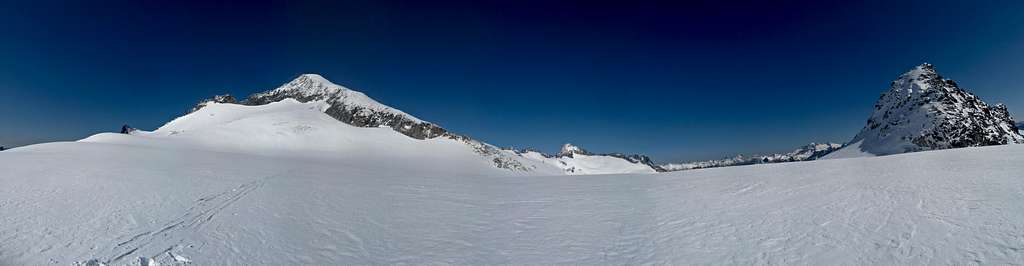
Inspiration Glacier and Eldorado Peak Panorama, Eldorado Peak is on the left while the route is in the center left
 Approaching the Inspiration |  Going Around the Ice Cliff |  Glacier Peak to the South |  Point 7733 Above |
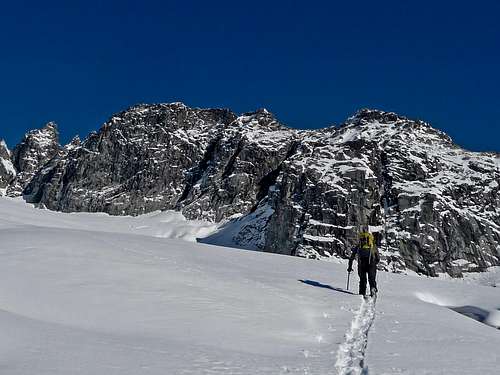
All around the glacier is flat for quite a ways which means as long as the place is not over crowded, there are many options for camping here. So now cross the mostly flat Inspiration Glacier and head up towards the higher gap on the lower East Ridge of Eldorado. You might have to switch back going up if your going through deeper snow. Once you head through "The Gap" you are officially on the East Ridge. This is a great spot to take a rest and enjoy the views.
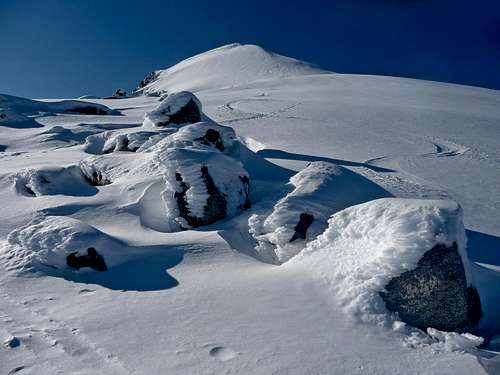
The East Ridge with Wind Blown Rocks
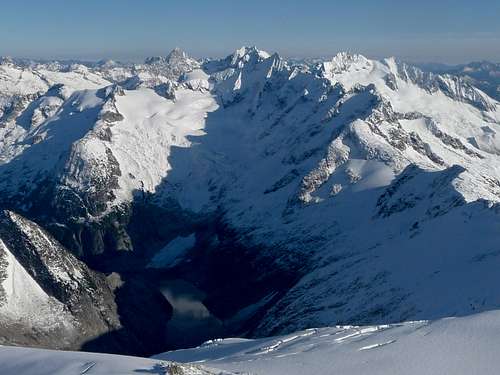
 Going through "The Gap" |  Hiking up the Inspiration |  Klawatti Peak from the Ridge |  Moraine Lake Below |
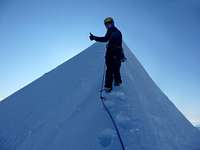
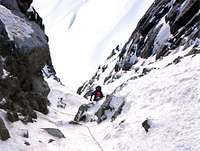
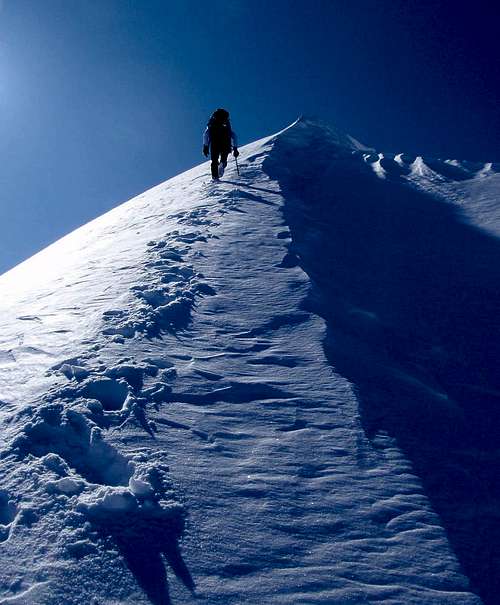
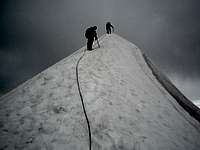
Stay roped up on the East Ridge because you do travel back onto the glacier and there are some potential crevasses on the ridge as well as it being a safety net for the summit knife edge. On the East Ridge you start out going a little ways up onto the glacier until you find a decent ramp that brings you on the crest of the East Ridge. There are a few crevasses that you should watch out for here. Once on the ridge it is very straight forward all the way until you get near the summit. Near the summit be sure to go right in order to get onto the final famous summit knife edge. This is perhaps the most famous knife edge in the state of Washington. Some people come to this mountain just for this part. Sometimes it's wide and super easy, and at other times it looks like a cornice.
 The Wide Summit Ridge during Winter | 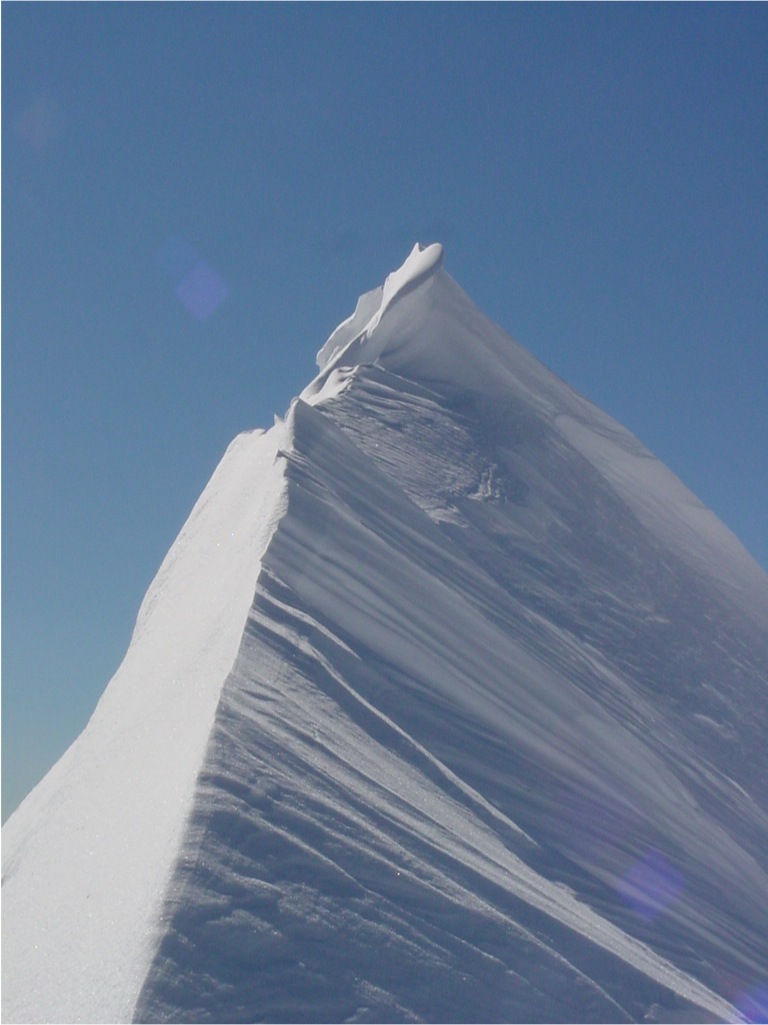 Knife Ridge on a Different Year |
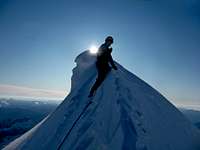
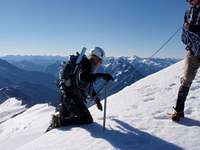
At first glance it might be very intimidating in looks, but it's more friendly than meets the eye. Crampons are highly recommended if you have not been wearing them already. The climb up the knife edge is absolutely brilliant and gives one the feeling of a true alpine experience. I do admit that this is not for the faint of heart, if exposure scares you, perhaps this isn't the best place to learn. As you get higher on the ridge you do start seeing that on both sides there are huge cliffs. But as long as you kick good steps and plant your ice axe in deep, it should be a exciting experience. Once you make it to the top of the ridge, take a few more steps and your on top of Eldorado! This is an accomplishment.

Eldorado Peak 360 Summit Panoramic View
 Looking Down the Ridge |  Normal Conditions of Ridge |  Dorado Needle to the North |  Looking Down Below |
 Climbing the Last Few Steps |  Black Peak to the East |  Forbidden Peak and Buckner |  Jack Mountain to the North |
An Incredible View to the East
Descending
"Getting up is optional, getting down is mandatory" -Ed Viesters
"If the snow is unconsolidated or if it is warm, this can be hell on earth." -Klenke
"If the snow is unconsolidated or if it is warm, this can be hell on earth." -Klenke
Descending Down the East Ridge
On the summit you still have unfinished business, the way down can sometimes be a difficult task. First you have the knife edge you have to down climb and after that the East Ridge. You may find yourself having to make haste because of the sun almost setting, snow slides starting up (winter), very cold air, and of course the worst part. The snow turning into ice! What happens is the layer of snow on the glacier freezes over while the snow under the ice layer is still soft. What happens? It can become a posthole nightmare where the slope is slippery making skiing and snowshoeing very difficult, but the inner layer soft enough so that you sink in deep. This makes traveling take hours longer with more effort and sometimes spots where you have to dip yourself out. In summer you probably won't encounter these conditions which you should be happy for this. But when there is heavy snow, expect this and try to get out of the snow before the sun sets.
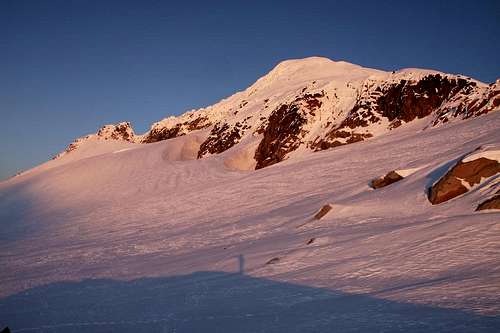
Eldorado Peak late in the Day
On the way down the boulder field if you cannot find the cairns and are feeling lost, follow the bottom edge of the boulder field in places which makes it virtually impossible for you to get lost as long as you have a general idea of where to go. Then find the climbers path that goes to the lower boulder field. On the lower boulder field do not go all the way to the bottom because the trail is around 300 feet or so from the bottom which has a mini sign post that indicates the trail. Keep in mind this part of the trip will probably take place in the dark. Now it's just a hour or so away of hiking down the steep trail down to the car. After crossing the log and walking to the trailhead you can say to yourself "Wow, what a Day!"
Red Tape

Plenty of Water in the Basin

Inspiration Base Camp

Marmots in the Meadows

Purple Flowers

Tired from the Climb

Heading Out in a Hurry
Also note that while there is "open camping" on the Roush Creek rib at 5400 ft and on the Inspiration / Eldorado Glacier apron at 7500 ft, these are also designated Wilderness Zones and have restrictions on both the number of parties and the number of persons per party.
Other Regulations:
For more info see Leave No Trace from the NPS.
- Pets are not allowed because Eldorado is in the National Park.
- The group size limit is 12
- Respect Wildlife and other Climbers
- Dispose of Waste Properly
For more info see Leave No Trace from the NPS.
The Marblemount visitor center can be reached at 206-386-4495 ext.11. During the winter months it may be more difficult to contact them over the phone which has been my experience. You can also contact them on the Nation Park Service Website.
Water Sources:
There are some mini waterfalls near Eldorado Basin after the boulder field as well as the upper basin. Perhaps the best place to get water is right below the Eldorado Glacier where water flows out of depending on the time of year and the snow pack. If you have a stove, the glaciers and snow should be plenty for you and your party.
Time It Takes:
This peak be climbed in 1 to 2 days depending on conditions, ambitions, and how much you like camping. Most in shape alpinist can do this peak in a single day, but just because it's a single day doesn't mean it is not a bit of a journey. When I climbed this peak in winter time it took me and my comrades 18 hours with a hard effort. In the fall it took us around 16 hours.
Depending on if you stay the night on the mountain or plan on doing this in a single day plays a roll in your wake up/ start time. If your climbing this peak in summer time and feel like your in great shape, you can leave as late as 6 a.m. in the morning. If there is much fresh snow on the mountain and it's winter time, I would suggest starting between 2-3 a.m. to get as much day light as possible. Plan your wake up time accordingly and make sure you get off the glacier before dark.
Camping
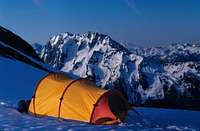
Camping in the Basin

Inspiration Glacier at Night
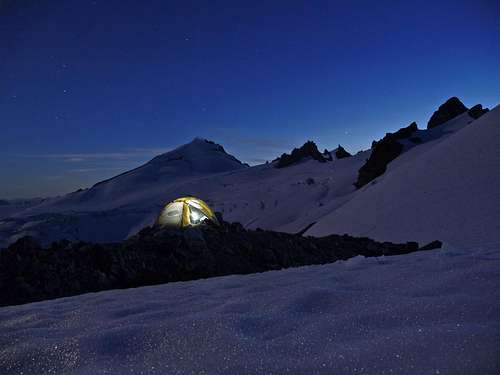
A Beautiful Night at Klawatti Camp
When To Climb
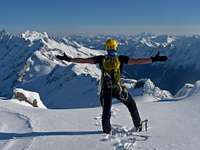
A Moment of Pure Joy

Eldorado's East Face
Mountain Conditions
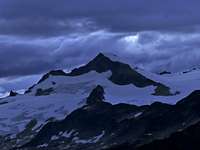
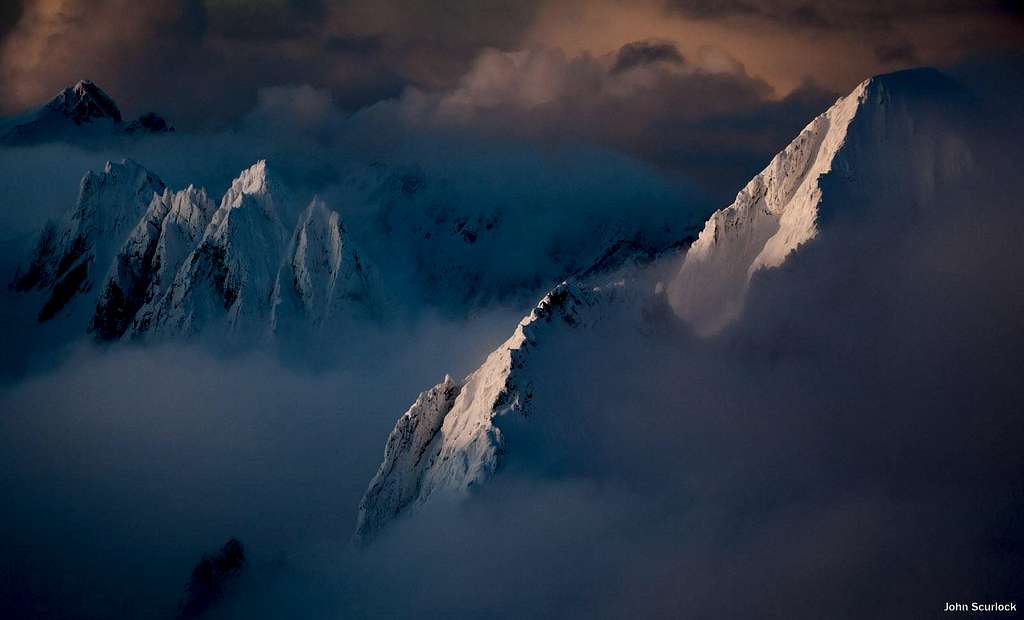
Storm over Eldorado Peak
Hidden Crevasse on the Ridge
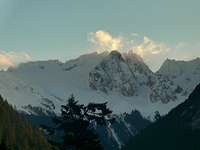
One should climb this peak when weather is good. Not only for safety reasons, but because the views on this mountain are quite spectacular and should not be missed.
For current weather information on Eldorado Peak check in with the Noaa Forecast.
For Avalanche Conditions, check in with the Northwest Avalanche Center. (Limited based on the season)
Check in with the NOCA Website for more information on the current road conditions which it will say for the "Cascade River Road". There is no up to date website for the trail conditions for Eldorado Peak.
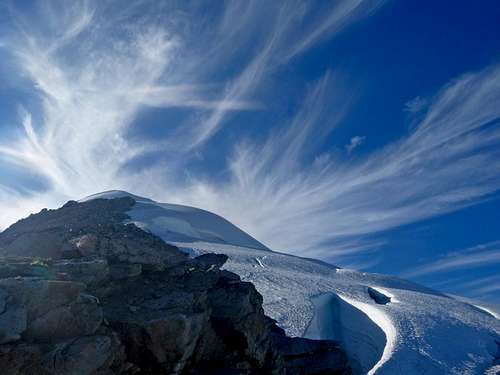
Cirrus Clouds over Eldorado Peak
Gear for the Climb
Roped up Near the Top
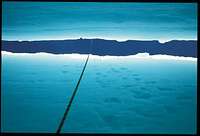
View from inside a Crevasse
The Axe Comes in Handy

Getting Ready to Cook
Mandatory Gear for the Climb:
- Ice Axe
- Crampons
- Helmet
- Rope
- Glacier Rescue Gear (prusiks, carabiners, webbing, ect.)
- 2 Snow Pickets (for standard glacier travel)
- Shell Jacket
- 2-3 Liters of Water Per Person
- First Aid Kit
- Glacier Glasses/UV Glasses
- Full Scale Mountaineering Boots (or plastics if your up to it)
- Plenty of Food
Recommended Extras:
- Nylon Shell Pants
- Sun Screen
- Map and Compass
- Long and Short Sleeve Shirt
Overnight Gear:
- Tent/Bivy
- Sleeping Bag
- Ground Pad
- Water Filter/Tablets
- Stove, Fuel, Pot, and utensils (for cooking)
Optional Gear:
- Camera (Highly Recommended)
- Tooth Brush and Paste
- Shorts
- Toilet Paper/Blue Bag
- Trekking Poles
- GPS
Topographic Maps
 |
History
This peak was first climbed in 1933 by Donald Blair, Norval Grigg, Arthur Wilson, Art Winder.The peak was given the name "Eldorado" during the 1890's as a symbol of hope for riches that could occur from local mining claims, especially the Skagit Queen Mine which was a major mining operation located east of the mountain near Thunder Creek.
Historical Fact About "Eldorado" Name:
"El Dorado" was originally the Spanish name derived for a legendary Muisca tribal chief in northwestern South America. According to legend, "El Dorado" would cover himself with gold dust, and throw gold and jewels into a lake to appease an underwater god. Europeans later associated the name "El Dorado" with the Lost City of Gold. The term "El Dorado" was eventually anglicized to the single word "Eldorado" and many settlers of European descent began using it as a metaphor for any place where wealth could be quickly gathered. Hence, by naming a peak "Eldorado" it provided hope to nearby miners and settlers that riches would soon be found and vast.
Special Thanks to Redwic for getting most of this historical information.
Eldorado Peak though the Clouds
Sunset and Sunrise Photos
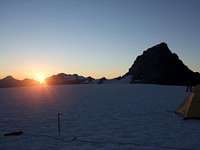 Sunrise over Eldorado Glacier |  Alpenglow on Spire Point |  Sunrise from Eldorado Camp | 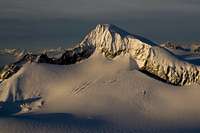 Evening Light |
 Eldorado's South Face |  Enjoying a Beautiful Evening |  Alpenglow on Magic Mountain |  Sun Setting over the Traids |
 Hidden Lake Peaks |  Oh the Colors on Eldorado |  Sunrise from Down Below |  Alpenglow on Johannesburg |
 Sunrise on the East Face |  Sahale Alpenglow |  Sunrise on Eldorado |  Sunrise from the Basin |

Evening Colors over Eldorado Peak
Videos
External Links
- Some what Current Conditions can be seen on the National Park Service website. The updates come in as people/rangers climb Eldorado.
- Eldorado via Sibley Creek by Steph Abegg: This Trip report shows some of the many flowers on Eldorado
- Inspiration Glacier Trip Report : August 30–31, 2003 which has a decent description of the trip with lots of pics.
- For one of the fastest known ascents, here is a link on CascadeClimbers.com