
|
|
Route |
|---|---|
|
|
39.11881°N / 107.06653°W |
|
|
Mountaineering, Scrambling |
|
|
Summer |
|
|
Most of a day |
|
|
Class 3 |
|
|
Class 3/4 scramble |
|
|
I |
|
|
Overview
The "S" Ridge (South Ridge) of Snowmass Mountain is a classic route that provides fun, solid rock scrambling and a good alternative to Snowmass' more popular East Slope (standard) and West Face routes. The standard East route is less difficult but a long, 21.5 mile trip. The West Face route is much shorter, but it climbs a steep gully that is loaded with loose, dangerous rock. The S-Ridge route is only a 8-9 mile round trip climb from Lead King Basin trailhead and is more stable than either of the two routes I mentioned before.This route is best done without snow - mid to late summer.
Getting There
Drive to Carbondale and head south on CO 133. 21.5 miles later, turn left on Gunnison County Road 3 and go for about 5 miles to enter the town of Marble. Continue following Road 3 through the town and pass Beaver Lake. From the lake, the road starts getting rough and 2WD vehicles may have trouble. 1.5 miles after the lake, there is a signed junction. Turn left on FR 315 for Lead King Basin. From here, the road really gets rough, and only 4WD vehicles should continue. Two miles up the FR 315, there is one final junction - stay left. Drive over a ridge at 10,850' and down switchbacks into the Lead King Basin valley. The small parking area is right at the bottom of the switchbacks.

Route Description
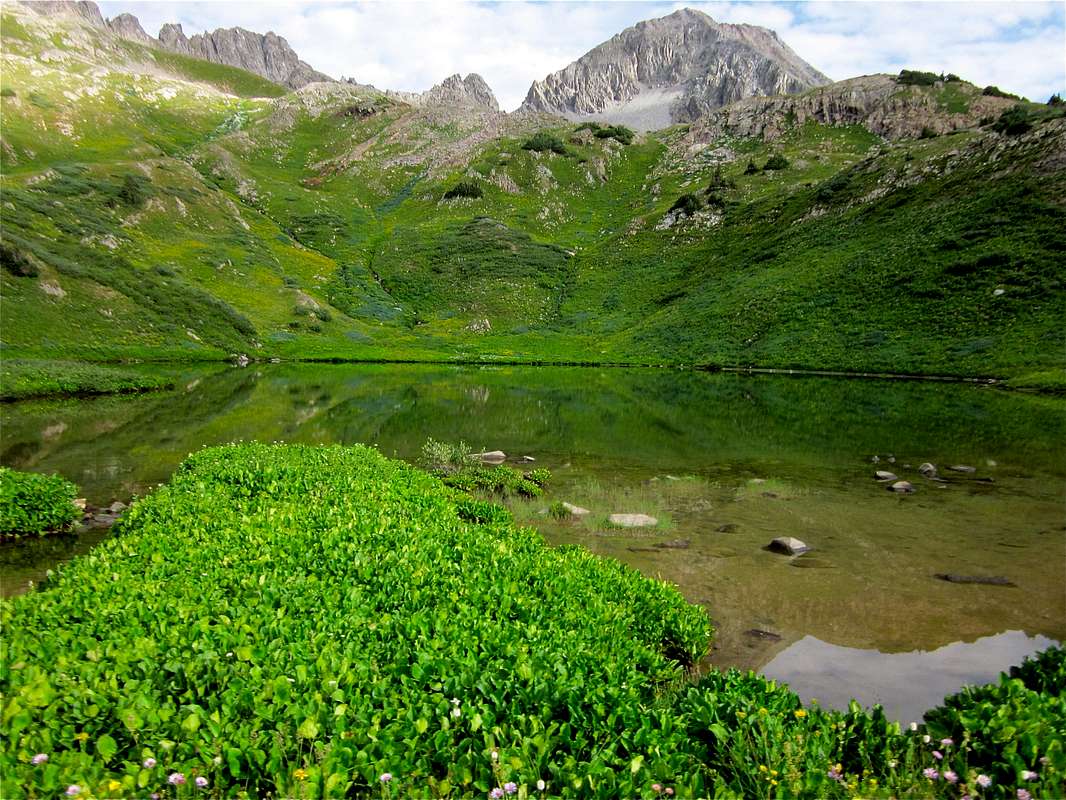
From the Lead King Basin trailhead (9,730'), hike north on a solid trail that climbs up the lush, green basin. Just under 0.5 miles from the trailhead, there is a trail junction. Turn left and follow the trail along the side of a headwall for about 1,300'. Over the top of the headwall, reach Geneva Lake at 11,000'. Snowmass and the "S" ridge are in full view from here.
Snowmass Mountain from Geneva Lake
The trail passes along the left (west) side of Geneva Lake and up a short hill. Partway up the hill, reach another junction and turn left - there is a sign in the foliage for Camp #4 on the left trail. The trail climbs over the short hill and traverses across the left slope before cresting another short hill. Climb over this and reach Little Gem Lake (11,700').
 Little Gem Lake (11,700') |  From the same location, looking at the route to the "S" ridge |
From here, leave the trail and strike northeast, directly toward the summit of Snowmass Mountain. Traverse across and down the gentle slope, at a rough 45 degree angle, to a stream on the valley floor below Snowmass' broad west face. At this point you are at about 11,600'. Cross the stream and start climbing up a rocky gully at the base of Snowmass.

The rocky gully at Snowmass' base
This gully is not very steep or loose, although some care must be taken. Climb up for about 300' vertical, aiming right as you get higher. At the top, turn right and traverse across the massive rocky slope toward a pair of gullies at the south end of the "S" ridge.

Traversing toward the base of the twin gullies
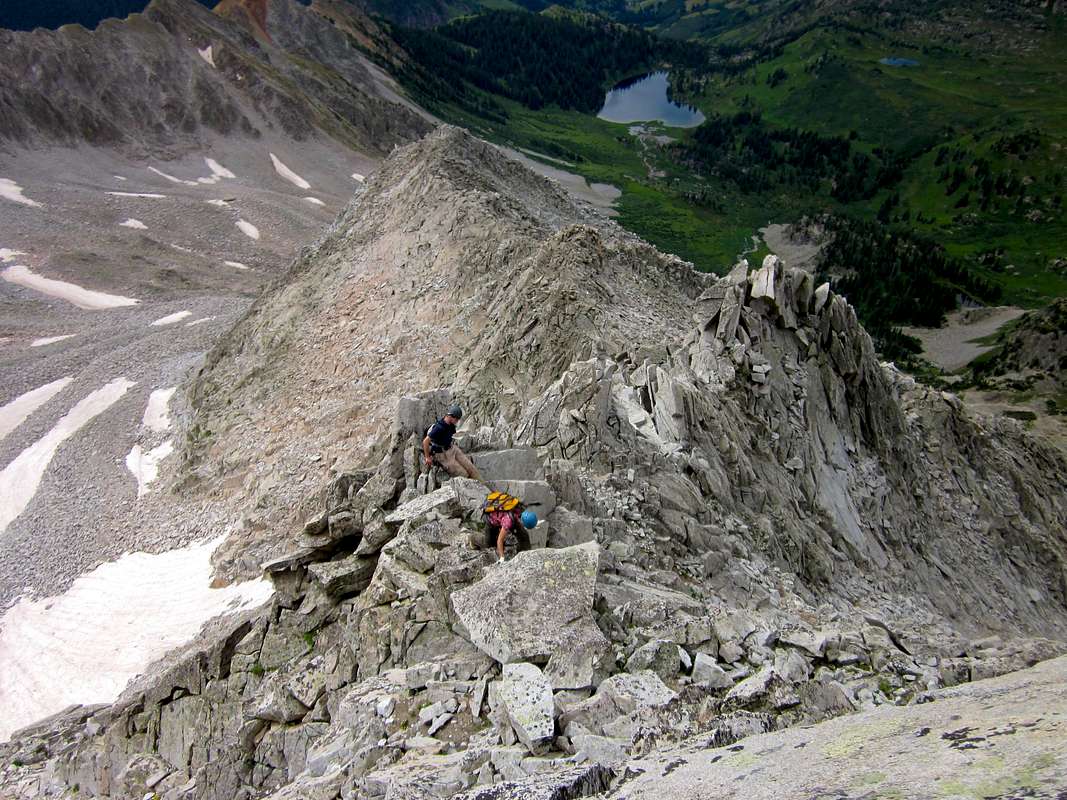
Reach the base of the gullies and take your pick. Both gullies are about 400' vertical, quite steep and contain the loosest rock of the route. Climbing helmets are definitely a good idea to wear during this section.
 At the base of the farthest right (south) gully below the crest of the "S" ridge |  Near the top of the gully - Little Gem Lake is below and to the right |

Near the end of first stretch of the "S" ridge
Near the top of the first stretch at 13,200', a distinctive feature towers 15 to 20 feet on the ridge crest - the blade rock.
 The blade rock |  Near the top of the first curve of the "S" - the blade rock is on the left, less distinctive from above |

At the beginning of the second curve of the "S", with the summit in view
Scramble across to the end of the second section and reach the base of the crux wall - the center of the wall goes at Class 4, although this obstacle can be avoided by traversing to the far left of the picture below, through the notch and into a loose, Class 3 gully that leads back to the ridge crest higher up, above the crux wall.
 Near the base of the crux wall |  Climbing the crack in the center of the wall |
Above the crux and steep point
From here, scramble on top or just to the left of the ridge crest until the final summit pitch comes into view.

The final summit pitch - about 100'
Scramble up loose Class 2 scree and reach the summit block of Snowmass Mountain!

The summit block
Essential Gear
When compared to most of the other Colorado 14ers, Snowmass is a serious mountain. Many climbers have underestimated its difficulties and dangerous rock, and more than a few accidents have occurred on its upper slopes. Thus, coming prepared, mentally and physically, is essential to your success and safety.- Bring everything necessary for a big day in the mountains (adequate clothing, water and food, sunscreen, etc.)
- Good shoes that you are comfortable doing some scrambling and mild climbing in
- A climbing helmet
- A simple first aid kit
- A rope or para-cord is useful in case of emergency